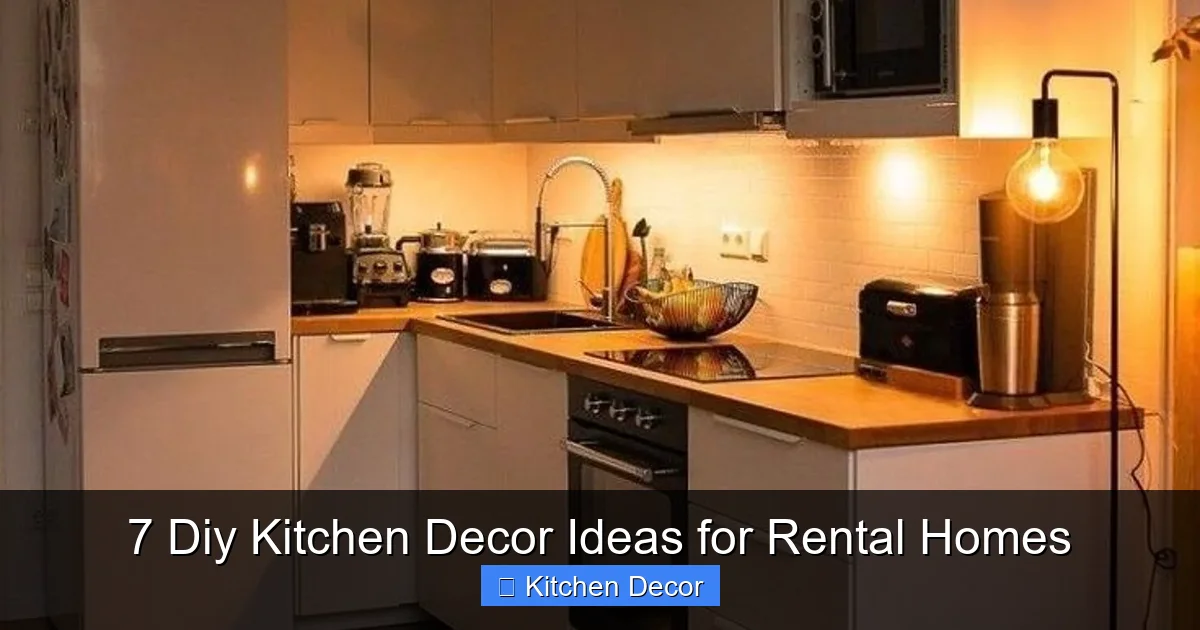
Revitalize your rental kitchen without breaking your lease or your budget! This guide provides 7 fantastic, temporary DIY kitchen decor ideas for rental homes, from peel-and-stick backsplashes to clever storage solutions. Discover how to add personality, functionality, and style, ensuring a comfortable cooking space that truly feels like home, all with easy-to-remove materials.
7 Diy Kitchen Decor Ideas for Rental Homes
Welcome, fellow renters! Are you tired of that drab, uninspired kitchen that came with your rental property? Do you dream of a space that reflects your personality, functions better, and actually feels like home, but fear losing your security deposit or violating your lease? You’re not alone! Many renters face the challenge of wanting to personalize their living spaces, especially the kitchen, without making permanent changes.
The good news is that transforming your rental kitchen into a stylish, functional, and inviting hub is absolutely possible with smart, temporary, and budget-friendly DIY kitchen decor ideas. This comprehensive guide will walk you through seven fantastic projects designed specifically for rental homes. We’ll explore how to add flair, increase storage, and inject personality using clever techniques and easily removable products. From peel-and-stick solutions to creative lighting and greenery, get ready to unlock your inner decorator and make your rental kitchen a place you truly love, all while keeping your landlord happy!
Let’s dive into these exciting DIY kitchen decor ideas for rental homes!
Key Takeaways
- Embrace Temporary Solutions: Focus on decor ideas that are easily reversible, such as peel-and-stick products, Command strips, and freestanding items, to avoid lease violations and ensure a full security deposit return.
- Prioritize Surface Transformations: Utilize removable wallpaper or contact paper for dramatic changes to countertops, cabinet faces, or even appliances, offering a fresh look without permanent commitment.
- Maximize Vertical Space Cleverly: Implement Command-hook shelves, wall organizers, or hanging planters to add storage and decor without drilling holes, making the most of limited kitchen real estate.
- Infuse Life with Greenery: Incorporate herbs, small plants, or hanging baskets to bring freshness, color, and a natural touch to your kitchen, improving ambiance and air quality.
- Upgrade Lighting Without Rewiring: Opt for plug-in pendant lights, battery-operated under-cabinet LEDs, or decorative lamps to enhance functionality and mood lighting, easily removable when you move.
- Personalize with Textiles and Art: Add warmth and personality using colorful rugs, dish towels, tension rod curtains, and framed artwork hung with temporary adhesives, allowing for quick style changes.
- Budget-Friendly & Upcycled Decor: Discover how repurposing everyday items like jars, crates, and baskets can create charming, functional storage and decor, keeping costs down and promoting sustainability.
1. Peel-and-Stick Backsplash Magic
One of the most impactful ways to transform a kitchen is by upgrading the backsplash. Traditional tile installation is a no-go for renters, but thankfully, modern peel-and-stick tiles offer a stunning, temporary alternative that looks incredibly realistic. This DIY kitchen decor idea can dramatically change the look and feel of your cooking space.
What You’ll Need:
- Peel-and-stick tiles (choose from subway tile, mosaic, geometric, or even faux marble designs)
- Measuring tape and ruler
- Utility knife or sharp scissors
- Squeegee or credit card for smoothing
- Cleaning supplies (mild degreaser, cloth)
Step-by-Step Instructions:
-
Prepare Your Surface:
Thoroughly clean the area where you plan to install the backsplash. Use a mild degreaser to remove any grease or grime, then wipe it down with a damp cloth and let it dry completely. A clean, smooth, dry surface is crucial for proper adhesion.
-
Measure and Plan:
Measure the length and height of the wall area you want to cover. It’s often best to start from a corner and work your way across. Lay out a few sheets of your peel-and-stick tiles on a flat surface to get a feel for the pattern and how they will fit together. You might need to trim the edges to get a clean finish. Remember, precision is key for a seamless look.
-
Start Applying:
Peel off a small portion of the backing from the top edge of your first tile sheet. Align it carefully with your starting point (e.g., a counter edge or corner). Press it firmly onto the wall, working your way down, slowly peeling off the rest of the backing as you go. Use your squeegee or credit card to smooth out any air bubbles, pushing them towards the edges.
-
Continue and Cut:
Overlap subsequent sheets slightly according to the product’s instructions, ensuring the pattern aligns perfectly. For cuts around outlets or at the end of a row, measure precisely, mark the backing of the tile, and use your utility knife or sharp scissors. A straight edge or ruler can help you achieve clean, straight cuts. Don’t rush this part!
-
Finishing Touches:
Once all tiles are applied, go over them again with the squeegee to ensure strong adhesion. If any edges lift, a bit of extra pressure usually helps. Stand back and admire your brand new, beautiful backsplash!
Pro Tips:
- Practice on an inconspicuous area first if you’re nervous about application.
- When removing, warm the tiles gently with a hairdryer on a low setting to soften the adhesive, making it easier to peel off without damaging the paint underneath.
- Some companies offer small sample packs – grab one to test colors and textures in your specific kitchen lighting before committing to a larger purchase.
2. Command Hook & Lightweight Shelf Solutions
Creating extra storage and display space in a rental kitchen can be a challenge when you can’t drill into walls. Enter Command hooks and strips! These adhesive wonders allow you to install lightweight shelving and organizers without leaving a trace when you move out. This is a brilliant DIY kitchen decor idea for adding both functionality and style.
What You’ll Need:
- Various Command hooks and strips (ensure you check weight limits)
- Lightweight shelves (e.g., small wooden shelves, acrylic ledges, wire spice racks)
- Level
- Cleaning supplies (rubbing alcohol, cloth)
Step-by-Step Instructions:
-
Assess Your Needs & Space:
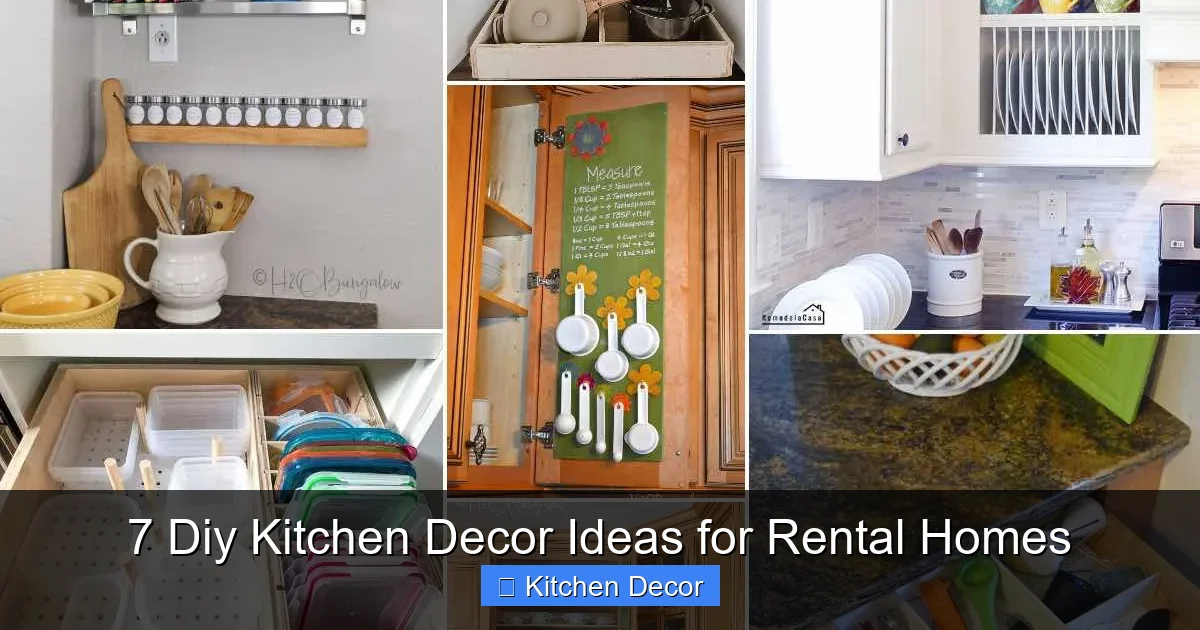
Identify areas where you need extra storage or want to display items. Popular spots include above the sink, next to cabinets, or even on the side of a refrigerator. Consider what you want to place on the shelves – spices, small plants, cookbooks, or decorative items – to determine the appropriate shelf size and weight capacity.
Visual guide about 7 Diy Kitchen Decor Ideas for Rental Homes
Image source: h2obungalow.com
-
Clean and Prepare the Wall:
Clean the wall surface thoroughly with rubbing alcohol and let it dry completely. This step is crucial for the Command strips to adhere properly. Do not use household cleaners, as they can leave residues.
-
Attach Command Strips to Shelves:
Follow the instructions on your Command strip packaging. For most shelves, you’ll attach the strips to the back of the shelf itself, ensuring they are evenly spaced and sufficient for the weight you plan to put on it. For floating shelves that require a bracket, some manufacturers offer options designed for Command hooks, or you can use picture-hanging strips for very light ledges.
-
Mount Your Shelves:
Press the shelf firmly against the wall in the desired location. Use a level to ensure it’s straight before applying full pressure. Hold each strip in place for 30 seconds as per Command’s instructions. Allow the adhesive to cure for at least an hour (or longer if specified) before placing items on the shelves. This allows the adhesive to reach its maximum strength.
-
Decorate and Organize:
Once cured, style your new shelves! Arrange spices, small potted herbs, recipe books, or decorative kitchen items. You can also use Command hooks directly to hang dish towels, oven mitts, or even lightweight cutting boards, freeing up valuable counter space.
Pro Tips:
- Always err on the side of caution with weight limits. If in doubt, use more strips than recommended or choose lighter items.
- Mix and match different types of Command products – clear hooks for a minimalist look, decorative hooks for flair, and various strip sizes for shelves.
- Create a small “gallery wall” effect by hanging small framed prints or lightweight kitchen-themed art with Command picture hanging strips.
3. Removable Wallpaper or Contact Paper Cabinets & Countertops
Outdated cabinets and drab countertops are common complaints in rental kitchens. Removable wallpaper and contact paper are absolute game-changers, offering a temporary yet dramatic transformation without the commitment of paint or new surfaces. This is one of the most transformative DIY kitchen decor ideas for a rental.
What You’ll Need:
- Removable wallpaper or high-quality contact paper (choose a design you love: wood grain, marble, solid color, geometric pattern)
- Measuring tape and ruler
- Utility knife or sharp scissors
- Squeegee or felt-edged applicator
- Hair dryer (optional, for tricky spots or removal)
- Cleaning supplies (degreaser, cloth)
Step-by-Step Instructions:
-
Clean and Prepare Surfaces:
Thoroughly clean all cabinet doors, drawer fronts, and countertop surfaces you plan to cover. Grease and dust are the enemies of good adhesion. Use a degreaser, wipe clean, and let everything dry completely. For cabinets, remove handles and knobs if possible for a cleaner application. For countertops, ensure the surface is smooth and free of debris.
-
Measure Carefully:
Measure each individual cabinet door, drawer front, or section of countertop. Add an extra inch or two to each side of your measurements for trimming later. It’s much better to have too much than too little. When working with patterns, consider how you want them to align across multiple surfaces.
-
Cut and Apply to Cabinets:
Cut your first piece of wallpaper or contact paper to size. Peel back a few inches of the backing paper from the top edge. Align the paper with the top edge of your cabinet door or drawer, making sure it’s straight. Slowly and carefully, press the paper down, gradually peeling off the backing with one hand while smoothing out air bubbles with your squeegee in the other. Work from the center outwards to push bubbles to the edges. Trim any excess with your utility knife for a crisp finish. Reattach hardware once finished.
-
Apply to Countertops (More Challenging but Rewarding):
For countertops, this process requires patience. Work in smaller sections if necessary. Align the paper along the back edge of the counter, slowly peeling and smoothing. When encountering sinks or faucets, make careful cuts with your utility knife. Don’t be afraid to lift and reposition if needed, but do so gently to avoid stretching the paper. Overlap seams slightly if required by the product, or aim for a butt joint for a seamless look.
-
Remove Bubbles & Trim:
Once fully applied, go over the entire surface with your squeegee, applying firm pressure to ensure maximum adhesion and to remove any remaining tiny bubbles. Use your utility knife to carefully trim any excess material around edges, corners, and fixtures for a professional look.
Pro Tips:
- For stubborn bubbles, a pin prick can release the air, then smooth it down.
- A hairdryer on low heat can make the contact paper more pliable, especially around curves or corners, and also aid in clean removal.
- Always buy a little extra material than you think you need for mistakes or future touch-ups.
- Test a small, hidden area first to ensure the product removes cleanly without damaging the underlying surface.
4. DIY Herb Garden & Plant Power
Adding greenery is one of the simplest yet most effective DIY kitchen decor ideas for infusing life, freshness, and a touch of nature into any space, especially a rental kitchen. Plants not only look beautiful but can also improve air quality and provide fresh herbs for cooking!
What You’ll Need:
- Small pots or planters (choose decorative ones!)
- Potting soil
- Herb seeds or small herb plants (basil, mint, rosemary, thyme are great kitchen choices)
- Watering can or spray bottle
- Optional: Command hooks for hanging planters, small window sill shelf.
Step-by-Step Instructions:
-
Choose Your Plants & Location:
Consider the light conditions in your kitchen. Most herbs need at least 4-6 hours of direct sunlight. A sunny windowsill is ideal. If you don’t have one, consider growing low-light tolerant plants like pothos or ZZ plants. Choose herbs you love to cook with!
Visual guide about 7 Diy Kitchen Decor Ideas for Rental Homes
Image source: i.pinimg.com
-
Select Your Planters:
This is where your personal style comes in! Choose pots that complement your kitchen decor. Terracotta, ceramic, minimalist white, or colorful glazed pots can all look fantastic. Ensure they have drainage holes or use a layer of pebbles at the bottom to prevent root rot.
-
Pot Your Plants:
Fill your chosen pots with fresh potting soil. Create a small well in the center, place your herb plant (or sow seeds according to package directions), and gently backfill with soil, patting lightly around the base. If planting seeds, ensure they are at the correct depth.
-
Hydrate and Display:
Give your newly potted plants a good watering. Place them on your windowsill, a small shelf, or even hang them from Command hooks if using lightweight planters. You can also group several small pots together for a lush look.
Pro Tips:
- Label your herbs, especially if growing from seed, so you know what’s what!
- Consider a vertical garden using a tiered shelf or wall-mounted pockets (secured with Command strips) if you’re short on counter space.
- Don’t forget to water regularly, but avoid overwatering. Check the soil moisture before adding more.
- Decorative small watering cans can double as decor when not in use.
5. Upcycled & Repurposed Storage Solutions
Clutter can quickly make a small rental kitchen feel even smaller. Clever storage is essential, and upcycling existing items or finding creative new uses for everyday objects is a sustainable and budget-friendly DIY kitchen decor idea. This adds charm and functionality without buying new, bulky furniture.
What You’ll Need:
- Various items for repurposing: old wooden crates, glass jars, wicker baskets, vintage tins, cake stands, magazine holders.
- Optional: Sandpaper, paint (chalk paint works well for a rustic look), paint brushes.
- Cleaning supplies.
Step-by-Step Instructions:
-
Gather and Assess:
Look around your home, visit thrift stores, or check online marketplaces for items that could be given a new life in the kitchen. Think about what you need to store: spices, utensils, produce, dish towels, snacks.
-
Clean and Prepare:
Thoroughly clean all items. For wooden crates or vintage tins, a light sanding might be needed to smooth rough edges or remove rust. If painting, prime the surface first for better adhesion and a lasting finish. Let everything dry completely.
-
Personalize (Optional):
Paint wooden crates a fun color, stencil designs onto glass jars, or line baskets with fabric. This step allows you to truly integrate these items into your kitchen’s aesthetic. A simple coat of paint can transform a plain item into a stylish piece of DIY kitchen decor.
-
Organize and Display:
- Glass Jars: Use various sizes for bulk grains, pasta, spices, nuts, or even as attractive holders for utensils. Clear jars make it easy to see contents.
- Wooden Crates: Stack them on their side to create open shelving for cookbooks, produce, or small appliances. Use them right-side-up to store larger items like potatoes or onions.
- Wicker Baskets: Perfect for holding dish towels, cleaning supplies under the sink, or even fresh fruit on the counter.
- Vintage Tins: Group them together to hold tea bags, coffee pods, or small office supplies if you have a kitchen desk nook.
- Cake Stands: Use multi-tiered cake stands to organize spices, oils, or frequently used condiments on the counter, making them easy to access and adding a decorative touch.
Pro Tips:
- Labels are your best friend! Use chalk paint labels, sticker labels, or even tie on cute tags to identify contents in jars and tins.
- Think vertically. Stack crates or use risers within cabinets to maximize space.
- Mix textures and materials (wood, glass, metal, fabric) for an eclectic and personalized look.
6. Lighting Upgrades (Plug-in & Battery-Operated)
Rental kitchens often come with basic, sometimes harsh, overhead lighting. Upgrading your lighting can dramatically alter the ambiance and functionality of your space, and you don’t need an electrician! Plug-in and battery-operated solutions are perfect DIY kitchen decor ideas for renters.
What You’ll Need:
- Plug-in pendant light kits (often sold with decorative shades)
- Battery-operated LED strip lights or puck lights (with adhesive backing)
- Small decorative lamps (e.g., a table lamp for a counter nook)
- Command hooks or clips (for hanging pendants or managing cords)
- Batteries (for battery-operated options)
Step-by-Step Instructions:
-
Identify Lighting Needs:
Assess your kitchen’s current lighting. Do you need more task lighting for meal prep? Ambient light for a cozier feel? Accent lighting to highlight decor? Think about areas under cabinets, over a specific workspace, or a dark corner that could use brightening.
-
Install Under-Cabinet LED Strips/Puck Lights:
These are fantastic for task lighting. Clean the underside of your cabinets thoroughly. Peel off the adhesive backing from the LED strips or puck lights and press them firmly into place. If using strips, you might need to cut them to size (check product instructions for designated cut points). Hide any battery packs or power cords as neatly as possible, perhaps with small Command clips. Battery-operated options are great for quick, temporary boosts of light.
-
Hang a Plug-in Pendant Light:
If you have a hook in the ceiling (check if it’s landlord-approved or install a heavy-duty Command hook if weight allows), you can hang a plug-in pendant light. Route the cord neatly along the ceiling and wall using Command cord clips until it reaches an outlet. You can drape it artfully or disguise it with cord covers. These add a stylish focal point and functional light over an island or dining area.
-
Add Decorative Lamps:
Place a small, stylish table lamp in a corner of your counter, on a rolling cart, or near a breakfast nook. This provides a soft, inviting glow that’s perfect for evening ambiance or a morning cup of coffee. Choose a lamp that complements your overall kitchen aesthetic.
Pro Tips:
- Look for LED strips that offer color temperature control (warm white, cool white) or dimming capabilities to adjust the mood.
- For plug-in lights, consider using smart plugs to control them with your phone or a voice assistant for added convenience.
- When using Command clips for cords, ensure they are rated for the weight of the cord and light fixture.
- Battery-operated lights are perfect for areas where outlets are scarce, like inside pantries or dark corners of shelving.
7. Textile & Artwork Accents
Finally, to truly make your rental kitchen feel warm, inviting, and uniquely yours, don’t overlook the power of textiles and artwork. These are among the easiest and most personal DIY kitchen decor ideas, offering maximum impact with minimal effort and no permanent changes.
What You’ll Need:
- Kitchen rug or runner (washable is a plus!)
- Stylish dish towels and oven mitts
- Window curtains (tension rod for easy installation)
- Framed prints, posters, or photos
- Command picture hanging strips or adhesive hooks
Step-by-Step Instructions:
-
Choose a Color Palette or Theme:
Decide on a color scheme or a general theme for your kitchen decor. This will help you select textiles and artwork that flow together and create a cohesive look. Do you prefer bright and cheerful, calm and neutral, or bold and eclectic?
-
Introduce a Kitchen Rug:
A rug can instantly define a space, add warmth, and provide comfort underfoot. Place a runner in front of your sink or a larger rug in a central area if space allows. Opt for washable rugs, especially in a high-traffic area like the kitchen, for easy cleaning.
-
Update Dish Towels and Oven Mitts:
Replace any mismatched or worn dish towels and oven mitts with new ones that fit your chosen color palette. Display them creatively – draped over an oven handle, neatly folded on a shelf, or hanging from a decorative Command hook. They’re functional decor!
-
Hang Window Treatments:
If your kitchen has a window, consider adding curtains or a valance. Use a tension rod, which fits inside the window frame without needing screws or drilling. Choose lightweight fabrics that allow natural light to filter through, or heavier ones for privacy, depending on your needs. This adds softness and a finished look.
-
Display Artwork:
Personalize your walls with framed prints, posters, or even your own photos. Use Command picture hanging strips or adhesive hooks to hang them. These allow you to create a gallery wall or place single pieces without damaging the paint. Look for kitchen-themed art, abstract pieces that match your colors, or family photos.
Pro Tips:
- Layer different textures and patterns within your chosen color scheme for a richer look.
- Rotate your dish towels and small artwork seasonally to give your kitchen a fresh update without much effort.
- Consider a large chalkboard or whiteboard (hung with Command strips) for grocery lists, recipes, or daily affirmations – it’s both functional and decorative.
- Don’t be afraid to mix and match styles. A modern rug can look great with vintage-inspired artwork.
Troubleshooting Common Rental Kitchen Decor Challenges
Even with renter-friendly DIY kitchen decor ideas, you might encounter a few snags. Here are some common issues and how to tackle them:
Peel-and-Stick Not Sticking Properly:
- Solution: Ensure the surface is impeccably clean and dry before application. Any grease, dust, or moisture will prevent proper adhesion. If it’s still an issue, try a little heat from a hairdryer on a low setting to activate the adhesive, then press firmly.
Bubbles in Contact Paper or Wallpaper:
- Solution: Small bubbles can often be smoothed out with a squeegee. For stubborn ones, use a pin to prick a tiny hole in the center of the bubble, then gently press the air out towards the hole.
Damage Upon Removal:
- Solution: Always follow the manufacturer’s instructions for removal. For adhesive products like Command strips or peel-and-stick items, slowly and gently warming them with a hairdryer on a low setting can soften the adhesive, making it easier to peel off without taking paint with it. Pull adhesive strips straight down, parallel to the wall, not out.
Weight Limits for Adhesive Hooks/Shelves:
- Solution: Never exceed the stated weight limit. If you’re unsure, use more hooks or strips than you think you need, or choose a lighter item. For items you can’t risk falling, consider freestanding options instead.
Unattractive Existing Features (e.g., outdated fixtures):
- Solution: While you can’t replace permanent fixtures, you can often disguise them. For example, a decorative bowl or plant can draw attention away from an old faucet. Battery-operated lights can make a dark, outdated corner appear brighter and more inviting. Focus on enhancing the positive aspects.
Conclusion
Transforming your rental kitchen doesn’t have to be a daunting task, nor does it require permanent changes or a huge budget. By embracing these 7 DIY kitchen decor ideas for rental homes, you can create a space that feels personal, functions efficiently, and inspires your culinary adventures. From the sleek look of a peel-and-stick backsplash to the vibrant life of a herb garden, each idea offers a unique way to infuse your personality into your temporary home.
Remember, the key is to choose solutions that are easily reversible, allowing you to reclaim your security deposit when it’s time to move on. Get creative, have fun, and enjoy the process of making your rental kitchen truly yours. You deserve a beautiful and functional space where you love to cook and gather. Happy decorating!