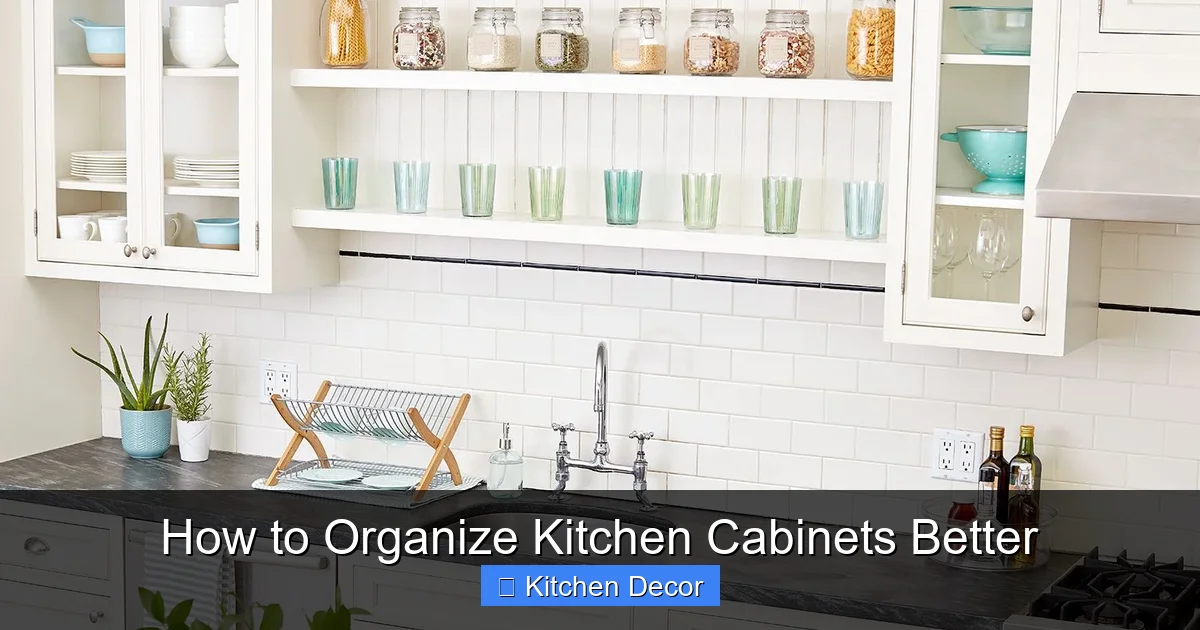
Ready to tackle kitchen chaos? This comprehensive guide will show you how to organize kitchen cabinets better, turning cluttered spaces into efficient storage zones. You’ll learn to declutter ruthlessly, clean thoroughly, implement smart storage solutions, and maintain a system that works for you. Say goodbye to searching for lost items and hello to a kitchen that functions beautifully and brings you joy.
How to Organize Kitchen Cabinets Better
Do you ever feel like your kitchen cabinets are a black hole, swallowing up whisks, spices, and the matching lid to that one container you desperately need? You’re not alone! A disorganized kitchen can lead to wasted time, wasted food, and a whole lot of frustration. But imagine a kitchen where everything has a home, where you can find what you need in an instant, and where cooking feels like a joy, not a treasure hunt.
This comprehensive guide will walk you through the entire process of how to organize kitchen cabinets better, transforming them from chaotic catch-alls into highly functional, stress-free storage spaces. We’ll cover everything from decluttering and cleaning to smart storage solutions and long-term maintenance. Get ready to reclaim your kitchen and make it work for you!
Key Takeaways
- Start with a Complete Emptying and Purge: The most effective way to organize kitchen cabinets is to remove every single item. This allows you to truly see what you own, clean thoroughly, and make honest decisions about what to keep, donate, or toss.
- Implement a Zoning System: Grouping similar items together and creating designated “zones” (e.g., baking zone, cooking zone, dinnerware zone) makes your kitchen highly functional. Store items where they are most frequently used for maximum efficiency.
- Utilize Smart Storage Solutions: Invest in shelf risers, drawer dividers, clear bins, and vertical organizers to maximize space and keep items contained. These tools are crucial for making the most of every inch within your kitchen cabinets.
- Prioritize Accessibility: Place frequently used items at the front and within easy reach, while less frequently used items can go higher up or in deeper recesses. This saves time and reduces frustration during daily cooking and meal prep.
- Decant Dry Goods for Efficiency and Freshness: Transferring items like pasta, flour, and cereals into clear, airtight containers not only looks tidier but also helps preserve freshness, prevents pests, and allows for easy inventory management.
- Don’t Forget Under-Sink and Deep Corner Cabinets: These often-neglected areas can be optimized with specialized pull-out shelves, tiered organizers, or lazy Susans to make their contents accessible and functional.
- Maintain with Regular Mini-Purges: Organization isn’t a one-time event. Schedule quick monthly or quarterly “check-ins” to re-evaluate items, tidy up, and prevent clutter from accumulating again, ensuring your organized kitchen cabinets stay that way.
Step 1: Prepare for the Purge – Gather Your Supplies
Before you dive headfirst into the task of organizing, it’s essential to gather the right tools. Think of it as preparing for a friendly battle against clutter! Having everything on hand will make the process smoother and more efficient.
Essential Cleaning Tools
You’ll want to give your cabinets a good scrub once they’re empty. Here’s what you’ll need:
- Cleaning cloths or sponges: Microfiber cloths work wonders for grabbing dust and grime.
- All-purpose cleaner: Choose a cleaner that’s safe for your cabinet material. A mix of warm water and a little dish soap often does the trick for general cleaning.
- Vacuum cleaner with attachments or a dustbuster: Great for sucking up crumbs and debris from corners.
- Trash bags: For anything that’s clearly trash.
- Donation box/bag: For items in good condition that you no longer need.
- Liner for shelves (optional): Shelf liners can protect your cabinets from spills and make them easier to clean in the future.
Storage Solutions You Might Need
Don’t buy everything upfront, but have an idea of what might help. You can purchase these after you’ve decluttered and assessed your needs.
- Clear bins or baskets: Perfect for grouping similar items, like snack bags, baking supplies, or cleaning products. Clear ones allow you to see what’s inside at a glance.
- Shelf risers or expanders: These are game-changers for maximizing vertical space, especially in tall cabinets.
- Drawer dividers: Essential for keeping cutlery, utensils, and small gadgets from becoming a jumbled mess.
- Lazy Susans (turntables): Ideal for corner cabinets or deep pantries, making items easily accessible.
- Pot and pan organizers/lid holders: To keep cookware stacked neatly and lids from scattering.
- Spice racks or tiered spice organizers: So you can see all your spices without digging.
- Food storage container organizers: Helps keep containers and their lids together.
Step 2: Empty Everything Out

Visual guide about How to Organize Kitchen Cabinets Better
Image source: smallishhome.com
This is often the most daunting but crucial step. To truly organize kitchen cabinets better, you need a clean slate.
Work Cabinet by Cabinet (or Zone by Zone)
Don’t try to empty your entire kitchen at once unless you have a huge amount of free space. Instead, pick one cabinet or a small section, like all your food storage containers, and tackle that area completely before moving to the next. This prevents overwhelm and keeps your kitchen somewhat functional during the process.
Lay Everything Out
As you empty a cabinet, place all its contents on a clean counter, table, or even a sheet on the floor. Group similar items together as you go – all your mugs in one pile, all your spices in another, all your baking dishes here, etc. This initial grouping will give you a visual inventory of exactly what you own. You might be surprised by how many duplicate items you find!
Step 3: Declutter and Purge Ruthlessly
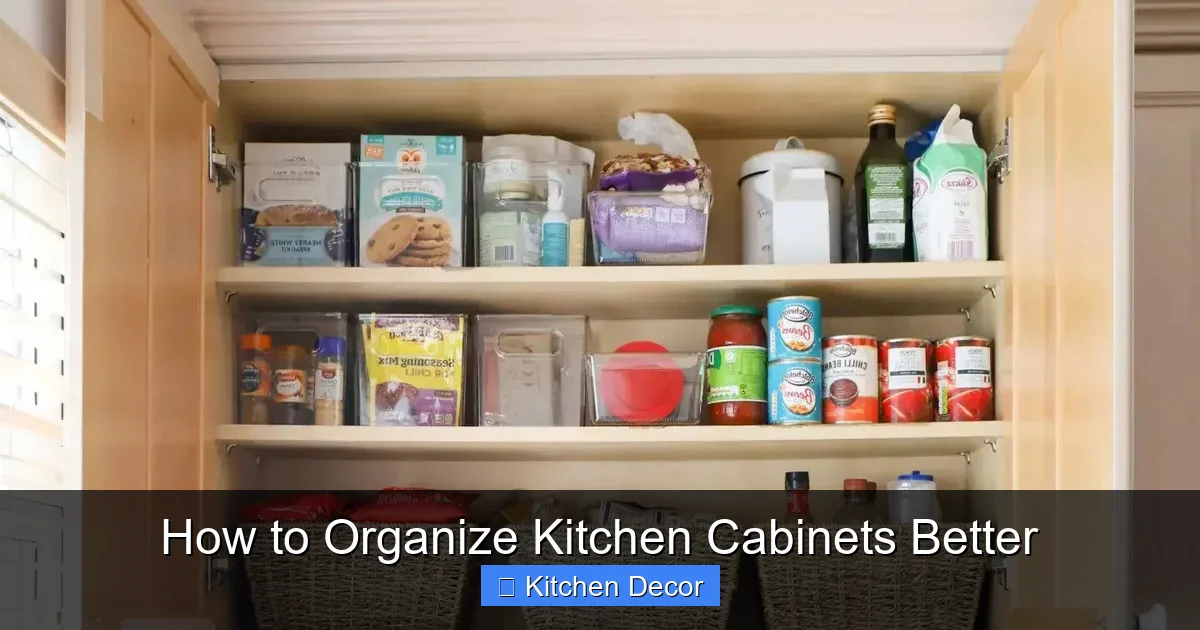
Visual guide about How to Organize Kitchen Cabinets Better
Image source: storables.com
This is where you make the tough decisions. The goal here is to keep only what you truly use, love, and need. Less stuff means more space and less stress.
The “Keep, Donate/Sell, Toss” System
For each item you’ve pulled out, ask yourself these questions:
- Do I use this regularly? (At least once a month, or seasonally for holiday items.)
- Is it still in good condition? (No chips, cracks, rust, or broken parts.)
- Do I have duplicates? (Do you really need five spatulas?)
- Does it serve a purpose that another item can’t?
- Does it bring me joy or make my life easier?
Based on your answers, sort items into three piles:
- Keep: Items that are functional, used often, and in good condition.
- Donate/Sell: Items that are still perfectly usable but you no longer need or want. Think extra mugs, unused small appliances, or serving dishes.
- Toss/Recycle: Anything broken, expired, rusty, unhygienic, or truly useless. Be honest here!
Be Honest About Usage
It’s easy to hold onto things “just in case.” But those “just in case” items often take up valuable real estate for years without ever being used. If you haven’t used something in over a year (and it’s not a sentimental heirloom or a once-a-year holiday item), seriously consider letting it go. This is a key step to truly organize kitchen cabinets better and keep them from reverting to chaos.
Check Expiration Dates
This is particularly important for food items in your pantry cabinets. Go through every jar, can, box, and bottle. Discard anything that’s expired, looks suspicious, or smells off. Remember, even unopened items can lose quality over time.
Step 4: Clean Your Cabinets Thoroughly
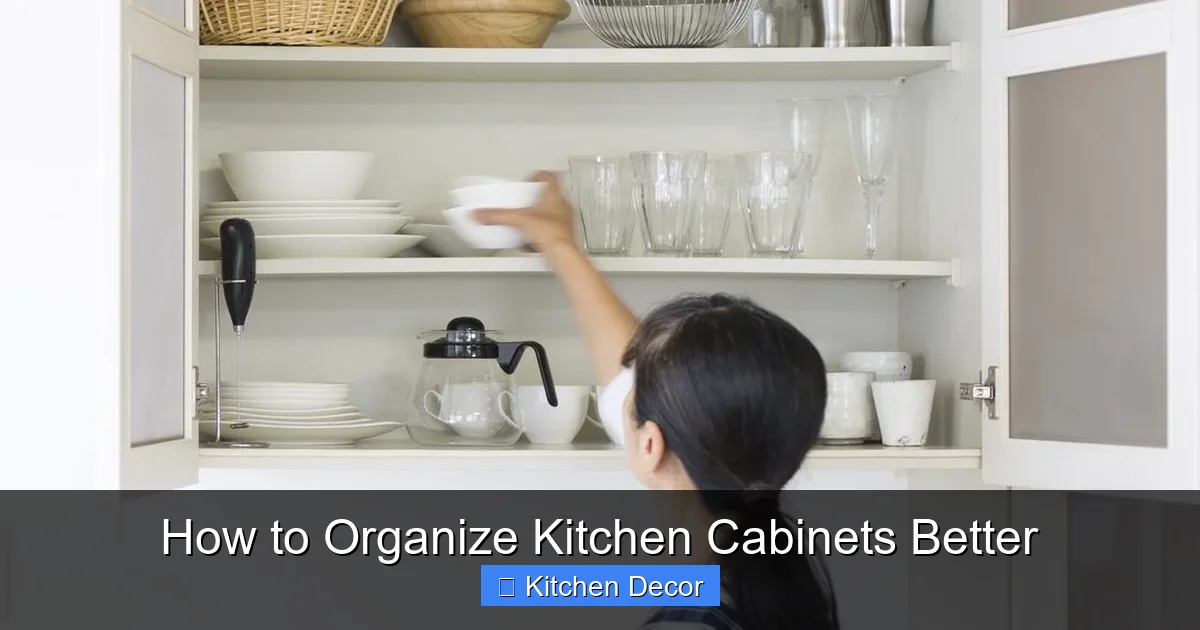
Visual guide about How to Organize Kitchen Cabinets Better
Image source: tasteofhome.com
Now that your cabinets are empty, it’s the perfect time to give them a deep clean. This step is often overlooked but contributes significantly to the feeling of a truly organized kitchen.
Wipe Down Surfaces
Using your all-purpose cleaner and a damp cloth, wipe down the inside of all cabinet doors, shelves, and the back walls. Pay attention to corners and crevices where crumbs and dust love to hide. For sticky residue, a little bit of warm soapy water or a specialized degreaser might be needed. If you plan to add shelf liners, this step is essential for them to adhere properly.
Tackle Lingering Odors
If your cabinets have a musty smell, after cleaning, you can place an open box of baking soda inside for a few days to absorb odors. Activated charcoal can also work wonders. Ensure the cabinets are completely dry before putting anything back in to prevent mold or mildew.
Step 5: Zone Your Kitchen and Plan Layout
Before you start putting things back, take a moment to plan. This is where you create a system that makes sense for how you cook and use your kitchen. A well-zoned kitchen is a truly organized kitchen.
Group Similar Items Together
You’ve already done some of this during the emptying phase. Now, refine it.
- Cooking Zone: Pots, pans, baking sheets, cooking utensils (spatulas, ladles), cutting boards, oils, vinegars, spices used for everyday cooking. This should be near your stove and prep area.
- Baking Zone: Flours, sugars, baking soda, baking powder, extracts, measuring cups/spoons, mixing bowls, cake pans, cookie sheets. Consider a cabinet near a counter space dedicated to baking.
- Prep Zone: Knives, small mixing bowls, peelers, graters, food processor. Near your main prep counter.
- Dinnerware Zone: Plates, bowls, glasses, mugs, serving dishes. Ideally near the dishwasher and dining area for easy loading and unloading.
- Pantry Zone: Canned goods, dry pasta, cereals, snacks, non-perishable food items.
- Cleaning Zone: Under the sink for dish soap, sponges, cleaning sprays.
- Storage Container Zone: All your food storage containers and their lids, grouped together.
Consider Accessibility and Frequency of Use
This is critical to organize kitchen cabinets effectively.
- Everyday Items: Store these at eye level and within easy reach. Think plates, glasses, coffee mugs, your most-used spices, and daily cooking utensils.
- Frequently Used Items: These can be on lower shelves or slightly higher, but still easily accessible. Baking ingredients (if you bake often), larger pots and pans.
- Infrequently Used Items: Holiday dishes, specialty small appliances (ice cream maker, waffle iron), or large stock pots can go in higher cabinets, deeper shelves, or less accessible corner cabinets.
Step 6: Choose Smart Storage Solutions
Now that you know what you’re keeping and where it’s going, it’s time to select the right tools to make your organized kitchen cabinets shine. Remember, less is often more. Don’t over-organize to the point of rigidity.
Bins, Baskets, and Containers
These are fantastic for corralling items and creating “drawers” within your cabinets.
- Clear containers for pantry items: Decant dry goods like pasta, rice, flour, sugar, and cereals into airtight, clear containers. They look beautiful, keep food fresh, deter pests, and let you see exactly how much you have. Plus, they stack!
- Baskets for snacks or cleaning supplies: Use opaque baskets for items you don’t necessarily want on display, like bags of chips, cleaning rags, or extra sponges.
- Divided bins for specific categories: Think tea bags, spice packets, or small sauce sachets.
Shelf Risers and Expanders
These are lifesavers for maximizing vertical space, especially in tall cabinets.
- Double the height: A shelf riser effectively creates two levels where there was only one, perfect for plates, mugs, or cans.
- Expandable shelves: Great for adjusting to different cabinet widths.
Drawer Dividers and Organizers
Crucial for keeping drawers tidy and functional.
- Adjustable dividers: Allow you to customize compartments for various utensils.
- Built-in organizers: Some kitchens come with these; if not, you can buy inserts for cutlery, knives, or even foil/cling wrap.
- Small silicone or bamboo trays: For smaller items like measuring spoons, bag clips, or bottle openers.
Vertical Storage (Pot Racks, Lid Holders)
Don’t let valuable cabinet space be consumed by awkwardly stacked items.
- Pot and pan organizers: Stand pots and pans on their sides or use tiered racks to keep them separate and easy to grab without unstacking.
- Lid holders: Mount these on the inside of cabinet doors or use a freestanding rack to keep lids organized and prevent them from rattling around.
- Magazine files: Can be repurposed to hold cutting boards, baking sheets, or even foil and plastic wrap boxes vertically.
Under-Sink Solutions
This area often becomes a messy catch-all.
- Two-tier pull-out organizers: Great for maximizing space around the plumbing pipes.
- Small bins: For sponges, dish soap refills, cleaning gloves, and other small items.
- Tension rods: Can be used to hang spray bottles or store dish towels.
Step 7: Load Your Cabinets Strategically
Now for the satisfying part: putting everything back into your beautifully cleaned and planned cabinets. This isn’t just about putting things away; it’s about putting them away smartly.
Place Heavy Items Below
Store heavy pots, large stacks of plates, and bulky small appliances in lower cabinets. This makes them safer and easier to access without straining your back or risking dropping them from a height.
Keep Frequently Used Items Up Front and Accessible
As discussed in the zoning step, daily essentials should be at eye level or just below, within a comfortable reach. If you use your coffee mugs every day, they don’t belong in the highest cabinet.
Utilize Vertical Space
This is where your shelf risers, pot racks, and lid holders come into play. Stack items vertically whenever possible. Use magazine files for cutting boards or baking sheets. Maximizing vertical space helps you organize kitchen cabinets efficiently.
Decant When Possible (e.g., dry goods into clear containers)
We mentioned this earlier, but it’s worth reiterating for the loading phase. When you decant items, not only do they look uniform and neat, but you can also quickly see when you’re running low, making grocery shopping easier. Label your containers with the item name and expiration date.
Store Food Safety First
When organizing pantry cabinets, ensure raw meats are separate from other foods, and store items that expire sooner at the front. Don’t overcrowd shelves, allowing for air circulation and easy visibility of all items.
Step 8: Maintain Your Organized Kitchen Cabinets
Organization is an ongoing process, not a one-time event. To keep your kitchen cabinets looking great and functioning efficiently, incorporate simple maintenance habits.
The “One-Touch” Rule
When you take something out, put it back immediately in its designated spot. Avoid placing items “temporarily” on the counter or in the wrong cabinet. This simple rule prevents clutter from accumulating.
Regular Mini-Purges
Schedule a quick 15-minute cabinet tidy-up once a month or once a quarter. This is a chance to:
- Quickly wipe down surfaces if needed.
- Check expiration dates on pantry items.
- Re-evaluate if you still need everything.
- Straighten up any items that have shifted.
These mini-purges are far less daunting than a full overhaul and will keep your organized kitchen cabinets from becoming overwhelming again.
Adapt as Needs Change
Life happens! Your family’s needs might change, you might get new appliances, or your cooking habits could evolve. Don’t be afraid to tweak your organization system as needed. If something isn’t working, adjust it. The best system is one that serves *your* current lifestyle.
Troubleshooting: Common Kitchen Cabinet Challenges
Even with the best intentions, some cabinet areas pose unique challenges. Here’s how to tackle a few common ones.
Limited Space Solutions
If you have small kitchen cabinets, every inch counts.
- Door organizers: Mount spice racks, small shelves, or even hooks on the inside of cabinet doors for extra storage.
- Utilize wall space: Install floating shelves or pegboards for frequently used items.
- Consider a rolling cart: If space allows, a small cart can provide extra storage for appliances or pantry overflow and can be tucked away when not in use.
Deep Cabinet Dilemmas
Deep cabinets are great for storage but can become a black hole for items pushed to the back.
- Pull-out shelves or drawers: These are an investment but make accessing items at the back incredibly easy.
- Deep bins or baskets: Use these to group items (e.g., all holiday baking supplies) so you can pull out the entire bin to access everything.
- Lazy Susans: Perfect for deep, wide shelves to bring items from the back to the front with a spin.
Corner Cabinet Conundrums
Corner cabinets are notorious for being awkward.
- Lazy Susans (full-circle or kidney-shaped): These are by far the most effective solution for corner cabinets, maximizing accessibility.
- Deep bins: If a Lazy Susan isn’t an option, use large, deep bins to pull out groups of items.
- Store less frequently used items: Since they are harder to access, reserve these for items you don’t need daily.
The Utensil Drawer Overload
It’s easy for utensil drawers to become a jumbled mess.
- Dedicated drawer dividers: Crucial for separating forks, spoons, knives, and larger cooking utensils.
- Vertical knife block in drawer: Frees up counter space and keeps knives safe.
- Purge duplicates: Do you really need six bottle openers or three pizza cutters? Keep only the best and most functional.
Conclusion
Congratulations! By following these steps, you’ve not only learned how to organize kitchen cabinets better, but you’ve also created a more functional, efficient, and enjoyable kitchen environment. No more rummaging, no more buying duplicates, and no more stress. An organized kitchen saves you time, reduces waste, and makes cooking a more pleasant experience. Remember, the key is consistency. By adopting simple maintenance habits and adapting your system as your needs change, you’ll keep your cabinets neat and your kitchen running smoothly for years to come. Enjoy your beautifully organized space!