Transform your kitchen with our ultimate guide on how to organize kitchen shelves neatly. We’ll walk you through decluttering, categorizing, and implementing smart storage solutions to create a functional and beautiful space. Achieve lasting order and enjoy a more efficient cooking experience, making meal prep a breeze and finding exactly what you need, when you need it.
How to Organize Kitchen Shelves Neatly
Do you dream of a kitchen where every item has its place? A space where you can effortlessly find the spices you need, grab a matching container lid, or simply admire a clutter-free environment? If your kitchen shelves are currently a chaotic jumble, overflowing with forgotten ingredients and mismatched crockery, you’re not alone. The good news is, achieving beautifully organized kitchen shelves is entirely within reach, and it’s a process that will transform not just your kitchen, but your daily routine too.
An organized kitchen isn’t just about aesthetics; it’s about efficiency, peace of mind, and even saving money. When you can see what you have, you’re less likely to buy duplicates or let food expire. When your cooking tools are easily accessible, meal prep becomes a joy instead of a chore. This comprehensive guide will walk you through a step-by-step process on how to organize kitchen shelves neatly, providing practical tips, smart solutions, and actionable advice to help you create a functional, serene, and incredibly efficient kitchen.
Get ready to roll up your sleeves and embark on a rewarding journey to a perfectly organized kitchen. By the end of this guide, you’ll have all the tools and knowledge you need to tackle those unruly shelves and maintain a system that works for you.
Key Takeaways
- Start with a Full Purge and Clean: Completely empty your shelves, ruthlessly decluttering expired, unused, or broken items, then thoroughly clean the empty space for a fresh start.
- Categorize and Zone Your Items: Group similar items together and assign dedicated zones within your kitchen for cooking, baking, dining, and dry goods, ensuring logical placement for easy access.
- Utilize Vertical Space Effectively: Maximize storage capacity by incorporating shelf risers, stackable containers, and tall organizers to make the most of every inch from shelf to ceiling.
- Invest in Smart Storage Solutions: Employ practical organizers like bins, baskets, turntables, and drawer dividers to contain items, prevent clutter, and enhance functionality.
- Decant and Label for Uniformity: Transfer dry goods into clear, airtight containers for better visibility, freshness, and a cohesive look, then clearly label everything for quick identification.
- Implement a Maintenance Routine: Establish simple habits like daily tidying, regular check-ins, and a “one-in, one-out” rule to ensure your neatly organized kitchen shelves stay that way long-term.
Step 1: The Grand Purge and Emptying
Before you can begin to organize kitchen shelves neatly, you must first clear everything out. This initial step is crucial for gaining a full understanding of what you own and how much space you truly have. Think of it as hitting the reset button.
Empty Every Shelf
Start by completely emptying one section of your kitchen at a time, or if you’re feeling ambitious and have the space, tackle all your kitchen shelves at once. Remove every single item – pots, pans, dishes, containers, food items, small appliances – from every cupboard, drawer, and open shelf. Place everything on your kitchen counters, dining table, or even the floor. This might look overwhelming initially, but seeing everything laid out is the first step towards clarity.
Declutter Ruthlessly
Now comes the tough but essential part: decluttering. As you empty items, create three piles: Keep, Donate/Sell, and Toss. Be honest with yourself. Ask these questions for each item:
- Do I use this regularly? If not, how often do I actually use it?
- Is it expired, broken, or chipped? If yes, toss it immediately.
- Do I have duplicates? Keep only the best one(s) or what you truly need.
- Does it bring me joy or serve a real purpose? If neither, let it go.
- Is it a “just in case” item? If you haven’t needed it in a year, chances are you won’t.
This is your chance to get rid of those mismatched container lids, the single lonely sock of a measuring spoon set, the spices you bought five years ago, or that specialty gadget you used once. Less clutter means more space and a much easier time trying to organize kitchen shelves neatly.
Clean Everything
With your shelves now completely empty, it’s the perfect opportunity for a deep clean. Wipe down the inside of every cupboard, drawer, and shelf with an all-purpose cleaner. Sanitize surfaces, especially in your pantry area. If you have shelf liners, now is a good time to replace old ones or install new, easy-to-clean liners. A clean foundation is key to a truly neat and appealing organizational system.
Step 2: Assess and Categorize Your Items
Once you’ve purged and cleaned, it’s time to understand what you’re working with. This step involves grouping and evaluating your “Keep” pile to prepare for logical placement.
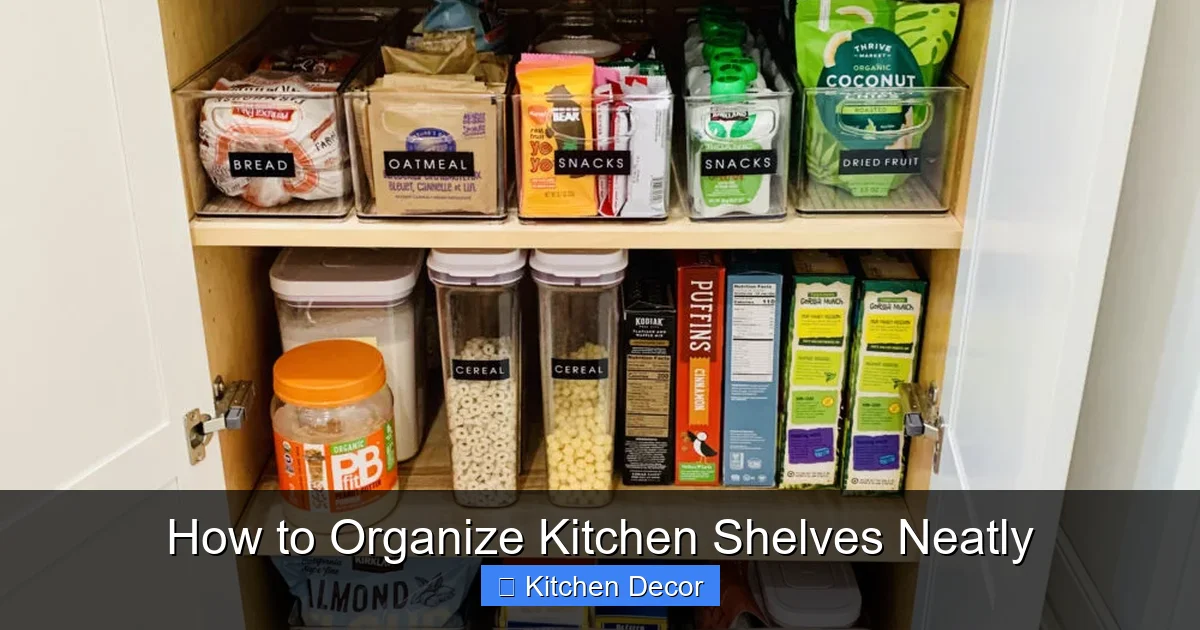
Visual guide about How to Organize Kitchen Shelves Neatly
Image source: img.freepik.com
Group Similar Items
Before putting anything back, group all similar items together. For example:
- Pantry Items: Grains, pastas, canned goods, baking supplies, snacks, spices, oils/vinegars.
- Cookware: Pots, pans, baking sheets, casserole dishes.
- Dishes & Serveware: Plates, bowls, mugs, glasses, serving platters.
- Food Storage: Containers, wraps, bags.
- Small Appliances: Toaster, blender, mixer, coffee maker.
- Utensils: Cooking utensils, eating utensils.
This gives you a clear picture of the volume of each category and helps you visualize where they might best fit when you begin to organize kitchen shelves neatly.
Evaluate Usage Frequency
Consider how often you use each group of items. This will be crucial for assigning “prime real estate” later:
- Daily Use: Coffee mugs, everyday plates, frequently used spices, cutting boards.
- Weekly Use: Pasta, rice, baking ingredients (if you bake weekly), mixing bowls.
- Infrequent Use: Holiday platters, specialty bakeware, extra large serving bowls, rarely used small appliances.
Items you use daily should be the easiest to access, while those used rarely can be stored on higher or lower shelves.
Consider Item Size and Weight
Pay attention to the physical characteristics of your items. Heavy items like cast iron pans or large bags of flour should be stored on sturdy, lower shelves for safety and ease of access. Lighter, bulkier items like chip bags or plastic containers might do well in bins on higher shelves, as long as they are easily retrieved.
Step 3: Plan Your Layout (The Zone Approach)
Now that you know what you have, it’s time to strategize where everything will go. A “zone approach” is highly effective for how to organize kitchen shelves neatly and efficiently.
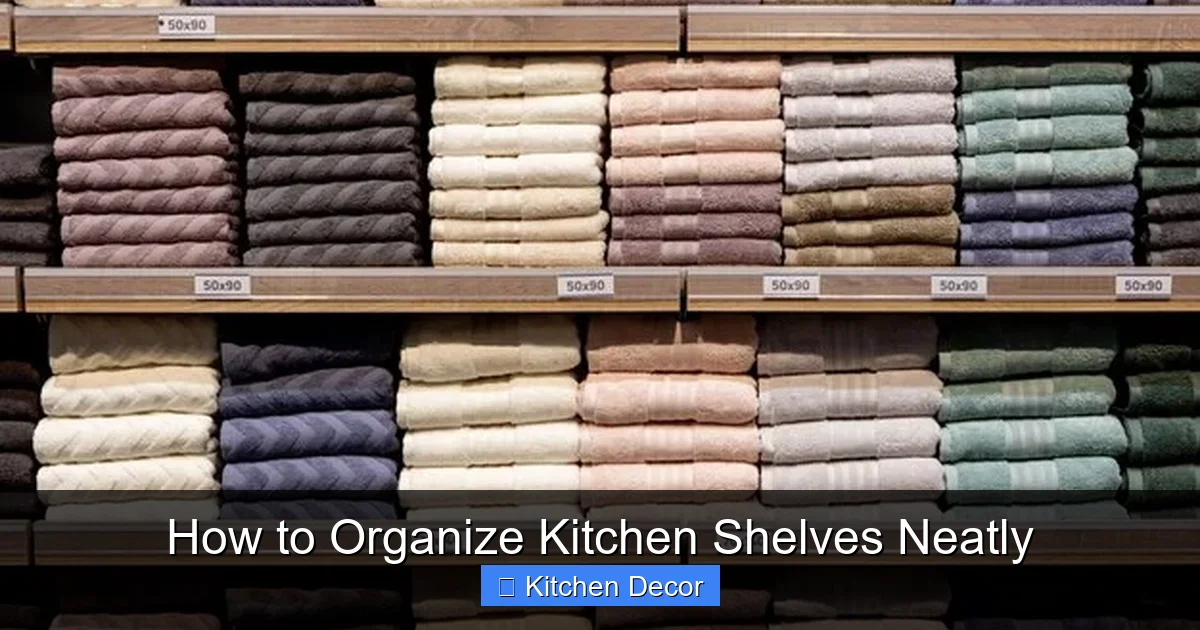
Visual guide about How to Organize Kitchen Shelves Neatly
Image source: bhg.com
Create Activity Zones
Think about the different activities that happen in your kitchen and group items accordingly. This minimizes steps and makes cooking more fluid:
- Cooking Zone: Near the stove – pots, pans, cooking oils, frequently used spices, cooking utensils.
- Prep Zone: Near your main countertop work surface – cutting boards, knives, mixing bowls, small appliances like a food processor.
- Pantry Zone: Dedicated shelves for dry goods, canned goods, baking supplies, snacks.
- Baking Zone: If you bake often, consolidate flour, sugar, leavening agents, measuring cups, and baking dishes in one area.
- Dining Zone: Near the dining table or dishwasher – everyday plates, bowls, glasses, cutlery.
- Coffee/Tea Station: Mugs, coffee maker, tea bags, sugar, stirrers.
Apply the “Prime Real Estate” Rule
This rule dictates that the most frequently used items should be stored in the most accessible spots – typically between eye level and waist level. Infrequently used items can go on the highest or lowest shelves.
- Eye Level: Everyday dishes, frequently used spices, often-grabbed pantry items.
- Waist Level: Heavier pots and pans, food storage containers, bulkier items.
- Upper Shelves: Seldom-used serving ware, seasonal items, extra pantry stock.
- Lower Shelves: Large appliances, infrequently used heavy pots, cleaning supplies (away from food).
Utilize Vertical Space
Don’t let the height between your shelves go to waste. Vertical space is gold! Think about how you can stack or lift items to maximize every inch. This is critical if you want to organize kitchen shelves neatly and efficiently.
Step 4: Smart Storage Solutions and Organizers
Once you have a plan, it’s time to bring in the tools that will help you contain, categorize, and maximize space. Investing in the right organizers can make a huge difference in how to organize kitchen shelves neatly and effectively.
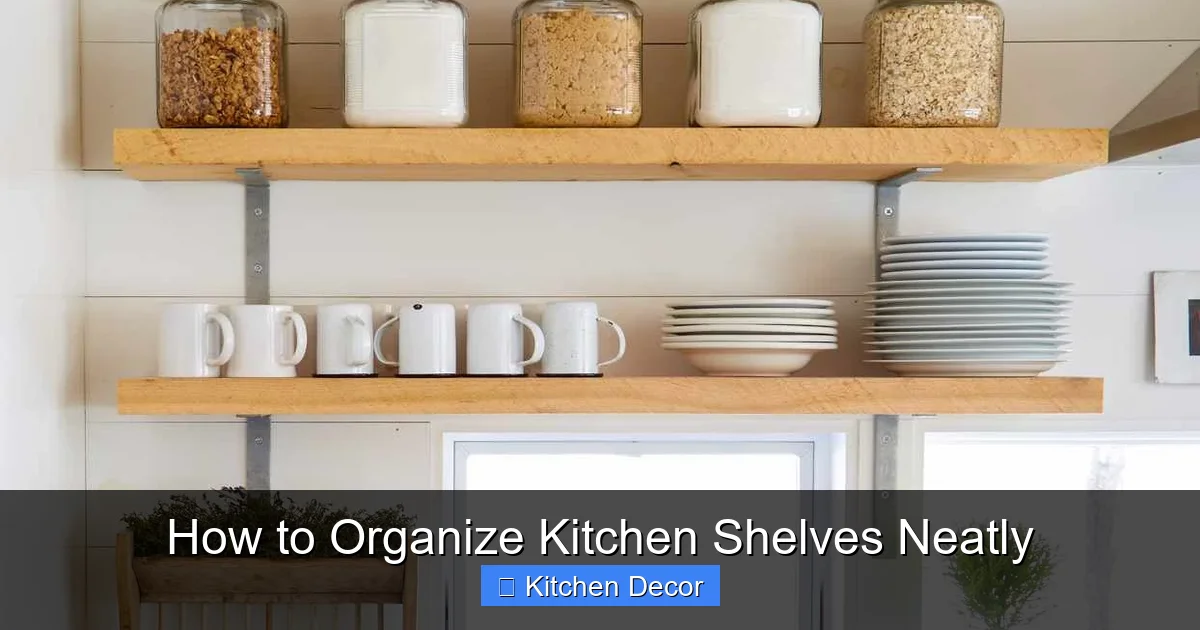
Visual guide about How to Organize Kitchen Shelves Neatly
Image source: i.pinimg.com
Shelf Risers and Expanders
These are fantastic for creating extra “levels” within a tall shelf. Use them for plates, bowls, mugs, or canned goods to double your storage capacity and prevent stacks from becoming too precarious.
Bins, Baskets, and Containers
These are your best friends for corralling smaller, loose items. They also create boundaries, making it easier to keep categories separate.
- Clear, airtight containers: Ideal for dry pantry goods like pasta, rice, flour, sugar, and cereals. They keep food fresh, prevent spills, and allow you to see exactly what you have. This also makes your pantry look incredibly organized.
- Opaque bins or baskets: Great for snacks, cleaning supplies, or items you don’t necessarily want on display.
- Divided bins: Perfect for holding packets, pouches, or small baking supplies.
Turntables (Lazy Susans)
Excellent for corner cabinets or deep shelves, turntables make it easy to access items that would otherwise get lost in the back. Use them for spices, oils, condiments, or cleaning supplies.
Drawer Dividers (for pantry drawers or utensil drawers)
If you have pantry drawers, dividers can help keep categories like snacks, baking mixes, or small appliances separate and tidy. For utensil drawers, they are a must-have for keeping forks, knives, spoons, and spatulas in their designated spots.
Wall-Mounted Organizers (if applicable)
Don’t forget about vertical wall space! Pot racks, magnetic knife strips, or wall-mounted spice racks can free up valuable shelf and drawer space, especially in smaller kitchens.
Step 5: Implementing the Organization
Now that you have your plan and your tools, it’s time to start putting everything back onto your shelves in its designated place. This is where your vision of how to organize kitchen shelves neatly comes to life.
Place Items Strategically
- Daily Use at Eye-Level: As discussed, put the items you reach for most often on shelves between your shoulders and waist.
- Heavy Items Low: Keep heavy pots, bulk dry goods, or small appliances on lower, sturdy shelves to prevent strain and accidents.
- Tall Items in the Back: Place taller containers or bottles behind shorter ones to maintain visibility.
- Group Vertically: Use shelf risers for plates and bowls. Stack items only if they are designed to be stacked and won’t topple easily.
Decant When Possible
For pantry items, decanting dry goods into clear, airtight containers not only looks uniform and appealing but also helps with freshness and portion control. It eliminates bulky, odd-shaped packaging, making it much easier to organize kitchen shelves neatly. Label your containers with the item’s name and expiration date using a label maker or chalk markers.
Label Everything
Labels are a game-changer for maintaining an organized system. Label your bins, containers, and even the shelves themselves if specific categories belong there. This ensures everyone in the household knows where things belong and helps you put items away correctly after grocery shopping or cooking. Clear labeling is essential for those who want to organize kitchen shelves neatly and keep them that way.
Arrange for Aesthetics and Function
While function is paramount, don’t overlook aesthetics. A visually pleasing shelf arrangement is often easier to maintain.
- Try to group items by color or type if it makes sense.
- Face labels outwards for quick identification.
- Avoid overstuffing shelves. Leave a little breathing room so items can be easily removed and replaced without dislodging others.
Step 6: Maintain Your Organized Shelves
The biggest challenge isn’t organizing, but *staying* organized. Here’s how to maintain your beautifully organized kitchen shelves.
Daily Tidy-Up
Dedicate 5-10 minutes each day to putting things back in their proper place. Wipe up spills immediately. Don’t let clutter accumulate.
Regular Check-ins
Once a month or every few months, do a quick “shelf audit.” Check expiration dates, especially in your pantry. Tidy up any areas that have started to slip. This prevents the need for another major overhaul.
One-In, One-Out Rule
When you buy a new item, especially for food storage or small kitchen tools, consider if there’s an older, similar item you can get rid of. This prevents accumulation and keeps your shelves from overflowing.
Adjust as Needed
Life changes, and so do your kitchen habits. If a system isn’t working for you, don’t be afraid to adjust it. Perhaps that spice rack isn’t ideal, or you’re now baking more often and need a larger baking zone. Flexibility is key to lasting organization.
Practical Tips for Maximizing Space and Efficiency
- Stackable Containers: Choose containers that stack securely to maximize vertical space in your pantry or fridge.
- Vertical Dividers: For cutting boards, baking sheets, and platters, use vertical dividers to store them on their side. This makes them much easier to access than stacking them horizontally.
- Clear Containers: They allow you to see what’s inside at a glance, eliminating the need to search through opaque boxes.
- “First In, First Out” (FIFO): For pantry items, place newer groceries behind older ones. This ensures you use older items before they expire, reducing waste.
- Use the Inside of Cabinet Doors: Magnetic strips, small hooks, or narrow shelves can be added to the inside of cabinet doors for spice jars, measuring spoons, or often-used utensils.
- Command Hooks: These are great for hanging oven mitts, dish towels, or even light cutting boards on the inside of cabinet doors or unused wall space.
Troubleshooting Common Shelf Organization Challenges
Even with the best intentions, you might encounter some hurdles when trying to organize kitchen shelves neatly. Here are solutions to common problems:
Small Kitchen/Limited Shelves
If you have minimal cabinet space, think vertically and outwardly:
- Wall-Mounted Solutions: Utilize every inch of wall space for open shelving, pot racks, or magnetic knife strips.
- Door Storage: Over-the-door pantry organizers or small shelves on cabinet doors.
- Multi-functional Items: Invest in items that serve multiple purposes (e.g., a cutting board that fits over the sink).
- Strategic Decluttering: Be even more ruthless with your decluttering to ensure only essential items remain.
Awkwardly Shaped Items
Large pots, casserole dishes, or unusual small appliances can be tricky:
- Vertical Storage: Use pot and pan organizers that stand items on their sides.
- Dedicated Spots: Assign a specific, easily accessible, and spacious spot for each awkward item so it doesn’t get crammed or lost.
- Corner Solutions: Turntables or corner shelving units can make large items in corner cabinets more accessible.
Items Falling Over
Tall bottles or wobbly stacks can be a nuisance:
- Bins with High Sides: Contain tall bottles or loose items in bins.
- Non-Slip Liners: Use non-slip shelf liners to prevent items from sliding.
- Proper Stacking: Ensure items are stacked securely and evenly. Avoid stacking too high.
- Adjustable Shelf Dividers: These can create compartments within a long shelf, preventing items from toppling into each other.
Maintaining the System
It’s easy to fall back into old habits. To keep your kitchen shelves organized:
- Involve the Household: Make sure everyone knows where things belong. Labels help immensely.
- Regular Mini-Tidies: A quick tidy-up after cooking or grocery shopping makes a huge difference.
- Reward Yourself: Acknowledge the effort and enjoy the benefits of your neatly organized kitchen. The joy of a functional space can be its own motivation!
Conclusion
Learning how to organize kitchen shelves neatly is more than just a chore; it’s an investment in your daily peace of mind and the efficiency of your home. By following these steps – from the initial purge and deep clean to categorizing, planning, and implementing smart storage solutions – you can transform even the most chaotic kitchen into a functional and beautiful space.
Remember, organization is an ongoing process, not a one-time event. With a little maintenance and a commitment to keeping things tidy, you’ll enjoy the benefits of your neatly organized kitchen shelves for years to come. So, take a deep breath, get started, and relish the calm and clarity that a well-organized kitchen brings to your life. Happy organizing!