Transform your cramped kitchen into a functional, stylish space with our ultimate Small Kitchen Organization Essentials Checklist. Learn to effectively declutter, maximize vertical storage, optimize cabinet interiors, and utilize multi-purpose tools. This guide provides practical steps and tips to maintain order, ensuring your small kitchen feels spacious and inviting and helps you reclaim your cooking joy.
Small Kitchen Organization Essentials Checklist
Welcome, fellow kitchen adventurers! Do you dream of a perfectly organized, highly functional kitchen, but then open your cabinet doors to face an avalanche of mismatched Tupperware? Or perhaps you gaze at your precious countertop real estate, wondering how to fit more than a coffee maker and a stray crumb without feeling utterly overwhelmed?
If you’re nodding your head, you’re not alone. Small kitchens, while cozy, can present unique challenges. Limited space, awkward layouts, and the sheer volume of kitchen gadgets we accumulate can quickly turn a culinary dream into a cluttered nightmare. But here’s the good news: a small kitchen doesn’t have to mean small dreams. With the right strategies, a little ingenuity, and a solid plan, you can transform your compact cooking area into an efficient, enjoyable, and surprisingly spacious hub.
This comprehensive guide will walk you through the ultimate small kitchen organization essentials checklist. We’re not just talking about tidying up; we’re talking about a complete overhaul that rethinks how you use your space. We’ll cover everything from ruthless decluttering to clever storage solutions, helping you create a system that works for your lifestyle and keeps your kitchen serene. Get ready to reclaim your countertops, find exactly what you need when you need it, and fall in love with your small kitchen all over again!
Key Takeaways
- Declutter Ruthlessly: Begin by removing all non-essential items, duplicates, and expired goods to create a clean slate. This is the foundational step on any effective small kitchen organization essentials checklist.
- Maximize Vertical Space: Utilize walls, cabinet doors, and tiered shelves to store items upwards, freeing up valuable counter and cabinet space. Think creatively about every available inch.
- Optimize Interiors: Invest in drawer dividers, pull-out shelves, and Lazy Susans to make every inch of your cabinets and drawers work harder and more efficiently.
- Prioritize Multi-Purpose Tools: Choose collapsible, nesting, and dual-function items to reduce clutter and enhance versatility, a smart move for any small kitchen organization essentials checklist.
- Maintain Consistency: Implement daily habits like the “one-minute rule” and regular mini-declutters to keep your organized system intact and prevent future clutter build-up.
- Strategic Countertop Use: Keep countertops as clear as possible, only displaying absolute essentials, and using vertical organizers for what must stay out to preserve valuable prep space.
Step 1: Declutter and Depersonalize Your Space
Before you buy a single organizer, the first and most crucial step on our small kitchen organization essentials checklist is to declutter. Think of it as hitting the reset button. You can’t truly organize what you don’t need or use. This step requires honesty and a willingness to let go.
The “Everything Out” Method
To start, empty everything out. Yes, everything! Take every item out of your cabinets, drawers, pantry, and off your countertops. Place it all on your dining table, a portable island, or even the floor. Seeing everything you own laid out can be quite eye-opening and provides a clear picture of what you’re working with. This visual impact helps you make more objective decisions.
The Three-Pile System (Keep, Donate/Sell, Toss)
Now, go through each item, one by one, and sort it into one of three piles:
- Keep: These are items you use regularly (at least once a week or month), truly love, or need for specific tasks. Be honest about “regularly.”
- Donate/Sell: Items that are still in good condition but you no longer use, have duplicates of, or realize you never truly needed. Think about donating to local charities or selling online.
- Toss: Anything broken, expired, chipped, stained beyond repair, or truly unusable. This includes old takeout menus, random bits of plastic, and expired spices.
Be Ruthless, Be Realistic
This is where the rubber meets the road. Ask yourself these questions for each item:
- When was the last time I used this? (If it’s been over a year, seriously consider letting it go.)
- Do I have more than one of these? (Do you really need three spatulas or five coffee mugs if you live alone?)
- Is it serving a purpose, or is it just taking up space?
- Does it fit my current lifestyle and cooking habits?
- Does it bring me joy? (The KonMari method isn’t just for clothes!)
Practical Tip: For sentimental items, take a photo before letting them go. For rarely used items (like a giant turkey roaster), consider if a friend has one you can borrow, or if renting is an option for that one time a year.
Step 2: Master Vertical Space with Smart Storage Solutions
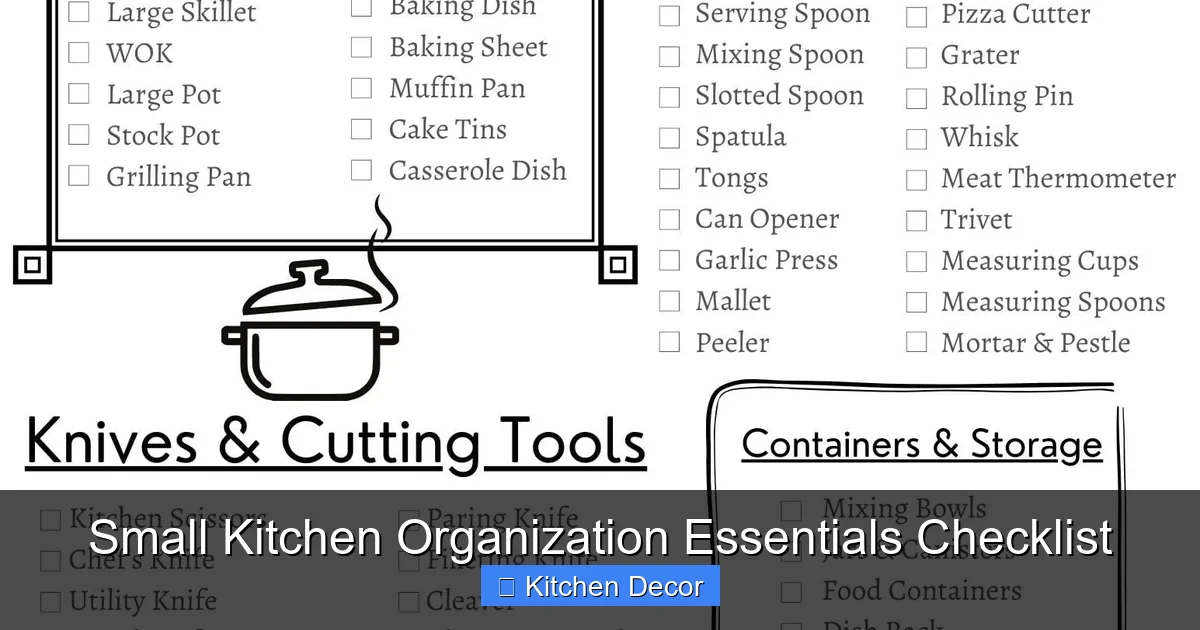
Once you’ve decluttered, the next vital item on our small kitchen organization essentials checklist is to look up! Small kitchens thrive when you think vertically. Walls, cabinet doors, and even the space above your fridge are untapped goldmines.
Visual guide about Small Kitchen Organization Essentials Checklist
Image source: i.etsystatic.com
Shelves, Racks, and Hooks Galore
- Floating Shelves: Install shelves above existing countertops, windows, or even a blank wall. These are perfect for displaying aesthetically pleasing items like cookbooks, pretty dishes, or frequently used spices in attractive jars.
- Wall-Mounted Pot Racks: Free up precious cabinet space by hanging pots and pans on the wall. This not only looks professional but also makes your cookware easily accessible. Ensure they are securely mounted into studs.
- Magnetic Knife Strips: Ditch the bulky knife block that eats up countertop space. A magnetic strip keeps your knives safely stored and within easy reach on the wall.
- Pegboards: A pegboard can be a customizable dream. Install one on an empty wall and use hooks, small shelves, and bins to organize utensils, cutting boards, small pots, or even cleaning supplies.
Stackable Storage
Inside your cabinets and pantry, stacking is your friend.
- Can Dispensers: These clever organizers hold cans horizontally and feed them forward as you take one, saving space and making it easy to see your stock.
- Plate Holders & Bakeware Organizers: Instead of stacking plates directly on top of each other, use vertical plate holders. Similarly, bakeware organizers can hold baking sheets, cutting boards, and cooling racks upright, making them easier to grab without toppling everything.
- Tiered Shelves & Risers: Add small tiered shelves inside cabinets to create extra levels for mugs, spices, or smaller dishes, effectively doubling your storage space.
Over-the-Door Solutions
Don’t forget the inside of your cabinet doors or even the main kitchen door!
- Pantry Door Organizers: A slim, over-the-door rack can hold spices, small jars, foil, plastic wrap, or even cleaning supplies.
- Towel Racks: Install a small towel bar on the inside of a lower cabinet door for dishcloths or hand towels, keeping them out of sight but always accessible.
Practical Tip: Before installing anything, map out your space. Measure carefully and consider what you need to store where. Use painter’s tape to visualize where shelves or racks will go.
Step 3: Optimize Cabinet and Drawer Interiors
Now that you’ve tackled vertical space, let’s dive into the guts of your kitchen: the cabinets and drawers. Maximizing their efficiency is a cornerstone of our small kitchen organization essentials checklist.
Visual guide about Small Kitchen Organization Essentials Checklist
Image source: worksheets.clipart-library.com
Drawer Dividers and Organizers
Drawers can quickly become junk drawers if not managed. Contain the chaos!
- Cutlery Trays: A classic for a reason. Get one that fits your drawer perfectly, or even an expandable one.
- Adjustable Dividers: These are fantastic for larger drawers, allowing you to create custom compartments for utensils, cooking tools, or even small food packets.
- Spice Drawer Inserts: If you have a shallow drawer, an angled spice insert can beautifully display your spice jars, making them easy to find and grab.
- Small Bins: Use small, non-slip bins within drawers to corral items like bag clips, wine stoppers, or small gadgets.
Cabinet Organizers
Cabinets often have deep, dark corners. Let’s illuminate and utilize them!
- Pull-Out Shelves/Baskets: These are a game-changer for lower cabinets. Instead of rummaging, everything glides out to you, making items in the back easily accessible.
- Lazy Susans (Turntables): Perfect for corner cabinets or deep pantry shelves. Use them for oils, vinegars, spices, condiments, or baking supplies. A quick spin brings everything to the front.
- Under-Sink Organizers: The area under the sink is often neglected. Use stackable bins or specialized under-sink racks to organize cleaning supplies, sponges, and dish soap, often working around plumbing.
- Stackable Storage Bins: Clear bins are excellent for pantry items, snacks, or even small appliance accessories. Being able to see what’s inside helps maintain order.
Door-Mounted Storage (Again!)
Cabinet doors aren’t just for towels.
- Spice Racks: Slim racks that attach to the inside of cabinet doors are perfect for housing frequently used spices, keeping them off your counter or out of a drawer.
- Foil/Wrap Dispensers: Mount wire racks specifically designed for rolls of foil, plastic wrap, and parchment paper to the inside of a cabinet door for neat storage.
Practical Tip: Before buying drawer organizers or cabinet inserts, measure your spaces meticulously. Consider the height, width, and depth to ensure a perfect fit and maximum efficiency. Opt for clear containers so you can easily see contents.
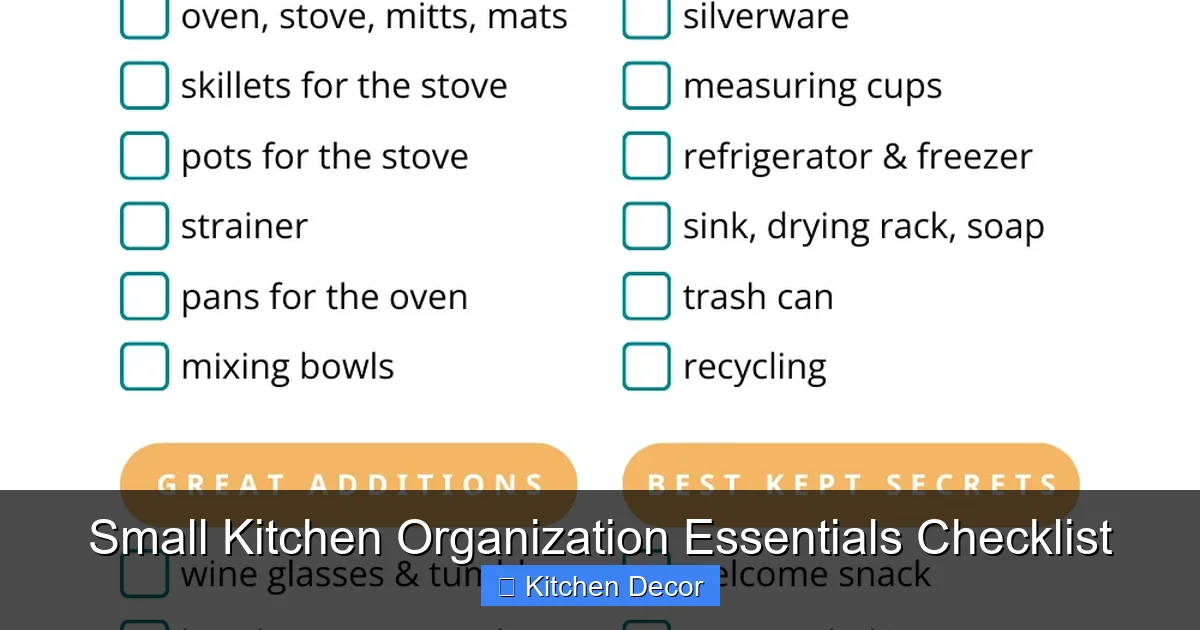
Step 4: Utilize Countertops Wisely and Strategically
In a small kitchen, countertops are precious real estate. How you use them makes a huge difference in the perceived spaciousness and actual functionality. This is a critical point on our small kitchen organization essentials checklist.

Visual guide about Small Kitchen Organization Essentials Checklist
Image source: blog.apartminty.com
Minimalist Approach is Key
The golden rule for small kitchen countertops is “less is more.”
- Only Absolute Essentials: Limit what lives on your counter to items you use daily, like a coffee maker, toaster, or perhaps a stand mixer if you bake frequently. Even then, consider if smaller versions or a different storage spot would work.
- Small Appliances Put Away: Resist the urge to display every gadget. If you use your blender once a week, store it in a cabinet and pull it out when needed. A dedicated appliance garage (if you have one) is ideal.
Vertical Countertop Organizers
If you must keep items out, organize them vertically.
- Tiered Fruit Baskets: Instead of a large bowl, a two or three-tiered fruit basket stores produce without spreading out.
- Spice Racks: A small, tiered spice rack can keep frequently used spices neat and tidy on the counter if you don’t have drawer or cabinet door space.
- Knife Blocks (Consider Alternatives): While traditional knife blocks take up space, if you must have one, choose a compact, slim design. A magnetic knife strip mounted on the wall is usually a better space-saving option.
Designate a “Landing Zone”
Create one small, dedicated area for items that tend to collect: keys, mail, phone chargers. A small tray or bowl keeps this clutter contained rather than spread across your entire counter.
Practical Tip: Clear your counters completely at the end of each day. Wiping them down not only keeps them clean but also reinforces the habit of putting things away, making your kitchen feel bigger and more inviting.
Step 5: Embrace Multi-Purpose and Space-Saving Tools
Smart selection of your kitchen tools and appliances is a game-changer for small kitchens. This essential step on our small kitchen organization essentials checklist focuses on efficiency and versatility.
Collapsible and Nesting Items
These are your best friends for saving space.
- Nesting Mixing Bowls and Measuring Cups: Sets that fit neatly inside each other take up a fraction of the space of individual items.
- Collapsible Strainers and Colanders: These silicon wonders flatten down for easy storage in a drawer or cabinet.
- Stackable Storage Containers: Look for food storage sets where the containers and lids stack or nest efficiently, avoiding that infamous “Tupperware avalanche.”
Appliances that Do Double Duty
Choose wisely when investing in appliances.
- Immersion Blender: Instead of a bulky countertop blender, an immersion blender can perform many tasks with a much smaller footprint.
- Multi-Cookers (e.g., Instant Pot): These appliances can function as pressure cookers, slow cookers, rice makers, yogurt makers, and more, replacing several single-purpose gadgets.
- Toaster Oven/Air Fryer Combos: If you use both, a single appliance that does both jobs saves counter space and an extra storage spot.
Cutting Boards with Features
Even your cutting board can be a multi-tasker.
- Over-the-Sink Cutting Boards: These expand over your sink, providing extra prep space and making cleanup easier.
- Cutting Boards with Storage: Some designs include built-in drawers for collecting chopped ingredients or even for storing knives.
Practical Tip: When purchasing new kitchen items, always consider their size and storage needs. Ask yourself: “Does this item pull its weight? Can it do more than one thing? Will it fit neatly into my organized system?”
Step 6: Create a Functional Pantry (Even Without a Dedicated One)
A “pantry” in a small kitchen might just be a cabinet, a set of shelves, or even a deep drawer. Regardless of its size, organizing it effectively is a crucial part of our small kitchen organization essentials checklist.
Designate a Cabinet or Shelf
If you don’t have a walk-in pantry, dedicate a specific cabinet or a section of a larger cabinet as your “pantry.” This creates a clear home for all your non-perishable food items.
Use Clear, Airtight Containers
Transfer dry goods like pasta, rice, flour, sugar, and cereals into clear, airtight containers. This isn’t just for aesthetics; it:
- Keeps Food Fresh: Protects against pests and moisture.
- Saves Space: Square or rectangular containers pack together more efficiently than bags or oddly shaped boxes.
- Allows Visibility: You can easily see what you have and when you’re running low, preventing duplicate purchases.
- Label Everything: Don’t forget to label containers with the item’s name and expiration date.
First-In, First-Out (FIFO) System
When stocking your pantry, practice FIFO. Place new items at the back and older items at the front. This ensures you use food before it expires and reduces waste.
Maximize Door Space (Again!)
As mentioned before, the inside of your pantry cabinet door can hold spices, small packets of mixes, or even small jars of condiments.
Practical Tip: Take inventory regularly. Before grocery shopping, quickly scan your pantry. Make a list of what you have and what you need. This prevents overbuying and ensures you don’t accumulate duplicates.
Step 7: Establish and Maintain Organization Habits
An organized kitchen isn’t a one-time project; it’s a lifestyle. The final, yet ongoing, step on our small kitchen organization essentials checklist is to build habits that ensure your hard work pays off long-term.
The “One Minute Rule”
If a task takes less than one minute, do it immediately. This applies to wiping down a counter, putting away a spice jar, or loading a dish into the dishwasher. These small actions prevent clutter from accumulating.
Regular Mini-Declutter Sessions
Don’t wait for your kitchen to become a disaster zone again. Schedule a quick 15-minute “reset” session weekly or bi-weekly. This could involve:
- Quickly scanning your pantry for expired items.
- Wiping down frequently used surfaces.
- Re-sorting a messy drawer.
- Checking for items that have migrated out of their designated homes.
Everything Has a Home
This is foundational. Once you’ve organized, every single item in your kitchen should have a designated spot. When you’re done using something, put it back in its home immediately. This simple habit eliminates “clutter creep.”
Involve the Whole Household
If you live with others, communicate your new organizational system. Explain where things belong and why it’s important to maintain order. Assign small, age-appropriate tasks to family members to help share the load.
Practical Tip: Be flexible. Your needs might change, or you might find a better way to store something. Don’t be afraid to adjust your system. Organization is an ongoing process of refinement.
Troubleshooting Common Small Kitchen Woes
Even with the best intentions and a great small kitchen organization essentials checklist, you might encounter bumps along the way. Here are solutions to some common problems:
“My Drawers Are Still Overstuffed!”
If your drawers feel too full even after using dividers, it’s a sign you either need to declutter more aggressively or you have too many items for the space. Revisit Step 1. Do you really need all those cooking gadgets? Can some be stored elsewhere (e.g., rarely used cookie cutters in a basement storage bin)? Consider vertical storage for larger items that might be hogging drawer space.
“I Can’t Reach Anything High Up!”
This is common in small kitchens where vertical space is maximized. Solutions include:
- Step Stool: Keep a slim, foldable step stool handy in your kitchen or a nearby pantry/closet.
- Rotation: Store frequently used items on lower shelves and less-used items higher up.
- Designated Grabber: If mobility is an issue, consider a reacher tool.
“It Gets Messy Again So Fast!”
This often points to a breakdown in maintenance habits. Revisit Step 7:
- Are you consistently following the “one-minute rule”?
- Does every item truly have a designated home that’s easy to return it to?
- Are others in your household contributing to the mess without understanding the system? A quick family meeting might be in order.
- Is your system too complicated? Sometimes simplifying storage can make it easier to maintain.
“I Have Too Many Appliances for My Small Kitchen!”
Small kitchens often suffer from “appliance overload.”
- Prioritize: Which appliances do you use weekly? Daily? Monthly? Keep the most used ones accessible.
- Off-Site Storage: Can seasonal or rarely used appliances (e.g., ice cream maker, waffle maker) be stored in a basement, garage, or even a hall closet?
- Re-evaluate Need: Do you *really* need that specific gadget? Could a multi-functional appliance replace it? If you haven’t used an appliance in over a year, consider selling or donating it.
Conclusion
Congratulations! You’ve navigated the comprehensive small kitchen organization essentials checklist and are now equipped with the knowledge and tools to transform your compact culinary space. Remember, an organized small kitchen isn’t about perfection; it’s about creating a functional, peaceful environment where you enjoy cooking and spending time.
By starting with a thorough declutter, embracing vertical storage, optimizing every inch of your cabinets and drawers, making smart choices about your tools, and establishing consistent habits, you’ve laid the groundwork for lasting order. Don’t be afraid to start small, tackle one area at a time, and celebrate each little victory along the way.
Your small kitchen has immense potential. With this checklist as your guide, you can unlock that potential, turning what might have once felt like a constraint into a cozy, efficient, and inspiring place to create delicious meals and lasting memories. Happy organizing!