Ready to conquer kitchen clutter? Our comprehensive guide will show you how to manage kitchen space effectively, turning chaos into calm. Discover a simple, step-by-step process for decluttering, zoning, and optimizing storage, ensuring your kitchen becomes a beautifully organized and highly functional heart of your home. Achieve lasting order and enjoy cooking more!
How to Manage Kitchen Space Step by Step Table
Your kitchen is often called the heart of the home, a place where meals are created, families gather, and memories are made. But let’s be honest, it can also quickly become the most cluttered room in the house! From overflowing pantries to crammed countertops, a disorganized kitchen can make cooking a chore and entertaining a headache. If you’re tired of rummaging for that elusive spatula or struggling to find counter space, you’ve come to the right place.
This comprehensive guide will walk you through a simple, step-by-step process to transform your kitchen from chaotic to calm. We’ll show you exactly how to manage kitchen space, making it more functional, efficient, and enjoyable. By the end, you’ll have a beautifully organized kitchen that truly works for you, making every culinary adventure a pleasure.
Key Takeaways
- Decluttering is the Foundation: Before you organize, ruthlessly purge unused, expired, or broken items to create a clean slate.
- Zone Your Kitchen for Efficiency: Group similar items and tasks together (e.g., prep, cooking, cleaning) to streamline your workflow and make cooking easier.
- Utilize Vertical Space Effectively: Don’t overlook cabinet height or wall space. Shelf risers, stackable containers, and wall-mounted solutions can double your storage.
- Invest in Smart Organizers: Drawer dividers, pull-out shelves, lazy Susans, and clear containers are essential tools to keep items tidy and easily accessible.
- Maintain with Consistent Habits: Organization isn’t a one-time task. Implement daily routines and regular check-ins to keep your kitchen tidy and functional.
- Labeling is Key for Long-Term Order: Clearly labeling containers and shelves helps everyone in the household know where things belong, preventing future clutter.
- Adapt Solutions to Your Lifestyle: Your kitchen management strategy should fit your cooking habits, family needs, and the unique layout of your space for optimal success.
Step 1: The Grand Purge – Assess and Declutter
Before you can effectively manage kitchen space, you need to know exactly what you’re working with. This first step is crucial and often the most liberating. It’s all about creating a clean slate by removing everything you don’t need, use, or love.
Empty Everything Out
This might sound daunting, but trust us, it’s worth it. Pick one area at a time (e.g., one cabinet, one drawer, then the pantry) to avoid feeling overwhelmed. Take everything out. Yes, everything. Place items on your dining table, a cleared countertop, or even a clean sheet on the floor. Seeing everything laid out helps you visualize the sheer volume of your possessions and make informed decisions.
Ruthless Purge: Keep, Donate, Toss, Relocate
Now, go through each item with a critical eye. Create four piles:
- Keep: Items you use regularly, love, and are in good condition.
- Donate/Sell: Items that are still functional and in good condition but you no longer use or need. Think about small appliances, extra dishware, or specialty gadgets. Many charities accept kitchen items.
- Toss: Broken items, expired food, mismatched plastic containers without lids, stained kitchen towels beyond repair, or anything that’s simply garbage. Be honest with yourself about what’s truly unusable.
- Relocate: Items that don’t belong in the kitchen. This could be mail, craft supplies, tools, or office supplies that have migrated to your kitchen counters or drawers. Return them to their rightful homes.
Practical Tip: For specialty gadgets, ask yourself: “Have I used this in the last year? Will I realistically use it in the next year?” If the answer is no, it’s likely a candidate for the ‘Donate’ pile. Don’t let guilt keep you from letting go.
Categorize What Remains
Once you’ve purged, group your ‘Keep’ items into logical categories. This will make the next steps much easier. For example:
- Cookware (pots, pans, baking sheets)
- Dishware (plates, bowls, mugs)
- Utensils (cooking tools, serving spoons)
- Cutlery (forks, knives, spoons)
- Food Storage (containers, wraps)
- Small Appliances (mixer, toaster, coffee maker)
- Pantry Staples (grains, canned goods, spices)
- Cleaning Supplies
This categorization is fundamental to effectively manage kitchen space, as it sets the stage for a logical and accessible layout.
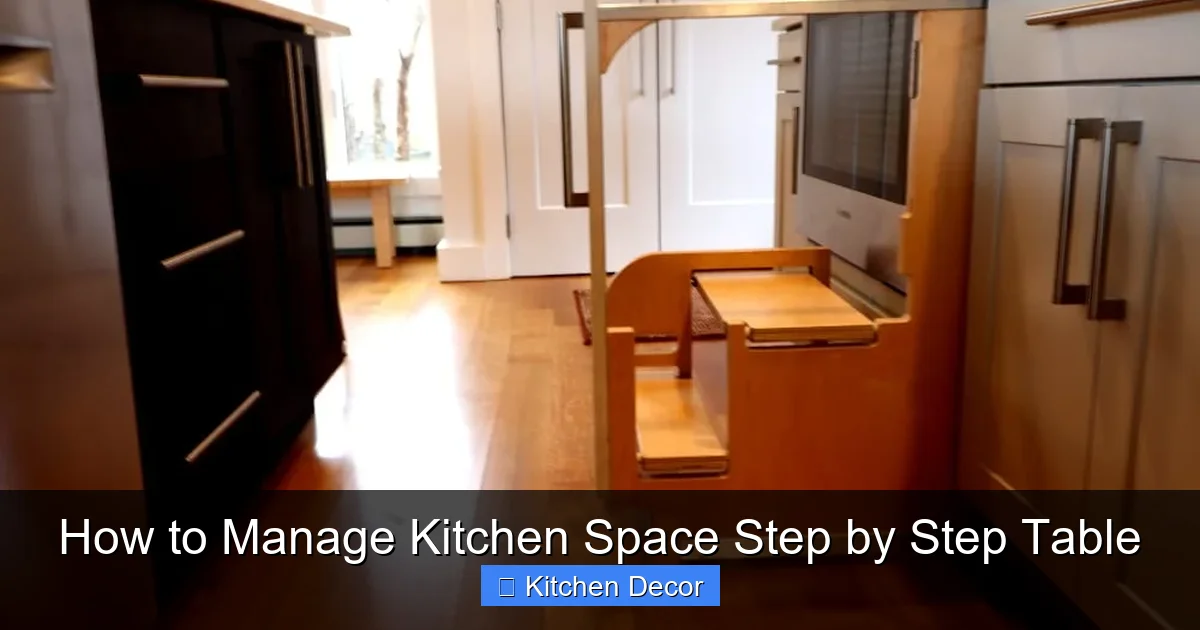
Step 2: Design Your Kitchen’s Workflow – Zoning for Efficiency
Now that you know what you have, it’s time to decide where everything should live. A well-designed kitchen operates like a finely tuned machine, with zones that make sense for how you cook and clean. This is how you truly optimize and manage kitchen space for maximum efficiency.
Visual guide about How to Manage Kitchen Space Step by Step Table
Image source: ea.blum.com
The Prep Zone
This area is where you do most of your chopping, mixing, and ingredient preparation. Ideally, it should be near your sink and refrigerator. Store items here that you use frequently during prep:
- Cutting boards
- Knives and knife blocks
- Mixing bowls and measuring cups/spoons
- Peelers, graters, and other prep tools
- Often-used spices and oils
Example: If you have a counter stretch between your sink and stove, designate that as your primary prep area. Keep a pull-out bin for compost or trash nearby for easy waste disposal.
The Cooking Zone
This zone revolves around your stove and oven. You want everything you need for cooking to be within easy reach without having to walk across the kitchen. Here you’ll store:
- Pots and pans (ideally in a cabinet or drawer near the stove)
- Baking sheets and casserole dishes (near the oven)
- Spatulas, ladles, tongs, and other cooking utensils
- Spices, herbs, oils, and vinegars
- Oven mitts and pot holders
Practical Tip: Consider a wall-mounted spice rack or a small, tiered organizer next to the stove for quick access to frequently used spices. This helps you manage kitchen space on the countertop.
The Food Storage Zone (Pantry & Fridge)
This is where all your non-perishable and perishable food items live. The goal is easy visibility and accessibility to prevent forgotten items and food waste.
- Pantry: Group similar items together – all grains, all canned goods, all snacks, baking supplies. Use clear, airtight containers for staples like flour, sugar, and pasta to keep them fresh and easily identifiable.
- Refrigerator/Freezer: Implement a “first in, first out” system. Designate shelves for specific categories (e.g., dairy, produce, leftovers). Utilize clear bins to corral smaller items and prevent spills.
Example: A designated “snack drawer” in the fridge for kids, or a “breakfast cabinet” with coffee, tea, and cereals, can really help manage kitchen space and daily routines.
The Dishware & Utensil Zone
This zone should ideally be near your dishwasher or sink for easy unloading and setting the table. This is where your everyday plates, bowls, glasses, mugs, and cutlery belong.
- Store everyday dishes in easily accessible upper cabinets or lower drawers near your dining area.
- Cutlery should be in a divided drawer close to the table setting area.
- Special occasion dishware can be stored in higher, less accessible cabinets.
Practical Tip: If you frequently eat at a kitchen island or breakfast bar, consider storing some everyday items within that vicinity to reduce steps.
The Cleaning Zone
This area is usually centered around your sink and dishwasher. Keep all your cleaning supplies here for quick access after meals.
- Dish soap, sponges, dish brush
- Dishwasher detergent
- Trash can and recycling bin (ideally in an easily accessible cabinet or pull-out)
- All-purpose cleaner, paper towels
Example: Under-sink organizers or a caddy can keep cleaning supplies tidy and prevent them from toppling over. This small step can greatly help manage kitchen space in a typically messy area.
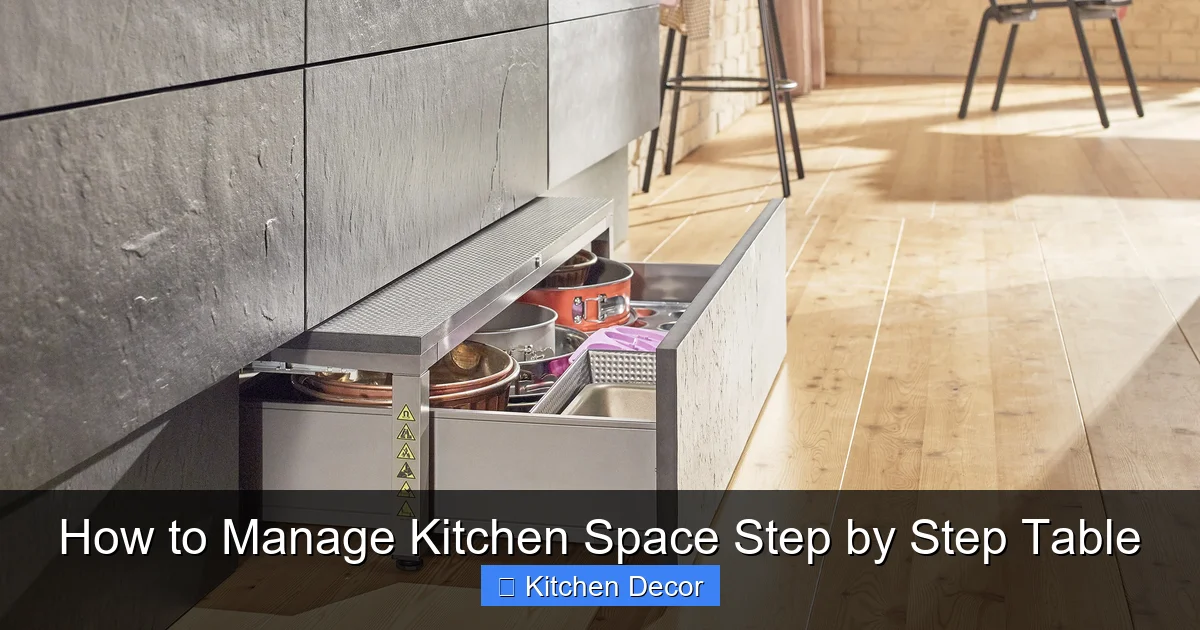
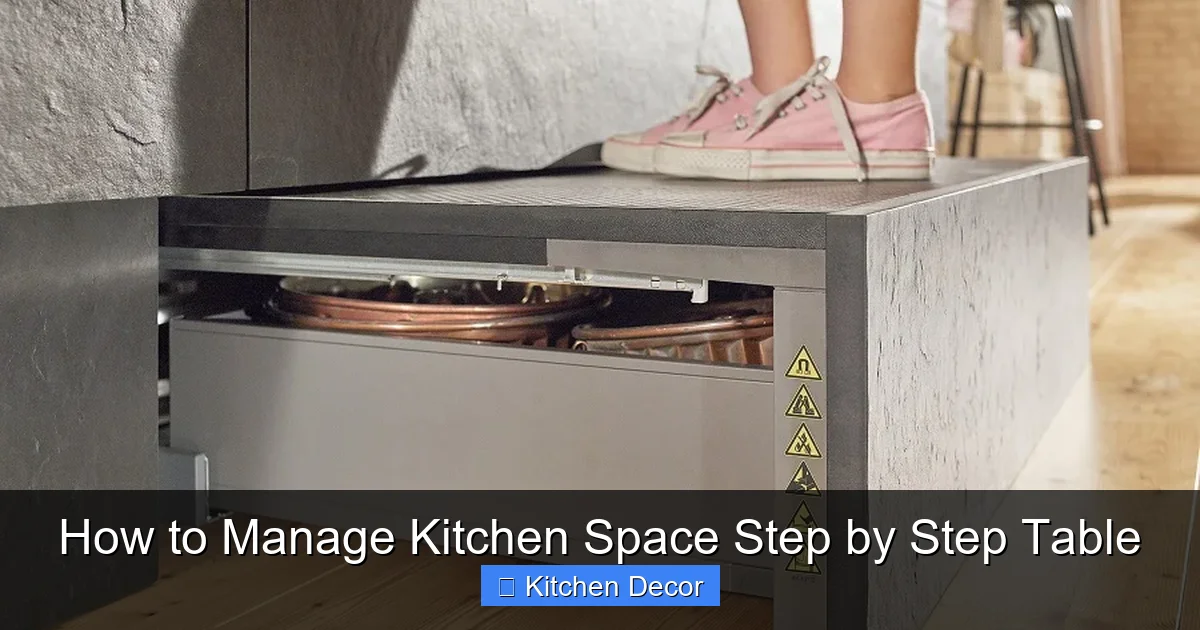
Step 3: Optimize Storage Solutions – Smart Tools for Every Inch
With your kitchen zoned, it’s time to implement smart storage solutions that maximize every square inch. This is where you leverage specialized tools to truly manage kitchen space effectively.

Visual guide about How to Manage Kitchen Space Step by Step Table
Image source: xyloefarmoges.com
Vertical Space is Your Friend
Don’t just think horizontally; look up! Vertical space is often underutilized.
- Shelf Risers: Add extra tiers within cabinets to store plates, bowls, or cans, effectively doubling your shelf space.
- Stackable Containers: Use clear, stackable containers for pantry items to utilize height and keep things organized.
- Pot & Pan Racks: A ceiling-mounted or cabinet-insert pot rack can free up valuable cabinet space.
- Tension Rods: Use small tension rods under sinks to hang spray bottles, or inside cabinets to store cutting boards vertically.
Drawer and Cabinet Organizers
These are game-changers for tidiness and accessibility.
- Drawer Dividers: Essential for cutlery, cooking utensils, and even foils/wraps. They prevent items from shifting and becoming a jumbled mess.
- Pull-out Shelves/Drawers: Install these in lower cabinets for easier access to pots, pans, or cleaning supplies. No more rummaging in the back!
- Lazy Susans (Turntables): Perfect for corner cabinets, spice cabinets, or under the sink. They bring items from the back to the front with a simple spin.
- Under-shelf Baskets: Clip onto existing shelves to create an extra layer of storage for small items like tea towels, spices, or snacks.
Practical Tip: Measure your drawers and cabinets before buying organizers to ensure a perfect fit. Customizing your storage this way will help you better manage kitchen space.
Wall-Mounted Solutions
When cabinet or drawer space is limited, look to your walls.
- Magnetic Knife Strips: Free up drawer space and keep knives safely and visibly stored.
- Pegboards: A versatile solution for hanging pots, pans, utensils, and even small baskets. You can customize the layout as your needs change.
- Wall Shelves: Open shelving can be both decorative and functional for displaying attractive dishware, cookbooks, or frequently used items.
- Door Organizers: Over-the-door racks (for pantry doors or cabinet doors) can hold spices, wraps, cleaning supplies, or small gadgets.
Example: A pegboard near your cooking zone can hold frequently used ladles, strainers, and even small frying pans, making them instantly accessible.
Pantry Power-Up
A well-organized pantry is a joy to behold and a key part of how to manage kitchen space.
- Clear, Airtight Containers: Transfer dry goods (pasta, rice, flour, sugar, cereals) into clear containers. This looks tidier, keeps food fresh, and allows you to see stock levels at a glance.
- Tiered Shelves: Great for canned goods and spice jars, allowing you to see items at the back.
- Label Everything: This is non-negotiable for pantry success. Label containers with their contents and expiration dates.
- Baskets & Bins: Use these to corral similar items like snack bags, baking mixes, or specialty ingredients.
Practical Tip: Dedicate one small bin in your pantry for “use soon” items – those approaching their expiration date or open packages. This helps prevent food waste.
Step 4: Maintain and Adapt – Keeping the Order Alive
Organizing your kitchen is a fantastic achievement, but it’s not a one-time event. The real secret to how to manage kitchen space long-term is consistent maintenance and a willingness to adapt.
Visual guide about How to Manage Kitchen Space Step by Step Table
Image source: drewtrans.pl
Daily Habits for Lasting Order
Small, consistent actions prevent clutter from piling up again.
- “A Place for Everything, and Everything in Its Place”: After using an item, return it immediately to its designated spot.
- Clean as You Go: Wipe down counters, put away ingredients, and load the dishwasher as you cook.
- Nightly Reset: Spend 5-10 minutes each evening doing a quick kitchen tidy-up. Load the dishwasher, wipe surfaces, and put away any stray items. Waking up to a clean kitchen is a wonderful feeling!
Regular Reviews
Schedule a quick “mini-purge” a few times a year (e.g., seasonally or quarterly). Take 30 minutes to an hour to:
- Check expiration dates in the pantry and fridge.
- Reassess if items are still in their optimal zones.
- Identify any new clutter hotspots and address them.
- Adjust your storage solutions as your needs change (e.g., if you buy a new appliance or your family’s eating habits shift).
The Power of Labeling
We’ve mentioned it before, but it’s worth reiterating. Labels are essential for everyone in the household to understand and maintain the system you’ve created. This is crucial to successfully manage kitchen space collaboratively.
- Label food containers with contents and dates.
- Label shelves in your pantry or cabinets if it helps categorize items (e.g., “Baking,” “Snacks,” “Breakfast”).
Troubleshooting & Advanced Tips for Managing Kitchen Space
Dealing with a Small Kitchen
Every inch counts in a compact kitchen!
- Multi-functional Items: Invest in appliances that do double duty (e.g., an Instant Pot that’s also a slow cooker).
- Portable Island/Cart: A rolling island can provide extra prep space or storage when needed, and tuck away when not.
- Over-the-Sink Solutions: Cutting boards or dish drying racks that fit over your sink can provide extra workspace.
- Less is More: Be extra strict with your decluttering. Only keep what you absolutely need and use.
Maximizing Counter Space
Clear counters create a feeling of spaciousness and make prep easier.
- Only Keep Essentials: Limit what lives permanently on your counters to 3-5 frequently used items (e.g., coffee maker, fruit bowl, knife block).
- Vertical Counter Organizers: Use tiered fruit bowls, small shelf risers, or a vertical plate rack to store items without spreading them out horizontally.
- Utilize Wall Space: As mentioned, magnetic knife strips and wall shelves can free up significant counter area.
Storing Awkward or Specialty Items
Every kitchen has them!
- Large Serving Platters/Trays: Use vertical dividers in deep cabinets or slide them behind other items if space allows.
- Small Appliances: If not used daily, store them in a pantry, a deep lower cabinet, or a dedicated appliance garage.
- Cookbooks: Display them on open shelves, or use a specific shelf in the pantry. Declutter those you rarely reference.
Conclusion
Congratulations! You now have a comprehensive, step-by-step guide on how to manage kitchen space effectively. By committing to the grand purge, thoughtfully zoning your kitchen, implementing smart storage solutions, and maintaining consistent habits, you can transform your kitchen into a highly functional, organized, and beautiful space.
Remember, this is a process, not a sprint. Be patient with yourself, celebrate small victories, and don’t be afraid to adjust your system as your needs evolve. A well-organized kitchen not only saves you time and reduces stress but also inspires creativity and makes cooking and entertaining a true joy. Enjoy your beautifully managed kitchen!