Tired of a cluttered and messy kitchen under sink area? This comprehensive guide will walk you through transforming that chaotic space into an organized, functional, and aesthetically pleasing storage zone. You’ll learn how to declutter effectively, clean thoroughly, and choose the best storage solutions to maximize every inch, ensuring everything has its place. Get ready to enjoy a more efficient and stress-free kitchen experience!
Kitchen Under Sink Organization
Is your kitchen under sink cabinet a chaotic abyss? A dark, cluttered cavern where sponges disappear, cleaning supplies topple over, and reaching for dish soap becomes an archaeological expedition? You’re not alone! For many homeowners, the space beneath the kitchen sink is one of the most neglected and disorganized areas in the entire house.
But imagine this: an under-sink cabinet where everything has its place. Where you can effortlessly grab the dish soap, find a fresh garbage bag, or locate that specific cleaner without rummaging or knocking things over. Sounds like a dream, right? Well, it’s an achievable reality! This comprehensive how-to guide will walk you through every step of transforming your kitchen under sink organization from chaos to calm.
We’ll cover everything from the initial decluttering and deep cleaning to choosing the perfect storage solutions tailored to your needs and maintaining that sparkling order. By the end of this guide, you’ll have a beautifully organized, highly functional, and stress-free kitchen under sink area that makes daily tasks a breeze. Let’s dive in!
Key Takeaways
- Start Fresh: The first and most crucial step is to completely empty your under-sink cabinet. This allows for thorough cleaning and a clear assessment of everything you truly need to store.
- Clean and Inspect: Once empty, clean the entire space meticulously. This is also the perfect opportunity to check for any leaks, water damage, or pest issues before reorganizing.
- Measure and Plan: Don’t buy storage solutions blindly. Accurately measure your under-sink dimensions, noting pipes and obstacles, to ensure your chosen organizers fit perfectly and maximize space.
- Utilize Vertical Space: The area under your kitchen sink is often tall but narrow. Employ stackable bins, multi-tier shelves, and tension rods to make the most of vertical storage, rather than just spreading items horizontally.
- Choose Smart Solutions: Opt for practical organizers like pull-out drawers, lazy Susans, stackable containers, and door-mounted caddies. These solutions help manage tricky plumbing and keep items accessible.
- Categorize and Zone: Group similar items together (e.g., cleaning supplies, trash bags, dish soap refills). Assign specific zones within your under-sink area to maintain order and make finding things easy.
- Maintain Regularly: Organization is not a one-time event. Schedule quick tidying sessions every few weeks and a deeper re-evaluation every few months to prevent clutter from accumulating again.
Step 1: Empty Everything Out
You can’t organize a space effectively if it’s still full of stuff. The first and most crucial step in any kitchen under sink organization project is to completely empty the cabinet. Yes, every single item must come out!
Remove Every Single Item
Pull out all bottles, sponges, rags, trash bags, extra soap, random tools, and anything else that has found its way into this space. Lay everything out on a large towel or tarp on your kitchen floor or counter. This gives you a clear visual of exactly what you’ve been storing.
Declutter and Sort
Now comes the hard part, but also the most rewarding: decluttering. Go through each item you’ve removed and make honest decisions. Create three piles:
- Keep: Items you regularly use, are still good, and belong under the kitchen sink.
- Relocate: Items that don’t belong here (e.g., craft supplies, pet treats, pantry items) but are still useful. Find their proper home elsewhere in your house.
- Discard/Recycle: Empty bottles, expired cleaning products, worn-out sponges, broken items, or anything you haven’t used in ages. Check local guidelines for proper disposal of hazardous materials.
Be ruthless! If you haven’t used it in six months or more, chances are you don’t need to store it under your kitchen sink. Remember, less clutter means easier organization down the line.
Step 2: Clean and Sanitize
With the cabinet completely empty, this is the perfect opportunity for a thorough cleaning. This step is essential not just for hygiene, but also to identify any hidden issues.
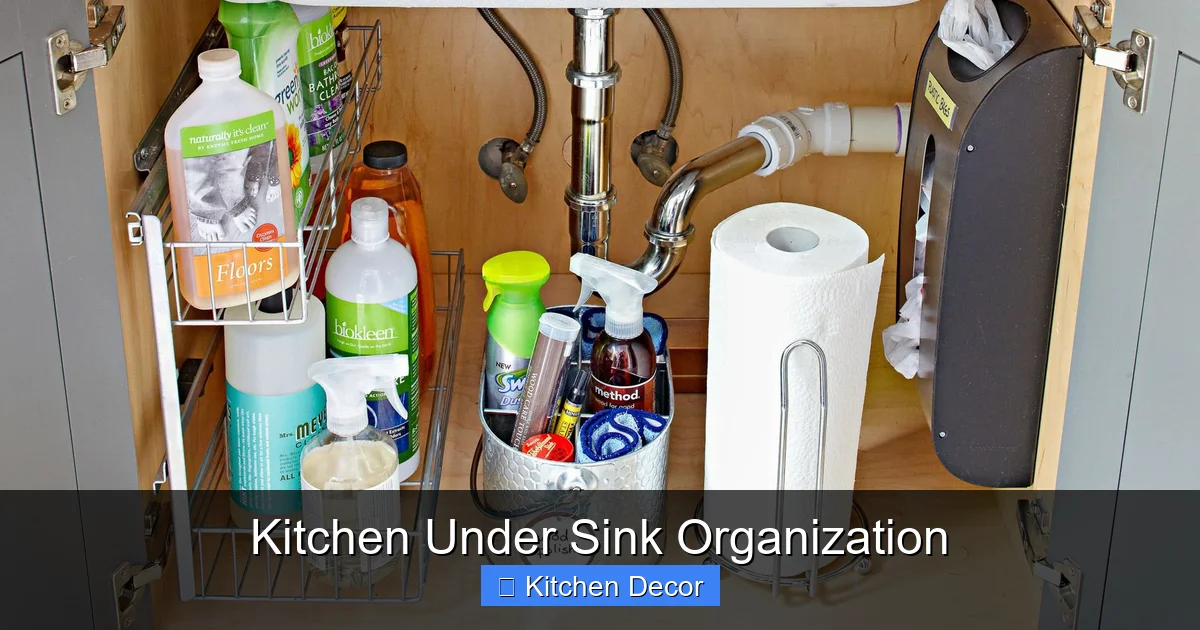
Visual guide about Kitchen Under Sink Organization
Image source: bhg.com
Wipe Down Surfaces
Using an all-purpose cleaner and a clean cloth, wipe down every interior surface of the cabinet: the bottom, sides, and even the back. Don’t forget the inside of the cabinet doors. For stubborn grime or mold, a scrub brush might be necessary. A solution of warm water and a little dish soap often works wonders.
Sanitize for Freshness
After cleaning, sanitize the area, especially if you store trash cans or damp items here. A diluted bleach solution or a commercial sanitizing spray will do the trick. Ensure the area is completely dry before proceeding to prevent mold and mildew growth. You might even place a moisture absorber or a small sachet of baking soda in the corner to keep things fresh.
Inspect for Leaks or Damage
While the space is clear, take a good look at the plumbing. Check pipes, connections, and the underside of the sink basin for any signs of leaks, drips, or water damage. Look for water stains, warped wood, or a musty smell. Addressing these issues now will prevent bigger problems (and ruined organization) in the future. If you find a leak, call a plumber before moving forward with organization.
Step 3: Assess Your Needs and Inventory
Now that your space is clean and clear, it’s time to think about what needs to go back and how to best arrange it. This is a critical step for effective kitchen under sink organization.
Group Similar Items
Look at your “Keep” pile. Group items by category:
- Cleaning Supplies: Dish soap, dishwasher pods, surface cleaners, scrub brushes, sponges, rubber gloves.
- Trash & Recycling: Extra trash bags, small recycling bags.
- Kitchen Linens: Dish towels, cleaning cloths (if you store them here).
- Specialty Items: Polishes, appliance cleaners, pest control items (store safely!).
- Other: Small tools, pet food storage (if applicable and safe), rarely used kitchen gadgets.
This grouping helps you see how much space each category requires and where to place them.
Measure Your Space Accurately
This is where many organization projects go wrong! Don’t guess. Grab a tape measure and accurately record the dimensions of your under-sink cabinet:
- Width: From side to side.
- Depth: From front to back.
- Height: From the bottom of the cabinet to the top, taking into account the sink basin itself.
Crucially, pay close attention to the plumbing. Note where the drain pipes, water lines, and garbage disposal (if you have one) are located. These will create obstacles and dictate the types of organizers you can use. Draw a quick sketch if it helps visualize the space and pipe locations. This will be invaluable when selecting storage solutions for your kitchen under sink organization.
Step 4: Choose the Right Organization Solutions
With your measurements and inventory in hand, you’re ready to select storage solutions. The key is to maximize vertical space and work around the pipes. There are many clever products designed specifically for kitchen under sink organization.
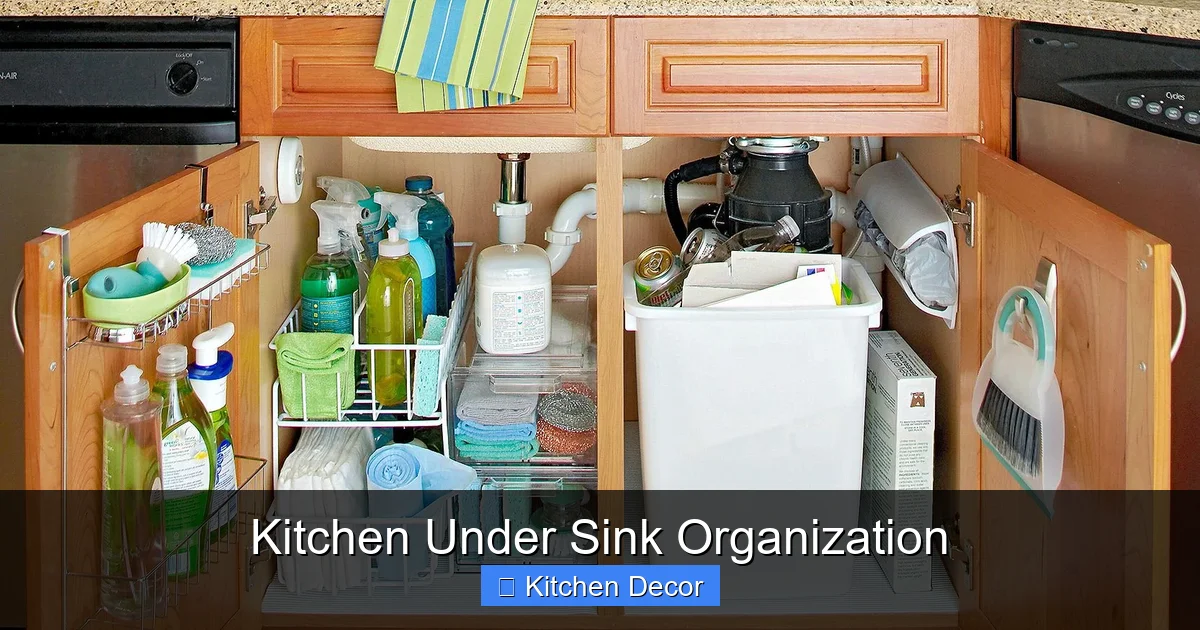
Visual guide about Kitchen Under Sink Organization
Image source: bhg.com
Pull-Out Drawers and Shelves
These are game-changers for any under-sink area, especially for a deep cabinet.
- Why they work: They bring items from the back of the cabinet to the front, eliminating the need to reach or dig.
- Considerations: Look for U-shaped or adjustable models that can accommodate plumbing. Measure carefully to ensure clearance.
- Ideal for: Larger cleaning bottles, frequently used items, or heavier supplies.
Stackable Bins and Containers
These are versatile and budget-friendly options that make great use of vertical space.
- Why they work: You can stack multiple layers of storage, effectively doubling or tripling your usable space. Clear bins are great for seeing contents at a glance.
- Considerations: Ensure they are sturdy enough for the items you’ll store. Lids can help keep things tidy and dust-free.
- Ideal for: Sponges, dish pods, rags, small brushes, or items you want to keep contained.
Turntables (Lazy Susans)
Perfect for corner spaces or for items that are frequently accessed.
- Why they work: They allow you to spin items around to easily reach anything without knocking over adjacent bottles.
- Considerations: Make sure the diameter fits your cabinet and clears any pipes.
- Ideal for: Bottles of cleaner, spray bottles, dish soap refills, or smaller items that tend to get lost in the back.
Over-the-Door Organizers
Don’t forget the inside of your cabinet doors! These offer often-overlooked storage potential.
- Why they work: They keep small, frequently used items easily accessible and free up valuable shelf space.
- Considerations: Check door clearance. Ensure the organizer doesn’t prevent the door from closing properly once items are loaded.
- Ideal for: Sponges, scrub brushes, rubber gloves, small trash bags, or even a small dustpan.
Tension Rods
A simple, inexpensive hack that creates instant hanging space.
- Why they work: Install a tension rod across the top part of the cabinet (above the plumbing) to hang spray bottles by their nozzles. This frees up the bottom space.
- Considerations: Ensure the rod is strong enough for the weight of your bottles.
- Ideal for: Spray bottles of cleaner, small hand towels.
Caddies and Totes
For supplies you often need to move around the house or want to grab quickly.
- Why they work: A caddy filled with cleaning supplies can be easily pulled out for cleaning tasks, then returned neatly.
- Considerations: Choose one with a handle for easy transport.
- Ideal for: All-purpose cleaner, glass cleaner, scrub brush, and cloths – a portable cleaning kit.
Step 5: Implement Your Organization System
Now it’s time to put your chosen solutions into action and create your beautifully organized kitchen under sink space!
Strategize Placement Around Pipes
This is where your measurements and diagram come in handy. Place your larger organizers first, carefully positioning them to avoid pipes and the garbage disposal. U-shaped shelves or pull-outs are specifically designed for this challenge. Work with the obstacles, not against them.
Keep Frequently Used Items Accessible
Store items you reach for daily (like dish soap, sponges, and dishwasher pods) in the most accessible spots – typically the front and center, or on pull-out shelves. Less frequently used items can go towards the back or on higher shelves. Good kitchen under sink organization means practicality.
Store Hazardous Items Safely
If you have young children or pets, store any toxic cleaning products in a secured container or in a different, higher cabinet with a child lock. Safety first!
Utilize Vertical Space Effectively
Stack those bins! Hang spray bottles on a tension rod! Use door organizers! Think “up” when organizing under the sink. This is how you maximize every inch and prevent items from getting lost or buried.
Step 6: Label Everything
While optional, labeling is a powerful tool for maintaining organization and making your system intuitive for everyone who uses the kitchen.
Why Labels Matter
Labels quickly tell you where things belong, making cleanup faster and reducing the likelihood of clutter returning. They’re especially helpful for clear bins or when multiple people use the space.
Labeling Tips
Use a label maker, pre-made labels, or even just a permanent marker on masking tape. Label bins for “Sponges,” “Dishwasher Pods,” “Surface Cleaner Refills,” or “Extra Trash Bags.”
Step 7: Maintain Your Organized Space
Congratulations! You’ve achieved fantastic kitchen under sink organization. The final step is arguably the most important: keeping it that way.
“One In, One Out” Rule
When you buy a new cleaning product, make a point to use up or discard the old one before placing the new one. This prevents accumulation.
Quick Tidy-Ups
Every few weeks, take a minute to straighten items, wipe up any spills, and put things back in their designated spots. A minute or two of maintenance can save hours of re-organizing later.
Regular Reviews
Every few months, do a mini-declutter. Take everything out, reassess what you use, and adjust your system if your needs have changed. This keeps your kitchen under sink organization optimized and prevents creeping clutter.
Troubleshooting Common Kitchen Under Sink Organization Challenges
Dealing with Awkward Plumbing
Pipes are the number one challenge!
- Solution: Look for U-shaped organizers, adjustable shelves, or individual bins that can be placed around pipes. Tension rods above pipes are excellent for spray bottles. Custom-built solutions or simple wire shelving can also be cut or adapted.
Very Small Under-Sink Spaces
If your cabinet is tiny, every inch counts.
- Solution: Focus on vertical storage with stackable containers. Utilize the cabinet doors heavily with shallow organizers. Prioritize only the absolute essentials for under the sink; store less frequently used items elsewhere.
Budget Concerns
You don’t need to spend a fortune to get organized.
- Solution: Start with what you have! Repurpose old shoe boxes or plastic containers. Dollar stores and discount retailers often have affordable bins and caddies. DIY solutions like tension rods are also very budget-friendly.
Keeping It Clean
Spills and dampness can be an issue under the sink.
- Solution: Place a waterproof mat or a plastic liner on the bottom of the cabinet. This protects the wood and makes spills easier to clean. Regularly wipe down any bottles that might drip.
Conclusion
Transforming your kitchen under sink organization from a messy catch-all to a highly functional, well-ordered space is a project that pays dividends every single day. By following these steps – emptying, cleaning, planning, selecting smart solutions, and maintaining – you’ll not only gain valuable storage but also a sense of peace and efficiency in your kitchen. No more struggling to find what you need, no more toppling towers of bottles. Just a perfectly organized space that supports your daily routine. Enjoy your newly decluttered and stress-free kitchen under sink cabinet!