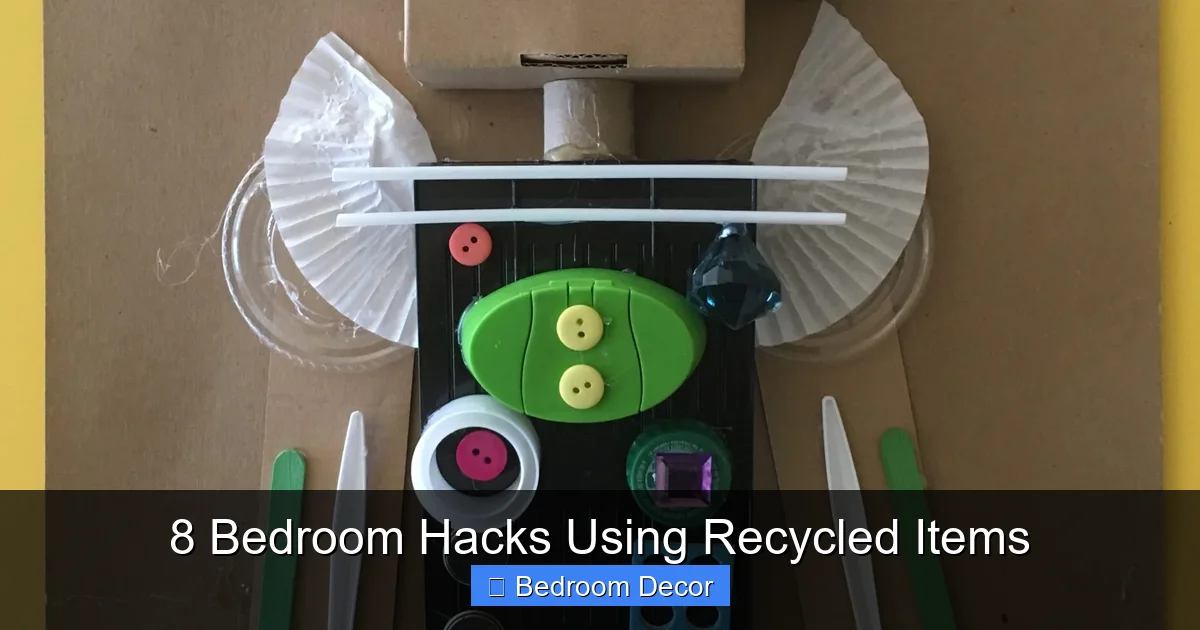
Discover how to effortlessly transform your bedroom into a stylish, organized sanctuary without breaking the bank. This guide unveils 8 ingenious bedroom hacks using recycled items, from old t-shirts to cardboard boxes, proving that beautiful decor can also be sustainable. Learn to craft unique pieces and practical storage solutions, embracing your creativity while personalizing your space with one-of-a-kind, upcycled treasures.
8 Bedroom Hacks Using Recycled Items
Welcome to the wonderful world of upcycling! If you’re looking to refresh your bedroom’s look, add some much-needed storage, or simply inject more personality into your space without spending a fortune, you’ve come to the right place. Our bedrooms are our personal sanctuaries, and they should reflect who we are—cozy, inviting, and uniquely ours. But who says creating a dream bedroom has to be expensive or environmentally taxing?
This comprehensive guide will walk you through 8 brilliant bedroom hacks using recycled items that prove sustainability and style can go hand-in-hand. We’ll show you how to transform everyday “trash” into functional treasures, from chic storage solutions to decorative accents. Get ready to unleash your inner DIY guru, save some money, and make a positive impact on the planet, all while creating a bedroom you absolutely adore. Let’s dive into these exciting bedroom hacks using recycled items!
Key Takeaways
- Budget-Friendly Decor: Learn to create stunning bedroom decor and functional storage using items you already have, saving money on expensive purchases.
- Eco-Conscious Living: Embrace sustainability by giving new life to discarded items, reducing waste and your environmental footprint.
- Personalized Style: Infuse your bedroom with unique character and charm by crafting custom pieces that reflect your personal taste and creativity.
- Versatile Materials: Discover how common household recyclables like glass jars, cardboard boxes, old clothes, and even wooden pallets can be repurposed.
- Simple & Accessible Techniques: Most hacks require basic tools and skills, making them accessible for beginners and experienced DIYers alike.
- Enhanced Organization: Create clever and attractive storage solutions that help declutter your bedroom, making it more serene and functional.
- Unleash Creativity: This guide encourages experimentation and personal touches, empowering you to think outside the box and turn trash into treasure.
1. Craft a Cozy T-Shirt Rag Rug
Give your feet a treat and your old t-shirts a new purpose by creating a soft, colorful rag rug. This is one of the most satisfying bedroom hacks using recycled items, perfect for adding warmth and a pop of color beside your bed.
Materials You’ll Need:
- Several old cotton t-shirts (the more, the bigger your rug)
- Sharp fabric scissors
- A large crochet hook (N/P/Q size or larger, if crocheting) OR a non-slip rug mat (if tying/braiding)
- Needle and thread (optional, for securing braids)
Step-by-Step Instructions:
-
Prepare Your T-Shirt “Yarn”
Lay a t-shirt flat and smooth it out. Using sharp fabric scissors, cut off the bottom hem and the top section (sleeves and collar). You’ll be left with a large rectangle of fabric. Now, cut this rectangle into continuous strips, about 1 to 1.5 inches wide, creating a long loop of fabric. Don’t worry if they aren’t perfectly even; slight variations add character. Repeat this process for all your t-shirts.
-
Connect Your Fabric Strips
To create continuous “yarn,” take two loops and link them together using a slip knot or by simply looping one through the other and pulling tight. Continue connecting all your t-shirt strips until you have several long strands of varied colors.
-
Choose Your Rug Technique: Crocheting or Braiding/Tying
Option A: Crocheted Rag Rug
If you know how to crochet, this is a fantastic way to create a sturdy and beautiful rug. Use your large crochet hook and begin by chaining a foundation row. Then, work in single crochet stitches, either in rows or in a spiral, connecting new colors as you go. The key is to keep your stitches relatively loose to prevent the rug from becoming too stiff.Option B: Braided or Tied Rug (No-Sew)
For a no-sew option, gather three long strands of your t-shirt yarn and begin braiding them tightly. Continue adding new strands as needed by tying them onto the ends of existing strands with small, secure knots. Once you have a very long braid, begin coiling it into a spiral. As you coil, use a needle and strong thread to stitch the coils together from the underside, or tie sections of the braid directly onto a non-slip rug mat using small, secure knots. -
Finish Your Rug
Once your rug reaches the desired size, secure the ends of your t-shirt yarn. If crocheted, simply weave in the loose ends. For a braided rug, tie off the end securely. Trim any stray threads. You now have a unique, handmade rug, one of the coziest bedroom hacks using recycled items!
Practical Tip:
Experiment with different color combinations. For a cohesive look, stick to a specific color palette (e.g., all blues and greens, or neutrals). Wash your t-shirts before cutting them to prevent shrinkage later.
2. Create Chic Cardboard Box Storage Bins
Tired of clutter? Cardboard boxes are everywhere, and with a little creativity, they can become stylish and incredibly functional storage bins. This is one of the most practical bedroom hacks using recycled items for tidying up your space.
Materials You’ll Need:
- Sturdy cardboard boxes (various sizes work well)
- Decorative paper, fabric scraps, or paint
- Strong adhesive (craft glue, spray adhesive, or hot glue gun)
- Scissors or a craft knife
- Ruler and pencil
- Handles (optional: rope, leather strips, old belt segments)
Step-by-Step Instructions:
-
Select and Reinforce Your Boxes
Choose boxes that are in good condition and sturdy enough for what you plan to store. For extra durability, you can reinforce the inside corners with hot glue or duct tape. Ensure the bottom flaps are securely taped down.
Visual guide about 8 Bedroom Hacks Using Recycled Items
Image source: containerwatergardens.net
-
Measure and Cut Your Covering Material
Measure all sides of your box (bottom, front, back, and two sides) that you wish to cover. Add about an inch to each measurement for overlap. Cut your chosen decorative paper or fabric to these dimensions. If painting, simply ensure your box is clean and dry.
-
Apply Your Decoration
Option A: Covering with Paper/Fabric
Apply a generous, even layer of adhesive to one side of the box at a time. Carefully smooth your paper or fabric onto the surface, pressing out any air bubbles. Fold the excess material over the edges and glue it down on the inside for a clean finish. Repeat for all sides. Allow ample drying time.Option B: Painting Your Box
If painting, apply a primer first, especially if the box has printing on it. Then, paint your box in your desired color, applying multiple thin coats for an even finish. Consider stenciling patterns or adding freehand designs once the base coat is dry. -
Add Handles (Optional)
If you want to make your bins easier to pull out from under a bed or shelf, add handles. Cut two small slits on the front of the box, thread a loop of rope or a leather strip through, and tie knots on the inside to secure. Alternatively, you can glue sturdy ribbon or fabric strips to the front as decorative pulls.
-
Organize and Enjoy
Once dry, fill your new storage bins! They’re perfect for clothes, books, accessories, or craft supplies. These stylish bins are prime examples of practical bedroom hacks using recycled items.
Practical Tip:
Label your boxes for easy identification, especially if they’re going into a closet or under a bed. Use chalkboard paint on a section of the box for reusable labels, or create cute tags from scrap paper.
3. Create Elegant Glass Jar Organizers
From sparkling candle holders to chic storage for makeup brushes, glass jars are incredibly versatile. This simple hack is one of the quickest and prettiest bedroom hacks using recycled items to declutter your vanity or nightstand.
Materials You’ll Need:
- Various sizes of clean glass jars (pasta sauce jars, jam jars, pickle jars, etc.)
- Paint (spray paint, acrylics, chalk paint), twine, ribbon, or fabric scraps
- Strong adhesive (if attaching fabric or embellishments)
- Glitter, beads, or other decorative elements (optional)
Step-by-Step Instructions:
-
Clean and Prepare Your Jars
Thoroughly wash and dry all your glass jars. Remove any labels completely by soaking them in warm, soapy water or using rubbing alcohol/goo gone for stubborn residue. Ensure they are completely dry before decorating.
Visual guide about 8 Bedroom Hacks Using Recycled Items
Image source: images.squarespace-cdn.com
-
Choose Your Decoration Method
Option A: Painting
For a sleek look, spray paint the jars (outside only) in a uniform color. For a frosted look, use frosted glass spray paint. If using acrylic or chalk paint, you can paint the outside for a rustic look, or pour paint inside and swirl it around to coat the interior for a glossy, protective finish (let dry upside down). Consider a metallic paint for a touch of glamour.Option B: Wrapping
Wrap twine, jute, or ribbon around the outside of the jars, securing the ends with a dab of hot glue. You can wrap the entire jar or just a section. Lace or fabric scraps can also be glued around the jars for a softer touch.Option C: Decoupage/Embellishment
Use decoupage glue to attach pretty paper cutouts, dried flowers, or even glitter to the outside of the jars. Small beads or charms can also be glued on for extra detail. -
Let Dry and Fill
Allow your decorated jars to dry completely according to the paint or adhesive instructions. Once dry, they are ready to be filled! Use them for makeup brushes, cotton swabs, hair ties, pens, jewelry, or even as small vases for fresh flowers. Grouping different sizes of jars creates a visually appealing display, making these great bedroom hacks using recycled items.
Practical Tip:
For items like cotton swabs or Q-tips, choose jars with wider openings. For makeup brushes, taller, slimmer jars work best. You can also paint the lids of your jars to match for a more finished look, making them suitable for storing small items like paperclips or pushpins.
4. Build a Rustic Pallet Headboard
Bring a touch of rustic charm to your bedroom with a DIY headboard made from recycled wooden pallets. This is one of the more ambitious but incredibly rewarding bedroom hacks using recycled items, offering a substantial style upgrade.
Materials You’ll Need:
- 1-3 wooden pallets (depending on desired size – check for heat-treated “HT” stamp, avoid “MB” methyl bromide treated)
- Sandpaper (medium and fine grit) or an electric sander
- Wood stain or paint
- Brushes or rags for application
- Screws and a drill
- Wall mounting hardware (L-brackets, French cleat, or heavy-duty picture hangers)
- Wood sealer (optional, for durability)
- Pry bar and hammer (if disassembling pallets)
Step-by-Step Instructions:
-
Source and Prepare Your Pallets
Find clean, sturdy pallets. Look for the “HT” stamp, which means they were heat-treated. Avoid “MB” stamped pallets, as these were treated with chemicals. Thoroughly clean your pallets with soap and water, then let them dry completely. If your pallets are too wide, you may need to carefully disassemble some boards using a pry bar and hammer, then cut them to your desired length.
Visual guide about 8 Bedroom Hacks Using Recycled Items
Image source: thesprucecrafts.com
-
Sand Your Pallets Smooth
This step is crucial for safety and appearance. Sand all surfaces of the pallets thoroughly to remove splinters and rough edges. Start with medium-grit sandpaper and finish with fine-grit for a smooth finish. An electric sander will save a lot of time and effort here.
-
Stain or Paint Your Headboard
Once sanded and wiped clean of dust, apply your chosen stain or paint. For a rustic look, a dark wood stain works beautifully. For a brighter, modern feel, paint them white, grey, or a color that complements your bedroom decor. Apply multiple thin coats as needed, allowing each to dry completely. If desired, apply a wood sealer for extra protection.
-
Assemble and Mount the Headboard
If using multiple pallets, arrange them to form the desired headboard shape. You can lay them horizontally or stack them vertically. Secure them together from the back using screws and wood scraps for support if needed. Once assembled, mount the headboard securely to your wall using appropriate hardware like L-brackets or a French cleat, ensuring it’s level and stable behind your bed. Make sure to anchor into wall studs for maximum security. This transforms your bed into a focal point, showcasing one of the most impactful bedroom hacks using recycled items.
Practical Tip:
Measure your bed frame carefully before sourcing pallets to ensure they are the right size. For extra detail, you can incorporate LED strip lights along the back of the headboard for a warm, ambient glow.
5. Design Literary Book Shelves/Nooks
Give your old hardcover books a new chapter as unique floating shelves or charming decorative nooks. This creative idea is perfect for small spaces and adds a truly personal touch, making it one of the most distinctive bedroom hacks using recycled items.
Materials You’ll Need:
- Sturdy hardcover books (2-3 per shelf)
- L-brackets or invisible shelf brackets (e.g., “floating shelf brackets”)
- Drill with appropriate drill bits
- Screws (suitable for your wall type and bracket)
- Pencil and level
- Measuring tape
Step-by-Step Instructions:
-
Select Your Books
Choose hardcover books that are relatively thick and sturdy. Make sure they are books you don’t plan on reading again or that hold sentimental value you wish to display. Books of similar size can create a more uniform look, but varied sizes can also add character.
-
Prepare the Brackets
If using L-brackets, decide where you want to place them on the inside cover of the book. The goal is for the book to appear as if it’s floating. If using an invisible shelf bracket, these typically involve drilling a hole through the book, so plan carefully where your hole will be to maintain stability.
-
Attach Brackets to Books
Option A: L-Brackets
Open the book’s back cover. Position the L-bracket so that the shorter arm sits flush against the inside of the back cover, and the longer arm will extend to the wall. Mark and pre-drill small pilot holes through the back cover and into the first few pages. Secure the L-bracket to the book using short screws, ensuring they don’t go through the front cover. You want the book to rest on the L-bracket, essentially using the book itself as the shelf.Option B: Invisible Shelf Brackets
These usually require drilling a hole through the entire book from front to back, allowing the bracket’s rod to pass through. This is a more advanced technique but creates a truly “floating” effect. Ensure the hole is perfectly straight and snug with the bracket rod. -
Mount to the Wall
Hold your book-shelf against the wall where you want it to be. Use a level to ensure it’s straight. Mark the positions for your wall screws. Pre-drill holes in the wall, inserting wall anchors if you’re not drilling into studs. Secure the L-bracket (or invisible bracket hardware) to the wall. Carefully slide the book onto the bracket if using the floating type, or simply let it rest and close the cover around the L-bracket.
-
Display Your Treasures
These unique shelves are perfect for holding small, lightweight items like eyeglasses, a small succulent, or a few decorative trinkets. These provide charming, unexpected bedroom hacks using recycled items.
Practical Tip:
For an even more magical look, choose books with beautiful covers or unique titles. You can also stack several books and secure them together with strong glue or thin screws before attaching the bracket for a multi-level book nook.
6. Upcycle Stylish Tin Can Planters/Holders
Don’t toss those empty tin cans! They’re perfect for transforming into charming planters, pen holders, or decorative storage for small items. This quick and easy project is a fun example of bedroom hacks using recycled items.
Materials You’ll Need:
- Empty tin cans (various sizes, e.g., soup, vegetable, coffee cans)
- Can opener (for safe edge removal)
- Sandpaper (fine grit)
- Paint (spray paint, acrylics, chalk paint) or decorative paper/fabric
- Strong adhesive (craft glue, hot glue)
- Drill with a small drill bit (if making planters)
- Twine, ribbon, or other embellishments (optional)
Step-by-Step Instructions:
-
Clean and Prepare Your Cans
Thoroughly wash and dry your tin cans. Use a smooth-edge can opener to remove the top lid safely, or be very careful if the top edge is sharp. Use fine-grit sandpaper to smooth down any rough or sharp edges on both the top and bottom of the can to prevent cuts.
-
Add Drainage Holes (for Planters Only)
If you plan to use your cans as planters for live plants, you’ll need drainage. Using a drill with a small metal drill bit, carefully drill 2-3 small holes in the bottom of each can. This prevents root rot. Skip this step if you’re using them as pen holders or for artificial plants.
-
Decorate Your Cans
Option A: Painting
Apply a primer, especially if the cans have shiny labels or imperfections. Then, spray paint or hand-paint your cans in your chosen colors. Chalk paint gives a matte, rustic finish, while metallic spray paint can look sleek and modern. You can also create patterns using painter’s tape or stencils.Option B: Wrapping
Measure and cut decorative paper (like scrapbook paper or wallpaper remnants) or fabric to fit around the can. Apply a strong adhesive to the can and carefully wrap the material around, smoothing out any bubbles. Overlap and glue the ends securely. You can also wrap with twine or jute for a textured look. -
Embellish (Optional)
Once your paint is dry or your wrapping is secure, add extra details. Tie a ribbon around the top, glue on some beads, or attach a small charm. For a cohesive look, group several decorated cans of different sizes together.
-
Fill and Enjoy
Use your finished cans as planters for small succulents, herbs, or artificial flowers. They also make excellent holders for pens, pencils, paintbrushes, makeup tools, or even remote controls. These charming containers are fantastic bedroom hacks using recycled items.
Practical Tip:
If using them as planters, add a layer of small pebbles at the bottom before adding soil to further aid drainage. For a truly unique look, create a mosaic effect on your cans using broken pieces of old CDs or small colorful tiles.
7. Craft Artistic Magazine/Newspaper Wall Art
Transform old magazines and newspapers into vibrant, textured wall art. This eco-friendly art project allows for endless creativity and adds a unique, modern touch to your bedroom decor, making it one of the most visually appealing bedroom hacks using recycled items.
Materials You’ll Need:
- Old magazines, newspapers, or colorful flyers
- Scissors or a craft knife
- White craft glue (PVA glue) or Mod Podge
- Canvas, sturdy cardboard, or a piece of wood for a base
- Paintbrush (for applying glue/Mod Podge)
- Ruler (optional, for precise cuts)
Step-by-Step Instructions:
-
Gather and Prepare Your Paper
Flip through your old magazines or newspapers and tear out pages with interesting colors, patterns, or textures. You might want to stick to a specific color palette (e.g., cool blues and greens, or warm reds and oranges) for a cohesive look. For a rolled paper art piece, you’ll want thinner paper like magazine pages or newspaper.
-
Choose Your Art Technique
Option A: Magazine Collage Art
Cut out various shapes, words, or images from your chosen pages. You can go abstract, create a landscape, or even a portrait. Arrange these pieces on your canvas or cardboard base, experimenting with different layouts until you find one you love. Once satisfied, use craft glue or Mod Podge to adhere each piece securely to the base, smoothing out any wrinkles. Apply a final layer of Mod Podge over the entire collage for a protective, glossy finish.Option B: Rolled Paper Art (Paper Coils or Tubes)
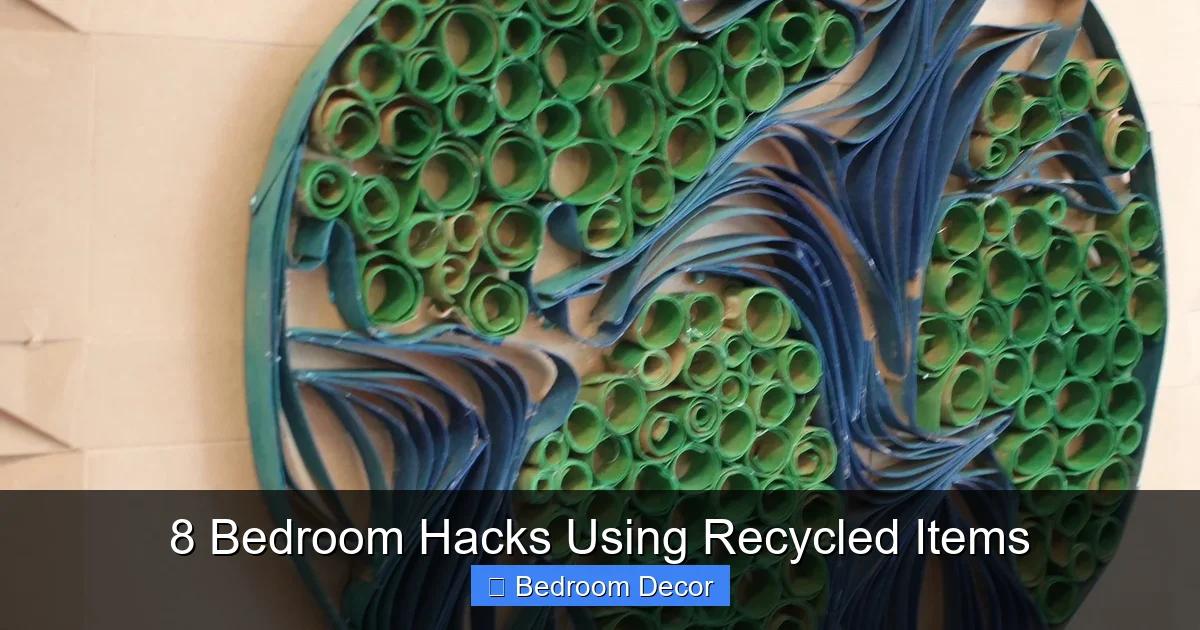
Cut your magazine pages into thin strips (e.g., 1-2 cm wide). Roll each strip tightly around a skewer or knitting needle to create a tight coil or tube. Once rolled, secure the end with a small dot of glue and let it dry. Repeat this process until you have a large collection of coils/tubes. Then, arrange and glue these coils onto your canvas or cardboard base, building up texture and form. You can create geometric patterns, abstract swirls, or even shape them into specific images. This method creates a striking 3D effect. -
Mount and Display
Once your artwork is completely dry, it’s ready to hang! If using a canvas, it’s typically ready to hang as is. For cardboard or wood bases, attach a picture hanger to the back. Your unique, eco-friendly wall art will add a fantastic focal point to your bedroom, demonstrating truly creative bedroom hacks using recycled items.
Practical Tip:
For a more uniform look with rolled paper art, use only the text-heavy pages of magazines or newspapers, creating a monochromatic texture. For collage, focus on abstract shapes rather than specific images for a modern aesthetic.
8. Craft an Upcycled Plastic Bottle Jewelry Stand
Keep your necklaces untangled and your bracelets neatly displayed with a charming jewelry stand made from plastic bottles. This is an ingenious and useful addition to your vanity, showcasing excellent bedroom hacks using recycled items.
Materials You’ll Need:
- Several clean plastic bottles of varying sizes (e.g., small soda bottles, water bottles, large juice bottles)
- Sharp utility knife or strong scissors
- Strong adhesive (super glue, E6000, or hot glue)
- Sandpaper (fine grit)
- Paint (spray paint, acrylics) or decorative paper/fabric (optional)
- Mod Podge (if using paper/fabric)
Step-by-Step Instructions:
-
Prepare Your Plastic Bottle Pieces
Thoroughly wash and dry your plastic bottles. Carefully cut the bottom sections off several bottles, aiming for different heights to create tiers for your stand. For instance, use the very bottom of a large juice bottle for the base, a slightly taller section from a soda bottle for the middle tier, and a smaller, shorter section from a water bottle for the top. You can also cut ring holders from the tapered top sections of bottles. Be mindful of sharp edges; use sandpaper to gently smooth them down after cutting.
-
Assemble Your Tiers
Take the largest bottle bottom you’ve cut, which will serve as your base. Apply a generous amount of strong adhesive to the center of its cut edge. Carefully center and press the next smallest bottle bottom onto it. Hold firmly until the glue sets. Repeat this process, stacking progressively smaller bottle bottoms to create your multi-tiered stand. Ensure each tier is firmly attached and level before moving to the next.
-
Add Ring Holders/Branches (Optional)
If you want ring holders, cut the tapered top sections of plastic bottles (where the neck begins to widen). You can glue these vertically onto your tiers or directly to the base. For bracelet “branches,” you can cut longer, thinner sections of bottles or even use the necks of the bottles (without the caps) and glue them horizontally to the central column or base.
-
Decorate Your Stand (Optional)
Once the glue is completely dry and the stand is stable, you can decorate it. Spray paint the entire stand a uniform color (e.g., metallic gold, glossy white, or a pastel shade). Alternatively, use Mod Podge to adhere decorative paper or fabric scraps to the tiers for a patterned look. You can also add glitter or other embellishments.
-
Organize Your Jewelry
Allow any paint or glue to dry completely. Then, hang your necklaces and bracelets on the edges of the tiers, place rings on the holders, and use the base for earrings or watches. This elegant stand is a perfect example of functional bedroom hacks using recycled items, keeping your accessories organized and on display.
Practical Tip:
For extra stability, you can fill the bottom-most base with sand or small pebbles before sealing it. When cutting plastic, use a scoring method with a utility knife first, then carefully snap along the score line for cleaner edges.
Troubleshooting Common DIY Challenges
Even with the best instructions, DIY projects can sometimes hit a snag. Here are a few common issues and how to troubleshoot them:
- “My item doesn’t look professional/is a bit flimsy.”
Solution: Take your time. Professional results often come from patience and attention to detail. For flimsiness, reinforce your items. For cardboard, add an extra layer of glue or tape to internal seams. For pallet furniture, ensure all screws are properly secured and consider adding cross-braces. Sometimes, a second coat of paint or glue can make a big difference.
- “The recycled items aren’t cleaning up well.”
Solution: For stubborn labels on glass jars or tin cans, try soaking them in hot, soapy water with a tablespoon of baking soda. For residue, rubbing alcohol, nail polish remover, or commercial “Goo Gone” products often work wonders. For t-shirts, a good wash cycle with stain remover should do the trick. For pallets, a stiff brush and mild detergent followed by thorough rinsing is essential.
- “My project isn’t turning out exactly as I envisioned.”
Solution: Embrace the imperfection! Handmade items often have unique quirks that add to their charm. If you’re really unhappy, evaluate what went wrong. Did you rush? Did you use the wrong materials? Sometimes, a quick repaint or an added embellishment can completely transform the piece. Remember, the goal is often about the process and the satisfaction of creating, not just perfection.
Conclusion
And there you have it – 8 fantastic bedroom hacks using recycled items that prove creativity knows no bounds. By embracing upcycling, you’re not just saving money and reducing waste; you’re also infusing your personal sanctuary with unique pieces that tell a story. Each of these bedroom hacks using recycled items offers a chance to personalize your space, add practical organization, and feel good about your environmental impact.
From cozy rag rugs and clever storage bins to artistic wall decor and elegant organizers, these projects are designed to be fun, accessible, and incredibly rewarding. So, gather your “trash,” unleash your imagination, and start transforming your bedroom into a stylish, sustainable haven that’s truly one-of-a-kind. Happy crafting!