Discover the magic of transforming simple paper into beautiful room decor! This comprehensive guide provides easy-to-follow instructions for a variety of paper crafts, from elegant wall art to whimsical mobiles. Unleash your creativity and personalize your living space with these fun and affordable DIY projects.
Ready to give your room a fresh, new look without spending a fortune? Paper is an amazing material that can be transformed into stunning decor pieces with just a little creativity and effort. In this guide, we’ll walk you through various ways to make beautiful room decor using paper. You’ll learn simple techniques that anyone can master, from creating intricate wall art to charming accents that add personality to your space. Get ready to unleash your inner artist and discover how easy and fun it is to craft your own unique decorations!
Why Choose Paper for Room Decor?
Paper is a fantastic medium for DIY room decor for many reasons. Firstly, it’s incredibly affordable and readily available in an endless array of colors, patterns, and textures. This means you can achieve a high-end look without a high-end price tag. Secondly, paper is versatile. You can cut it, fold it, roll it, glue it, and shape it into almost anything you can imagine. Whether you’re aiming for minimalist chic, bohemian vibes, or a playful pop of color, paper can help you achieve it. Finally, paper crafting is a wonderful way to express your personal style and create truly unique items that reflect your personality. Plus, it’s a great way to upcycle and reuse materials, making it an eco-friendly choice.
Key Takeaways
- Versatile Materials: Paper is an incredibly versatile and budget-friendly material, perfect for creating a wide range of decorative items.
- Beginner-Friendly Projects: This guide offers projects suitable for all skill levels, including simple techniques like folding and cutting.
- Customization is Key: Learn how to personalize your paper decor by choosing different colors, patterns, and sizes to match your existing style.
- Variety of Techniques: Explore different paper crafting methods, such as quilling, origami, paper flowers, and string art, to create diverse decor pieces.
- Cost-Effective Decor: Elevate your room’s aesthetic without breaking the bank by using readily available and inexpensive paper materials.
- Sustainable Crafting: Many paper decor projects can be made using recycled paper, making them an eco-friendly choice.
- Therapeutic Activity: Engaging in paper crafting can be a relaxing and rewarding hobby, offering a creative outlet for stress relief.
Creating Stunning Paper Wall Art
Wall art can instantly elevate a room’s ambiance. Paper offers numerous possibilities for creating eye-catching wall displays.
1. Geometric Paper Wall Art
This project is perfect for adding a modern and graphic touch to your walls. It’s surprisingly simple to execute.
Materials Needed:
- Cardstock or thick paper in various colors
- Scissors or a craft knife
- Ruler
- Pencil
- Glue stick or double-sided tape
- A large piece of poster board or canvas as a base (optional)
Instructions:
- Plan Your Design: Decide on a geometric pattern. Think about triangles, squares, diamonds, or a combination. You can sketch your idea on paper first.
- Cut Your Shapes: Cut out various geometric shapes from your colored cardstock. Aim for different sizes and angles to create depth and interest.
- Arrange Your Shapes: Lay out your cut shapes on your base or directly on the wall where you want them to go. Play around with different arrangements until you’re happy with the composition.
- Adhere Your Shapes: Once you have your layout, begin attaching the shapes to your base or wall using a glue stick or double-sided tape. Work systematically to ensure clean lines and secure adhesion.
- Final Touches: If using a base, you can frame it or hang it as is. If attaching directly to the wall, ensure all edges are smooth and secure.
Tip: For a more polished look, use a ruler to ensure all cuts are straight and all angles are precise. You can also create a monochromatic scheme using different shades of the same color.
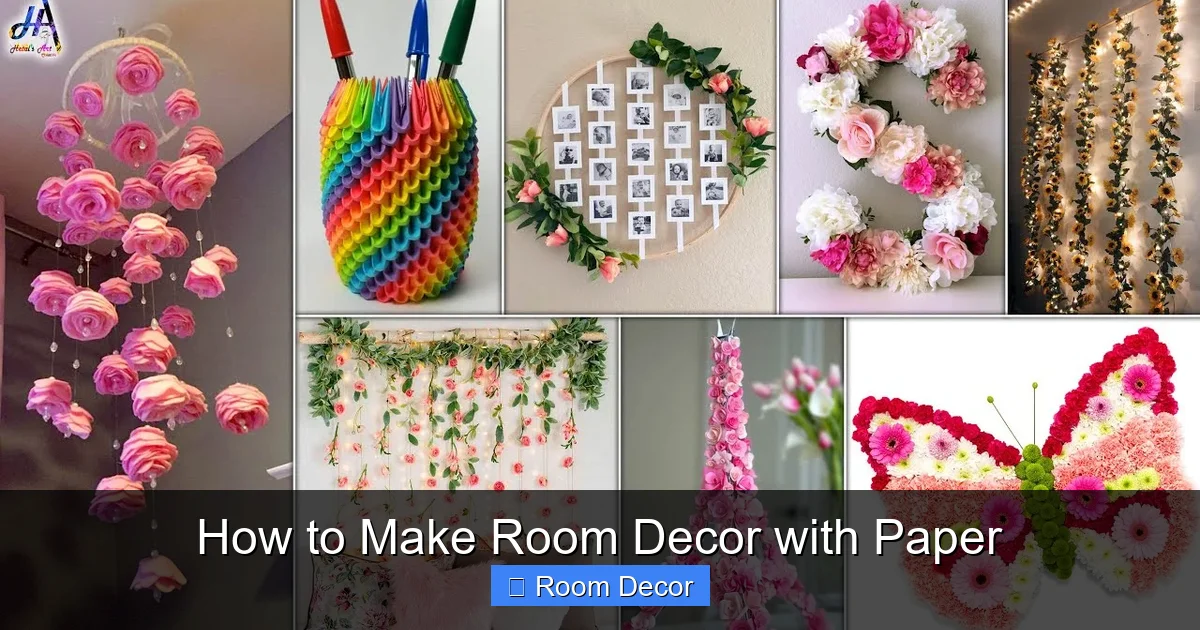
2. 3D Paper Flowers
Paper flowers are a timeless and charming way to add color and softness to any room. They can be used as a standalone piece or as part of a larger display.
Materials Needed:
- Construction paper or cardstock in various colors
- Scissors
- Pencil
- Glue gun and glue sticks
- Optional: Floral wire, pipe cleaners, or small wooden dowels for stems
Instructions:
- Create Petal Templates: Draw various petal shapes on a piece of paper. Common shapes include teardrop, heart, or slightly curved leaf shapes. Make different sizes for variety.
- Cut Out Petals: Trace your templates onto your colored paper and cut out numerous petals. The number needed will depend on the size and fullness of the flower.
- Shape the Petals: Gently curl the edges of each petal outwards using a pencil or your fingers. This gives them a more realistic and delicate appearance.
- Assemble the Flower: Start with a small circle of paper for the center. Glue the petals around this center, overlapping them slightly. For fuller flowers, add multiple layers of petals.
- Add Details: You can add a smaller, contrasting color circle for the center of the flower. If you want to create a bouquet, attach stems using floral wire or pipe cleaners.
Tip: Experiment with different paper types for varying textures. Tissue paper can create delicate, airy flowers, while cardstock offers more structure.
3. Paper Quilling Designs
Quilling is the art of rolling, shaping, and gluing strips of paper to create decorative designs. It can produce intricate and elegant patterns.
Materials Needed:
- Quilling paper strips (or cut your own from cardstock)
- Quilling tool (or a toothpick with a slit)
- White craft glue
- Tweezers
- A surface to work on (e.g., a cutting mat or piece of cardboard)
- Optional: Frame or backing paper
Instructions:
- Prepare Your Strips: If you haven’t bought pre-cut strips, cut your paper into uniform widths (usually 1/8 or 1/4 inch).
- Create Basic Shapes:
- Tight Coil: Insert the end of a paper strip into your quilling tool and wind it tightly around the tool.
- Loose Coil: Create a tight coil first, then release it and let it uncoil to your desired size. Glue the end to secure.
- Teardrop: Pinch one end of a loose coil to create a teardrop shape.
- Marquise: Pinch both ends of a loose coil to create an eye or marquise shape.
- Assemble Your Design: Arrange your shaped coils and elements on your backing paper or directly on a surface if you plan to frame it later. Use tweezers for precise placement.
- Glue Your Pieces: Once you’re happy with the arrangement, carefully glue each piece to the backing or to each other. Apply a small dot of glue to the ends of coils and where elements meet.
- Finishing: Let the glue dry completely. You can seal your quilled artwork with a clear spray sealant for added durability.
Troubleshooting: If your coils are unraveling, ensure you’re securely gluing the end strip down. If your shapes are uneven, practice making more uniform coils.
Example: Create a beautiful floral arrangement, an intricate mandala, or a personalized initial using quilled elements.
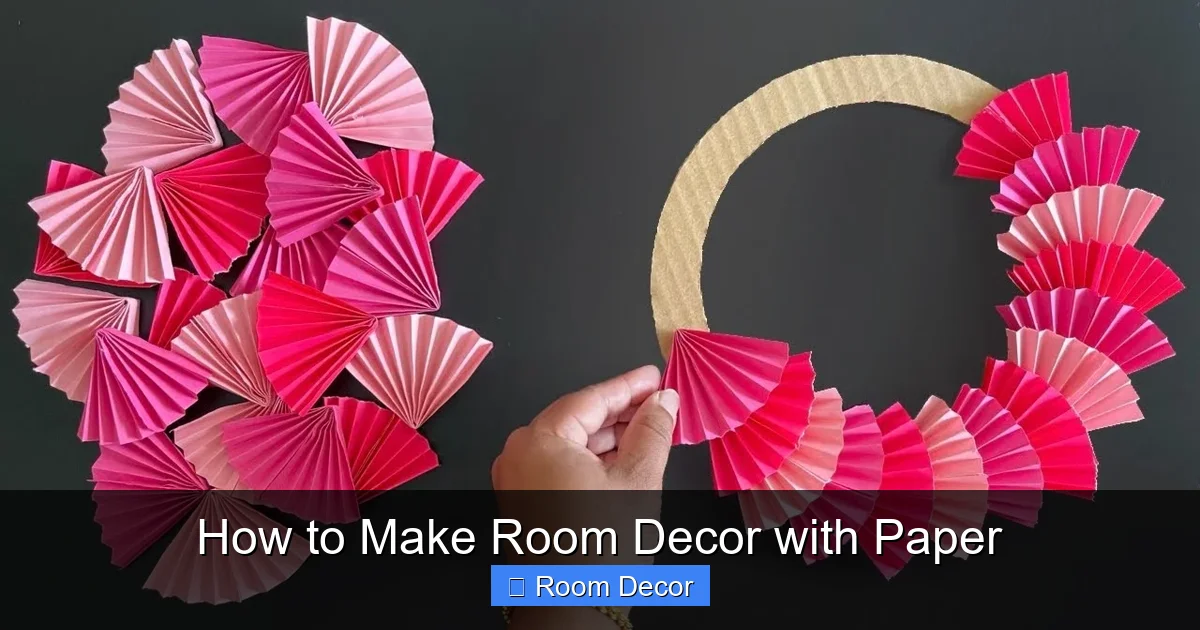
Whimsical Paper Decorations for Ambiance
Beyond wall art, paper can be used to create decorative elements that add a playful and inviting atmosphere.
Visual guide about How to Make Room Decor with Paper
Image source: i.ytimg.com
1. Paper Lanterns
Paper lanterns are fantastic for creating a soft, ambient glow. They can be hung individually or in groups.
Materials Needed:
- Thin paper (e.g., tissue paper, parchment paper, or even printer paper)
- Scissors
- Glue stick or tape
- Optional: Wire or string for hanging, small LED fairy lights
Instructions:
- Cut Your Paper: You’ll need one rectangular piece of paper for the lantern body. For a standard lantern, a piece around 8×10 inches works well.
- Fold and Cut: Fold the paper in half lengthwise. Starting from the folded edge, make cuts towards the open edge, stopping about an inch from the open edge. Space your cuts evenly, about 1/2 to 1 inch apart.
- Open and Form: Unfold the paper. It will now have many parallel slits. Bring the two short edges together to form a cylinder, overlapping them slightly. Secure with glue or tape.
- Create the Top and Bottom: Cut two thin strips of paper for the top and bottom rims of the lantern. Glue or tape these around the open edges of the cylinder.
- Add a Hanger: Create a loop handle from a strip of paper or wire and attach it to the top rim.
Tip: Use different colored papers or create patterned cuts for a unique look. You can also insert battery-operated LED lights for a beautiful glowing effect.
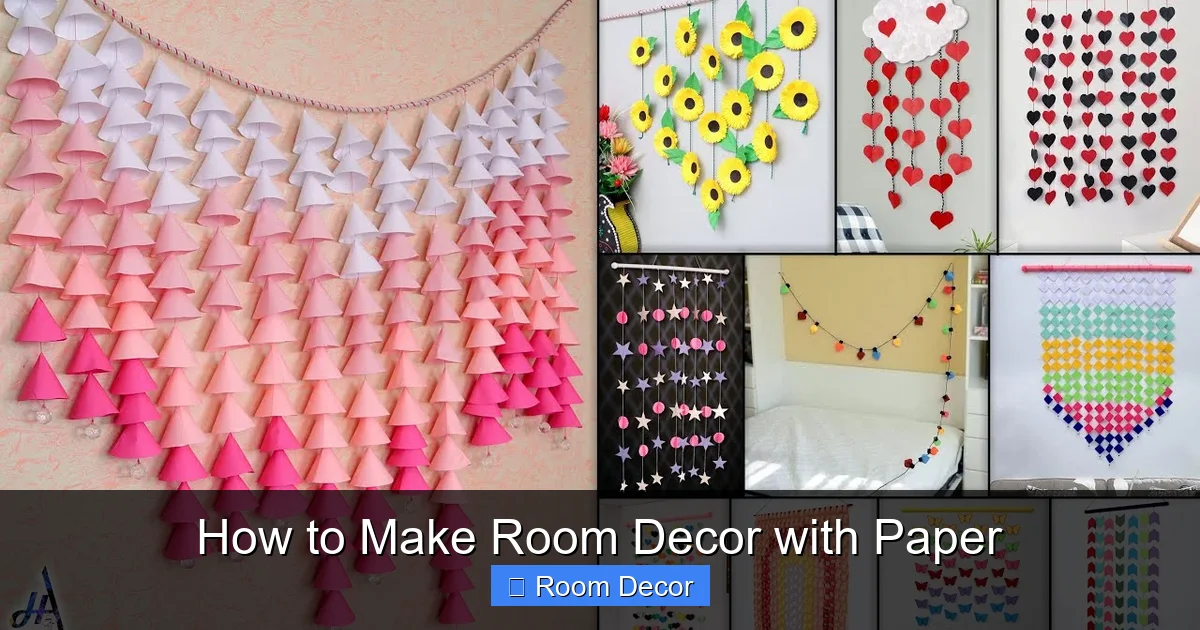
2. Paper Garlands and Bunting
Garlands and bunting are simple yet effective ways to add a festive or decorative touch to any corner of your room.
Materials Needed:
- Colored paper or cardstock
- Scissors
- Hole punch
- String or twine
- Optional: Glue, ruler, pencil
Instructions:
- Choose Your Shape: Decide on the shape for your garland. Popular choices include flags (for bunting), circles, stars, hearts, or even simple cutouts of leaves or flowers.
- Cut Out Your Shapes: Cut out multiple shapes from your chosen paper. For consistency, you can use a template or a shape cutter.
- Prepare for Stringing:
- For Flags/Bunting: Fold a small portion of the top edge of each flag over the string and glue or tape it in place.
- For Other Shapes: Punch two holes at the top of each shape, close enough to keep it stable on the string.
- String Them Together: Thread your string or twine through the holes (or around the folded edge). Space the shapes evenly along the string.
- Hang Your Garland: Once complete, hang your garland across walls, shelves, or windows.
Tip: Mix and match different colors and patterns of paper for a more dynamic garland. You can also add beads or other embellishments between the paper shapes.
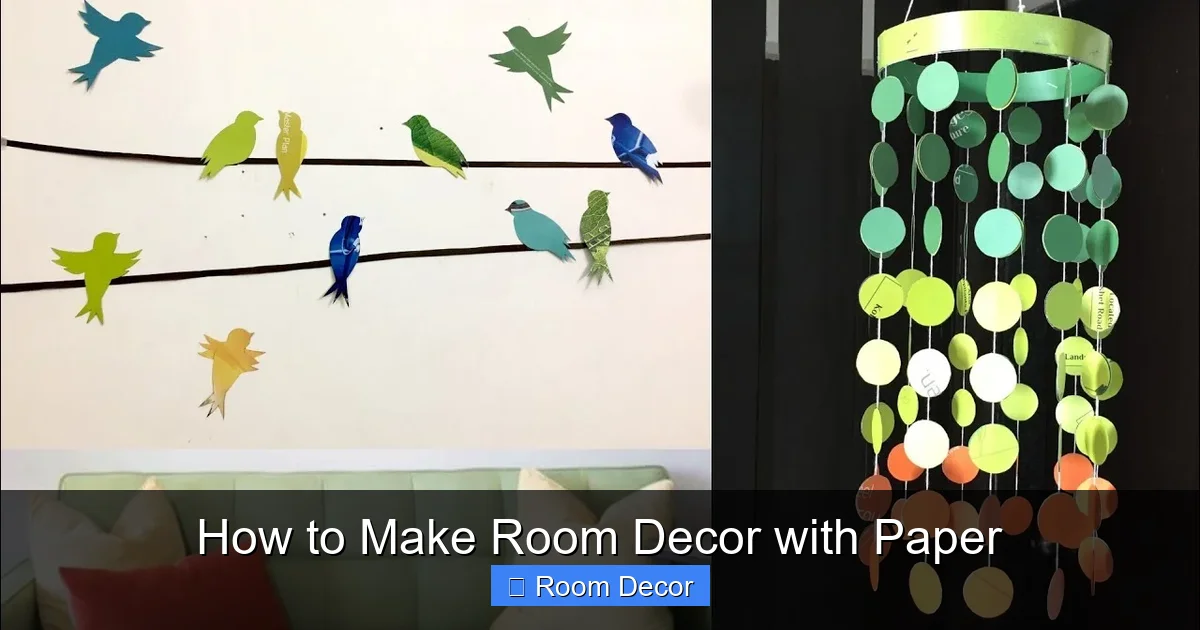
3. Paper Mobiles
A paper mobile can add a touch of whimsy and gentle movement to your room, especially in a nursery or creative space.
Materials Needed:
- Various types of paper (construction paper, cardstock, patterned paper)
- Scissors
- Thread or fishing line
- Embroidery hoop or wooden dowels for the frame
- Glue or tape
- Hole punch
Instructions:
- Create Your Mobile Elements: Cut out various shapes from your paper – stars, moons, clouds, leaves, geometric shapes, or small origami figures.
- Prepare for Hanging: Punch a hole in the top of each paper element.
- Assemble the Frame: Use an embroidery hoop or tie wooden dowels together to create a cross shape. This will be the base from which your mobile hangs.
- Attach Hanging Lines: Cut different lengths of thread or fishing line. Tie one end of each to your paper elements.
- Connect to the Frame: Tie the other end of each thread to your frame (embroidery hoop or dowels). Vary the lengths of the threads to create a cascading effect.
- Add a Suspension Loop: Create a loop from string or fishing line at the top center of your frame to hang the mobile.
Tip: For added dimension, consider using 3D folded paper elements or layering different paper shapes.
Tips for Success and Troubleshooting
Crafting with paper is generally forgiving, but a few tips can help you achieve professional-looking results and overcome common challenges.
Visual guide about How to Make Room Decor with Paper
Image source: i.ytimg.com
General Tips:
- Use the Right Paper: Thicker paper like cardstock is great for structural pieces and wall art, while thinner papers like tissue or construction paper are good for delicate flowers or layered effects.
- Sharp Scissors are Key: For clean cuts and crisp edges, always use sharp scissors or a craft knife.
- Patience is a Virtue: Some paper crafts, like quilling, require patience. Don’t rush the process.
- Test Your Glue: Always test your glue on a scrap piece of paper to ensure it dries clear and doesn’t warp the paper excessively. A glue stick is often best for flat applications, while a craft glue or glue gun is better for adhering 3D elements.
- Embrace Imperfection: Handmade items have charm! Minor imperfections often add character.
Troubleshooting Common Issues:
- Paper Warping: If your paper is warping from glue, try using less glue, a glue stick, or a spray adhesive. You can also place a heavy book on top of the glued pieces while they dry.
- Uneven Cuts: Practice makes perfect! For straight lines, use a ruler and a craft knife on a cutting mat. For curved cuts, focus on smooth, consistent movements.
- Elements Not Sticking: Ensure the surfaces you’re gluing are clean and dry. For difficult-to-stick materials, a stronger craft glue or a hot glue gun might be necessary.
- Designs Falling Apart: Double-check that all connections are securely glued. For hanging items like mobiles or lanterns, reinforce stress points with extra glue or tape.
Conclusion
Making room decor with paper is a wonderfully creative, accessible, and budget-friendly way to personalize your living space. From elegant quilled designs and vibrant paper flowers to geometric wall art and charming paper lanterns, the possibilities are truly endless. This guide has provided you with a foundation of techniques and project ideas to get you started. Remember to experiment with colors, textures, and styles to create pieces that uniquely reflect your personality and taste. So gather your supplies, unleash your imagination, and start transforming your room into a beautiful, handcrafted haven!
Visual guide about How to Make Room Decor with Paper
Image source: i.ytimg.com