
Looking to refresh your kitchen without a hefty renovation bill? This comprehensive guide reveals how to decorate your kitchen backsplash cheaply, turning a drab wall into a dazzling focal point. You’ll learn simple, budget-friendly techniques, from transformative paint jobs and easy peel-and-stick solutions to clever DIY projects. Get ready to personalize your kitchen with style and save money doing it.
How to Decorate Kitchen Backsplash Cheaply
Your kitchen is often the heart of your home. It’s where meals are made, coffee is brewed, and memories are often shared. But sometimes, looking at that tired, plain, or outdated kitchen backsplash can make the whole room feel a little less inviting. You dream of a beautiful, new look, but a full kitchen renovation feels out of reach – especially for the budget.
Good news! You absolutely don’t need to spend a fortune to give your kitchen backsplash a stunning facelift. There are countless creative, affordable, and surprisingly simple ways to decorate a kitchen backsplash cheaply. This guide is your ultimate resource for transforming that forgotten space into a stylish focal point without emptying your wallet. We’ll explore various budget-friendly techniques, from quick paint jobs to clever DIY solutions, all designed to help you achieve a designer look for less.
Get ready to roll up your sleeves and unleash your inner decorator. You’ll learn step-by-step how to prepare your surface, apply different materials, and add those special touches that make a big impact. Let’s make your kitchen shine!
Key Takeaways
- Embrace Budget-Friendly Materials: Discover how common and affordable materials like paint, peel-and-stick tiles, and even contact paper can completely transform your backsplash without high costs.
- Preparation is Key to Success: Regardless of the method chosen, thorough cleaning and proper preparation of your existing backsplash surface are crucial for durable and professional-looking results.
- DIY Projects Offer Unique Personalization: Explore creative DIY options such as stenciling, geometric patterns, or using everyday items like bottle caps or pennies to craft a one-of-a-kind backsplash that reflects your personal style.
- Removable Options for Renters: Learn about renter-friendly solutions like temporary wallpaper, peel-and-stick tiles, and decals that can be easily removed without damaging the original surface.
- Combine Functionality with Style: Consider adding practical elements like open shelving or rail systems above your backsplash to not only enhance its look but also improve kitchen storage and organization.
- Patience Leads to Professional Finish: Take your time with each step, especially during application and drying. Rushing can lead to mistakes that are costly to fix, even on a budget project.
- Small Changes Make a Big Impact: Realize that even minor updates, like a fresh coat of paint or a few well-placed decals, can dramatically alter the feel and aesthetic of your entire kitchen.
Step 1: Plan Your Budget-Friendly Backsplash Transformation
Before you dive into paints or peel-and-stick tiles, a little planning goes a long way. This initial step helps you clarify your vision and ensures you pick the right method to decorate your kitchen backsplash cheaply.
1.1 Assess Your Current Backsplash and Kitchen Style
Take a good look at what you already have. Is it plain drywall, old tile, laminate, or something else? Understanding the existing surface will influence which cheap backsplash decorating options are best for you. Also, think about your kitchen’s overall style. Do you want something modern, rustic, farmhouse, or eclectic? Your backsplash should complement this.
1.2 Define Your Budget and Desired Outcome
When we say “cheaply,” what does that mean for you? Are we talking under $50, under $100, or a bit more? Knowing your spending limit will help you narrow down materials. Do you want a temporary fix, or something that will last a few years? This impacts choices like removable wallpaper versus more permanent paint solutions.
1.3 Measure Your Backsplash Area Accurately
Grab a measuring tape! Measure the length and height of all the areas you plan to cover. Don’t forget to account for outlets and switches. This measurement is crucial for buying the correct amount of material and avoiding costly re-purchases. Add about 10-15% extra for cuts and mistakes.
Step 2: Prepare Your Backsplash Surface
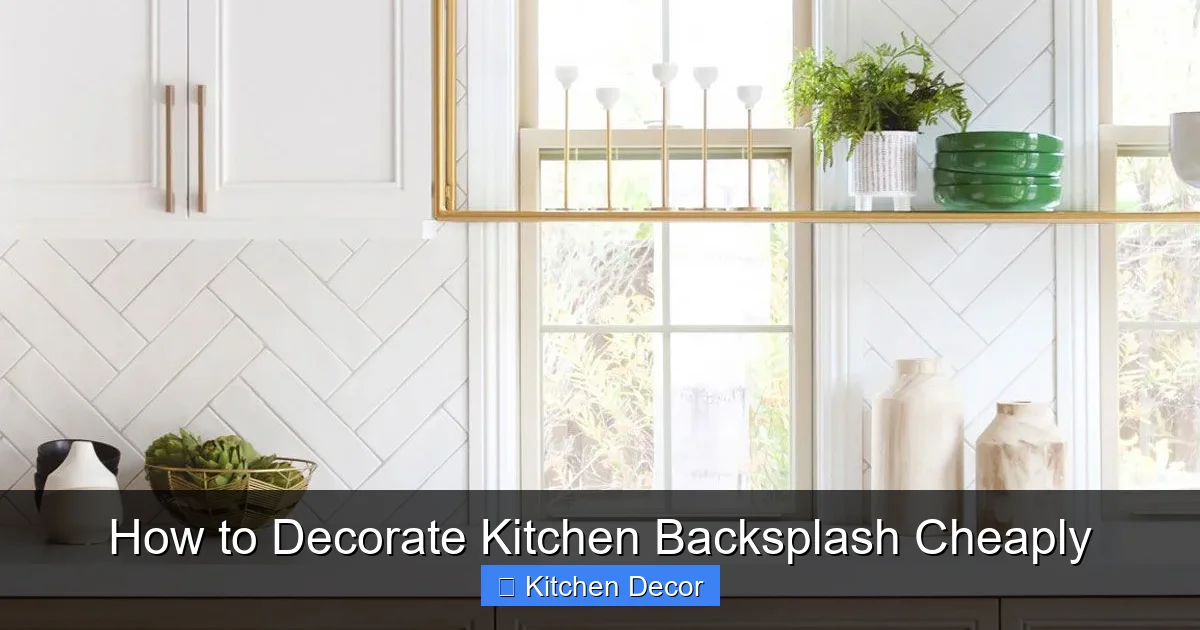
No matter which method you choose to decorate your kitchen backsplash cheaply, proper preparation is the secret to a professional and long-lasting finish. Skipping this step can lead to peeling, poor adhesion, and frustration.
Visual guide about How to Decorate Kitchen Backsplash Cheaply
Image source: i.pinimg.com
2.1 Clean the Backsplash Thoroughly
Kitchen backsplashes gather grease, grime, and food splatters. Use a degreasing cleaner (like dish soap and water, or a commercial kitchen degreaser) to scrub the entire surface. Rinse thoroughly with clean water and let it dry completely. Any residue will prevent new materials from sticking properly.
2.2 Repair Any Damages
If you have cracks, holes, or uneven spots in drywall or grout, now is the time to fix them. Use spackle or wall filler for drywall, and grout repair kits for tile. Sand any patched areas smooth once dry. A smooth, even surface is essential for a flawless finish.
2.3 Lightly Sand (If Applicable) and Prime
For existing smooth surfaces like laminate, gloss paint, or old tile, a light sanding with fine-grit sandpaper (120-180 grit) can create “tooth” for better adhesion. Always wipe away sanding dust. If painting, or if your surface is very porous, a good quality primer can improve paint coverage and durability. Primer is especially important if you’re painting over dark colors with a lighter shade.
Step 3: Transform with Paint – The Ultimate Budget Makeover
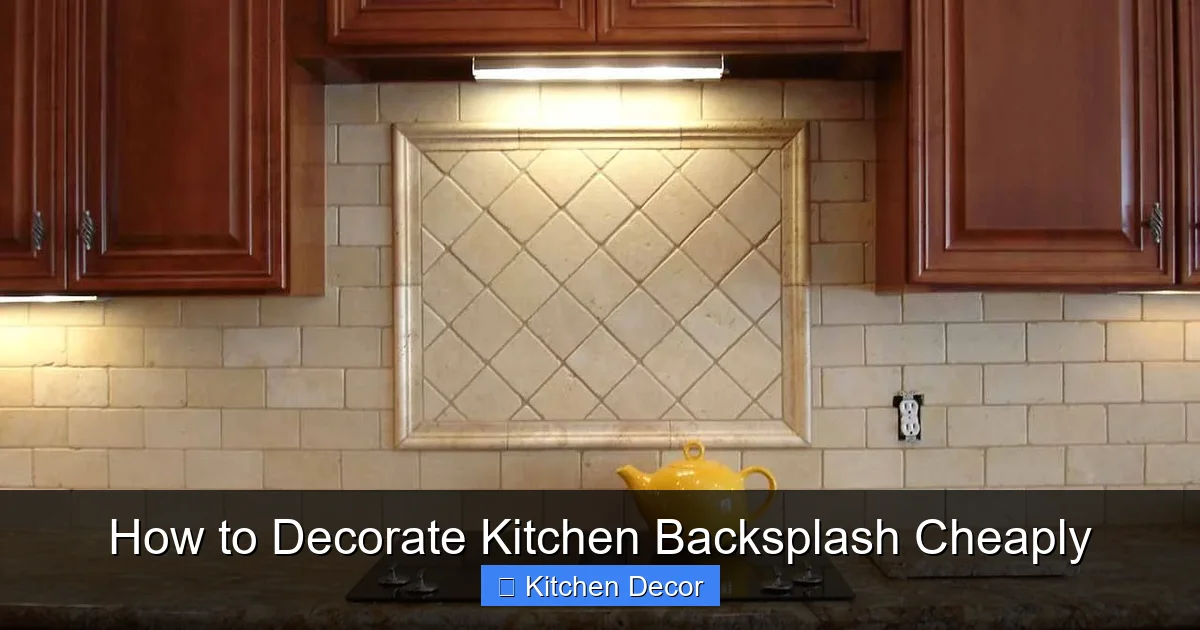
Painting is arguably the cheapest and most impactful way to decorate a kitchen backsplash. It offers endless possibilities for customization and can dramatically change the feel of your kitchen.
Visual guide about How to Decorate Kitchen Backsplash Cheaply
Image source: thearchitecturedesigns.com
3.1 Solid Color Refresh
The simplest option is a fresh coat of paint in a new color.
Choose a color that complements your countertops, cabinets, and overall kitchen aesthetic. Lighter colors can make a small kitchen feel larger and brighter. Darker, bold colors can add drama and sophistication. Ensure you use paint specifically designed for kitchens or bathrooms, as these are more durable and washable.
How to: Apply painter’s tape along the edges where the backsplash meets countertops and cabinets. Apply two thin coats of your chosen paint, allowing ample drying time between coats. Remove tape carefully before the final coat is fully dry to prevent peeling.
3.2 Stenciling for a Faux Tile Look
This is a fantastic way to mimic expensive tile patterns without the cost or hassle. There are thousands of stencil designs available, from intricate Moroccan patterns to classic subway tile shapes.
How to: Paint your backsplash a base color first (e.g., white or light gray). Once dry, position your stencil. Use a stencil brush or a foam roller with very little paint to dab or roll over the stencil. Offload excess paint onto a paper towel to prevent bleeding. Work in sections, repositioning the stencil carefully and wiping the back clean between uses. Once fully dry, consider a clear coat sealer for added protection.
3.3 Geometric Patterns and Stripes
Create a modern and striking backsplash with simple geometric shapes or stripes using painter’s tape. This method allows for a lot of creativity and can be incredibly eye-catching.
How to: Paint a base color. Once dry, use painter’s tape to create your desired pattern (e.g., vertical stripes, chevron, diamond shapes). Press the tape down firmly to prevent paint from seeping underneath. Paint over the entire taped area with your contrasting color. Remove the tape before the paint is fully dry.
Step 4: The Magic of Peel-and-Stick Options
Peel-and-stick materials are a renter’s dream and a DIYer’s best friend. They offer an incredible variety of styles and are relatively easy to apply and remove, making them an excellent choice to decorate your kitchen backsplash cheaply.
Visual guide about How to Decorate Kitchen Backsplash Cheaply
Image source: 3.bp.blogspot.com
4.1 Peel-and-Stick Tiles
These come in various materials, from thin vinyl to thicker gel-based or even metal finishes. They mimic the look of traditional subway tile, mosaic, or even natural stone. They are incredibly popular because they’re easy to install and look surprisingly realistic.
How to: Ensure your surface is clean and smooth. Peel off the backing paper, align the tile carefully, and press firmly. Overlap edges slightly if instructed, or butt them together for a seamless look. Use a utility knife and a straight edge to cut tiles around outlets or at edges. Work slowly and methodically for the best results.
4.2 Removable Wallpaper
Wallpaper has come a long way! Removable wallpaper offers an enormous range of patterns, textures, and colors, including designs that mimic marble, wood, brick, or intricate prints. It’s perfect for adding a bold statement or subtle texture.
How to: Measure and cut your wallpaper panels, adding a few extra inches to the top and bottom for trimming. Peel back a few inches of the backing, align the top edge, and slowly smooth the paper onto the wall using a smoothing tool or credit card, working out air bubbles as you go. Overlap subsequent panels slightly (check manufacturer instructions) for a seamless appearance. Trim excess with a utility knife.
4.3 Vinyl Decals and Stickers
For a quick and super affordable update, vinyl decals or individual tile stickers can add personality and pattern. These are perfect for adding accents to an existing plain backsplash or covering up minor imperfections.
How to: Ensure the surface is clean and dry. Peel and stick! For larger decals, slowly peel the backing while pressing the decal onto the surface with a squeegee to prevent bubbles. For individual tile stickers, simply apply them over existing tiles or a painted surface for an instant mosaic effect.
Step 5: Creative DIY & Upcycling Solutions
If you love unique projects and don’t mind a bit more hands-on work, these DIY ideas are fantastic ways to decorate your kitchen backsplash cheaply and showcase your personality.
5.1 Contact Paper Creativity
Similar to removable wallpaper but often even cheaper, contact paper comes in countless patterns, including wood grain, marble, granite, or solid colors. It’s durable and waterproof, making it ideal for kitchen use.
How to: Clean and dry your surface thoroughly. Measure and cut the contact paper, leaving a small overlap. Peel back a portion of the backing paper and carefully align the contact paper. Slowly press it onto the backsplash, smoothing out air bubbles with a squeegee or credit card as you go. Overlap seams slightly and trim excess with a utility knife.
5.2 Penny or Bottle Cap Backsplash
For a truly unique and conversation-starting backsplash, consider using pennies or flattened bottle caps. This is a time-consuming but incredibly rewarding project that costs very little for the materials themselves.
How to: Clean and dry your surface. Plan your pattern. Apply construction adhesive or strong glue to the back of each penny/bottle cap and press firmly onto the wall. Work in small sections. Once all are adhered, you can grout between them (for pennies, use unsanded grout) or apply a clear epoxy resin for a smooth, protective finish over both pennies and bottle caps. This method requires patience and attention to detail.
5.3 Fabric or Wallpaper Under Clear Acrylic/Plexiglass
This method allows you to use any fabric or traditional wallpaper pattern without worrying about spills or cleaning. The clear acrylic protects it beautifully.
How to: Cut your chosen fabric or wallpaper to the exact dimensions of your backsplash area. Affix it to the wall using temporary spray adhesive or double-sided tape (just enough to hold it in place). Have a sheet of clear acrylic or plexiglass cut to size at a hardware store. Mount the acrylic over the fabric/wallpaper using stand-off screws or clear adhesive strips. This creates a smooth, wipeable surface that can be changed out easily.
Step 6: Beyond the Surface – Adding Dimension and Functionality
Sometimes, decorating cheaply isn’t just about covering the existing backsplash. It’s about adding elements that enhance its look and your kitchen’s utility.
6.1 Open Shelving or Floating Shelves
Installing a few small open shelves above your backsplash can add visual interest, display decorative items, and provide extra storage for spices, small plants, or frequently used dishes. Choose inexpensive shelves from IKEA, Amazon, or even DIY wood planks.
How to: Measure and mark where your shelves will go. Ensure they are level. Install appropriate anchors for your wall type (drywall anchors for drywall, masonry anchors for brick, etc.). Attach the shelf brackets or floating shelf hardware. Decorate with items that complement your kitchen.
6.2 Rail Systems with Hooks
A simple metal rail system installed along your backsplash can be incredibly practical and stylish. Hang utensils, small pots, towels, or even mini planters on S-hooks. This clears up counter space and keeps essentials within reach.
How to: Purchase a kitchen rail system (often found at IKEA or home improvement stores). Mark and drill holes for mounting brackets, ensuring the rail is level. Install the rail and add your desired S-hooks and hanging items.
6.3 Backsplash Wall Art or Mirrors
If your backsplash is a plain, painted wall, consider adding small pieces of art, framed prints, or even a small mirror. These can break up the monotony and add personality. Choose items that are lightweight and easy to clean.
How to: Use small picture hanging strips or lightweight nails. Ensure items are hung securely and away from direct heat sources like stovetops. For mirrors, consider shatterproof acrylic mirrors for safety in the kitchen.
Step 7: General Tips for a Successful Cheap Backsplash Project
No matter which method you choose to decorate your kitchen backsplash cheaply, these universal tips will help ensure a smooth process and fantastic results.
- Take Your Time: Rushing can lead to mistakes that are costly to fix, even with inexpensive materials. Patience is your best friend.
- Work in Sections: Especially for larger areas, break down the project into manageable sections. This helps maintain accuracy and prevents fatigue.
- Read Instructions: Always read the manufacturer’s instructions for paints, primers, peel-and-stick products, and adhesives. They often have specific guidelines for application and drying times.
- Ventilate: If using paints, primers, or strong adhesives, ensure your kitchen is well-ventilated by opening windows or using fans.
- Protect Your Surfaces: Lay down drop cloths or old newspapers on your countertops and floor to protect them from spills and drips. Use painter’s tape carefully around edges.
- Clean Tools Immediately: Clean brushes, rollers, and other tools immediately after use to prolong their life and make future projects easier.
Troubleshooting Common Backsplash Decorating Issues
Even when you decorate your kitchen backsplash cheaply, a few hiccups can occur. Here’s how to address them:
Adhesion Problems with Peel-and-Stick or Decals
Symptom: Edges lifting, bubbles appearing.
Solution: This often happens due to poor surface prep (grease, dust) or rushing the application. Ensure the surface is perfectly clean and dry. When applying, use a squeegee or credit card to firmly press and smooth out air bubbles. For lifting edges, a dab of strong adhesive (like super glue or construction adhesive for peel-and-stick tiles) applied sparingly to the back can help, but test in an inconspicuous area first.
Paint Bleeding Under Tape
Symptom: Jagged paint lines under painter’s tape.
Solution: This means the tape wasn’t sealed properly. Before painting your main color, paint a thin coat of your *base* color or a clear topcoat along the edge of the tape. This seals the tape, and any bleed-through will be the same color as the base, creating a crisp line. Then, paint your desired color. Remove tape slowly while the paint is still slightly wet.
Uneven Application or Bubbles in Contact Paper/Wallpaper
Symptom: Wrinkles, air bubbles, or misaligned patterns.
Solution: For wrinkles, gently peel back the section and reapply, smoothing carefully. For small air bubbles, you can often push them to the nearest edge with a squeegee. For stubborn bubbles, carefully prick them with a fine needle and then smooth them out. Take your time during application; it’s easier to prevent than fix.
Difficulty Cleaning Your New Backsplash
Symptom: Stains or grease not coming off easily.
Solution: Ensure you’ve used appropriate materials. For painted backsplashes, use washable kitchen/bath paint and consider a protective topcoat if durability is a concern. For peel-and-stick, most are water-resistant and wipe clean with mild soap and water. Avoid abrasive cleaners, which can damage surfaces like contact paper or paint. If a project isn’t intended for wet areas (like some fabrics), ensure it’s properly sealed under acrylic or epoxy.
Conclusion
Congratulations! You now have a treasure trove of ideas and practical steps to decorate your kitchen backsplash cheaply. From the transformative power of paint and the convenience of peel-and-stick options to truly unique DIY projects, you can achieve a stylish, personalized kitchen without a hefty price tag.
Remember, the goal is not perfection but personality and impact. A freshly updated backsplash can make your entire kitchen feel new and inviting, reflecting your taste and making your home a happier place. So, pick your favorite method, gather your tools, and get ready to create a kitchen backsplash you’ll love – all while keeping your budget intact!