Transform your child’s space into a personalized wonderland with our comprehensive guide on how to decorate kids’ room using DIY ideas. Learn creative, budget-friendly projects for walls, storage, furniture, and unique decor. Involve your child in the process for a fun, bonding experience and a room they’ll truly love, making their room truly one-of-a-kind.
How to Decorate Kids Room Using Diy Ideas
Ready to transform your child’s room into a magical, functional, and personalized space without spending a fortune? You’re in the right place! Learning how to decorate kids room using DIY ideas is not only budget-friendly but also incredibly rewarding. It allows you to create a unique environment that truly reflects your child’s personality and interests.
In this comprehensive guide, we’ll walk you through everything you need to know. We’ll cover planning, creative wall makeovers, smart storage solutions, furniture upgrades, and delightful handmade decor. We’ll also touch on incorporating play zones and, most importantly, ensuring safety. Get ready to unleash your creativity, involve your little one, and embark on a fun journey to decorate kids room using DIY ideas!
Key Takeaways
- Involve Your Child from the Start: Let your child help brainstorm themes, colors, and DIY projects. This ensures the room truly reflects their personality and makes them feel invested in the space.
- Prioritize Walls for Big Impact: Simple DIY wall transformations like painting accent walls, adding removable decals, or creating gallery walls with your child’s art can dramatically change the room’s feel without breaking the bank.
- Craft Smart, Flexible Storage Solutions: Upcycle old bins, build simple shelving units, or install pegboards. DIY storage helps keep clutter at bay while adding a personalized touch.
- Give Furniture a DIY Makeover: Don’t buy new! Painting, stenciling, or repurposing existing furniture pieces (like dressers or old chests) can create unique, functional items tailored to your child’s room.
- Handmade Decor Adds Personality: From DIY lighting and cozy textiles to custom mobiles and garlands, handmade accessories infuse the room with warmth, character, and a unique charm that store-bought items often lack.
- Safety and Play Zones are Essential: Always ensure your DIY projects are child-safe, using non-toxic materials and securing items properly. Designate specific areas for reading, playing, and creating to make the room both fun and functional.
- Embrace Imperfection and Creativity: DIY decorating is about the process as much as the outcome. Be open to adapting ideas, learning new skills, and celebrating the unique, often imperfect, beauty of handmade items.
Step 1: Plan Your Vision & Involve Your Child
Before you even pick up a paintbrush, a little planning goes a long way. This initial step is crucial for creating a cohesive and well-loved space. And here’s the best part: involve your child! Their input is invaluable. After all, it’s their room.
Brainstorm Themes & Colors
Sit down with your child and talk about what they love. Do they dream of outer space? A fairytale forest? A superhero hideout? Or perhaps they just have a favorite color (or three!).
- Ask Open-Ended Questions: Instead of “Do you like blue?”, try “What makes you happy when you play in your room?” or “If your room could be anything, what would it be?”
- Look for Inspiration: Browse books, magazines, or online platforms together. Point out colors, patterns, and themes that catch their eye.
- Choose a Base Palette: Even if your child loves every color, try to narrow it down to 2-3 main colors. This creates a harmonious look. You can always add pops of other colors with accessories.
Involving them early makes them feel like a co-creator. It boosts their excitement for the project!
Measure & Sketch
Once you have a general idea, it’s time to get practical. Measuring your child’s room helps you visualize the space and plan your DIY projects effectively.
- Take Accurate Measurements: Measure the length, width, and height of the room. Note the location of windows, doors, and electrical outlets.
- Draw a Floor Plan: A simple sketch of the room on graph paper can be incredibly helpful. You don’t need to be an artist! Use it to draw in existing furniture and then experiment with new layouts.
- Consider Functionality: Think about zones. Where will they sleep? Where will they play? Where will they read? Planning these zones now helps you strategically place your DIY elements.
This step helps ensure your DIY ideas fit perfectly and serve their intended purpose.
Set a Budget
One of the biggest reasons to decorate kids room using DIY ideas is to save money. But even DIY projects need a budget.
- List Out Potential Projects: Based on your theme and measurements, make a list of everything you’d like to do.
- Estimate Costs: For each project, research the cost of materials (paint, wood, fabric, etc.). Remember to factor in tools you might need to buy or rent.
- Look for Free or Low-Cost Materials: Before buying new, check your home for items you can upcycle. Old furniture, fabric scraps, or even empty cardboard boxes can be transformed. Friends and family might have items to give away too!
A clear budget helps you prioritize and stick to your spending limits, making your DIY adventure stress-free.
Step 2: DIY Wall Transformations
Walls are often the largest surface in a room and offer a huge canvas for creativity. Transforming them with DIY ideas can make the biggest visual impact.
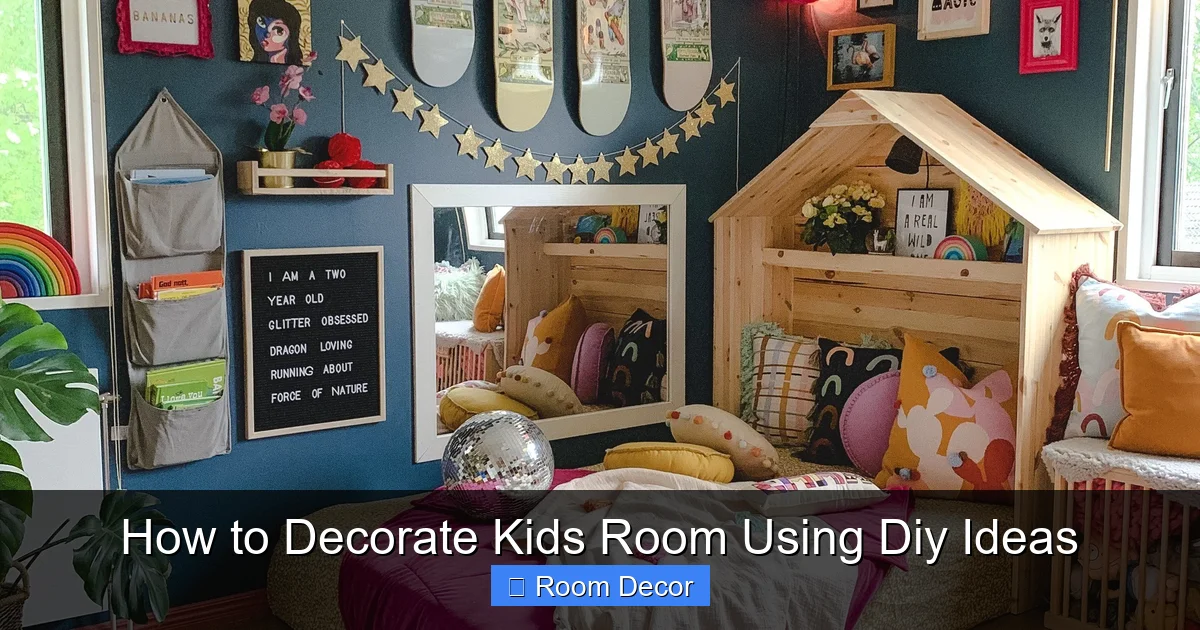
Visual guide about How to Decorate Kids Room Using Diy Ideas
Image source: i.pinimg.com
Creative Paint Ideas
Paint is your best friend when you decorate kids room using DIY ideas. It’s affordable, versatile, and can dramatically change the mood of a room.
- Accent Wall: Choose one wall to be the star. Paint it a bold color, add stripes, polka dots, or geometric patterns using painter’s tape. For a popular look, try painting a mountain range or a half-painted wall with a fun border.
- Stenciling: Buy pre-made stencils or cut your own from cardboard. Stencil playful patterns like stars, clouds, animals, or even letters of the alphabet onto a plain wall.
- Ombre Effect: Blend two or three colors vertically or horizontally for a soft, gradient look. This adds a dreamy touch to any kids’ room.
Always use low-VOC (Volatile Organic Compound) or zero-VOC paint for kids’ rooms to ensure good air quality.
Removable Wall Decals & Stickers
If you’re renting or your child’s preferences change often, removable decals are a fantastic DIY-friendly option.
- Easy Application: These peel-and-stick decorations come in countless designs – from trees and animals to superheroes and constellations.
- Flexibility: They can be easily removed without damaging the paint, making them perfect for temporary themes or renters.
- DIY Decals: You can even cut your own shapes from contact paper or adhesive vinyl for a truly custom look. Think large polka dots, geometric shapes, or even your child’s initial.
This is a super simple way to decorate kids room using DIY ideas that are low commitment.
Gallery Walls with DIY Art
Celebrate your child’s creativity by turning their artwork into a gallery display. This is a personal and heartwarming way to decorate kids room using DIY ideas.
- Frame Their Masterpieces: Buy inexpensive frames from a discount store and paint them to match your room’s theme. Display your child’s drawings, paintings, or even handwritten notes.
- Printable Art: Find free printable art online (many websites offer kid-friendly designs). Print them out, frame them, and arrange them alongside your child’s creations.
- Clothespin Garland: String a simple rope or twine across a wall and use mini clothespins to hang up changing artwork. This makes it easy to update the display regularly.
A gallery wall adds character and tells a story, making the room uniquely theirs.
Step 3: Crafting Unique Storage Solutions
Kids’ rooms are notorious for clutter. DIY storage solutions are not only practical but can also be stylish elements when you decorate kids room using DIY ideas.
Visual guide about How to Decorate Kids Room Using Diy Ideas
Image source: i.ytimg.com
Upcycled Storage Bins & Baskets
Give new life to old items to create charming and functional storage.
- Fabric-Covered Bins: Take plain plastic storage bins and cover them with colorful fabric using spray adhesive. Choose fabrics that match your room’s theme.
- Painted Crates: Wooden crates can be painted, stacked, and secured to create rustic shelving or toy storage. Add casters to the bottom for mobile toy bins.
- Decorated Cardboard Boxes: Large cardboard boxes can be covered with contact paper, fabric, or painted and sealed to create sturdy toy boxes. Add rope handles for easy pulling.
These DIY storage solutions are effective and add a personalized touch.
DIY Shelving Units
Shelves are essential for displaying books, toys, and small treasures. You can easily build simple yet stylish ones.
- Simple Floating Shelves: Buy inexpensive lumber planks, sand them smooth, paint or stain them, and mount them using hidden shelf brackets. These are perfect for small books or display items.
- Crate Shelves: As mentioned before, old wooden crates can be painted and stacked vertically or horizontally, secured together, and mounted to the wall for a quirky shelving unit.
- Ladder Shelves: An old step ladder can be painted and used as a unique display shelf for books or decorative items. Just ensure it’s stable and secured to the wall if necessary.
Always ensure any mounted shelves are securely fastened to wall studs for safety.
Pegboards for Practical & Playful Storage
Pegboards are incredibly versatile and perfect for a kids’ room, offering flexible storage and display options.
- Install a Pegboard: Buy a sheet of pegboard, paint it a fun color, and mount it to the wall (ensure there’s a small gap behind it for the pegs to fit).
- Add Hooks & Baskets: Use various pegboard hooks, cups, and small shelves to hang art supplies, small toys, dress-up accessories, or even display collections.
- Interactive Element: Your child can help organize and re-organize items on the pegboard, making it a dynamic part of their room.
Pegboards are a fantastic, adaptable way to decorate kids room using DIY ideas that grow with them.
Step 4: Personalized Furniture Upgrades
Buying new furniture can be expensive. DIY upgrades can transform old or plain pieces into custom treasures.
Visual guide about How to Decorate Kids Room Using Diy Ideas
Image source: blog.pincel.app
Painting & Refinishing Old Furniture
A fresh coat of paint can do wonders for an outdated dresser, nightstand, or bookshelf.
- Pick a Fun Color: Choose a color that ties into your room’s theme. You can do a single color, two-tone, or even add stenciled patterns.
- Add New Hardware: Change out old knobs and pulls for playful, colorful ones. You can even make your own using painted wooden beads or small toys.
- Distressed Look: For a shabby chic feel, lightly sand edges after painting for a distressed look.
Remember to use non-toxic, child-safe paints and sealers.
DIY Headboards
A headboard can be a focal point in the room, and you can easily make one yourself.
- Plywood & Fabric: Cut a piece of plywood to size, pad it with foam or batting, and cover it with a fun fabric using a staple gun.
- Fairy Light Headboard: Attach a simple piece of plywood or even a large canvas to the wall behind the bed and string fairy lights across it for a magical glow.
- Book Headboard: For older kids, you could arrange old hardback books (open or closed) on a board to create a unique literary headboard.
These projects allow you to decorate kids room using DIY ideas that add personality to their sleeping area.
Repurposed Furniture Ideas
Think outside the box when looking at old furniture. Can it serve a new purpose?
- Dresser to Changing Table: A sturdy dresser can easily become a changing table by adding a changing pad on top. Once they outgrow it, it’s still a functional dresser.
- Old Chest to Bench: An old wooden chest can be painted, cushioned on top, and used as both a bench and toy storage.
- Table & Chairs Set: If you find a small table and chairs, a coat of paint can make it a perfect activity or craft station.
Repurposing is a great way to save money and add character when you decorate kids room using DIY ideas.
Step 5: Handmade Decor & Accessories
The small details often make the biggest difference. Handmade decor adds warmth and a truly unique touch.
DIY Lighting Fixtures
Lighting can create ambiance and highlight special areas.
- Custom Lampshades: Buy a plain lampshade and decorate it with fabric scraps, painted designs, or glued-on pom-poms.
- Fairy Lights: String fairy lights around a bed canopy, along a wall, or inside a decorative jar for a soft, magical glow.
- Paper Lanterns: Decorate plain paper lanterns with paint, glitter, or tissue paper to create custom hanging lights.
Always ensure any electrical DIYs are done safely or involve a professional.
Cozy Textiles
Textiles add comfort, color, and texture to a room.
- No-Sew Fleece Blankets: Buy two coordinating pieces of fleece fabric, cut fringes around the edges, and tie them together for a soft, cozy blanket.
- Decorative Pillows: Use fabric scraps, old t-shirts, or simple canvas material to create custom pillow covers. You can paint designs, sew on appliques, or add tassels.
- Fabric Bunting: Cut triangles from various fabrics, attach them to a ribbon, and hang them across a wall or window.
These simple projects are excellent ways to decorate kids room using DIY ideas that add softness and comfort.
Playful Rugs & Mats
A rug can define a play area or add a splash of color.
- Stenciled Rugs: Buy a plain, inexpensive rug (jute or cotton works well) and use fabric paint and stencils to add patterns like roads, hopscotch, or stars.
- Braided Rag Rugs: Upcycle old t-shirts or fabric scraps by cutting them into strips and braiding them into a unique, colorful rug.
Always use non-slip backing for rugs in kids’ rooms.
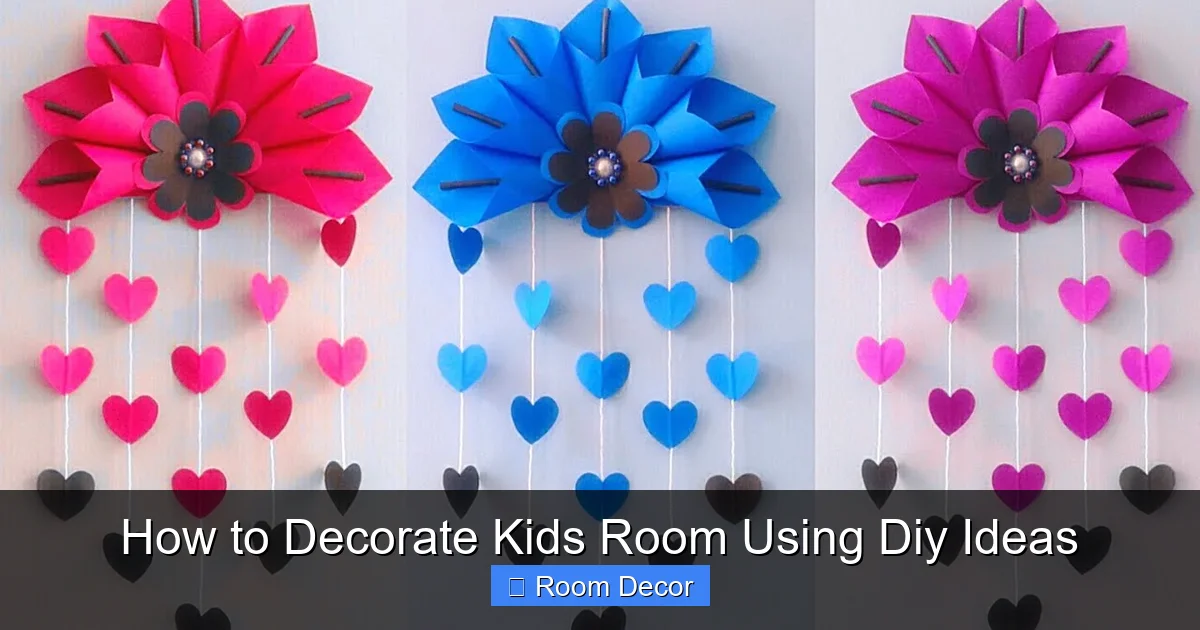
Mobile & Garland Creations
These hanging decorations add a whimsical touch.
- Pom-Pom Mobiles: Make colorful pom-poms from yarn and attach them to a wooden hoop or branch for a charming mobile.
- Felt Garlands: Cut shapes (stars, clouds, animals) from felt, string them together, and hang them across a wall, window, or above the bed.
- Nature-Inspired Mobiles: Collect small sticks, leaves, pinecones, and other natural elements. Paint them, and hang them from a branch for an earthy mobile.
These lightweight DIYs are perfect for adding visual interest and character.
Step 6: Incorporate Play & Learning Zones
A kids’ room is more than just a place to sleep. Designating specific zones enhances functionality and encourages creativity.
Reading Nooks
Encourage a love for books with a cozy reading corner.
- Canopy Creation: Hang a sheer fabric canopy or a hula hoop draped with fabric in a corner. Add soft pillows and a comfy blanket underneath.
- Book Storage: Install low, accessible DIY shelves or use a fabric sling book display for easy access to stories.
- Soft Lighting: Add a small, child-safe lamp or fairy lights for a warm glow.
A reading nook is a quiet escape perfect for imagination.
Chalkboard/Whiteboard Walls
Give your child a dedicated space to express their artistic side without drawing on other walls.
- Chalkboard Paint: Paint a section of a wall (or a full wall!) with chalkboard paint. You can even frame it with painted trim for a more finished look.
- Whiteboard Paint: For a cleaner option, use whiteboard paint. This is great for drawing or practicing letters and numbers with dry-erase markers.
This DIY idea is a fantastic way to encourage creativity and learning.
Sensory Play Areas
For younger children, a small sensory play area can be engaging and calming.
- Activity Board: Attach various textures, switches, and small, safe objects to a wooden board for a DIY busy board.
- Sensory Bins: Use a shallow plastic bin filled with rice, beans, water beads, or sand, along with small scoops, toys, and natural elements.
Always supervise children during sensory play and ensure all items are age-appropriate and safe.
Step 7: Safety First & Finishing Touches
As you near completion, a few final steps ensure the room is safe, beautiful, and truly ready for your child.
Childproofing Your DIYs
Safety is paramount in any kids’ room, especially with DIY projects.
- Secure Furniture: Anchor all dressers, bookshelves, and other tall furniture to the wall to prevent tipping.
- Non-Toxic Materials: Ensure all paints, glues, and finishes are child-safe and non-toxic.
- Rounded Edges: Sand down any sharp edges on DIY furniture or wooden elements.
- Cord Management: Secure blinds cords and electrical wires out of reach.
- Small Parts: For younger children, avoid small parts that could be choking hazards on DIY decor.
Always double-check your work for safety before letting your child fully enjoy their new room.
Personalize with Photos & Mementos
Add the final layer of personality and warmth.
- Family Photos: Display photos of family, friends, and pets in simple DIY frames.
- Mementos: Arrange special keepsakes, awards, or cherished toys on shelves.
These personal touches truly make the room feel like home.
Involve Your Child in the Final Setup
The journey isn’t over until your child helps with the grand reveal.
- Arrange Toys Together: Let them decide where their favorite toys go in the new storage.
- Hang Their Art: Give them a final piece of art to hang in their new gallery wall.
- Test Out New Zones: Have them try out the reading nook or draw on the chalkboard wall.
This final involvement solidifies their ownership and appreciation of their newly decorated space.
Troubleshooting Common DIY Decorating Challenges
Even with the best plans, DIY projects can sometimes hit a snag. Here are quick tips for common issues:
- Project Didn’t Turn Out As Expected: Don’t despair! Sometimes, the charm of DIY is its imperfection. Embrace it. If it’s truly not working, try to repurpose the materials or paint over it. Think of it as a learning experience.
- Child’s Preferences Change (Often!): This is why flexible DIYs are great! Stick to removable decals, easily painted surfaces, and versatile storage. Avoid highly permanent, expensive themes for younger children. DIY allows for easy updates!
- Budget Overruns: If you find yourself spending more than planned, pause and re-evaluate. Can you simplify a project? Use materials you already have? Prioritize the most impactful DIYs and save others for later.
- Lack of Time: Break down larger projects into smaller, manageable tasks. Even 15-30 minutes of DIY work a day or a couple of hours on a weekend can make progress. Don’t rush; enjoy the process.
Remember, the goal is to create a beloved space, not a perfectly catalog-worthy room. Have fun!
Conclusion
Decorating a kids’ room using DIY ideas is a fantastic way to create a personalized, inspiring, and functional space on a budget. From planning out whimsical themes and transforming plain walls to crafting clever storage and upcycling furniture, every DIY project adds a layer of love and uniqueness. Involving your child throughout the process not only makes it more fun but also ensures the room truly feels like theirs.
You’ve learned practical steps, creative techniques, and essential safety tips to embark on your DIY decorating journey. So, gather your materials, unleash your imagination, and get ready to create a room where your child can dream, play, learn, and grow. Enjoy the process of bringing their ideal space to life!