
Ready to refresh your kitchen without a hefty budget or complex projects? This guide offers 6 incredibly easy DIY kitchen decor ideas for beginners, perfect for adding personal flair and functionality to your space. You’ll learn simple, step-by-step methods to update everything from cabinet hardware to creating a charming herb garden, ensuring your kitchen feels fresh and inviting with minimal effort.
6 Easy Diy Kitchen Decor Ideas for Beginners
Welcome to your ultimate guide for refreshing your kitchen with simple, fun, and totally doable DIY projects! If you’ve been dreaming of a kitchen makeover but feel overwhelmed by the thought of big renovations or hefty expenses, you’re in the perfect place. We believe that everyone, even absolute beginners, can create a beautiful and personalized kitchen space.
This guide will walk you through six fantastic DIY kitchen decor ideas that are specifically chosen for their ease of execution, affordability, and the significant impact they make. You don’t need fancy tools or prior experience. Just a little enthusiasm, a few basic supplies, and you’ll be well on your way to transforming your kitchen into a space you adore. We’ll cover everything from updating small details to adding charming personal touches, all designed to build your confidence and spark your creativity. Get ready to roll up your sleeves and discover how enjoyable and rewarding DIY kitchen decor can be!
Key Takeaways
- Start Small for Big Impact: Even minor updates like changing cabinet hardware or styling open shelves can dramatically refresh your kitchen’s look and feel, making them ideal DIY kitchen decor ideas for beginners.
- Personalize Your Space: DIY projects allow you to inject your unique personality into your kitchen, creating a space that truly feels like your own without generic, mass-produced decor.
- Budget-Friendly Transformations: Many effective kitchen decor updates don’t require a large budget. Focus on repurposing, upcycling, or simple craft projects to achieve stylish results affordably.
- Boost Functionality and Aesthetics: From creating an indoor herb garden to optimizing storage with styled shelving, these DIY ideas not only look great but also enhance the practical use of your kitchen.
- Build Confidence with Simple Projects: These beginner-friendly tasks are designed to be straightforward, helping you gain confidence in your DIY skills for future home improvement endeavors.
- Embrace Your Creativity: Don’t be afraid to experiment with colors, textures, and materials. DIY kitchen decor is all about expressing your creativity and making your kitchen a happier place.
1. Transform Your Kitchen with New Cabinet Hardware
One of the quickest, most impactful, and surprisingly easy DIY kitchen decor ideas for beginners is updating your cabinet hardware. Think of it as putting new jewelry on your kitchen cabinets. It can completely change the vibe from dated to modern, rustic to chic, in just an afternoon. This project requires minimal tools and skill, making it a fantastic starting point for your DIY journey.
Materials You’ll Need:
- New cabinet pulls and/or knobs (count how many you need first!)
- Screwdriver (usually Philips head, but check your existing screws)
- Measuring tape or ruler (optional, but helpful for precise placement)
- Small level (optional, for making sure new pulls are straight)
- Pencil (for marking)
Step-by-Step Instructions:
H3. Step 1: Choose Your Hardware
Before you buy anything, take a moment to consider the style you want for your kitchen. Do you prefer sleek, minimalist bar pulls? Or perhaps classic round knobs? What finish will complement your existing appliances and decor – matte black, brushed nickel, gold, or something else? Measure the distance between the screw holes on your current pulls if you’re replacing them, to ensure your new hardware will fit without drilling new holes. This is crucial for an easy DIY upgrade.
H3. Step 2: Remove Old Hardware
This is the simplest part! Open your cabinet doors and drawers. Using your screwdriver, unscrew the fasteners holding the old knobs or pulls in place. Keep a small bowl or container handy to collect the old screws and hardware. If you plan to reuse the old hardware elsewhere or donate it, keep everything organized.
H3. Step 3: Clean the Surfaces
Once the old hardware is off, you might notice dust, grime, or even faded paint underneath. Take a moment to clean the cabinet surfaces thoroughly with a gentle kitchen cleaner. This ensures a fresh start and a polished look for your new hardware.
H3. Step 4: Install New Hardware
Now for the fun part!
- For Knobs: Simply push the screw through the cabinet door or drawer from the inside, then twist the knob onto the screw from the outside until it’s snug. Don’t overtighten, as this can strip the screw or damage the cabinet.
- For Pulls: Align the two screw holes of the new pull with the existing holes on your cabinet. Push the screws through from the inside and secure them into the pull from the outside. Again, tighten gently but firmly. If your new pulls have different spacing, you might need to fill the old holes with wood filler, sand, and paint, then drill new holes. However, for a beginner-friendly project, matching the existing hole spacing is highly recommended.
Practical Tips:
- Buy One First: If you’re unsure about a style, buy one knob or pull to test it out on a single cabinet before committing to a full set.
- Don’t Mix & Match (Unless You Mean To): While eclectic can be fun, for beginners, sticking to one style and finish for all hardware creates a cohesive look.
- Consider Comfort: Make sure the new hardware feels comfortable to grip and use daily.
2. Create a Charming DIY Herb Garden
Visual guide about 6 Easy Diy Kitchen Decor Ideas for Beginners
Image source: balconygardenweb.b-cdn.net
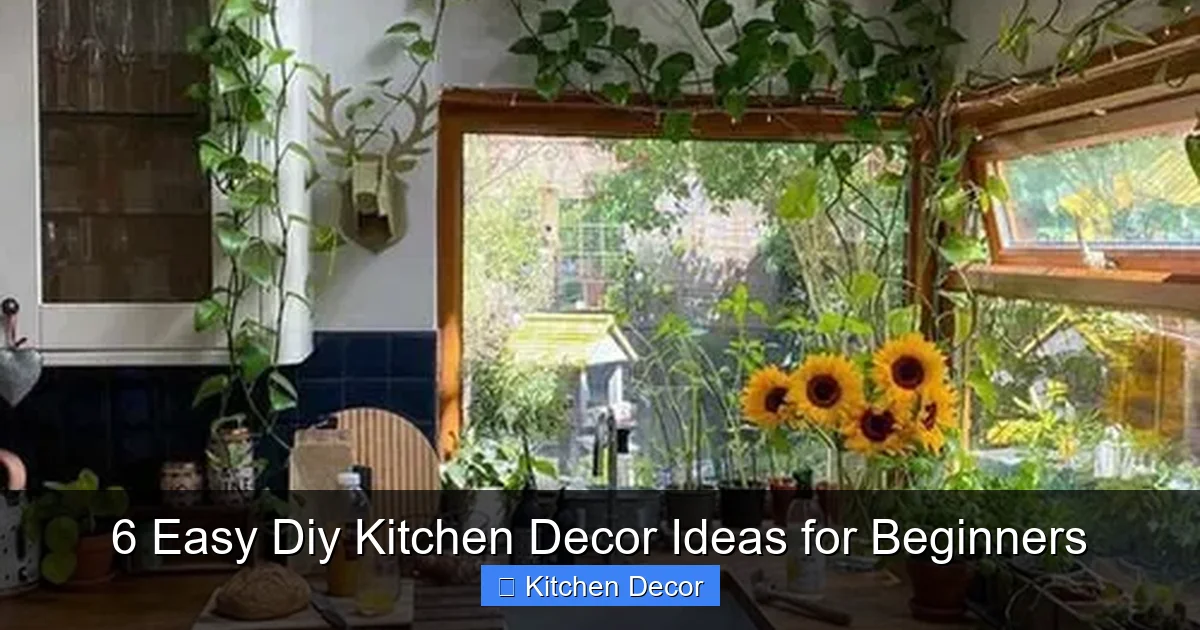
Adding a living element to your kitchen is a fantastic way to introduce freshness, color, and even delicious ingredients into your cooking. A DIY herb garden is one of those perfect DIY kitchen decor ideas that are both beautiful and functional. It’s incredibly satisfying to snip fresh basil or mint right from your windowsill.
Materials You’ll Need:
- Small pots or containers (terra cotta, ceramic, or repurposed cans/jars work well)
- Potting soil
- Herb seeds or small herb plants (basil, mint, rosemary, thyme, parsley are great for beginners)
- Small shovel or trowel
- Watering can or spray bottle
- Optional: Labels or plant markers
- Optional: Tray or saucer to catch excess water
Step-by-Step Instructions:
H3. Step 1: Choose Your Herbs and Containers
Select herbs that you love to cook with and that thrive in similar conditions. For beginners, choosing plants rather than seeds is often easier. As for containers, consider what fits your kitchen’s aesthetic. Terra cotta pots offer a rustic charm, while painted cans or modern ceramic pots can add a contemporary touch. Ensure your containers have drainage holes, or you’ll need to add a layer of pebbles at the bottom for drainage.
H3. Step 2: Prepare Your Containers
If your containers have drainage holes, great! If not, and you’re using repurposed items like cans, you might need to carefully drill a few small holes in the bottom. This prevents waterlogging, which can kill your herbs. If you’re using a tray, place it where your garden will live before adding soil.
H3. Step 3: Pot Your Herbs
- Fill your chosen containers with potting soil, leaving about an inch or two from the rim.
- If you’re using plant starters, gently remove the herb from its nursery pot, loosening any tightly packed roots. Place it in the new pot, ensuring the top of the root ball is level with the soil surface.
- If you’re planting seeds, follow the package instructions for depth and spacing. Generally, a few seeds per pot is a good start.
- Add more soil around the plant, gently patting it down to secure the herb in place.
H3. Step 4: Water and Place
Water your newly potted herbs thoroughly. A watering can with a narrow spout or a spray bottle works well to avoid disturbing the soil too much. Place your herb garden in a spot in your kitchen that receives plenty of sunlight – usually a south-facing window is ideal.
Practical Tips:
- Don’t Overwater: Most herbs prefer slightly drier soil. Check the soil moisture with your finger before watering again.
- Rotate Regularly: Turn your pots every few days to ensure all sides of the plant get adequate sunlight.
- Harvest Often: Regular harvesting encourages bushier growth and prevents herbs from “bolting” (going to seed too early).
- Label Your Herbs: Especially if you’re growing several similar-looking herbs, labels can prevent confusion!
3. Add Personality with a DIY Accent Wall or Chalkboard Wall

Visual guide about 6 Easy Diy Kitchen Decor Ideas for Beginners
Image source: statanalytica.com
Want to make a big statement without a major renovation? A DIY accent wall or chalkboard wall is one of the most transformative DIY kitchen decor ideas. It allows you to introduce color, texture, or even a functional message board into your kitchen with just a bit of paint and creativity. This project takes a little more time than hardware, but the payoff is huge!
Materials You’ll Need:
- Painter’s tape
- Drop cloths or old sheets
- Paint roller with tray
- Paint brushes (for edges and corners)
- Chosen paint color (latex interior paint for accent wall, or chalkboard paint for chalkboard wall)
- Stirring stick
- Lint-free rags (for cleanup)
- Optional for chalkboard: Chalk, eraser
Step-by-Step Instructions:
H3. Step 1: Choose Your Wall and Prepare the Area
Select a single wall in your kitchen that you want to highlight. This could be a wall next to your dining area, a small nook, or even the wall behind open shelving. Clear everything away from the wall. Lay down drop cloths to protect your floors and any nearby furniture. Use painter’s tape to create crisp lines around baseboards, ceiling, and adjacent walls.
H3. Step 2: Clean and Prime the Wall (Optional but Recommended)
Wipe down the wall with a damp cloth to remove any dust or grease, then let it dry completely. If your wall has a dark color and you’re going lighter, or if you’re using chalkboard paint, applying a coat of primer first can help the paint adhere better and reduce the number of paint coats needed. Let the primer dry according to the manufacturer’s instructions.
H3. Step 3: Apply Your Paint
- Accent Wall: Pour your chosen paint into the roller tray. Use a paintbrush to “cut in” along the edges, corners, and taped areas. Then, use the roller to apply paint to the larger sections of the wall in even strokes, working from top to bottom. Allow the first coat to dry completely before applying a second coat if needed. Two thin coats are always better than one thick one.
- Chalkboard Wall: Apply chalkboard paint the same way as regular paint. Pay close attention to the manufacturer’s instructions, especially regarding drying time between coats and the curing time before you can write on it. Usually, 2-3 coats are recommended for a durable chalkboard surface.
H3. Step 4: Remove Tape and Enjoy
Once the final coat of paint is dry to the touch (but not fully cured), carefully remove the painter’s tape. Pull it off at a 45-degree angle for the cleanest lines. For a chalkboard wall, wait the full curing time (often 3-7 days) before conditioning the surface by rubbing the side of a piece of chalk over the entire surface, then wiping it off.
Practical Tips:
- Ventilation is Key: Open windows while painting to ensure good air circulation.
- Small Areas First: For beginners, starting with a smaller, less prominent wall might be less intimidating.
- Chalkboard Fun: A chalkboard wall is perfect for grocery lists, recipes, family messages, or even kids’ drawings while you cook!
- Test a Patch: If unsure about a color, paint a small, inconspicuous patch first and let it dry to see how it looks in different lighting.
4. Style Your Open Shelving or a Decorative Nook
Visual guide about 6 Easy Diy Kitchen Decor Ideas for Beginners
Image source: justthewoods.com
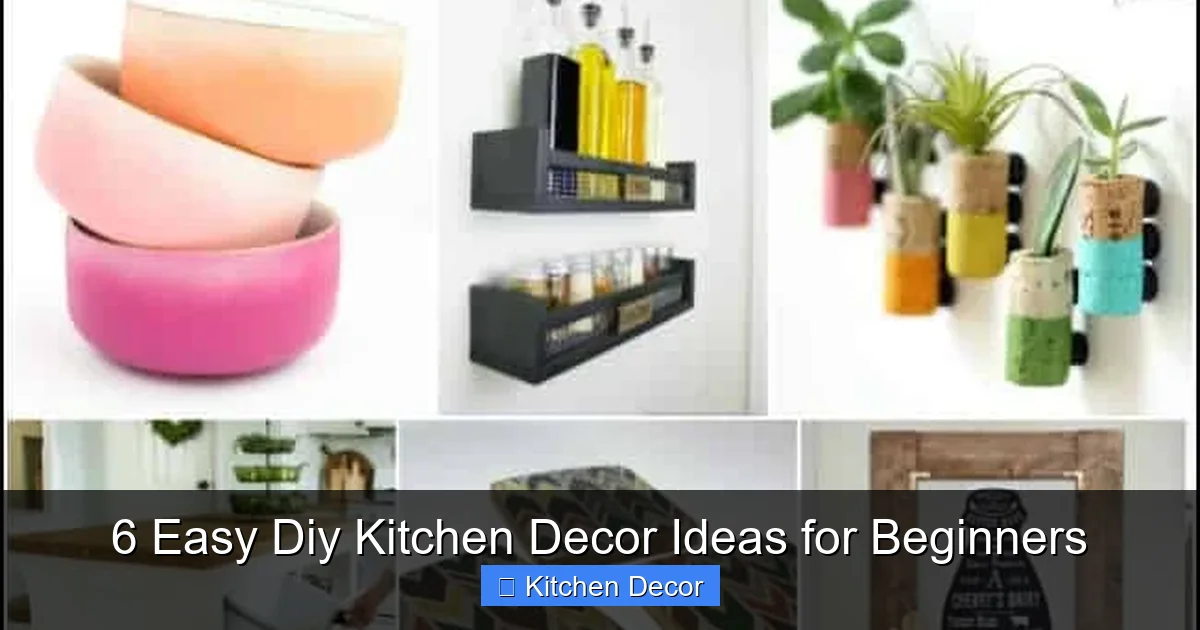
Open shelving has become a popular kitchen trend, offering a chance to display beautiful dishes, cookbooks, and decorative items. If you already have open shelves, or even just a small decorative nook, styling it creatively is one of the most satisfying DIY kitchen decor ideas. It’s all about composition and making your items look intentional and aesthetically pleasing.
Materials You’ll Need:
- Items to display: cookbooks, pretty dishes, small plants, decorative bowls, vintage finds, artwork, small cutting boards, etc.
- Clean cloth for dusting
Step-by-Step Instructions:
H3. Step 1: Declutter and Clean
First things first: remove everything from your shelves or nook. Give the shelves a thorough cleaning. This provides a fresh canvas for your styling. Take this opportunity to declutter anything you don’t truly love or use regularly.
H3. Step 2: Gather Your Potential Display Items
Collect all the items you’re considering for display. Lay them out on a counter or table so you can see everything you have. Think about items that fit your kitchen’s style, are visually appealing, or hold sentimental value. Consider varying heights, textures, and materials.
H3. Step 3: Start with Larger Anchor Pieces
Begin by placing your largest items first. These are your “anchors.” This might be a stack of cookbooks, a tall vase, or a large decorative platter. Distribute these pieces across the shelves to create balance. Don’t be afraid to leave some empty space; open shelving shouldn’t feel crammed.
H3. Step 4: Layer and Group Smaller Items
Once your anchors are in place, start layering in medium and smaller items.
- Use the “Rule of Three”: Items often look best when grouped in odd numbers (especially three).
- Vary Heights: Place taller items next to shorter ones to create visual interest.
- Mix Textures: Combine smooth ceramics with rough wood, or glass with woven baskets.
- Add Greenery: A small potted plant (like your new herbs!) or a faux plant can bring life to the shelves.
- Personal Touches: Include a framed photo, a unique souvenir, or a piece of art that reflects your personality.
H3. Step 5: Step Back and Adjust
After placing everything, step back and look at your shelves from a distance. Does it feel balanced? Is there too much or too little? Is the color palette cohesive? Don’t be afraid to rearrange, swap items, or even remove things until it feels just right. This is a creative process, and there’s no single “right” way.
Practical Tips:
- Less is More: Open shelves can quickly look cluttered. Be selective about what you display.
- Color Cohesion: Stick to a consistent color palette, or use a few accent colors to tie things together.
- Functional & Beautiful: Display everyday items like your favorite coffee mugs or mixing bowls if they’re pretty!
- Dust Regularly: Open shelves are dust magnets, so make dusting part of your routine.
5. Craft Your Own DIY Kitchen Art or Signage
Nothing says “personal touch” quite like custom artwork or a unique sign. Creating your own DIY kitchen art is one of the most enjoyable DIY kitchen decor ideas, allowing you to express your creativity and tailor pieces specifically to your space. You don’t need to be an artist to make something charming!
Materials You’ll Need:
- Canvas, wooden board, or a framed picture (from a thrift store perhaps!)
- Acrylic paints, chalk paint, or permanent markers
- Paint brushes, stencils, sponges
- Pencil and eraser
- Optional: Jute twine, small hooks for hanging, clear sealant spray
- Inspiration: Quotes, kitchen motifs (coffee cups, whisks), simple patterns
Step-by-Step Instructions:
H3. Step 1: Choose Your Medium and Concept
Decide what kind of art you want to create. Will it be a painted sign with a witty kitchen quote? A simple abstract piece with colors that match your decor? Or perhaps a stenciled design?
- Canvas/Wood: A simple stretched canvas or a flat piece of wood (even a cutting board!) makes a great base.
- Repurposed Frame: Find an old frame, remove the existing art, and paint directly onto the backing board or insert your new creation.
H3. Step 2: Prepare Your Base
If using a wooden board or a thrifted frame backing, you might want to sand it lightly and apply a coat of primer or a base color first. For canvases, they are usually pre-primed. If you’re using a stencil, ensure your surface is clean and dry.
H3. Step 3: Sketch Your Design (Optional)
If you’re painting words or a specific image, lightly sketch your design onto your chosen base with a pencil. Don’t press too hard, as you want to be able to erase mistakes or cover them with paint. For quotes, you can print out your chosen font and trace it, or freehand it if you feel confident.
H3. Step 4: Bring Your Art to Life
- Painting: Use your acrylic or chalk paints to fill in your design. Start with lighter colors and move to darker ones. Allow each layer to dry before adding the next, especially if you’re layering colors. Use different brush sizes for details and larger areas.
- Stenciling: Secure your stencil in place with painter’s tape. Apply paint with a sponge or a stenciling brush, dabbing gently rather than brushing to prevent paint from bleeding under the stencil.
- Markers: For simple text or line art, permanent markers can be excellent, especially on lighter backgrounds.
H3. Step 5: Finish and Display
Once your paint or ink is completely dry, you can add any final touches. If your art will be in a high-traffic area or near water, consider spraying it with a clear sealant (matte or glossy, depending on your preference) to protect it. Then, find the perfect spot in your kitchen to hang or display your new masterpiece!
Practical Tips:
- Use Templates: Don’t be afraid to use stencils, printouts, or even free online clip art as a guide.
- Practice on Scrap: If you’re nervous, practice your design or painting technique on a scrap piece of paper or cardboard first.
- Hand-Lettering: For a rustic look, imperfect hand-lettering often adds charm!
- Kitchen-Themed Quotes: “Coffee First,” “Eat Well Laugh Often Love Much,” or “The Secret Ingredient Is Always Love” are popular kitchen sentiments.
6. Refresh with Textiles: Rugs, Curtains, and Dishtowels
This is perhaps the easiest and most versatile of all DIY kitchen decor ideas. Textiles are fantastic for instantly adding warmth, color, pattern, and texture to your kitchen. The best part? They are incredibly easy to swap out seasonally or whenever you fancy a change, without any commitment.
Materials You’ll Need:
- Kitchen rug or runner
- Kitchen curtains or valance
- Dishtowels and/or oven mitts
- Optional: Small decorative throw pillow for a banquette or breakfast nook
Step-by-Step Instructions:
H3. Step 1: Assess Your Current Kitchen Style and Color Palette
Before you start shopping, take a good look at your kitchen. What colors are dominant? What’s the overall style (farmhouse, modern, traditional, eclectic)? You want your new textiles to complement or enhance these existing elements, not clash with them.
H3. Step 2: Choose Your Kitchen Rug or Runner
- Functionality First: For the kitchen, durability and easy cleaning are key. Look for rugs made from synthetic fibers, cotton, or wool blends that can withstand spills and heavy foot traffic. Non-slip backing is a must for safety.
- Placement: A runner often works well in front of a sink or stove. A larger area rug can define a dining nook.
- Color/Pattern: A rug is a great way to introduce a bold pattern or a pop of color. Or, choose a neutral rug for a calming base.
H3. Step 3: Select Kitchen Curtains or a Valance
- Light Control vs. Privacy: Consider how much light you want to let in and how much privacy you need. Sheer curtains offer filtered light, while heavier fabrics provide more privacy.
- Style: A simple valance adds a decorative touch without blocking too much light. Cafe curtains cover only the lower half of the window, offering privacy while still letting light in.
- Installation: Most kitchen curtains are lightweight and can be hung on a tension rod or a simple curtain rod with minimal fuss.
H3. Step 4: Update Dishtowels, Oven Mitts, and Other Linens
These small items can make a surprisingly big difference.
- Coordinated Sets: Look for dishtowels, oven mitts, and pot holders that come in coordinated sets or colors that complement your new rug and curtains.
- Seasonal Swaps: This is an inexpensive way to update your kitchen for holidays or changing seasons. Think warm reds and greens for winter, bright florals for spring.
- Functional & Decorative: Hang a pretty dishtowel over your oven handle or from a hook to add a touch of color.
Practical Tips:
- Layer Textures: Combine different textures, like a woven rug with soft cotton curtains, to add depth.
- Mix Patterns (Carefully): If you have a patterned rug, choose a more subtle or solid curtain, and vice versa. Or, mix patterns within the same color family for a cohesive but interesting look.
- Don’t Forget the Table: A new tablecloth or placemats can also tie your textile theme together beautifully.
- Washability: Always check the care instructions for all kitchen textiles – easy washing is a priority!
Troubleshooting Common Beginner DIY Issues
Even with easy projects, questions can pop up. Here are a few common beginner concerns:
- “My paint looks streaky!” This often happens if the paint is too thin, the roller isn’t fully loaded, or you’re applying uneven pressure. Try another thin coat, ensuring even application. Quality brushes and rollers make a difference.
- “My new hardware screws don’t fit.” Double-check the length of the screws. Sometimes, the hardware comes with different screw lengths. If not, you might need to buy slightly longer or shorter screws from a hardware store.
- “My herb plants are wilting.” This is usually due to overwatering, underwatering, or not enough light. Check the soil moisture, ensure good drainage, and move your plant to a sunnier spot if needed.
- “My open shelves still look messy.” Step back! Remove one or two items. Focus on creating “breathing room.” Try grouping items by color or type. Sometimes, less truly is more.
Conclusion
Congratulations! You’ve just explored six incredibly easy DIY kitchen decor ideas that are perfect for beginners. We hope this guide has shown you just how accessible and rewarding it can be to personalize your kitchen without professional help or a huge budget. From the simple satisfaction of updating cabinet hardware to the creative joy of painting an accent wall or cultivating your own herb garden, each of these projects offers a unique way to inject personality and style into the heart of your home.
Remember, DIY kitchen decor is a journey, not a race. Start with one project that excites you the most, take your time, and enjoy the process. Don’t be afraid to experiment, make it your own, and celebrate your progress. Your kitchen is a reflection of you, and with these easy DIY ideas, it’s about to become even more special. Happy decorating!