Ready for a kitchen refresh without breaking the bank or committing to a major reno? This guide reveals 10 fantastic DIY kitchen decor ideas that offer a quick and stunning makeover. Learn how to transform your space with simple projects like updating hardware, adding peel-and-stick backsplashes, refreshing cabinets, and incorporating personal touches, making your kitchen feel brand new in no time. Achieve a stylish, personalized kitchen on any budget with these impactful and easy-to-follow projects.
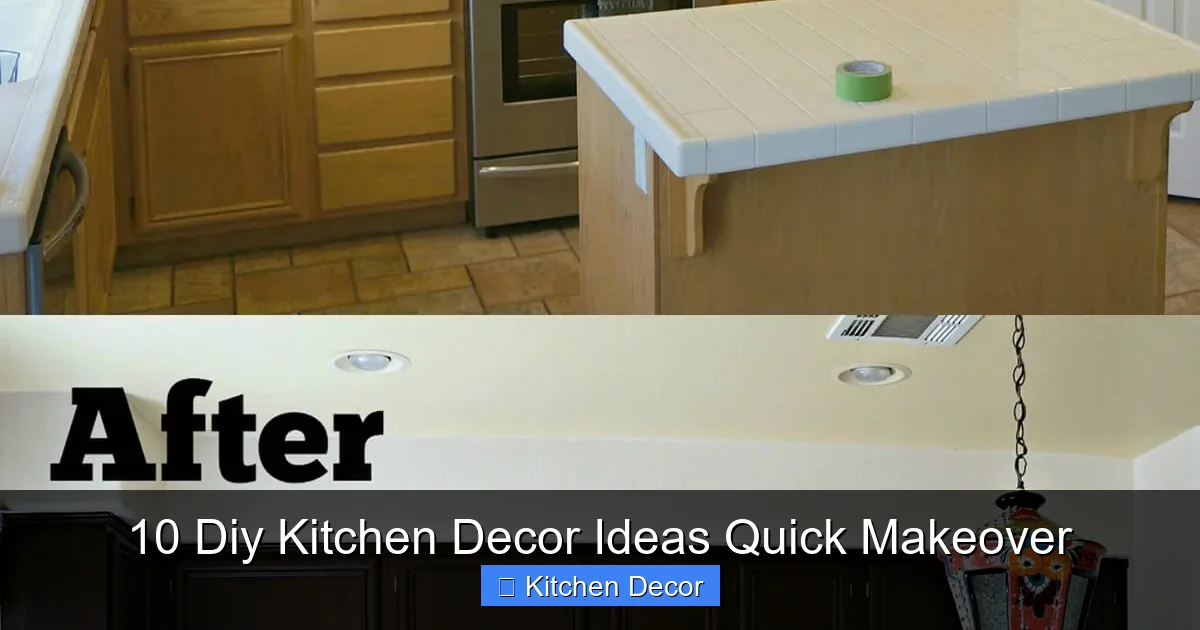
10 Diy Kitchen Decor Ideas Quick Makeover
Does your kitchen feel a little tired? Are you dreaming of a fresh, new look but dreading the thought of a costly, time-consuming renovation? You’re in the right place! Giving your kitchen a stunning makeover doesn’t have to involve demolition crews or emptying your savings account. With a bit of creativity, a dash of elbow grease, and some smart DIY choices, you can completely transform your space. This guide is packed with 10 DIY kitchen decor ideas quick makeover projects that are big on impact but easy on your wallet and your schedule.
We’ll walk you through simple, actionable steps to revitalize your kitchen, making it feel more modern, organized, and truly yours. From updating hardware to creating charming coffee nooks, these ideas prove that a dramatic change is well within your reach. Get ready to fall in love with your kitchen all over again!
Key Takeaways
- Small Changes, Big Impact: Discover how seemingly minor updates like new hardware or vibrant textiles can drastically alter your kitchen’s aesthetic and feel, creating a cohesive and fresh look.
- Budget-Friendly Transformation: Learn to achieve a high-end look without a high-end price tag. These DIY kitchen decor ideas prove that significant makeovers don’t require expensive renovations.
- Diverse Decor Options: Explore a wide range of projects, from functional upgrades like painting cabinets and updating lighting to purely decorative touches such as adding plants or creating personalized wall art, ensuring there’s an idea for every skill level and preference.
- Personalize Your Space: This guide empowers you to infuse your unique style and personality into your kitchen, making it a truly bespoke and inviting area that reflects you.
- Time-Efficient Projects: All 10 ideas are selected for their “quick makeover” potential, allowing you to see noticeable results in a short amount of time, perfect for busy schedules.
- No Renovation Experience Needed: These DIY projects are designed to be accessible to everyone, regardless of prior home improvement experience, providing clear, step-by-step instructions.
- Boost Functionality and Style: Many ideas offer a dual benefit, not only enhancing the visual appeal but also improving the organization, lighting, or overall usability of your kitchen space.
1. Refresh Cabinets with a Fresh Coat of Paint
Why Paint Your Cabinets?
Painting your kitchen cabinets is arguably one of the most impactful yet budget-friendly ways to give your entire kitchen a dramatic facelift. It’s a cornerstone for any serious DIY kitchen decor ideas quick makeover. A new color can completely change the mood, brighten the space, or introduce a modern aesthetic without the expense of replacing entire units. Whether you go for a crisp white, a trendy gray, or a bold accent color, painted cabinets instantly elevate your kitchen’s style.
Materials You’ll Need:
- Painter’s tape and drop cloths
- Screwdriver (for hardware removal)
- Degreaser/cleaner
- Fine-grit sandpaper (180-220 grit)
- Primer (cabinet-specific)
- Cabinet paint (high-quality, durable finish)
- Paintbrushes and rollers (foam rollers for smooth finish)
- Protective gloves and mask
Step-by-Step Cabinet Painting:
Prep is Key:
This is where most of your effort should go. First, empty your cabinets. Then, remove all cabinet doors and drawer fronts. Label them clearly so you know where they go back! Take off all existing hardware (knobs, pulls, hinges). Clean every surface thoroughly with a degreaser to remove grease and grime. Lightly sand all surfaces to create a good adhesion for the paint. Wipe away all dust.
Prime Time:
Apply one to two coats of high-quality primer. Primer helps the paint stick better and provides an even base, especially if you’re changing a dark color to a light one. Let it dry completely between coats as per product instructions.
Paint Away:
Once primed and dry, apply your first thin coat of cabinet paint. Use a good quality brush for edges and corners, and a foam roller for flat surfaces to achieve a smooth finish. Avoid thick coats, as they can drip or leave brush marks. Let it dry completely, then lightly sand with very fine grit sandpaper, clean, and apply a second coat. You might need a third coat for full coverage.
Reassemble:
After all paint is fully cured (this can take several days!), carefully reattach the hardware, then hang your doors and reinstall your drawer fronts. Stand back and admire your handiwork – your kitchen will feel like a brand new space!
Pro Tip:
Consider painting only your upper cabinets white and your lower cabinets a contrasting darker color (like navy or charcoal) for a popular two-tone effect. This offers a modern look with less commitment than painting everything one bold shade.
2. Update Cabinet Hardware
The Power of Small Details
If painting your cabinets feels like too big a project for your “quick makeover” goals, start smaller but equally impactful: change your cabinet hardware! New knobs, pulls, and hinges can instantly modernize your kitchen, matching your evolving style without any paint or sanding. This is one of the easiest kitchen decor ideas quick makeover that yields immediate satisfaction.

Visual guide about 10 Diy Kitchen Decor Ideas Quick Makeover
Image source: i.pinimg.com
Materials You’ll Need:
- New knobs and/or pulls
- Screwdriver (manual or electric)
- Measuring tape (if drilling new holes)
- Drill (if new holes are needed)
- Hardware jig (optional, for precise drilling)
Step-by-Step Hardware Swap:
Remove Old Hardware:
Simply unscrew and remove your existing knobs and pulls from cabinet doors and drawers. Keep the old screws handy if you plan to reuse them or compare their length to the new ones.
Install New Hardware:
If your new hardware has the same hole spacing as the old, this step is incredibly quick! Just screw the new pieces into place. Make sure they are snug but not overtightened.
Drilling New Holes (if necessary):
If your new hardware requires different hole spacing, you’ll need to fill the old holes with wood filler, sand smooth, and then paint over them. Once dry, carefully measure and mark the new drill points. Use a hardware jig for accuracy if you have one. Drill slowly and carefully to avoid splintering the wood. Then, screw in your new hardware.
Pro Tip:
Mix and match! Use knobs on upper cabinets and pulls on lower cabinets or drawers for a custom, designer look. Matte black, brushed brass, and polished nickel are popular finishes that can instantly elevate any kitchen style.
3. Install a Peel-and-Stick Backsplash
Instant Wall Transformation
A backsplash is a fantastic focal point in any kitchen, but traditional tile installation can be messy, expensive, and time-consuming. Enter peel-and-stick backsplashes! This innovative solution allows for an incredibly fast and stylish transformation, perfect for any DIY kitchen decor ideas quick makeover. It’s renter-friendly and comes in a huge variety of styles, from subway tile to mosaic patterns.

Visual guide about 10 Diy Kitchen Decor Ideas Quick Makeover
Image source: deavita.net
Materials You’ll Need:
- Peel-and-stick backsplash tiles
- Measuring tape
- Utility knife or sharp scissors
- Ruler or straight edge
- Level
- Cleaning spray and cloth
Step-by-Step Backsplash Magic:
Clean and Measure:
Thoroughly clean the wall surface where the backsplash will go. It needs to be smooth, dry, and free of grease. Measure the area carefully, calculating how many tile sheets you’ll need. It’s always a good idea to buy a bit extra for cuts and mistakes.
Plan Your Layout:
Lay out your tiles on a flat surface to visualize the pattern and make sure you like the arrangement. Decide where you’ll start – typically from a corner or the center of the most visible wall section.
Peel and Stick:
Starting from your chosen point, peel back a small section of the adhesive backing. Carefully align the tile sheet with your measured line or the adjacent tile, pressing it firmly onto the wall. Work your way across, slowly peeling more of the backing and pressing down to ensure good adhesion and to smooth out any air bubbles.
Cut as Needed:
Use a utility knife or sharp scissors and a straight edge to cut tiles around outlets, corners, or to fit end pieces. Take your time with these cuts for a professional finish.
Pro Tip:
Use a clean, dry cloth or a plastic squeegee to firmly press down each tile piece after application. This helps create a strong bond and smooths out any bumps, giving you a truly seamless and durable finish for your new kitchen aesthetic.
4. Create Open Shelving
Lighten Up Your Walls
Open shelving is a beloved trend that adds airiness and personality to a kitchen. If you have a few upper cabinets that feel bulky or overwhelming, removing them and installing simple open shelves can instantly make your kitchen feel larger and more modern. It’s a prime example of a stylish kitchen decor ideas quick makeover that impacts both form and function.

Visual guide about 10 Diy Kitchen Decor Ideas Quick Makeover
Image source: averageinspired.com
Materials You’ll Need:
- Shelving boards (wood, laminate, etc.)
- Shelf brackets
- Drill
- Level
- Stud finder
- Screws (appropriate for studs and brackets)
- Screwdriver
Step-by-Step Open Shelving:
Remove Cabinets:
Carefully empty and remove any existing upper cabinets. You might need a helper for this step. Patch any holes and touch up paint if necessary.
Locate Studs:
Use a stud finder to locate and mark the studs in the wall where you plan to install your shelves. Attaching shelves to studs is crucial for stability and safety, especially in a kitchen where items can be heavy.
Install Brackets:
Using a level, mark where your brackets will go. Ensure they are evenly spaced and perfectly level. Securely screw the brackets into the wall studs.
Place Shelves:
Rest your chosen shelving boards on the installed brackets. If your brackets allow, secure the shelves to the brackets from underneath or on top with small screws for added stability.
Style Your Shelves:
Now for the fun part! Display your favorite dishes, glassware, cookbooks, or decorative items. Mix functional pieces with a few decorative accents for a balanced look.
Pro Tip:
Don’t overcrowd your open shelves. Curate a collection of items that are both beautiful and frequently used. Consider a consistent color palette for your displayed items to maintain a cohesive and uncluttered aesthetic.
5. Upgrade Lighting Fixtures
Brighten Your Outlook
Often overlooked, lighting can dramatically alter the ambiance and functionality of your kitchen. Swapping out an old, outdated fixture for something more modern or adding new accent lighting is an excellent DIY kitchen decor ideas quick makeover. Better lighting can make your space feel larger, brighter, and more inviting, improving both mood and task visibility.
Materials You’ll Need:
- New light fixture (pendant, flush mount, etc.)
- Screwdriver
- Wire strippers
- Voltage tester
- Ladder or step stool
- (Optional) Under-cabinet LED strip lights
Step-by-Step Lighting Upgrade:
Safety First:
ALWAYS turn off the power to your kitchen at the circuit breaker before beginning any electrical work. Test the wires with a voltage tester to ensure the power is completely off.
Remove Old Fixture:
Carefully unscrew and disconnect the old light fixture, noting which wires connect to which (usually black to black, white to white, and ground to ground).
Install New Fixture:
Follow the manufacturer’s instructions for your new fixture. Typically, you’ll connect the corresponding wires, secure them with wire nuts, and then attach the fixture to the electrical box in the ceiling or wall. Have a helper hold the fixture if it’s heavy.
Test and Secure:
Once wired, carefully push the wires back into the electrical box and secure the fixture cover. Turn the power back on and test your new light!
Consider Under-Cabinet Lighting:
For an extra touch, install battery-operated or plug-in LED strip lights under your upper cabinets. These provide excellent task lighting and a beautiful ambient glow, making them a superb addition to any quick kitchen update.
Pro Tip:
Don’t be afraid to experiment with different bulb types. Warm white bulbs create a cozy atmosphere, while daylight bulbs offer crisp, bright task lighting. Dimmer switches are also a fantastic addition for controlling the mood.
6. Refresh Countertops with Contact Paper or Paint Kit
Temporary Countertop Facelift
Replacing countertops is a huge expense, but you can achieve a stunning temporary transformation with specialized contact paper or a countertop paint kit. This is a brilliant solution for any DIY kitchen decor ideas quick makeover, especially if you’re on a tight budget or living in a rental. You can mimic the look of marble, granite, or concrete for a fraction of the cost.
Materials You’ll Need:
- Specialized contact paper for countertops OR countertop paint kit
- Measuring tape
- Utility knife or sharp scissors
- Squeegee or credit card (for contact paper)
- Painter’s tape and drop cloths (for paint kit)
- Primer, base coat, top coat (included in paint kits)
- Rollers and brushes (for paint kit)
Step-by-Step Countertop Refresh:
Clean and Prep:
Thoroughly clean your countertops, removing all grease and grime. Ensure they are completely dry. If using contact paper, ensure the surface is smooth. If using a paint kit, lightly sand the surface according to the kit’s instructions.
Contact Paper Application:
Measure your countertop sections carefully. Cut the contact paper to size, leaving a few extra inches on all sides. Peel back a small portion of the backing, align the paper, and slowly unroll while pressing down and smoothing with a squeegee to remove air bubbles. Trim excess with a utility knife.
Paint Kit Application:
Follow your specific paint kit instructions, which typically involve applying a primer, then a decorative base coat (often with flecks to mimic stone), and finally several layers of a durable top coat. Allow proper drying time between each coat. Tape off any adjacent walls or sinks with painter’s tape.
Pro Tip:
Work in small sections, especially with contact paper, to avoid trapping air bubbles. For paint kits, ensure good ventilation and apply thin, even coats to achieve a professional-looking, durable finish.
7. Decorate with Plants and Herbs
Bring Nature Indoors
Adding greenery is one of the simplest yet most effective kitchen decor ideas quick makeover. Plants bring life, color, and a sense of freshness to any space. They can also improve air quality! Herbs like basil, mint, or rosemary add both beauty and functionality, offering fresh ingredients right at your fingertips.
Materials You’ll Need:
- Potted plants (spider plants, snake plants, succulents, pothos are great for kitchens)
- Potted herbs (basil, mint, rosemary, chives)
- Decorative planters or pots
- Small watering can
How to Green Your Kitchen:
Choose the Right Plants:
Select plants that thrive in your kitchen’s specific conditions (light levels, humidity). Low-maintenance options are ideal. For herbs, consider a sunny windowsill.
Placement is Key:
Place larger plants on countertops, on top of cabinets, or on open shelves. Hang smaller plants from the ceiling or a wall hook. A cluster of small succulents can look charming on a windowsill or a tiered tray.
Use Stylish Planters:
Don’t just use the nursery pots. Transfer your plants to decorative planters that complement your kitchen’s style. Ceramic, terracotta, or even sleek metal pots can make a statement.
Pro Tip:
Consider a vertical herb garden for small kitchens. Wall-mounted planters or a tiered stand can hold multiple herbs, maximizing space while adding a vibrant, aromatic focal point to your kitchen update.
8. Create a Dedicated Coffee or Tea Bar
Cozy and Organized Corner
Carving out a dedicated coffee or tea station is a wonderful way to add charm and functionality to your kitchen. It organizes your brewing essentials, frees up counter space elsewhere, and creates a cozy, inviting spot. This is a delightful addition to your list of kitchen decor ideas quick makeover.
Materials You’ll Need:
- Small dedicated counter space or a rolling cart
- Coffee maker/tea kettle
- Mugs or teacups
- Small shelves or a tray
- Decorative jars or containers for sugar, coffee beans, tea bags
- Small piece of art or a sign
Step-by-Step Coffee Bar Setup:
Designate Your Space:
Find an unused corner of your countertop, a small console table, or a rolling utility cart that can serve as your coffee/tea bar. Ensure it’s near an electrical outlet.
Gather Essentials:
Collect all your coffee maker, kettle, mugs, sugar, and stirrers in this one spot. Use attractive containers for coffee grounds or tea bags to keep things tidy and appealing.
Add Storage and Style:
Install a small floating shelf above the bar for displaying mugs or small decorative items. Use a pretty tray to corral smaller items. Add a personal touch with a small piece of art, a plant, or a whimsical sign.
Pro Tip:
Consider a small chalkboard or whiteboard where you can write down daily coffee quotes or grocery list reminders. This adds a personalized, functional touch to your cozy new station.
9. DIY Wall Art or Gallery Wall
Personalize Your Space
Bare walls can make a kitchen feel cold and uninviting. Adding DIY wall art or creating a gallery wall is a fantastic way to inject personality and color into your space. It’s an affordable and highly customizable DIY kitchen decor ideas quick makeover that lets your creativity shine.
Materials You’ll Need:
- Picture frames (various sizes, or uniform for a cohesive look)
- Prints, photos, or your own artwork
- Command strips or nails and a hammer
- Measuring tape and level
- (Optional) Paint, canvas, brushes for DIY artwork
Step-by-Step Wall Art Creation:
Choose Your Art:
Select prints, photos, or create your own art that suits your kitchen’s style. Consider themes like food, vintage advertising, abstract patterns, or family photos. Print out free printables online for a super budget-friendly option.
Frame It Up:
Place your chosen art into frames. You can upcycle old frames with a coat of spray paint for a fresh look.
Plan Your Layout:
Lay your framed art on the floor to experiment with different arrangements for your gallery wall. Take a picture of your favorite layout. Use painter’s tape to mark where each frame will go on the wall before hanging.
Hang with Care:
Using Command strips (great for renters!) or nails, carefully hang your frames. Use a level to ensure everything is straight and spaced correctly.
Pro Tip:
For an extra touch, incorporate a kitchen-themed clock or a small mirror into your gallery wall. This adds depth and functionality while enhancing the overall aesthetic of your kitchen decor ideas quick makeover.
10. Add Textile Accents: Rugs, Dish Towels, and Curtains
Softness and Style
Textiles are often underestimated in kitchen decor, but they play a huge role in adding warmth, color, and personality. Swapping out old dish towels, adding a stylish rug, or hanging new window treatments can instantly refresh your kitchen’s look. This is the ultimate “quick and easy” element among kitchen decor ideas quick makeover.
Materials You’ll Need:
- Kitchen rug or runner
- New dish towels and oven mitts
- Window curtains, valances, or blinds
- Curtain rod (if needed)
How to Add Textile Charm:
Roll Out a Rug:
A kitchen rug or runner can define a space, add comfort underfoot, and introduce color or pattern. Choose a rug that is durable, easy to clean, and slip-resistant. Place it in front of the sink, stove, or along a main walkway.
Swap Out Dish Towels:
This is arguably the quickest change! Invest in a set of new, colorful, or patterned dish towels and oven mitts that complement your kitchen’s color scheme. Hang them over the oven handle or from a decorative hook.
Update Window Treatments:
Old, faded curtains can drag down a kitchen’s appeal. Replace them with fresh, clean curtains, a simple valance, or even a sleek roller blind. Consider light-filtering fabrics to let in natural light while maintaining privacy.
Pro Tip:
Coordinate your textile choices. Pick a main color and an accent color, then select your rug, towels, and curtains within that palette for a cohesive, designer-like finish. This elevates your quick kitchen update to a new level of sophistication.
Troubleshooting & General Tips for Your DIY Kitchen Makeover
- Don’t Rush the Prep: Whether painting, sticking, or building, the quality of your preparation directly impacts the final result. Cleaning, sanding, and measuring accurately will save you headaches later.
- Test, Test, Test: For paint colors, always buy a small sample pot and paint a patch on your wall or a piece of cardboard to see how it looks in different lights throughout the day.
- Measure Twice, Cut Once: This age-old adage is especially true for anything involving cuts (backsplash, shelves, contact paper).
- Patience is a Virtue: Allow adequate drying times for paint and adhesives. Rushing can lead to a less durable and less attractive finish.
- Enlist Help: Some projects, like removing cabinets or installing light fixtures, are much easier and safer with an extra pair of hands.
- Ventilation is Key: When painting or using strong adhesives, always ensure your kitchen is well-ventilated by opening windows and using fans.
- Embrace Imperfection: It’s DIY! A few minor imperfections add character and remind you of the effort and love you put into your space.
Conclusion
There you have it – 10 DIY kitchen decor ideas quick makeover projects that prove you don’t need a massive budget or endless time to achieve a kitchen you adore. From transforming your cabinets with a fresh coat of paint to adding vibrant greenery and personal touches, each of these ideas offers a straightforward path to a more beautiful and functional kitchen. By tackling these projects, you’re not just redecorating; you’re creating a space that genuinely reflects your style and enhances your daily life.
So, pick an idea (or two, or three!), gather your materials, and get ready to unleash your inner interior designer. Your dream kitchen makeover is closer and easier than you think. Happy DIYing!