Discover 11 fantastic DIY kitchen decor ideas with wooden crates that are not only budget-friendly but also add rustic charm and practical storage to your culinary space. From stylish shelves to clever organizational solutions, these projects empower you to create a personalized, warm, and inviting kitchen with simple tools and a little creativity. Learn how to repurpose crates into beautiful and functional elements that reflect your unique style.
11 Diy Kitchen Decor Ideas with Wooden Crates
Are you dreaming of a kitchen with character, charm, and clever organization, all without breaking the bank? If so, you’ve come to the right place! Wooden crates are unsung heroes of DIY decor, offering an incredible canvas for creativity, especially when it comes to transforming your kitchen. These humble wooden boxes can be repurposed into everything from stylish shelving to ingenious storage solutions, adding a touch of rustic appeal and a whole lot of functionality.
This comprehensive guide will walk you through 11 fantastic diy kitchen decor ideas with wooden crates. We’ll show you how to turn simple crates into beautiful and practical elements for your home, complete with step-by-step instructions, essential tips, and creative variations. Get ready to grab your tools, unleash your inner decorator, and discover just how much you can achieve with a few wooden crates and a splash of imagination. Let’s dive into these exciting projects!
Key Takeaways
- Versatile Decor: Wooden crates are incredibly versatile, offering endless possibilities for shelves, storage, organizers, and even furniture in your kitchen.
- Budget-Friendly Transformation: Repurposing wooden crates is an affordable way to refresh your kitchen decor without spending a fortune.
- Personalized Style: Each project can be customized with paint, stain, fabric, or hardware to perfectly match your kitchen’s existing aesthetic or create a new look.
- Basic Tools Required: Most of these DIY projects require only common household tools like sandpaper, a drill, screws, and paint brushes, making them accessible for beginners.
- Functionality Meets Aesthetics: These ideas combine practical storage and organizational solutions with rustic charm, enhancing both the look and usability of your kitchen.
- Prioritize Preparation & Safety: Always clean and sand your crates thoroughly to remove splinters and dirt. Use appropriate safety gear and secure wall-mounted items properly for stability.
Before You Begin: Crate Preparation Essentials
No matter which of these diy kitchen decor ideas with wooden crates you choose, proper preparation is key. Always start by:
- Cleaning: Wipe down your crates thoroughly to remove any dirt, dust, or debris.
- Sanding: Lightly sand any rough edges or surfaces to prevent splinters and create a smooth finish, especially if the crates will be handled frequently. Use fine-grit sandpaper for the best results.
- Optional Finishing: Decide if you want to paint, stain, or seal your crates. Paint can add a pop of color, stain enhances the wood’s natural grain, and a clear sealant protects against moisture and wear. Always allow adequate drying time between coats.
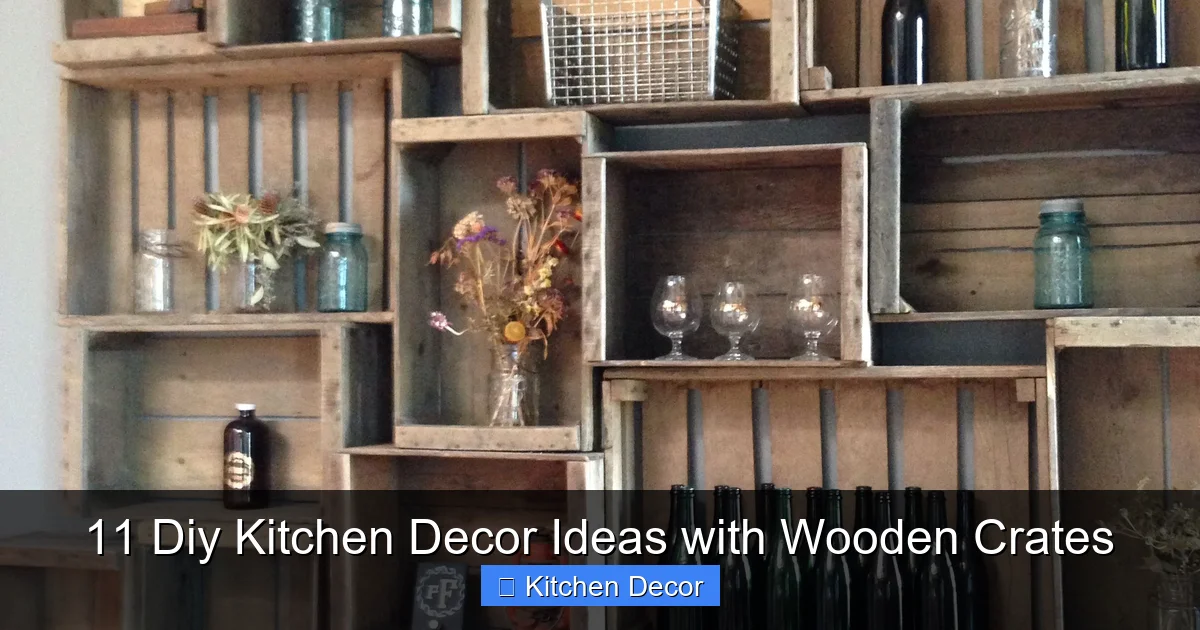
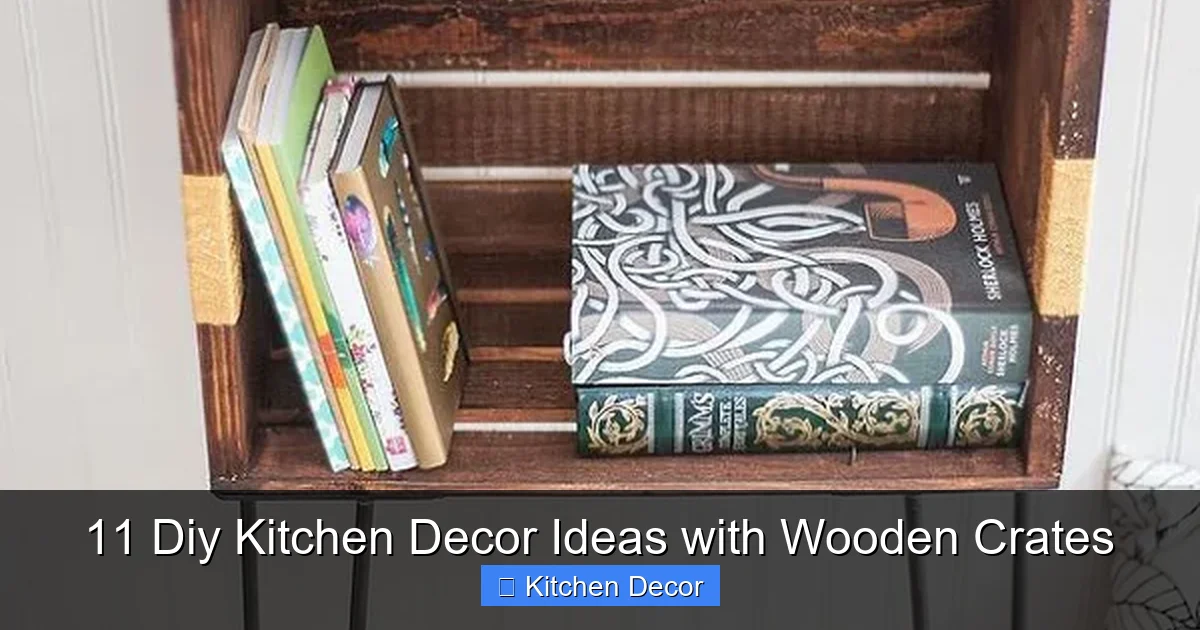
1. Rustic Wall-Mounted Shelving Unit
One of the most popular and effective diy kitchen decor ideas with wooden crates is creating a rustic wall-mounted shelving unit. This project adds instant visual interest and much-needed storage space for cookbooks, dishes, or decorative items. It’s an excellent way to utilize vertical space and infuse character into your kitchen.
Visual guide about 11 Diy Kitchen Decor Ideas with Wooden Crates
Image source: homemydesign.com
Materials Needed:
- 1-4 sturdy wooden crates (depending on desired size)
- Sandpaper (fine-grit)
- Paint, stain, or clear sealant (optional)
- Drill and screws (suitable for wood and wall anchors)
- Wall anchors (if not drilling into studs)
- Level
- Measuring tape
Step-by-Step Instructions:
-
Prepare Your Crates
Clean and sand all your wooden crates as described in the “Before You Begin” section. Apply paint, stain, or sealant if desired, allowing them to dry completely.
-
Plan Your Layout
Arrange your crates on the floor in the desired configuration. You can stack them vertically, arrange them horizontally, or create an asymmetrical design. Consider what you’ll be storing to ensure the openings face the most convenient direction.
-
Mark Wall Placement
Hold the first crate against the wall in your chosen spot. Use a level to ensure it’s straight, then lightly mark the top and bottom corners with a pencil. Repeat for all crates, ensuring proper spacing and alignment.
-
Secure Crates to the Wall
Using your drill, pre-drill holes through the back of each crate where it will attach to the wall. Align the crate with your pencil marks. If possible, drill directly into wall studs for maximum stability. If studs aren’t available, use appropriate wall anchors before driving screws through the crate and into the wall. Use at least two screws per crate for secure attachment. For stacked units, you can also screw crates together for added stability.
Tips and Variations:
- For a more enclosed look, add a thin piece of plywood or hardboard to the back of each crate before mounting.
- Mix and match different sized crates for a dynamic, eclectic display.
- Line the inside of the crates with patterned contact paper or fabric for a pop of color.
- Consider adding small hooks to the bottom of the lowest crate for hanging mugs or utensils.
2. Rolling Kitchen Island or Storage Cart
If you’re short on counter space or need flexible storage, a DIY rolling kitchen island or storage cart made from wooden crates is one of the most functional diy kitchen decor ideas with wooden crates. It offers mobility and extra surface area exactly where you need it.
Visual guide about 11 Diy Kitchen Decor Ideas with Wooden Crates
Image source: tulleandchantilly.com
Materials Needed:
- 2-4 sturdy wooden crates (matching size recommended)
- Wood glue
- Screws (wood screws, appropriate length)
- Drill
- 4 heavy-duty casters (two with locks)
- Plywood or butcher block for the top (cut to size)
- Sandpaper, paint/stain (optional)
- Handle or towel bar (optional)
Step-by-Step Instructions:
-
Prepare and Assemble the Crate Base
Clean and sand your crates. If painting or staining, do so now and let dry. Stack your crates in the desired configuration (e.g., two side-by-side on the bottom, two side-by-side on top). Use wood glue and screws to securely attach the crates to each other. Ensure the joints are strong and stable.
-
Attach the Casters
Flip your assembled crate base upside down. Position a caster at each corner of the bottom. Pre-drill pilot holes, then use screws to firmly attach each caster to the base. Make sure two of the casters have locks and are positioned diagonally from each other for stability.
-
Add the Top Surface
Place your plywood or butcher block top onto the assembled crate base. You can simply rest it on top, or for a more secure fit, use screws drilled up from the inside of the top crates into the underside of the top surface. Ensure screws are not too long and won’t poke through the top.
-
Optional: Add a Handle
If desired, attach a drawer pull or towel bar to one side of your rolling cart for easy maneuverability.
Tips and Variations:
- Choose a durable top surface like butcher block for a functional prep area, or reclaimed wood for a rustic look.
- Add a protective coat of polyurethane to the top surface, especially if it will be used for food prep.
- Incorporate small dividers within the crates for organizing utensils or dish towels.
- This project is one of the most practical diy kitchen decor ideas with wooden crates for small kitchens.
3. Charming Tiered Fruit and Vegetable Stand
Keep your produce fresh and beautifully displayed with a tiered fruit and vegetable stand. This is a simple yet effective way to add rustic appeal and organization to your countertop or pantry. It’s one of the easiest diy kitchen decor ideas with wooden crates to implement.
Visual guide about 11 Diy Kitchen Decor Ideas with Wooden Crates
Image source: cdn.homedit.com
Materials Needed:
- 2-3 wooden crates of varying sizes (or all the same)
- Sandpaper
- Food-safe sealant or paint (optional)
- Wood glue (optional, for permanent stacking)
Step-by-Step Instructions:
-
Prepare Your Crates
Clean and sand all crates thoroughly, paying extra attention to any rough spots. If you choose to paint or seal, ensure the products are food-safe, especially if produce will directly touch the wood. Let them dry completely.
-
Arrange Your Tiers
Place the largest crate on the bottom, then stack a slightly smaller one on top, and finally the smallest on the very top. You can also stack crates of the same size, offsetting them slightly for visual interest. Ensure the stacking is stable.
-
Secure (Optional) and Fill
For added stability, you can use a small amount of wood glue between the crates where they meet, or discreetly screw them together from the inside. Once stable, fill each tier with your favorite fruits and vegetables.
Tips and Variations:
- Line the bottom of each crate with burlap, decorative paper, or fabric for added charm and to protect the wood.
- Attach small chalkboard labels to the front of each crate to identify contents.
- Use this tiered stand for other kitchen items like baked goods, snacks, or even picnic supplies.
- This is a classic among diy kitchen decor ideas with wooden crates for good reason.
4. DIY Coffee & Tea Station Organizer
Elevate your morning routine with a dedicated and organized coffee and tea station. A wooden crate can be transformed into a stylish caddy that holds everything you need, making it one of the most thoughtful diy kitchen decor ideas with wooden crates for beverage lovers.
Materials Needed:
- 1 medium-sized wooden crate
- Sandpaper
- Paint or stain (optional)
- Small wooden dividers or thin plywood pieces (optional)
- Wood glue (optional)
Step-by-Step Instructions:
-
Prepare and Finish the Crate
Clean and sand your wooden crate. Paint or stain it in a color that complements your kitchen or coffee maker. Allow it to dry fully.
-
Create Internal Dividers (Optional)
If you want to organize K-cups, tea bags, sugar packets, and stirrers into separate compartments, measure and cut thin pieces of plywood or balsa wood to fit horizontally and/or vertically inside the crate. Secure them with wood glue.
-
Arrange Your Coffee Essentials
Place your mugs, K-cups, tea bags, sugar, stirrers, and any other coffee or tea accessories neatly into the organized crate. Position it next to your coffee maker for a complete beverage station.
Tips and Variations:
- Stencil “Coffee” or “Tea” onto the front of the crate for a personalized touch.
- Add small hooks to the sides of the crate to hang extra mugs or measuring spoons.
- This organizer can also be used for hot cocoa supplies, making it versatile for any season.
5. Customizable Spice Rack Display
Say goodbye to cluttered spice cabinets! A series of small wooden crates can be transformed into a charming and accessible spice rack display. This is one of the more unique diy kitchen decor ideas with wooden crates that adds both style and practicality.
Materials Needed:
- 1-3 small wooden crates (depending on desired length)
- Sandpaper
- Paint or stain (optional)
- Drill and screws
- Wall anchors (if needed)
- Level
Step-by-Step Instructions:
-
Prep Your Crates
Clean and sand the crates. Apply paint or stain if desired, ensuring they are dry before proceeding.
-
Plan Your Wall Layout
Decide where you want your spice rack to be. Measure the space and arrange your crates on the floor to visualize the layout. You can mount them side-by-side, staggered, or vertically. Make sure they will be easily accessible above your counter or stove (but not directly over intense heat).
-
Mount the Crates
Hold the first crate against the wall, use a level to ensure it’s straight, and mark the screw points through the back of the crate. Drill pilot holes into the wall (using wall anchors if not hitting a stud). Secure the crate to the wall with screws. Repeat for additional crates, ensuring they are level and evenly spaced.
Tips and Variations:
- For an open-faced display, turn the crates on their side so the long opening faces outward.
- Add a small lip or dowel rod across the front opening of each crate to prevent spice jars from falling out.
- Paint the inside of the crates with chalkboard paint to label spice categories.
- This is one of those clever diy kitchen decor ideas with wooden crates that really cleans up a common kitchen mess.
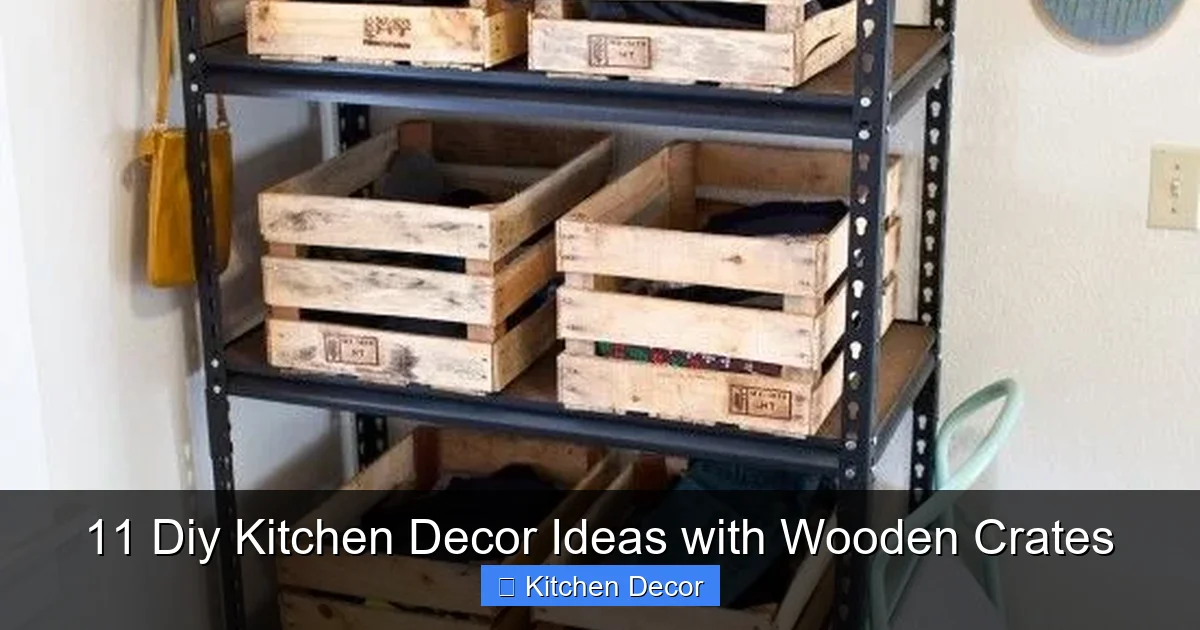
6. Stylish Pantry Organization Bins
Bring order to your pantry with stylish and cohesive organization bins made from wooden crates. This is an excellent way to group similar items and make your pantry look tidy and inviting. These are some of the best diy kitchen decor ideas with wooden crates for functional storage.
Materials Needed:
- Various sized wooden crates (to fit your pantry shelves)
- Sandpaper
- Paint or stain (optional)
- Labels (chalkboard labels, tags, or stencils)
Step-by-Step Instructions:
-
Prepare Your Crates
Clean and sand all the crates. Paint or stain them a uniform color for a cohesive look, or mix colors for a more eclectic style. Let them dry completely.
-
Categorize and Label
Decide what items you want to store in each crate (e.g., “Pasta & Grains,” “Snacks,” “Baking Supplies,” “Canned Goods”). Attach labels to the front of each crate. Chalkboard labels are great for changing contents, or you can stencil directly onto the wood.
-
Arrange in Pantry
Place the labeled crates on your pantry shelves. Use larger crates for bulkier items and smaller ones for specific categories. Enjoy your newly organized and beautiful pantry!
Tips and Variations:
- For easy access, particularly on lower shelves, attach small casters to the bottom of larger crates so they can slide out like drawers.
- Use shallower crates for frequently accessed items on eye-level shelves.
- Line the bottom of crates with non-slip mats if storing delicate items or items that might shift.
7. Functional Pet Food & Treat Station
Why should your furry friends miss out on stylish storage? Transform a wooden crate into a neat and tidy pet food and treat station. This keeps pet supplies organized and easily accessible. This is one of the most heartwarming diy kitchen decor ideas with wooden crates for pet owners.
Materials Needed:
- 1 sturdy wooden crate
- Sandpaper
- Jigsaw (if cutting holes for bowls)
- Pet food bowls (measure their diameter)
- Paint or sealant (pet-safe)
- Wood glue or screws (optional, for securing bowls)
Step-by-Step Instructions:
-
Prepare and Finish the Crate
Clean and sand the crate thoroughly. Apply pet-safe paint or sealant, especially if the crate will be near water or food. Let dry completely.
-
Mark and Cut Bowl Openings (Optional)
If you want to integrate pet bowls, turn the crate upside down. Place the pet bowls on the top surface (which will become the new bottom) where you want them to sit. Trace the inner lip of the bowls. Use a jigsaw to carefully cut out these circles. Sand the edges smooth.
-
Insert Bowls and Store Supplies
Insert the pet bowls into the cut openings. You can use a small amount of wood glue or a few screws from underneath to secure them if needed. Use the space inside the crate (under the bowls) to store pet food bags, treats, or leashes.
Tips and Variations:
- If not cutting holes, simply use the crate to hold two smaller bowls or a treat jar and toy basket.
- Paint paw prints or your pet’s name onto the crate for a personalized touch.
- Consider a taller crate if you have a larger dog, raising their bowls to a more comfortable height.
8. Vertical Indoor Herb Garden
Bring the freshness of an herb garden directly into your kitchen with this clever vertical display. Growing your own herbs is not only rewarding but also incredibly convenient for cooking. This is one of the most living diy kitchen decor ideas with wooden crates.
Materials Needed:
- 1-3 wooden crates (depending on desired height)
- Sandpaper
- Paint or sealant (water-resistant recommended)
- Plastic liners or small plant pots
- Potting soil
- Herb plants or seeds
- Drill, screws, and wall anchors (if mounting)
Step-by-Step Instructions:
-
Prepare and Seal Crates
Clean and sand your crates. Apply a water-resistant sealant or paint to protect the wood from moisture. This is crucial for longevity. Let dry completely.
-
Add Liners and Soil
If using plastic liners, place them inside each crate. If using pots, ensure they fit snugly. Fill the liners or pots with potting soil and plant your chosen herbs. Water them well.
-
Mount or Stack
Decide whether you want to stack your crates on a countertop or mount them vertically on a wall. If mounting, follow the wall-mounting steps from the shelving unit project (Idea #1), ensuring they are securely fastened and can handle the weight of soil and water. If stacking, ensure they are stable.
Tips and Variations:
- Choose herbs that thrive indoors and have similar light and water requirements.
- Ensure adequate drainage by drilling small holes in the bottom of plastic liners or using pots with drainage holes and saucers.
- Label each herb for easy identification, especially useful among diy kitchen decor ideas with wooden crates for gardening.
9. Under-Cabinet Storage Solutions
Maximize often-overlooked space under your kitchen cabinets with custom-fit crate storage. This is perfect for less frequently used items, cleaning supplies, or extra kitchen linens. These are some of the most efficient diy kitchen decor ideas with wooden crates for space optimization.
Materials Needed:
- Shallow wooden crates (measure your cabinet height!)
- Sandpaper
- Paint or stain (optional)
- Felt pads or small casters (optional)
Step-by-Step Instructions:
-
Measure and Select Crates
Measure the height and depth of the space under your cabinets. Select crates that fit comfortably, allowing for a little clearance. Shallow crates generally work best here.
-
Prepare Your Crates
Clean and sand the crates. Paint or stain them to match your kitchen decor or to create a unified look among your storage solutions. Allow them to dry.
-
Arrange and Organize
Place the crates under your cabinets. Use them to store pots and pans, baking sheets, cutting boards, cleaning products, or extra dish towels. Organize items into categories for easy retrieval.
Tips and Variations:
- Attach small felt pads to the bottom of the crates so they slide easily without scratching cabinet floors.
- For even easier access, attach small, discreet casters to the bottom, allowing the crates to function like pull-out drawers.
- Use these crates for seasonal items that you don’t need daily, freeing up prime cabinet space.
10. Breakfast Nook Bench with Storage
Create cozy and functional seating in your kitchen with a DIY breakfast nook bench that also offers hidden storage. This is one of the more ambitious but rewarding diy kitchen decor ideas with wooden crates.
Materials Needed:
- 2-3 sturdy wooden crates (matching size)
- Wood glue and screws
- Drill
- Plywood for the bench top (cut to size)
- Foam padding (for cushion)
- Fabric (durable, upholstery-grade)
- Staple gun
- Hinges (if making a lift-top bench)
- Sandpaper, paint/stain (optional)
Step-by-Step Instructions:
-
Prepare and Assemble the Crate Base
Clean and sand your crates. Paint or stain them if desired. Once dry, arrange the crates side-by-side to form the base of your bench. Use wood glue and screws to securely attach them together.
-
Create the Bench Top (Cushion)
Cut your plywood to the desired dimensions for the bench top. Lay the foam padding on top of the plywood, then drape your fabric over the foam and plywood, ensuring enough excess to wrap around to the underside. Use a staple gun to neatly pull and staple the fabric to the underside of the plywood, creating a taut cushion. Trim excess fabric.
-
Attach the Top (Optional Hinges)
For a non-storage bench, simply place the cushion on top of the crate base. For hidden storage, attach two hinges to the back edge of the crate base and the corresponding edge of the plywood top. This allows the cushion to lift, revealing the storage space inside the crates.
Tips and Variations:
- Choose a fabric that is easy to clean, especially for a kitchen setting.
- Add throw pillows for extra comfort and a decorative touch.
- This bench can also serve as an entryway seating area or extra seating in a dining room.
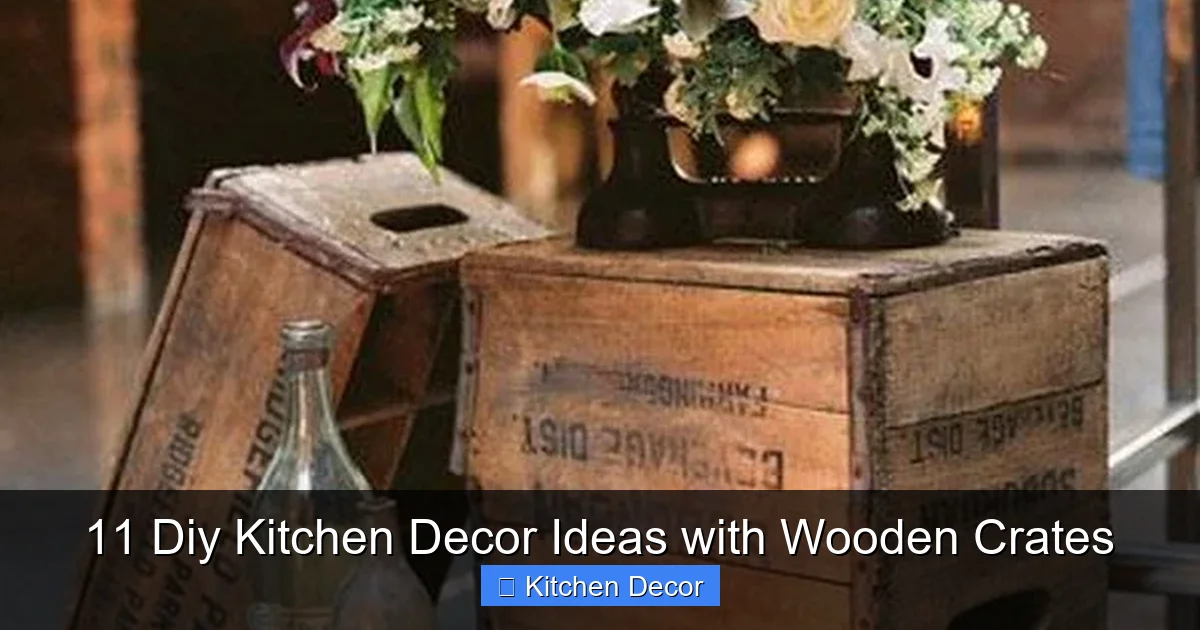
11. Decorative Centerpiece or Display Box
Sometimes, the simplest diy kitchen decor ideas with wooden crates are the most effective. A single crate can become a charming centerpiece or display box, perfect for showcasing seasonal decor, fresh flowers, or a collection of culinary treasures.
Materials Needed:
- 1 wooden crate (any size that fits your space)
- Sandpaper
- Paint or stain (optional)
- Decorative items (vases, candles, faux plants, seasonal fruit, etc.)
Step-by-Step Instructions:
-
Prepare and Finish Your Crate
Clean and sand the crate. Paint, stain, or simply seal it to highlight its natural wood grain. Let it dry completely.
-
Curate Your Display
Place the finished crate on your kitchen island, dining table, or a prominent counter space. Arrange your chosen decorative items inside the crate. Think about varying heights and textures to create visual interest.
Tips and Variations:
- Rotate your display with the seasons: spring flowers, autumn gourds, holiday ornaments.
- Use the crate to hold a collection of interesting antique kitchen utensils or vintage bottles.
- Fill it with potted herbs or small succulents for a touch of greenery.
Conclusion
There you have it – 11 fantastic diy kitchen decor ideas with wooden crates that prove just how versatile, affordable, and stylish these simple boxes can be. From creating much-needed storage with wall shelves and rolling carts to adding charming touches with fruit stands and decorative centerpieces, wooden crates offer endless opportunities to personalize your kitchen.
Embrace the joy of DIY and transform your kitchen into a space that truly reflects your unique style and needs. These projects are not just about saving money; they’re about the satisfaction of creating something beautiful and functional with your own hands. So, gather your crates, unleash your creativity, and start building the kitchen of your dreams today!