
Transform your space with 15 simple DIY room decor ideas! Discover easy, budget-friendly projects to add effortless style to any room, perfect for beginners looking to personalize their home.
Feeling like your room needs a little refresh but don’t know where to start? It’s totally normal to feel a bit overwhelmed by all the decor options out there. You want your space to feel like you, but the thought of complicated projects or big expenses can be a real mood killer.
Don’t worry, making your room stylish and cozy doesn’t have to be difficult or break the bank! We’ve gathered 15 super simple DIY room decor ideas that are perfect for beginners. Get ready to add your personal touch and create a space you’ll absolutely love.
15 Simple DIY Room Decor Ideas to Elevate Your Space
Let’s dive into some easy, creative ways to make your room shine. These ideas are all about big impact with minimal fuss, proving that you don’t need to be a design pro to create a beautiful home.
1. Faux Greenery Wall Art
Bring the outdoors in with a lush, vibrant wall of faux greenery. This is a fantastic way to add a pop of color and texture without the need for watering or sunlight. It’s perfect for renters or anyone who loves the look of plants but struggles to keep them alive!
- Materials: Faux plants (various types and sizes), a sturdy frame or backing board (like plywood or a large canvas), strong adhesive (hot glue gun or heavy-duty craft glue).
- How-to: Arrange your faux plants on the backing board, layering different textures and sizes. Once you’re happy with the arrangement, use your adhesive to secure them firmly. You can create a full wall or a smaller, statement piece.
- Style Tip: Mix in some faux flowers for extra color and dimension.
2. Upcycled Jar Organizers
Turn old jars into chic storage solutions. Mason jars, jam jars, or even pickle jars can be transformed into stylish containers for pens, makeup brushes, cotton swabs, or kitchen essentials. It’s an eco-friendly way to get organized! For more clever storage ideas, check out our guide on stylish kitchen storage accessories.
- Materials: Clean glass jars, spray paint (chalkboard, metallic, or matte finish), optional: twine, ribbon, or stencils.
- How-to: Ensure jars are thoroughly cleaned and dried. Apply a few thin coats of spray paint to the outside of the jars. Let them dry completely between coats. For a chalkboard finish, use chalkboard spray paint and let it cure for 24 hours before writing on it.
- Budget-Friendly Tip: Check your local thrift store for affordable jars if you don’t have enough at home.
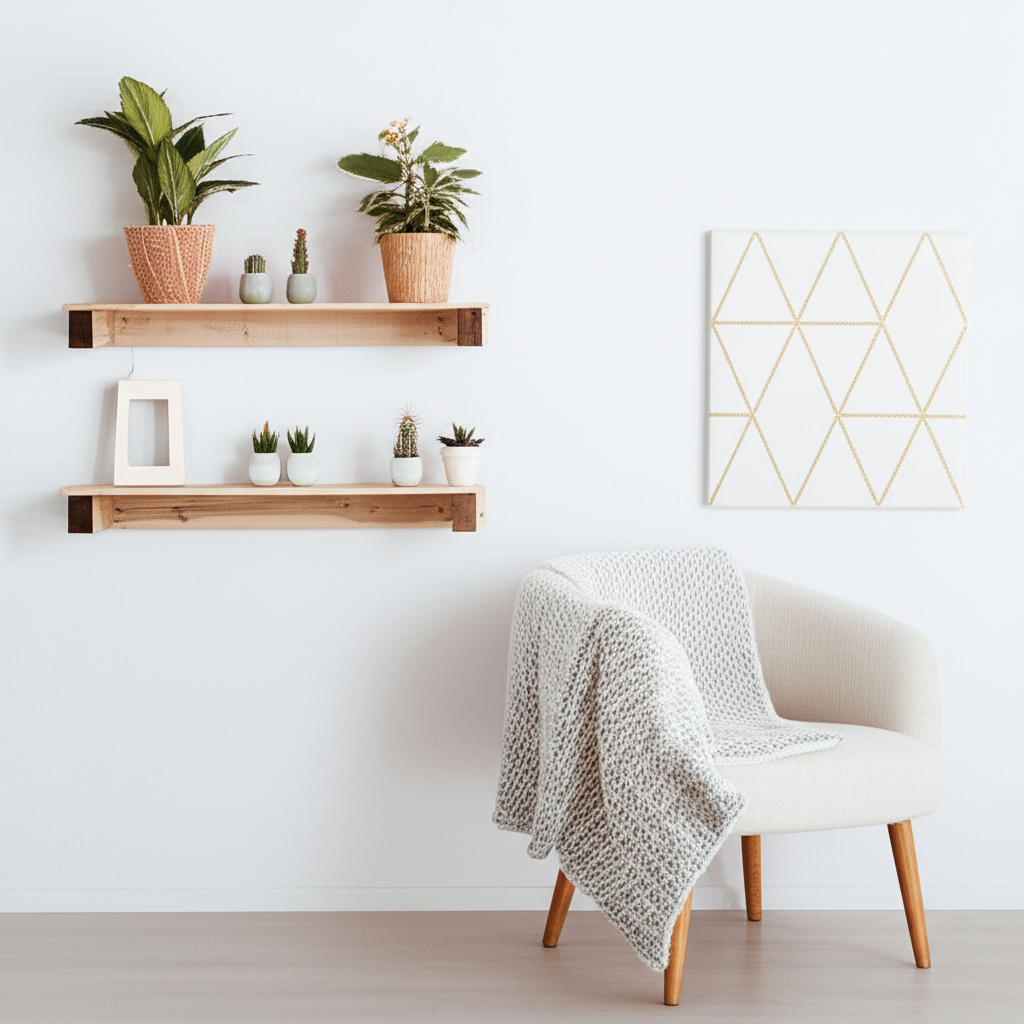
3. DIY Floating Shelves
Floating shelves offer a sleek, modern look and are surprisingly easy to make. They’re perfect for displaying decor, books, or small plants without taking up floor space. This project can make a small room feel more open.
- Materials: Wood planks (pine or select pine are good choices), L-brackets or specialized floating shelf hardware, screws, wall anchors (if not drilling into studs), level, drill, measuring tape.
- How-to: Cut your wood planks to the desired size. Paint or stain them to match your decor. Determine the placement on your wall, ensuring you locate wall studs if possible for maximum stability. Follow the instructions for your chosen floating shelf hardware to mount them securely.
- Resource: For detailed hardware installation, check out resources like Family Handyman for visual guides.
4. Painted Terracotta Pots
Give plain terracotta pots a makeover with a splash of color. This is a quick and easy way to add personality to your plants and brighten up windowsills or shelves.
- Materials: Terracotta pots, acrylic paints, paintbrushes, sealant (optional, for outdoor use).
- How-to: Clean the pots and let them dry. Paint your pots in solid colors, geometric patterns, or abstract designs. Let them dry completely. If you plan to use them outdoors, apply a sealant to protect the paint.
- Creative Idea: Use painter’s tape to create crisp lines and geometric patterns.
5. Gallery Wall with Personal Touches
A gallery wall is a fantastic way to showcase your favorite photos, art prints, or even postcards. It adds visual interest and tells a story about you. For more inspiration on wall decor, explore our collection of kitchen wall art ideas that can easily be adapted to any room.
- Materials: Various picture frames (mix and match styles and sizes), photos, art prints, or postcards, hammer, nails or picture hanging strips, measuring tape, level.
- How-to: Lay out your frames on the floor to plan your arrangement. Consider a symmetrical or asymmetrical layout. Measure and mark where each frame will hang on the wall. Use nails or strong hanging strips for secure placement.
- Pro Tip: Use consistent frame colors or finishes for a more cohesive look, or embrace the eclectic mix for a bohemian vibe.
6. Macrame Plant Hanger or Wall Hanging
Macrame adds a bohemian, textural element to any room. Creating your own macrame piece is a rewarding DIY project that looks impressive but is achievable for beginners.
- Materials: Macrame cord (cotton is popular), a wooden ring or dowel, scissors, measuring tape.
- How-to: There are many beginner-friendly macrame knot tutorials available online. Start with simple knots like the square knot and half hitch. Follow a pattern to create a plant hanger or a decorative wall hanging.
- Watch & Learn: Search for “beginner macrame plant hanger tutorial” on YouTube for step-by-step video guides.
7. DIY Coasters
Protect your furniture and add a stylish touch with homemade coasters. This is a quick project that yields functional decor.
- Materials: Ceramic tiles (from a hardware store), Mod Podge, scrapbook paper or fabric scraps, sealant (optional), cork backing or felt pads.
- How-to: Cut your paper or fabric to fit the tiles. Apply a layer of Mod Podge to the tile, place the paper/fabric on top, and smooth out any bubbles. Apply a few more coats of Mod Podge over the top to seal it. Once dry, add cork backing or felt pads to the bottom.
- Variety: Experiment with different papers, fabrics, or even old maps for unique designs.
8. Painted Furniture Accents
You don’t need to repaint an entire piece of furniture to make a statement. Painting just the legs of a table, the drawer fronts of a dresser, or the back of a bookshelf can create a surprising focal point.
- Materials: Furniture piece, sandpaper (fine-grit), primer, paint (chalk paint, latex, or spray paint), paintbrushes or rollers, painter’s tape.
- How-to: Clean the furniture piece. Lightly sand the areas you plan to paint. Apply a coat of primer, let it dry, then apply your chosen paint color. Use painter’s tape for clean lines.
- Rental Hack: If you’re renting, consider painting furniture you own and can take with you, or look for inexpensive pieces at thrift stores.
9. String Art
String art is a classic DIY that looks intricate but is quite straightforward. It involves hammering nails into a board in a pattern and then weaving string or thread around them.
- Materials: Wooden board, small nails, hammer, string or embroidery floss, printed pattern (optional).
- How-to: Lightly sand and paint your wooden board if desired. Place your pattern on the board and hammer nails along the outline. Remove the pattern and begin wrapping the string around the nails in a decorative pattern.
- Design Ideas: Shapes like hearts, stars, or letters work well for beginners.
10. DIY Throw Pillow Covers
Give your existing throw pillows a new look with simple DIY covers. This is a great way to update your living room or bedroom decor without buying new pillows.
- Materials: Fabric of your choice, sewing machine or fabric glue, scissors, existing pillow or pillow form.
- How-to: Measure your pillow. Cut two pieces of fabric to size, adding a seam allowance. Sew three sides together, insert the pillow, and sew the final side shut. Alternatively, use fabric glue for a no-sew option.
- No-Sew Alternative: Fold a large piece of fabric around the pillow and use fabric glue or iron-on hem tape to create the opening and secure the sides.
11. Mason Jar Sconces
These charming sconces add a rustic or industrial touch to your walls. They’re perfect for holding small flowers, fairy lights, or even as candle holders.
- Materials: Mason jars, pipe clamps or rustic hardware, wooden plank, screws, drill, paint (optional).
- How-to: Attach pipe clamps or hardware to a wooden plank. Secure the mason jars into the clamps. Mount the plank to your wall. You can paint the wood and clamps for a customized look.
- Safety First: If using as candle holders, ensure proper ventilation and never leave burning candles unattended.
12. Bottle Cap Art
Collect bottle caps and turn them into a unique piece of wall art. This is a fun, quirky project that adds a conversation starter to your space.
- Materials: Bottle caps, a sturdy backing board (wood or thick cardboard), strong adhesive (like E6000 or hot glue), paint (optional).
- How-to: Arrange the bottle caps on your backing board to create a design – a shape, a word, or an abstract pattern. Once you’re happy with the layout, glue them down securely.
- Tip: You can clean and paint the bottle caps for a more uniform look or use them as is for a vintage feel.
13. Washi Tape Wall Designs
Washi tape is a crafter’s dream! It’s repositionable, comes in endless patterns, and is perfect for adding temporary decorative elements to your walls. This is ideal for renters who can’t make permanent changes.
- Materials: Rolls of washi tape in various colors and patterns.
- How-to: Simply apply the washi tape directly to your wall to create geometric patterns, borders, faux headboards, or even outline artwork.
- Inspiration: Look up “washi tape wall art ideas” for endless creative inspiration.
14. DIY Diffuser with Essential Oils
Create a beautiful and fragrant ambiance in your room with a simple DIY essential oil diffuser. This not only adds a lovely scent but can also contribute to a relaxing atmosphere. For more ways to enhance your space naturally, see our tips on kitchen plant decor that brings life and freshness into your home.
- Materials: Small glass jar with a narrow opening, carrier oil (like almond or jojoba oil), essential oils of your choice, rattan or bamboo reeds.
- How-to: Fill the jar about halfway with your carrier oil. Add 15-20 drops of your favorite essential oils. Stir gently. Place 4-6 reeds into the oil mixture. Flip the reeds after a few hours to saturate them.
- Scent Combinations: Try lavender for relaxation, peppermint for energy, or a blend of citrus oils for freshness.
15. Mirror Makeover
A plain mirror can become a statement piece with a little DIY magic. Frame it, paint it, or add decorative elements to make it stand out.
- Materials: An existing mirror, frame material (e.g., wood strips, rope, mosaic tiles), adhesive (strong craft glue or E6000), paint (optional).
- How-to: Clean your mirror thoroughly. Decide on your frame design. If using wood, cut strips to size and glue them around the mirror’s edge. For rope, wrap it around the mirror’s frame. Mosaic tiles can be applied with grout.
- Tip: For a quick update, consider using decorative washi tape around the mirror’s edge.
DIY Decor Project Planning Table
To help you get started and stay organized, here’s a simple table to plan your DIY decor projects. It covers key aspects to consider before you begin.
| Project Idea | Estimated Time | Difficulty Level | Approximate Cost | Key Materials |
|---|---|---|---|---|
| Faux Greenery Wall Art | 2-4 hours | Easy | $30-$100+ (depending on size) | Faux plants, frame, glue |
| Upcycled Jar Organizers | 1-2 hours per jar | Very Easy | $5-$15 (for paint/twine) | Jars, spray paint |
| DIY Floating Shelves | 3-6 hours | Medium | $20-$60 per shelf | Wood, hardware, screws |
| Painted Terracotta Pots | 1 hour per pot | Very Easy | $5-$20 (for pots/paint) | Pots, acrylic paints |
| Gallery Wall | 2-4 hours (planning & hanging) | Easy | $20-$100+ (depending on frames) | Frames, photos, hanging hardware |
| Macrame Plant Hanger | 2-5 hours | Medium | $10-$30 | Macrame cord, ring |
| DIY Coasters | 1-2 hours | Easy | $10-$25 | Tiles, Mod Podge, paper/fabric |
| Painted Furniture Accents | 4-8 hours (including drying time) | Medium | $20-$50 | Furniture, primer, paint, tape |
| String Art | 2-4 hours | Medium | $15-$40 | Wood board, nails, string |
| DIY Throw Pillow Covers | 1-3 hours | Easy (sewing) / Very Easy (no-sew) | $10-$30 (for fabric) | Fabric, sewing machine/glue |
| Mason Jar Sconces | 2-3 hours | Easy | $20-$50 | Jars, clamps, wood, screws |
| Bottle Cap Art | 2-4 hours | Easy | $10-$30 (for backing/glue) | Bottle caps, backing board, glue |
| Washi Tape Wall Designs | 1-3 hours | Very Easy | $10-$30 (for tape) | Washi tape |
| DIY Diffuser | 30 minutes | Very Easy | $10-$25 | Jar, carrier oil, essential oils, reeds |
| Mirror Makeover | 2-5 hours | Medium | $15-$50 | Mirror, frame materials, glue |
Frequently Asked Questions About Simple DIY Room Decor
Here are some common questions beginners might have about tackling DIY decor projects.
Q1: What are the easiest DIY decor projects for absolute beginners?
The easiest projects involve minimal tools and steps, like painting terracotta pots, creating washi tape designs, making DIY coasters with Mod Podge, or arranging a gallery wall with existing frames. These allow you to build confidence without needing complex skills.
Q2: How can I make my DIY projects look professional?
Preparation is key! Clean your surfaces thoroughly, use painter’s tape for clean lines, apply thin, even coats of paint, and allow adequate drying time between steps. For sewing projects, pressing seams with an iron makes a big difference.
Q3: What are the best budget-friendly materials to use for DIY decor?
Look for upcycled items like jars and old furniture. Craft stores often have sales on paints, glues, and fabrics. Thrift stores are excellent sources for frames, mirrors, and unique pieces you can transform. Natural elements like branches or stones can also be incorporated for free.
Q4: How do I choose the right colors and style for my DIY projects?
Start by looking at rooms you love for inspiration. Consider the existing colors and style of your room. You can also create a mood board with images of decor you like. For beginners, sticking to a limited color palette (2-3 main colors) can create a cohesive look.
Q5: Can I do these DIY projects if I live in a small apartment or dorm room?
Absolutely! Many of these projects are perfect for small spaces. Washi tape, faux greenery, and floating shelves add style without taking up much room. Upcycled jars and DIY coasters are also great for maximizing small areas. Always check your lease agreement for any restrictions on making permanent changes.
Q6: How long will these DIY projects take?
The time varies greatly. Very simple projects like painting pots or applying washi tape can take under an hour. More involved projects like building floating shelves or creating macrame pieces might take a few hours, spread over a day or two to account for drying times.
Q7: Where can I find inspiration and tutorials for these ideas?
Websites like Pinterest and Instagram are treasure troves of visual inspiration. YouTube is fantastic for step-by-step video tutorials on specific techniques like macrame knots or painting furniture. Blogs dedicated to DIY and home decor also offer a wealth of ideas and guides.
Conclusion
See? Transforming your room doesn’t require a huge budget or advanced skills. With these 15 simple DIY room decor ideas, you can inject personality, style, and warmth into your space effortlessly. Whether you’re a student, a renter, or a homeowner looking to refresh your surroundings, these projects are designed to be achievable and enjoyable.
From upcycling everyday items to adding pops of color with paint, the possibilities are endless. Remember, the most important element of your decor is that it reflects you. So, pick a project that sparks your interest, gather your materials, and have fun creating a space that you truly love. Happy decorating!