Transform your space without breaking the bank! Discover 5 essential, budget-friendly DIY room decor ideas that are easy to implement, even for beginners. These simple yet impactful projects will help you create a stylish and personalized home you’ll love, proving that beautiful decor doesn’t require a big budget.
Feeling like your living space needs a refresh but worried about the cost? Many of us dream of a beautifully decorated home, but the thought of expensive furniture and decor can be overwhelming, especially when you’re on a tight budget. Renters and students often face the challenge of personalizing their spaces without making permanent changes or spending a lot of money.
It’s completely possible to create a home that feels stylish, cozy, and uniquely yours with a little creativity and some clever DIY. You don’t need to be a master crafter or have a huge budget to make a big impact.
This guide is here to help! We’ll walk you through five fantastic, budget-friendly DIY room decor ideas that are perfect for beginners. Get ready to discover simple ways to add personality and charm to your home.
5 Budget-Friendly DIY Room Decor Ideas: Essential for Beginners
Decorating your home doesn’t have to be expensive. With a bit of imagination and some readily available materials, you can create stunning pieces that reflect your personal style. These ideas are perfect for adding a touch of personality and warmth to any room, proving that a beautiful home is within everyone’s reach.
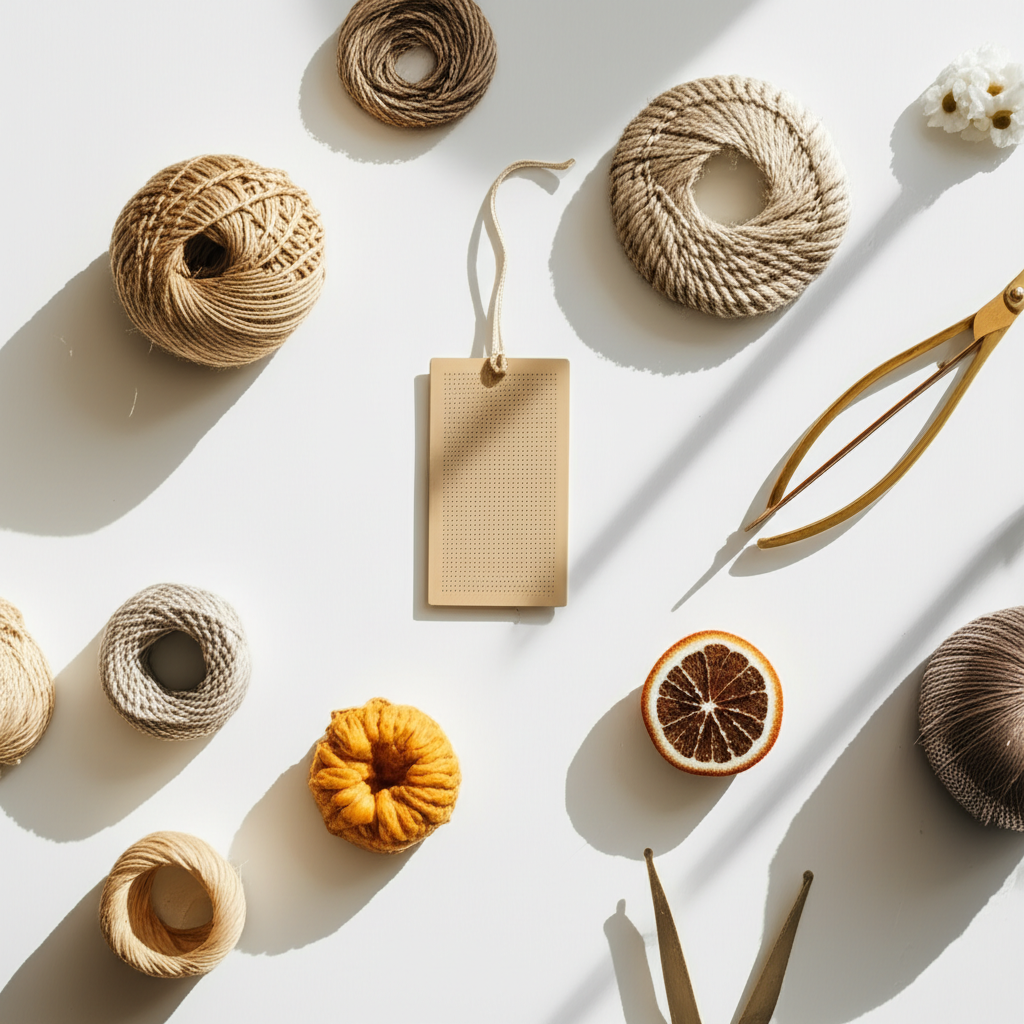
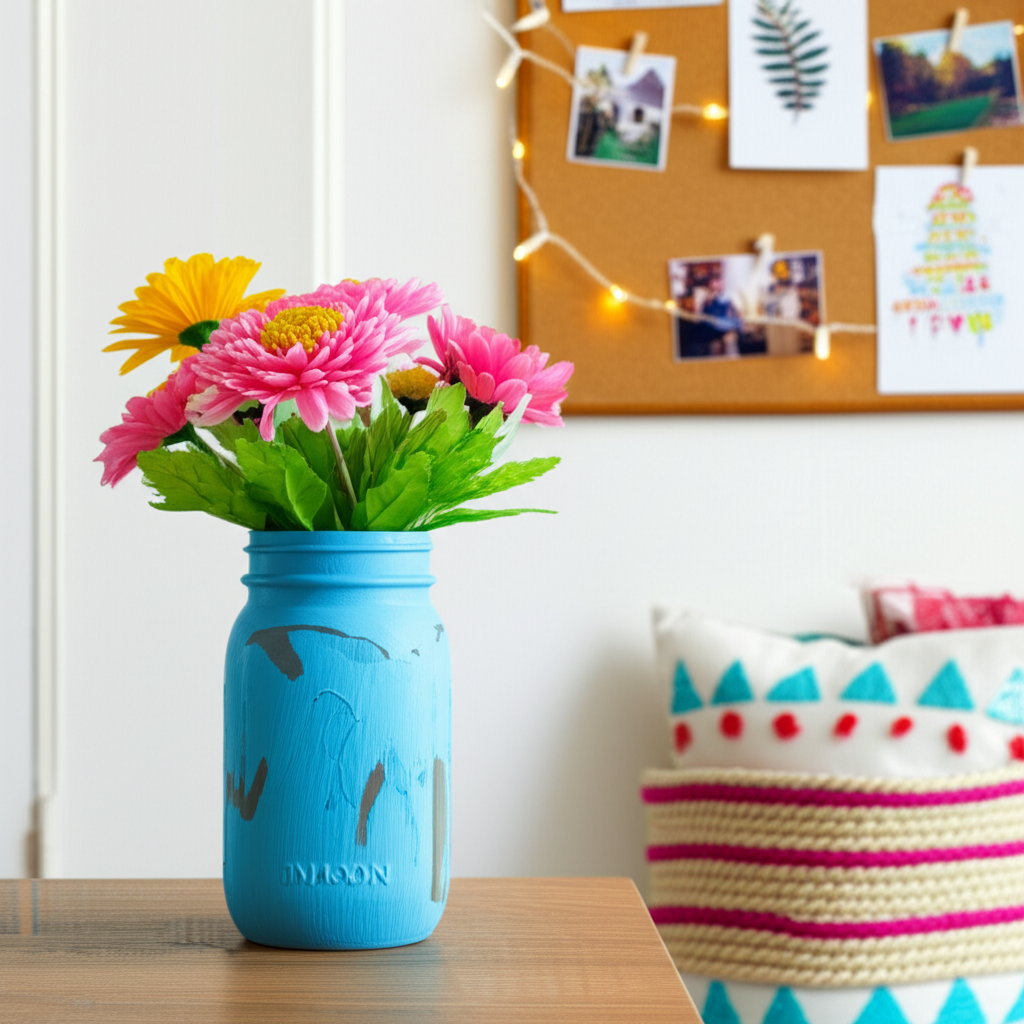
1. Upcycled Jar & Bottle Vases
Glass jars and bottles are often thrown away, but they can be transformed into beautiful and unique vases. This is a fantastic way to reduce waste and add a personal touch to your decor. Think of old jam jars, wine bottles, or even interesting-shaped perfume bottles.
This project is incredibly versatile. You can paint them, wrap them with twine, or leave them as they are for a minimalist look. They are perfect for displaying fresh flowers, dried stems, or even just as decorative objects on their own.
What You’ll Need:
- Clean glass jars or bottles (various sizes and shapes)
- Acrylic paints (optional)
- Paintbrushes (optional)
- Twine, jute rope, or ribbon (optional)
- Glue (hot glue gun or strong craft glue, optional)
- Sandpaper (for distressing, optional)
How to Make Them:
- Clean and Prep: Thoroughly wash and dry your jars and bottles. Remove any labels by soaking them in warm, soapy water. For stubborn labels, a little bit of Goo Gone or rubbing alcohol can help.
- Paint (Optional): If you want to add color, paint the outside of the jars. You can use solid colors, create ombre effects, or even use stencils. Let them dry completely. For a distressed look, lightly sand the painted areas after drying.
- Add Texture (Optional): Wrap twine, jute rope, or ribbon around the neck or body of the jar. Secure the ends with glue. This adds a rustic or bohemian feel.
- Decorate Further (Optional): You can also glue on beads, buttons, or other small decorative items for a truly custom look.
- Display: Arrange your new vases on shelves, tables, or windowsills. They look great with single stems or small bouquets.
This DIY project is excellent for practicing basic crafting skills and requires minimal investment. The results are always unique, as no two jars or bottles are exactly alike. For more upcycling inspiration, check out our guide to 12 White Kitchen Decor Ideas: Amazing Style.
2. DIY Gallery Wall with Found Frames
A gallery wall can be a stunning focal point in any room, but buying new frames can get expensive quickly. The secret to an affordable gallery wall is to hunt for frames at thrift stores, flea markets, or even ask friends and family if they have any old ones lying around.
Once you have your collection of frames, you can paint them all the same color for a cohesive look, or embrace their eclectic mix for a more bohemian vibe. The artwork inside can also be budget-friendly, using free printables, your own photos, or even pressed leaves and flowers.
Where to Find Frames on a Budget:
- Thrift Stores: Often have a wide selection of unique frames at very low prices.
- Flea Markets: Great for finding vintage and antique pieces.
- Yard Sales: Keep an eye out for hidden gems.
- Online Marketplaces: Check sites like Facebook Marketplace or Craigslist.
- Ask Friends & Family: People often have frames they no longer use.
Creating Your Gallery Wall:
- Gather Frames: Collect a variety of frames in different sizes, shapes, and styles.
- Prepare Frames: Clean them up. You can leave them as they are, or spray paint them a uniform color (like black, white, gold, or a color that matches your room).
- Select Artwork: Print free downloadable art online (many blogs offer these!), use your own photographs, or create simple abstract pieces. You can also frame postcards, maps, or even interesting fabric scraps.
- Arrange Layout: Before hanging, lay out your frames on the floor to plan your arrangement. Take a picture of your layout so you remember it.
- Hang Your Art: Use a level and measuring tape to hang your frames. Command strips are a renter-friendly option that won’t damage walls.
For free printable art, sites like Positively Splendid and Homey Oh My offer a great selection. This method allows for a highly personalized and stylish display that looks far more expensive than it is.
3. DIY Fabric Wall Art
Tired of bare walls? Fabric can add warmth, texture, and color to a room, and turning it into wall art is surprisingly simple and affordable. You don’t need to be a seamstress to create beautiful fabric art pieces.
This is a fantastic way to use up fabric scraps, old scarves, or even attractive tea towels. The possibilities are endless, from abstract designs to more structured pieces. It’s a great project for adding a soft touch to a room.
Simple Fabric Art Techniques:
- Stretched Canvas: This is perhaps the easiest method.
- Framed Fabric: Similar to a gallery wall, but with fabric as the art.
- Fabric Tapestry: A larger piece that can make a big statement.
How to Make Stretched Canvas Fabric Art:
- Choose Fabric: Select a piece of fabric with a pattern or color you love. Ensure it’s large enough to cover your canvas with some overlap.
- Get a Canvas: You can buy blank canvases from craft stores, or even reuse an old canvas. Alternatively, you can use a sturdy piece of cardboard or foam board as a backing.
- Prepare Fabric: Iron your fabric to remove wrinkles.
- Stretch and Staple: Lay the fabric face down on a clean surface. Place the canvas (or backing) face down on top of the fabric. Start by pulling the fabric taut across the top edge of the canvas and staple it securely. Then, pull the fabric taut across the bottom edge and staple. Repeat for the sides, ensuring the fabric is smooth and wrinkle-free. Fold and staple the corners neatly.
- Trim Excess: Trim any excess fabric from the back.
- Display: Hang your new fabric art on the wall.
For a more structured look, consider using a wooden embroidery hoop. Simply stretch the fabric taut inside the hoop and secure it by tightening the screw. This creates a lovely, rustic circular art piece. You can find many tutorials for these techniques on crafting blogs and YouTube.
4. Painted Furniture Makeover
Old, tired furniture doesn’t have to be replaced. A coat of paint can completely transform a piece, giving it a new lease on life and making it a stylish addition to your room. This is a rewarding DIY project that can save you a lot of money compared to buying new furniture.
Look for secondhand furniture at thrift stores, garage sales, or online. A simple wooden dresser, side table, or even a chair can be a perfect candidate for a makeover. The key is to choose a piece with good bones that just needs a cosmetic update.
Furniture Makeover Steps:
- Find Your Piece: Scout for furniture with solid construction but a dated finish.
- Clean Thoroughly: Wash the piece with soap and water to remove dirt and grime.
- Sand (Optional but Recommended): Lightly sand the surface to create a smooth base for the paint. This helps the paint adhere better. For a very smooth finish, you might want to use a primer.
- Prime (Recommended): Apply a coat of primer, especially if you’re painting over a dark or glossy finish.
- Paint: Apply thin, even coats of your chosen paint. Allow each coat to dry completely before applying the next. Latex or chalk paint are popular choices for furniture makeovers.
- Seal (Optional): For high-traffic pieces, consider applying a clear sealant or wax to protect the paint finish.
- Update Hardware: Replacing old knobs or pulls with new ones can also dramatically change the look of a piece.
For inspiration and tips on different paint types like chalk paint or milk paint, resources like This Old House’s paint guide can be very helpful. This project is perfect for adding a custom color that perfectly matches your room’s existing palette. If you’re looking to extend your decor upgrades to the kitchen, explore our 10 Minimal Decor Ideas For Kitchens: Amazing Makeover for cohesive styling.
5. DIY Mason Jar Lighting
Atmospheric lighting can make a huge difference in how a room feels. Mason jar lights are a charming and incredibly affordable way to add a warm glow to your space. They can be used as fairy lights, pendant lights, or even as candle holders.
This is a simple project that uses readily available materials, making it perfect for beginners. You can customize them with paint, twine, or other embellishments to match your decor style.
Mason Jar Lighting Ideas:
- Fairy Lights: String battery-operated fairy lights inside mason jars for a magical effect.
- Pendant Lights: With a simple kit, you can turn mason jars into charming pendant lights.
- Candle Holders: Place tealights or small pillar candles inside for a cozy ambiance.
How to Make Mason Jar Fairy Lights:
- Gather Supplies: You’ll need clean mason jars, battery-operated fairy lights (available at most craft or dollar stores), and optionally, a little twine or ribbon.
- Insert Lights: Carefully feed the string of fairy lights into the mason jar. Arrange them so they look appealing.
- Conceal Battery Pack: Tuck the battery pack either inside the jar at the bottom (if it’s small enough and won’t disrupt the lights) or have it hang discreetly behind the jar if you’re using them as standalone decor. Some fairy lights have small, easily hidden battery packs.
- Decorate (Optional): Tie a piece of twine or ribbon around the neck of the jar for an extra touch.
- Turn On and Enjoy: Switch on the lights and place your illuminated jars on shelves, mantels, or bedside tables.
For pendant light kits, you can find options online from retailers like Amazon or at specialty lighting stores. Always ensure any electrical components are used safely and according to manufacturer instructions. For safety with candles, consider using battery-operated LED candles, especially in areas where children or pets might be present.
Frequently Asked Questions About Budget DIY Decor
Q1: What is the easiest DIY decor project for a complete beginner?
A1: The easiest DIY decor projects are usually those that require minimal tools and steps, like painting old jars into vases or filling mason jars with fairy lights. These are very forgiving and offer immediate visual results.
Q2: Where can I find cheap materials for DIY projects?
A2: Great places to find affordable materials include thrift stores, dollar stores, craft store sales, and even your own home for upcycling items. Repurposing household items like old clothes, jars, and cardboard boxes is also a fantastic way to save money.
Q3: How can I make my DIY projects look professional?
A3: Preparation is key! Clean your surfaces well, sand if needed, and use good quality paint and tools. Take your time, apply thin, even coats, and allow adequate drying time between steps. Following instructions carefully will lead to a more polished finish.
Q4: Are DIY projects safe for renters?
A4: Many DIY projects are very renter-friendly! Using items like Command strips for hanging art, painting furniture that can be easily repainted later, or creating decor that doesn’t involve permanent fixtures are all great options. Always check your lease agreement for any specific rules.
Q5: What are some good resources for DIY inspiration?
A5: Pinterest and Instagram are treasure troves of DIY inspiration. Blogs dedicated to home decor, crafting, and DIY (like Apartment Therapy) also offer countless ideas and tutorials. YouTube is excellent for video guides.
Q6: Can I combine different DIY ideas to decorate a whole room?
A6: Absolutely! The best way to create a cohesive look is to combine several DIY elements. For example, you could use upcycled vases, a DIY gallery wall, and a painted furniture piece in the same room. Choose a color palette or style to tie everything together. For a complete room refresh, consider pairing your living space updates with 10 Best Kitchen Decor Themes: Amazing Results to maintain harmony throughout your home.
Q7: What if I make a mistake during a DIY project?
A7: Don’t worry! Most DIY mistakes can be fixed. Sanding and repainting is a common solution for paint errors. For fabric projects, you might be able to trim or adjust. Remember, part of the charm of DIY is its unique, handmade quality, so a small imperfection can add character!
Conclusion
Decorating your home doesn’t need to be a source of stress or financial strain. As you’ve seen, with a little imagination and these budget-friendly DIY ideas, you can create a space that is stylish, personal, and welcoming.
From transforming everyday jars into elegant vases to giving old furniture a vibrant new look, these projects are accessible for anyone, regardless of their crafting experience. They prove that creativity is the most valuable tool in your decorating arsenal.
So, gather your materials, unleash your inner designer, and start transforming your living space. You’ll be amazed at what you can achieve on a budget, creating a home that truly reflects you and brings you joy every day. Happy decorating!