
Transform your bedroom into a spacious sanctuary by mastering vertical storage ideas. This guide unveils 8 brilliant hacks, from installing sleek floating shelves to optimizing closet space with multi-tier organizers, ensuring every inch of your walls and corners works for you. Discover how to declutter, organize, and beautify your room using height, making your space feel larger and more efficient without sacrificing style and functionality.
Is your bedroom feeling a little cramped? Do you find yourself tripping over clutter, wishing you had more space for your clothes, books, and keepsakes? You’re not alone! Many of us struggle with maximizing small bedroom spaces, but there’s a secret weapon that can transform your room from cluttered to chic: vertical storage ideas. Instead of spreading your belongings outwards, we’re going to teach you how to go upwards!
Think about it: your floor space is limited, but your walls stretch all the way to the ceiling. That’s a huge, often untapped, resource for organization! By embracing vertical storage, you can free up valuable floor space, make your room feel larger, and create a much more organized and functional living area. It’s not just about practicality; smart vertical storage can also add character and style to your bedroom.
In this comprehensive guide, we’ll dive into 8 brilliant bedroom hacks focused on vertical storage ideas. We’ll show you how to implement each hack with clear, step-by-step instructions, practical tips, and examples to inspire you. Get ready to reclaim your space and turn your bedroom into the organized sanctuary you’ve always dreamed of!
Key Takeaways
- Embrace Wall Space: Recognize that your walls are prime real estate for expanding storage upwards, offering solutions beyond traditional floor-level furniture.
- Utilize Overlooked Areas: Don’t forget about corners, the back of doors, and even the often-underutilized vertical space within your closet. These areas can dramatically increase your storage capacity.
- Think Tall and Slim: Opt for furniture and organizers that emphasize height over width, such as tall bookcases or vertical drawer chests, to maximize storage without taking up precious floor space.
- Prioritize Customization: Many vertical storage solutions, like pegboards and modular shelving, allow for flexible arrangements that can be adapted to your specific needs and evolving collection of items.
- Declutter First: Before implementing any new vertical storage ideas, take time to declutter and purge unnecessary items. This ensures you’re organizing what you truly need and love.
- Blend Function and Aesthetics: Vertical storage doesn’t have to be purely practical; choose solutions that complement your bedroom’s decor and allow you to display cherished items beautifully.
1. Embrace Floating Wall Shelves
Floating shelves are a classic, stylish, and incredibly effective vertical storage solution. They offer open storage without the bulk of traditional bookcases, making your room feel more open and airy. They’re perfect for displaying decorative items, books, small plants, or even everyday essentials.
Step-by-Step Installation:
- Plan Your Layout: Decide where you want your shelves. Consider areas above your bed, desk, dresser, or even an empty wall. Measure the wall space to determine the ideal length and number of shelves.
- Choose Your Style: Floating shelves come in various materials (wood, metal, glass) and finishes. Select a style that complements your bedroom decor.
- Gather Tools: You’ll typically need a drill, level, measuring tape, pencil, stud finder, and the shelf mounting hardware.
- Locate Studs: Use a stud finder to locate wall studs. Mounting into studs provides the most secure installation. If studs aren’t available, use appropriate wall anchors for drywall.
- Mark and Drill: Mark the shelf placement on the wall, ensuring it’s level. Drill pilot holes for the mounting brackets or anchors.
- Install Brackets and Shelves: Securely attach the mounting hardware, then slide or attach the shelf onto the brackets.
- Decorate and Organize: Arrange your items on the shelves. Mix functional storage with decorative pieces for an appealing look. Use small bins or baskets to contain smaller items.
Practical Tip:
For a cohesive look, use shelves of varying lengths or stagger them creatively. Don’t overload floating shelves; check their weight capacity before placing heavy items.
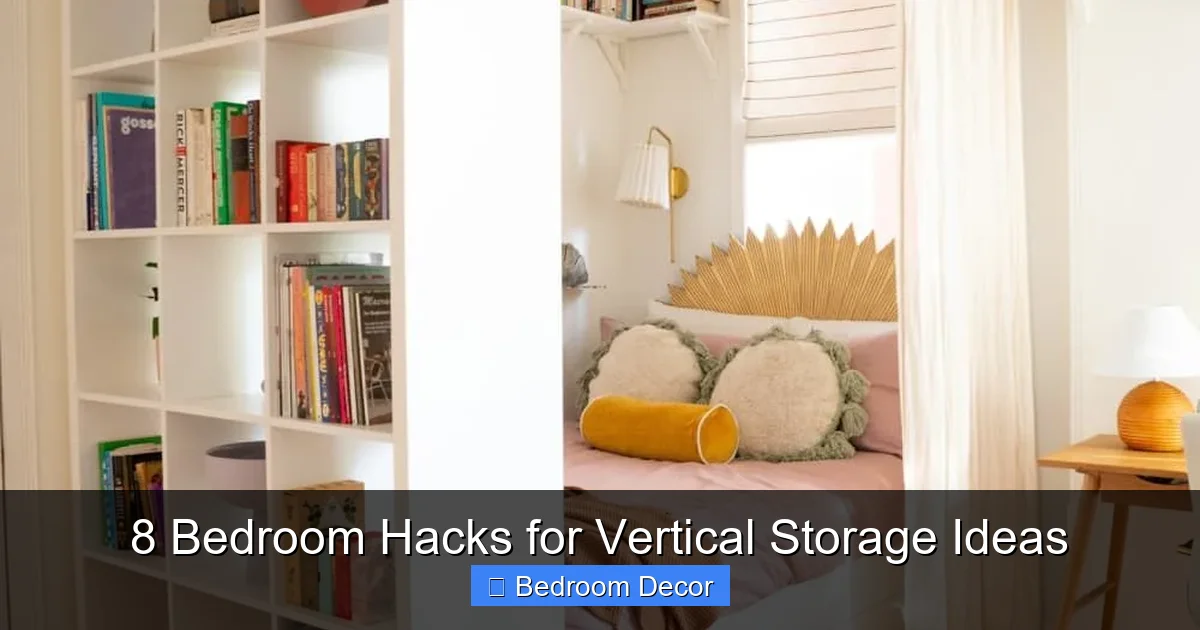
2. Utilize Tall & Slim Bookshelves/Shelving Units
When floor space is scarce, thinking vertically means choosing furniture that goes up instead of out. Tall and slim bookcases or shelving units are fantastic vertical storage ideas for maximizing height in a small footprint. They’re perfect for books, media, collectibles, or even folded clothes.
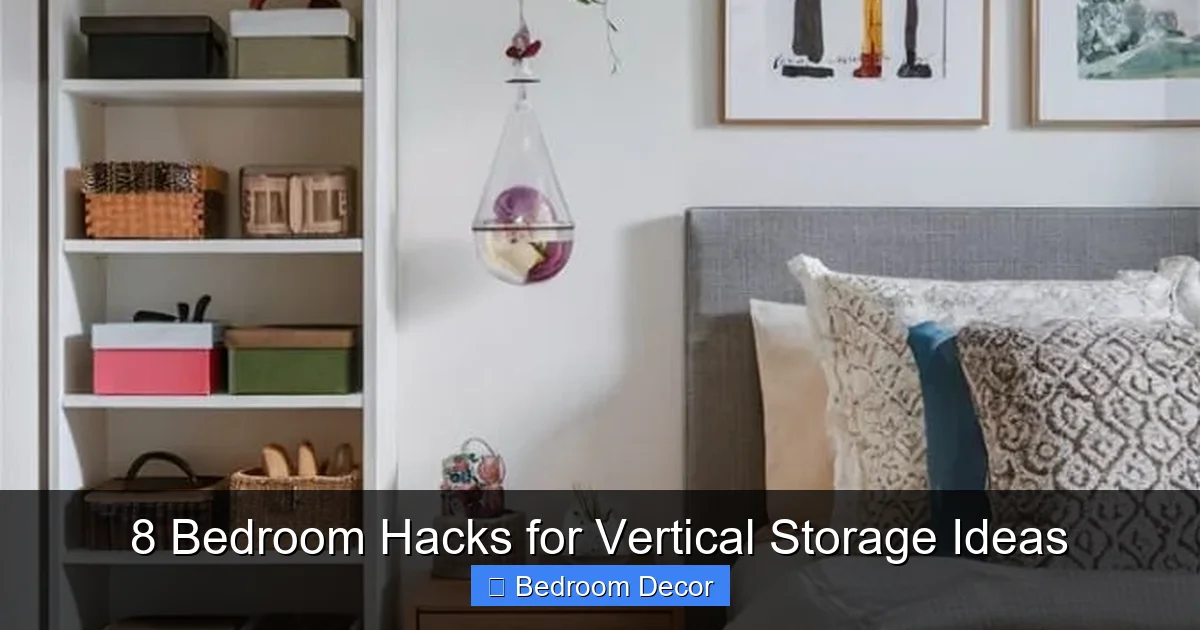
Visual guide about 8 Bedroom Hacks for Vertical Storage Ideas
Image source: i.pinimg.com
Step-by-Step Selection and Setup:
- Measure Your Space: Measure the width, depth, and height of the wall space where you plan to place the unit. Look for units that are significantly taller than they are wide.
- Consider Open vs. Closed: Decide if you prefer open shelves for display or closed cabinets/drawers for hidden storage. Many units offer a mix of both.
- Assembly and Placement: Assemble the unit according to the manufacturer’s instructions. Position it against the chosen wall, ensuring it doesn’t block windows or doorways.
- Anchor for Safety: Always anchor tall furniture to the wall using anti-tip kits, especially if you have children or pets. This is crucial for safety with any vertical storage solution.
- Organize by Category: Arrange items logically. Use decorative boxes or fabric bins on shelves to contain smaller items and maintain a tidy appearance.
- Add Style: Break up rows of books with decorative objects, framed photos, or small plants to add visual interest.
Practical Tip:
Look for modular shelving systems that allow you to add or remove sections, adapting to your evolving vertical storage needs.
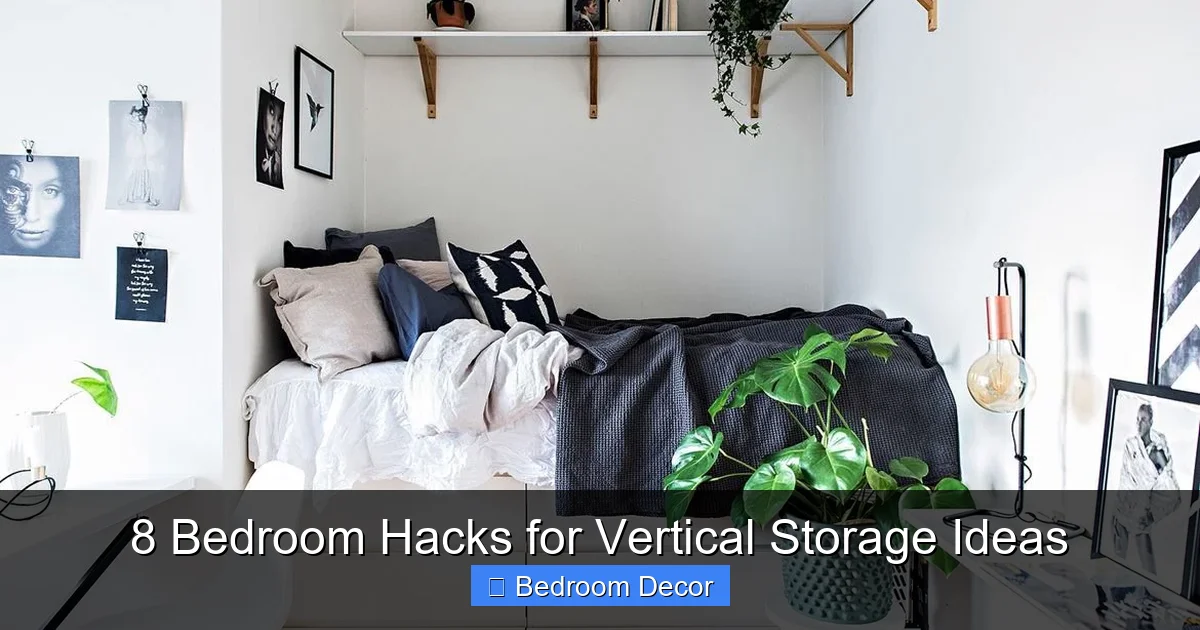
3. Maximize with Over-the-Door Organizers
The back of your bedroom door is often an overlooked space with immense vertical storage potential. Over-the-door organizers are simple, affordable, and incredibly effective for stashing a variety of items, from shoes to accessories to toiletries.
Visual guide about 8 Bedroom Hacks for Vertical Storage Ideas
Image source: i.pinimg.com
Step-by-Step Implementation:
- Assess Your Needs: What do you need to store? Shoes? Accessories? Scarves? Makeup? This will help you choose the right type of organizer.
- Choose Your Organizer:
- Pocket Organizers: Great for shoes, small clothing items, craft supplies, or toiletries.
- Hanging Hooks: Ideal for robes, towels, bags, or hats.
- Shelving Units: Some over-the-door units feature small shelves, perfect for books or small decorative items.
- Installation (No Tools Needed!): Most over-the-door organizers simply hook over the top edge of your door. Some may have adhesive strips or require minimal assembly.
- Load and Label: Fill the pockets or hang your items. For maximum efficiency, group similar items together.
Practical Tip:
Ensure the organizer doesn’t prevent the door from closing properly. If your door rattles, add felt pads to the back of the organizer or the door to reduce noise and prevent scuffing.
4. Unleash Flexibility with Wall-Mounted Pegboards & Slatwalls
For those who love customization and flexibility, wall-mounted pegboards or slatwalls are among the most dynamic vertical storage ideas. These systems allow you to add hooks, shelves, and bins in countless configurations, adapting to your ever-changing storage requirements.
Visual guide about 8 Bedroom Hacks for Vertical Storage Ideas
Image source: thespruce.com
Step-by-Step Setup:
- Choose Your Location: An empty wall above a desk, a dresser, or even a smaller section beside your bed is ideal.
- Select Your System:
- Pegboard: Typically made of wood or metal, with evenly spaced holes for pegs.
- Slatwall: Features horizontal grooves that accept various hooks, shelves, and baskets.
- Measure and Purchase: Determine the size of the board you need. Purchase the pegboard/slatwall panels, along with a starter set of hooks, shelves, and bins.
- Installation:
- Pegboard: Mark where you’ll drill holes, ensuring the board is level. Use screws and anchors to attach the pegboard securely to the wall. Leave a small gap behind the board using spacers to allow pegs to fit correctly.
- Slatwall: Slatwall panels often mount directly to studs or using specific hardware. Follow manufacturer instructions closely.
- Configure and Organize: Experiment with different hook and shelf placements until you find a layout that works for you. Hang jewelry, belts, scarves, small bags, stationery, or even lightweight art supplies.
Practical Tip:
Paint your pegboard a contrasting color to your wall for a fun, personalized touch that also serves as a functional piece of art.
5. Incorporate Stylish Ladder Shelves
Ladder shelves, also known as leaning shelves, offer a modern and attractive twist on traditional vertical storage. Their distinctive A-frame design leans against the wall, providing multiple tiers of open shelving without a heavy footprint. They are perfect for displaying books, plants, framed photos, or even small baskets of essentials.
Step-by-Step Integration:
- Select Your Spot: Choose a wall where the ladder shelf can lean securely without being in a high-traffic area. Ensure there’s enough space for its angled base.
- Choose Material and Finish: Ladder shelves come in wood, metal, and various finishes. Pick one that complements your existing bedroom decor.
- Assembly: Assemble the ladder shelf according to the instructions provided. These units are usually straightforward to put together.
- Position and Secure: Lean the shelf against the wall. Many ladder shelves come with anti-tip hardware to secure them to the wall, which is highly recommended for stability.
- Style Your Shelves: Arrange items on the shelves, balancing functionality with aesthetics. Place heavier items on lower shelves for stability.
Practical Tip:
Use the lowest, deepest shelf for larger items or a decorative bin, and lighter, smaller items on the higher shelves to create visual balance and enhance your vertical storage.
6. Opt for Vertical Drawer Chests/Dressers
When we think of dressers, we often picture wide, low units. However, choosing a tall, slim drawer chest is a fantastic vertical storage hack that maximizes storage capacity without consuming a large amount of floor space. These are ideal for clothes, linens, or even office supplies if you have a desk in your bedroom.
Step-by-Step Selection and Placement:
- Measure Up: Focus on the height and depth rather than just the width. Look for chests with more drawers stacked vertically.
- Consider Drawer Depth: Deeper drawers are great for bulky items like sweaters, while shallower drawers are perfect for socks, underwear, or accessories.
- Placement: Position the chest against a wall where it won’t impede movement or block natural light. A corner can be an excellent spot for a tall, narrow unit.
- Assemble and Anchor: Assemble the chest carefully. Crucially, always anchor any tall drawer unit to the wall using the provided anti-tip kit. This is non-negotiable for safety.
- Organize Drawers: Use drawer dividers or small bins within the drawers to keep items neatly separated and maximize the internal vertical space within each drawer.
Practical Tip:
Don’t just limit these to clothes! A tall drawer chest can serve as a linen closet, a craft supply organizer, or even a hidden filing system for documents.
7. Conquer Corners with Corner Storage Towers/Shelves
Corners are often neglected spaces, yet they offer significant vertical storage potential. Corner shelving units or towers are specifically designed to fit snugly into these areas, turning awkward angles into productive storage zones.
Step-by-Step Integration:
- Identify a Corner: Look for an unused or underutilized corner in your bedroom.
- Measure Carefully: Corner units require precise measurements for width and depth to ensure a good fit. Pay attention to how far the unit extends from the corner along each wall.
- Choose Your Style: Corner units come in various designs, from simple open shelves to more elaborate units with closed cabinets.
- Assembly and Placement: Assemble the unit according to instructions. Position it firmly in the corner.
- Anchor to Walls: Many corner units benefit from being anchored to the adjacent walls for stability, especially if they are tall.
- Curate Your Display: Use corner shelves for books, decorative objects, small electronics, or even a small lamp. Their unique shape makes them a focal point.
Practical Tip:
Combine open corner shelves with decorative items and closed corner cabinets for a mix of display and hidden vertical storage, keeping your space both organized and aesthetically pleasing.
8. Optimize Your Closet with Hanging Systems & Multi-Tier Hangers
Your closet is a goldmine for vertical storage ideas! Often, we only use the rod for hanging, leaving vast amounts of vertical space above and below. Implementing hanging organizers and multi-tier hangers can dramatically increase your closet’s capacity.
Step-by-Step Closet Makeover:
- Clear Out Your Closet: Start by emptying and decluttering. Only put back items you love and wear.
- Assess Vertical Space: Look at the space above your hanging rod, below your hanging clothes, and even on the inside of the closet door.
- Install Hanging Shelves/Cubbies: Use fabric or wire hanging organizers that hook over your closet rod. These create vertical compartments for folded clothes, sweaters, shoes, or bags.
- Utilize Multi-Tier Hangers:
- Cascading Hangers: Allow you to hang multiple garments vertically, saving rod space.
- Pant/Skirt Hangers: Designed to hold several pairs of pants or skirts on one hanger.
- Accessory Hangers: Specific hangers for scarves, ties, belts, or jewelry keep these items organized and visible.
- Add a Second Rod: If your closet has enough height, install a second, lower rod to double your hanging space for shorter items like shirts and skirts.
- Use the Door (Again!): Install an over-the-door organizer on the inside of your closet door for shoes, accessories, or even cleaning supplies.
- Stackable Bins/Drawers: Below hanging clothes, use stackable bins or clear drawers to create vertical storage for shoes, seasonal items, or extra linens.
Practical Tip:
Color-code or categorize your hanging items within the vertical system to make finding what you need even easier and more efficient.
Troubleshooting & Tips for Success with Vertical Storage Ideas
- Start Small: Don’t try to tackle your entire bedroom at once. Pick one area or one hack to implement first, then build from there.
- Measure Twice, Buy Once: Always measure your space accurately before purchasing any vertical storage solution. Consider the depth and height as much as the width.
- Anchor Everything: For tall furniture and wall-mounted units, always use anti-tip kits and secure them to the wall. Safety first!
- Mix Open and Closed Storage: A combination of open shelving (for display) and closed cabinets/drawers (for less attractive items) creates a balanced and tidy look.
- Use Bins and Baskets: Even on open vertical shelves, baskets, and decorative bins can help contain clutter and create a cleaner aesthetic.
- Don’t Overload: Respect the weight limits of shelves and organizers to prevent damage or accidents.
- Prioritize Accessibility: Place frequently used items at an easily reachable height. Less common items can go higher or lower.
- Keep it Clean: Regularly dust and tidy your vertical storage. Clutter can accumulate quickly, even when organized upwards.
Conclusion
There you have it – 8 powerful bedroom hacks to help you embrace vertical storage and transform your room! From the elegant simplicity of floating shelves to the ingenious efficiency of over-the-door organizers and the ultimate customization of pegboards, these vertical storage ideas are designed to help you reclaim your space. Remember, your bedroom walls are not just for decoration; they are prime real estate waiting to be utilized.
By thinking upwards, you’re not just creating more storage; you’re creating a more functional, organized, and serene environment. So, go ahead, pick your favorite hack (or two!), grab your measuring tape, and start turning your cluttered bedroom into a beautifully efficient haven. Happy organizing!