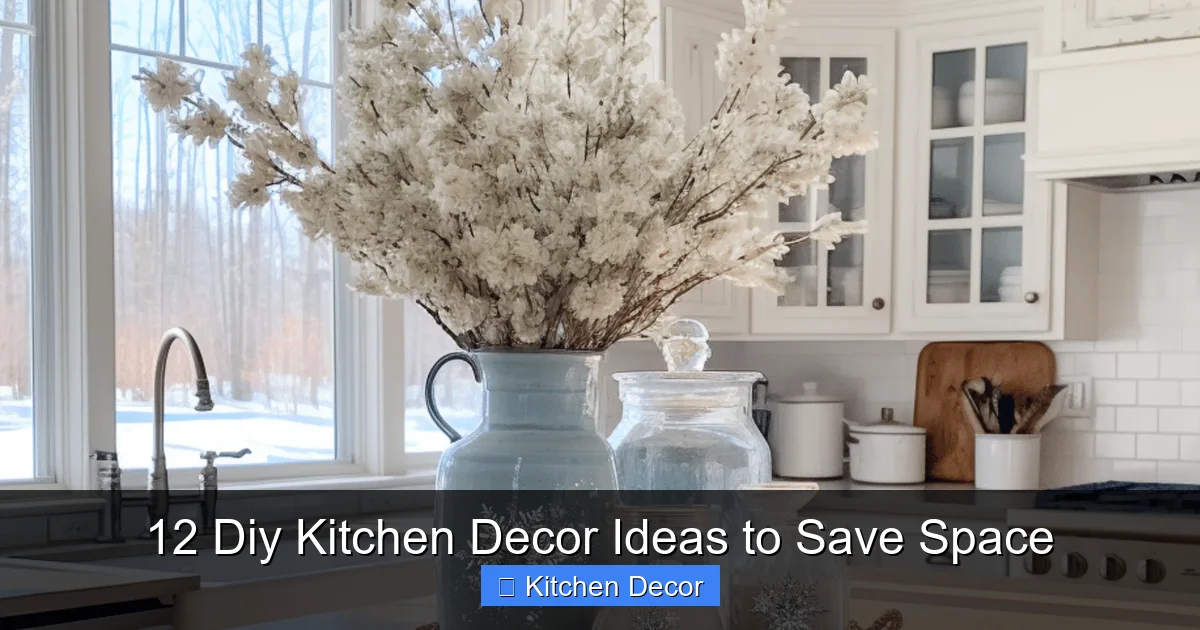
Revitalize your kitchen with 12 brilliant DIY decor ideas to save space and enhance functionality. Learn how to transform cramped areas into organized, beautiful zones using clever hacks like vertical storage, repurposed items, and multi-functional pieces. These budget-friendly projects empower you to maximize every inch, making your kitchen more efficient and enjoyable.
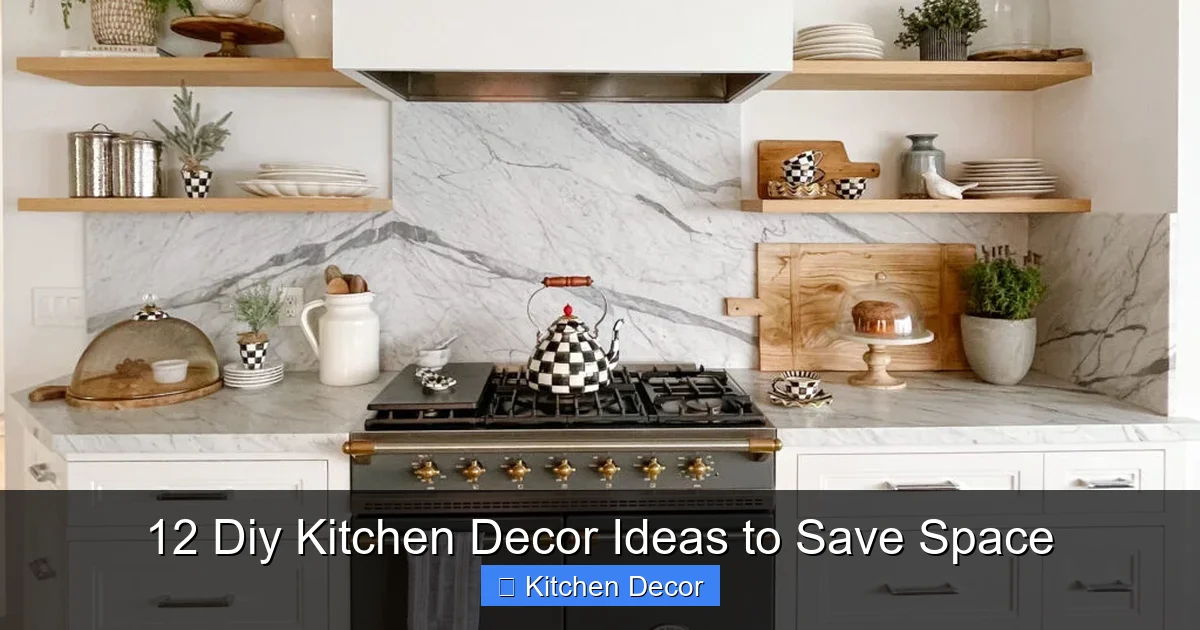
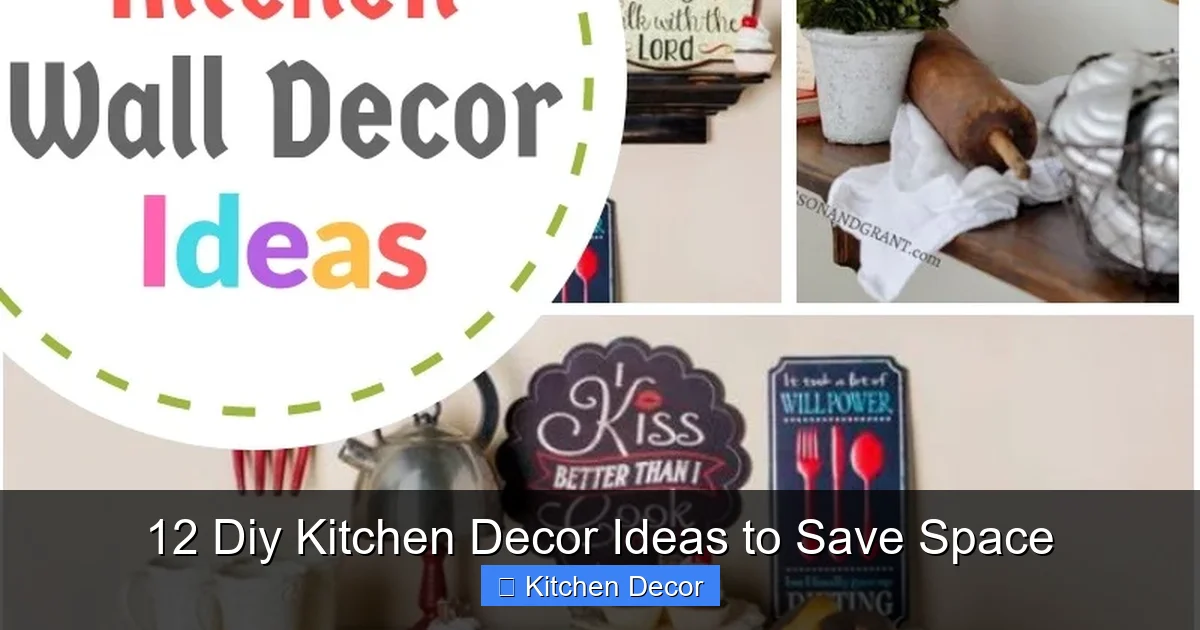
12 Diy Kitchen Decor Ideas to Save Space
Is your kitchen feeling a little cramped? Do you dream of more counter space, easier access to your cooking tools, or just a more organized look? You’re in the right place! Small kitchens can be charming, but they often challenge our organizational skills. The good news is, you don’t need a massive renovation to create more space and a better flow. With a few clever DIY kitchen decor ideas to save space, you can transform your culinary hub into a functional and beautiful area.
This guide will walk you through 12 creative, budget-friendly DIY projects. Each one is designed to maximize every inch of your kitchen. We’ll show you how to utilize vertical space, declutter your countertops, and add smart storage solutions. Get ready to roll up your sleeves and give your kitchen the upgrade it deserves!
Key Takeaways
- Embrace Vertical Space: Utilize walls, cabinet interiors, and even under-cabinet areas to free up precious counter and drawer space.
- Multi-functional Solutions: Opt for decor ideas that serve more than one purpose, like an over-the-sink cutting board or a rolling cart with storage.
- Repurpose & Upcycle: Transform old crates, jars, or baskets into stylish and functional storage solutions, adding character on a budget.
- Organize Smart, Not Hard: DIY projects like magnetic knife strips and pot lid holders can drastically improve organization and accessibility.
- Personalize Your Space: Choose projects that reflect your style while addressing specific space-saving needs, making your kitchen uniquely yours.
- Budget-Friendly Transformations: Most DIY kitchen decor ideas to save space can be completed with minimal tools and materials, making them accessible to everyone.
1. Magnetic Knife Strip for Countertop Freedom
Knives take up precious drawer space or sit in bulky blocks on your counter. A magnetic knife strip is a sleek, space-saving solution. It keeps your knives visible, organized, and within easy reach. This is one of the most practical DIY kitchen decor ideas to save space.
What You’ll Need:
- Magnetic knife strip kit (comes with hardware)
- Drill and drill bits
- Measuring tape
- Pencil
- Level
Step-by-Step DIY Guide:
- Choose Your Spot: Select an empty wall space near your prep area. Make sure it’s away from direct heat or water.
- Mark and Level: Use your measuring tape and pencil to mark where you want the strip. Use a level to ensure it’s perfectly straight.
- Drill Pilot Holes: Following the manufacturer’s instructions, drill pilot holes at your marked spots.
- Mount the Strip: Secure the magnetic strip to the wall using the provided screws and hardware.
- Test and Organize: Carefully place your knives on the strip. Enjoy your newfound counter space!
Pro Tip:
Consider mounting two smaller strips instead of one long one if your wall space is broken up. This adds visual interest and still saves space. These DIY kitchen decor solutions are all about custom fit!
2. Wall-Mounted Spice Rack for Easy Access
Spice jars can quickly clutter cabinets or drawers. A wall-mounted spice rack keeps them organized and makes finding your favorite seasonings a breeze. It’s one of those classic DIY kitchen decor ideas to save space that always works in small kitchens.
Visual guide about 12 Diy Kitchen Decor Ideas to Save Space
Image source: sanctuaryhomedecor.com
What You’ll Need:
- Small wooden planks or pre-made spice rack shelves
- Wood glue (optional)
- Screws and wall anchors
- Drill
- Measuring tape, pencil, level
- Paint or stain (optional)
Step-by-Step DIY Guide:
- Design Your Rack: Decide on the number of shelves and their length. You can buy ready-made narrow shelves or cut your own planks.
- Finish the Wood: If using raw wood, sand, paint, or stain your shelves to match your kitchen decor. Let them dry completely.
- Mark Placement: Use your measuring tape and pencil to mark where each shelf will go on the wall. Ensure even spacing and use a level.
- Install Shelves: For each shelf, drill pilot holes and secure it to the wall using screws and appropriate wall anchors. Make sure they are sturdy enough to hold the weight of your spices.
- Arrange Your Spices: Line up your spice jars, perhaps in alphabetical order or by frequency of use.
Pro Tip:
For a rustic look, use small pieces of reclaimed wood. Label your jars with uniform labels for an extra organized and aesthetically pleasing finish. This helps achieve functional space-saving kitchen decor.
3. Pegboard Powerhouse for Utensil and Pot Storage
A pegboard is a versatile hero for small kitchens. It turns an empty wall into dynamic, customizable storage for almost anything, from pots and pans to utensils and cutting boards. It’s a highly effective way to implement DIY kitchen decor ideas to save space.

Visual guide about 12 Diy Kitchen Decor Ideas to Save Space
Image source: thediymommy.com
What You’ll Need:
- Pegboard sheet (size depends on your wall)
- Pegboard mounting hardware (spacers, screws)
- Assorted pegboard hooks and baskets
- Drill, measuring tape, level, pencil
- Paint (optional)
Step-by-Step DIY Guide:
- Prepare the Pegboard: If desired, paint your pegboard a color that complements your kitchen. Let it dry.
- Choose Location: Find a suitable wall section. Consider a spot near your stove or main prep area.
- Mark and Mount: Hold the pegboard against the wall. Use a level to ensure it’s straight. Mark the drilling points for the mounting hardware. The spacers are crucial to allow hooks to fit.
- Drill and Secure: Drill pilot holes. Insert wall anchors if needed, then secure the pegboard using the mounting hardware.
- Organize with Hooks: Arrange various hooks, small shelves, and baskets to hold your kitchen tools. Experiment until you find the perfect layout.
Pro Tip:
Use outlines or labels on the pegboard to mark where each item belongs. This makes putting things away quick and easy, keeping your kitchen tidy. It’s a great piece of DIY kitchen decor for organization.
4. Floating Shelves for Open and Airy Storage
Traditional cabinets can feel heavy and bulky, especially in a small kitchen. Floating shelves offer a light, open alternative for storing dishes, cookbooks, or decorative items. They are fantastic DIY kitchen decor ideas to save space because they add storage without visual weight.
Visual guide about 12 Diy Kitchen Decor Ideas to Save Space
Image source: diycraftsfood.trulyhandpicked.com
What You’ll Need:
- Floating shelf brackets and shelves (wood, MDF)
- Drill, screwdriver
- Measuring tape, pencil, level
- Wall anchors (if not mounting into studs)
Step-by-Step DIY Guide:
- Plan Your Layout: Decide how many shelves you need and their spacing. Consider what you plan to store on them to determine depth and length.
- Locate Studs (or Use Anchors): Use a stud finder to locate wall studs for maximum stability. If studs aren’t available, use heavy-duty wall anchors.
- Mount Brackets: Mark the bracket positions with a pencil and level. Drill pilot holes and secure the floating shelf brackets firmly to the wall.
- Attach Shelves: Slide the shelves onto the brackets, or secure them from underneath, depending on your bracket type. Ensure they are level.
- Decorate and Organize: Arrange your items neatly. Use a mix of practical items (dishes) and decorative touches (small plants, artwork).
Pro Tip:
Choose shelves that match or complement your existing kitchen aesthetic. Light-colored shelves can make a small kitchen feel larger and brighter. Don’t overload them; keep styling simple and functional. This type of DIY kitchen decor works wonders for openness.
5. Under-Cabinet Jar Storage for Dry Goods
Free up precious pantry or countertop space by storing dry goods in jars mounted to the underside of your upper cabinets. This clever hack utilizes often-overlooked vertical space and is one of the most ingenious DIY kitchen decor ideas to save space.
What You’ll Need:
- Matching glass jars with metal lids (Mason jars work well)
- Screws (short enough not to pierce cabinet interior)
- Drill with a small bit
- Pencil
Step-by-Step DIY Guide:
- Prepare Your Jars: Wash and dry your chosen jars and lids thoroughly.
- Mark Lid Positions: Place the lids upside down on the underside of your cabinet. Arrange them with enough space between each for easy screwing and unscrewing. Use a pencil to mark the screw holes for each lid. Aim for at least 3-4 screws per lid for stability.
- Drill Pilot Holes: Carefully drill small pilot holes through the metal lids at your marked points.
- Attach Lids to Cabinet: Hold each lid in place under the cabinet, aligning the pilot holes with your marks. Use screws to firmly attach the lids to the cabinet’s underside. Make sure the screws are short enough.
- Fill and Twist: Fill your jars with spices, pasta, rice, or snacks. Twist them onto the mounted lids.
Pro Tip:
Use clear jars so you can easily see contents. Label the bottom of each jar or lid for quick identification without needing to remove them. This smart space-saving kitchen decor is both practical and stylish.
6. DIY Pot Lid Organizer for Cabinet Neatness
Pot lids are notorious for causing cabinet chaos. A simple DIY organizer can keep them tidy, easily accessible, and free up valuable cabinet space. This project is a lifesaver for anyone struggling with disorganization and looking for DIY kitchen decor ideas to save space.
What You’ll Need:
- Tension rods, or a small wire dish rack
- Command hooks or small adhesive hooks (if using cabinet doors)
- Measuring tape
Step-by-Step DIY Guide (using tension rods):
- Measure Cabinet Door: Open a cabinet door. Measure the width of the door where you want to place the lids.
- Install First Rod: Place one tension rod horizontally across the inside of the cabinet door, a few inches from the bottom edge. Tighten it firmly.
- Install Second Rod: Place a second tension rod parallel to the first, a few inches above it. The distance between the rods should accommodate the rim of your pot lids.
- Test and Adjust: Place a lid between the rods to ensure it’s held securely. Adjust the rods as needed. Repeat for other lids.
Step-by-Step DIY Guide (using a wire rack for inside cabinet):
- Choose Your Rack: Select a small, vertical wire dish rack.
- Place Inside Cabinet: Stand the rack upright inside your cabinet.
- Organize Lids: Slide your pot lids into the slots of the rack. This keeps them upright and prevents them from nesting messily.
Pro Tip:
For large, heavy lids, consider a more robust solution like small hooks screwed directly into the cabinet door frame or a purpose-built lid organizer. Ensure hooks are strong enough to prevent items from falling when opening/closing the door. This is truly smart DIY kitchen organization.
7. Vertical Herb Garden for Freshness and Style
Fresh herbs elevate any dish, but growing them can take up precious counter space. A vertical herb garden is a beautiful and practical way to enjoy fresh herbs while adding a touch of green to your kitchen. This makes it a delightful example of DIY kitchen decor ideas to save space.
What You’ll Need:
- Small pots or containers (with drainage holes)
- A ladder shelf, hanging planter, or wooden pallet
- Potting soil
- Herb seeds or small herb plants
- Screws/hooks (if hanging)
- Drill (if needed for drainage or mounting)
Step-by-Step DIY Guide (using a ladder shelf):
- Assemble Shelf: If using a flat-pack ladder shelf, assemble it according to instructions.
- Pot Your Herbs: Plant your chosen herbs (basil, mint, parsley, etc.) in small pots with good potting soil.
- Arrange on Shelf: Place the potted herbs on the steps of the ladder shelf. Position the shelf near a sunny window in your kitchen.
Step-by-Step DIY Guide (using a hanging system):
- Choose Hanging Planters: Select small planters designed for hanging. Some have multiple pockets.
- Mount Hooks/Rail: Install sturdy hooks or a decorative rail on a suitable wall space near a window.
- Hang and Plant: Hang your planters. Fill them with soil and plant your herbs.
Pro Tip:
Ensure your chosen location gets enough sunlight. Rotate pots regularly for even growth. Consider small drip trays under pots if you’re concerned about water damage. Vertical DIY kitchen decor is always a smart move.
8. Repurposed Crate or Basket Shelving for Rustic Charm
Old wooden crates or sturdy baskets can be transformed into charming, rustic storage. Stack them, mount them, or place them on the floor. They offer versatile storage for produce, linens, or even small appliances. This is an excellent way to incorporate creative and sustainable DIY kitchen decor ideas to save space.
What You’ll Need:
- Clean, sturdy wooden crates or robust baskets
- Sandpaper (for crates)
- Paint or stain (optional)
- Screws and wall anchors (if mounting)
- Drill, level, measuring tape, pencil
Step-by-Step DIY Guide (for stacked crates):
- Prepare Crates: If using wooden crates, lightly sand them to remove splinters. Paint or stain if desired and let dry.
- Stack and Secure: Arrange your crates in a configuration that fits your space. You can stack them vertically or horizontally. For stability, use small wood screws to connect adjacent crates.
- Organize: Fill the compartments with items like root vegetables, towels, or even cookbooks.
Step-by-Step DIY Guide (for wall-mounted baskets):
- Select Baskets: Choose baskets with a flat back or that can be easily flattened against a wall.
- Mark and Mount: Hold the basket against the wall where you want it. Mark where you’ll need to drill for screws or strong hooks. Drill pilot holes and secure the basket.
- Store Items: Use these for lighter items like oven mitts, dishtowels, or small kitchen gadgets.
Pro Tip:
Mix and match different sizes of crates or baskets for visual interest. Line baskets with fabric for a softer look or to protect delicate items. These DIY kitchen projects offer both functionality and character.
9. DIY Pull-Out Pantry Shelves to Maximize Cabinets
Deep cabinets are great for storage, but items often get lost in the back. DIY pull-out shelves or drawers bring everything to you, making every inch of your cabinet space accessible. This is a game-changer among DIY kitchen decor ideas to save space for pantry organization.
What You’ll Need:
- Wooden planks for shelves/drawer boxes
- Drawer slides (full extension recommended)
- Screws, drill
- Measuring tape, pencil, level
- Saw (or have wood cut at hardware store)
Step-by-Step DIY Guide:
- Measure Carefully: Measure the inside dimensions of your cabinet (width, depth, height). Account for the drawer slides themselves.
- Cut Wood: Cut your wooden planks to create the base and sides for your pull-out shelves/drawers. You’ll need a bottom piece and four side pieces for each unit.
- Assemble Drawer Boxes: Assemble your shelf/drawer boxes using wood glue and screws. Ensure they are square and sturdy.
- Install Drawer Slides: Attach one part of the drawer slide to the sides of your assembled box and the other part to the inside walls of your cabinet. Follow the manufacturer’s instructions carefully for proper alignment.
- Test and Fill: Slide your new shelves in and out to ensure smooth operation. Fill them with pantry items like cans, jars, or baking supplies.
Pro Tip:
For easier installation, choose drawer slides that are “self-closing” or “soft-close” for a more professional feel. Consider adding a small lip or front panel to prevent items from falling out. Looking for more space-saving kitchen decor? This is it!
10. Over-the-Sink Solutions (Cutting Board & Drying Rack)
Your sink area is often underutilized. An over-the-sink cutting board or a custom drying rack can turn this space into a multi-functional workhorse, adding invaluable prep and drying space without using up your counter. These are smart, practical DIY kitchen decor ideas to save space.
What You’ll Need:
- Large, sturdy wooden board (food-safe for cutting board)
- Measuring tape, pencil, saw
- Sandpaper
- Wood sealer (food-safe for cutting board)
- For drying rack: dowel rods, wood glue, drill
Step-by-Step DIY Guide (Over-the-Sink Cutting Board):
- Measure Sink: Measure the width and depth of your sink opening. Add a few inches to the width so the board can rest securely on the countertop edges.
- Cut Board: Cut your chosen wooden board to the measured dimensions.
- Sand and Seal: Sand all edges smooth. Apply a food-safe wood sealer to protect the wood and make it easy to clean. Let it dry completely.
- Test Fit: Place the board over your sink. It should sit securely on the counter.
Step-by-Step DIY Guide (Over-the-Sink Drying Rack):
- Measure and Design: Measure your sink opening. Design a simple frame with dowel rods spaced apart to hold dishes.
- Cut Wood: Cut the frame pieces and dowel rods to size.
- Assemble Frame: Drill holes for the dowels in the frame pieces. Use wood glue to secure the dowels into the frame.
- Seal: Seal the wood with a waterproof sealant.
- Place Over Sink: The finished rack should rest over your sink, allowing dishes to drip dry directly into the basin.
Pro Tip:
For an over-the-sink cutting board, consider adding small rubber feet to the underside to prevent slipping and protect your counter. For the drying rack, make sure the wood is treated to resist water damage. These DIY kitchen solutions are often multi-functional.
11. Inside-Door Storage for Wraps and Foils
The inside of your cabinet doors is often overlooked space. Installing simple racks or hooks can create perfect storage for aluminum foil, plastic wrap, cutting boards, or cleaning supplies. This is a quick win for anyone looking for simple DIY kitchen decor ideas to save space.
What You’ll Need:
- Magazine files (plastic or wire) or small tension rods
- Small screws or strong adhesive hooks/strips
- Drill (if using screws)
- Measuring tape, pencil
Step-by-Step DIY Guide (using magazine files):
- Choose Files: Select narrow magazine files that fit inside your cabinet doors without interfering with the shelves when closed.
- Mark Placement: Hold the file against the inside of the cabinet door. Mark where the screws or adhesive strips will go. Ensure it’s high enough to hold your rolls.
- Attach Files: If using screws, drill pilot holes and secure the files. If using adhesive strips, follow the product instructions for attachment.
- Organize Rolls: Slide in your foil, plastic wrap, and parchment paper rolls.
Step-by-Step DIY Guide (using tension rods for cutting boards):
- Measure Door: Measure the inside width of your cabinet door.
- Install Rods: Place two small tension rods horizontally across the inside of the door, several inches apart. The distance depends on the thickness of your cutting boards.
- Store Boards: Slide cutting boards vertically between the rods.
Pro Tip:
Before installing, check that your chosen storage solution won’t prevent the cabinet door from closing properly or hit shelves inside. Use a test item to ensure fit. These DIY kitchen organization ideas are small but mighty.
12. Compact Rolling Kitchen Cart/Island for Flexibility
When permanent counter space is scarce, a compact rolling kitchen cart or island is a brilliant solution. It provides extra prep space, storage, and can be moved out of the way when not needed. This is one of the more involved but rewarding DIY kitchen decor ideas to save space.
What You’ll Need:
- Sturdy wood for frame and top (butcher block or plywood)
- Casters (locking wheels)
- Screws, wood glue
- Drill, saw, measuring tape, pencil
- Optional: basket slides, baskets, paint/stain
Step-by-Step DIY Guide:
- Design Your Cart: Sketch out your desired cart size and features (shelves, drawers, towel bar). Keep it compact for small spaces.
- Cut Wood Pieces: Cut all your wood according to your design – legs, shelves, top, and any side panels.
- Assemble Frame: Use wood glue and screws to assemble the basic frame of your cart. Ensure it’s sturdy and square.
- Install Shelves/Storage: Add any shelves, basket slides, or other storage elements to the frame.
- Attach Top: Secure your chosen top (butcher block, tiled surface, etc.) to the frame.
- Install Casters: Flip the cart over and attach the locking casters to the bottom of the legs.
- Finish: Sand, paint, or stain your cart to match your kitchen decor.
Pro Tip:
Choose heavy-duty locking casters to ensure the cart stays put when you’re working. Add a small towel bar to one side for even more functionality. Consider making the top a removable cutting board for extra versatility. These DIY kitchen decor projects truly add flexibility.
Smart Tips for Your Space-Saving Kitchen DIYs
To make the most of your efforts with these DIY kitchen decor ideas to save space, keep these tips in mind:
- Measure Twice, Build Once: Accuracy is key, especially in small spaces where every millimeter counts.
- Prioritize Needs: Think about what items cause the most clutter or are hardest to access. Start with DIYs that address those pain points first. These space-saving kitchen decor solutions should serve your biggest needs.
- Consider Aesthetics: Even functional pieces can be beautiful. Choose materials, colors, and finishes that complement your kitchen’s existing style. Your DIY kitchen decor should fit your home.
- Safety First: Always use appropriate safety gear (gloves, eye protection) and follow tool instructions. Ensure wall-mounted items are securely fastened.
- Don’t Be Afraid to Adjust: If an idea isn’t working exactly as planned, be flexible. Sometimes a slight modification can make all the difference.
- Declutter Before You Organize: Before implementing new storage, go through your kitchen items. Get rid of anything you don’t use or need. You can’t organize clutter!
Conclusion
Transforming a small or cluttered kitchen doesn’t have to be overwhelming or expensive. By embracing these 12 clever DIY kitchen decor ideas to save space, you can create a kitchen that is not only highly functional and organized but also reflects your personal style.
From utilizing vertical wall space with magnetic strips and pegboards to maximizing cabinet interiors with pull-out shelves and door organizers, each project offers a practical solution to common space challenges. These DIY kitchen projects empower you to take control of your kitchen’s functionality and aesthetic. Take inspiration from these ideas, adapt them to your specific needs, and enjoy the satisfaction of a beautifully organized and efficient kitchen. Happy DIYing!