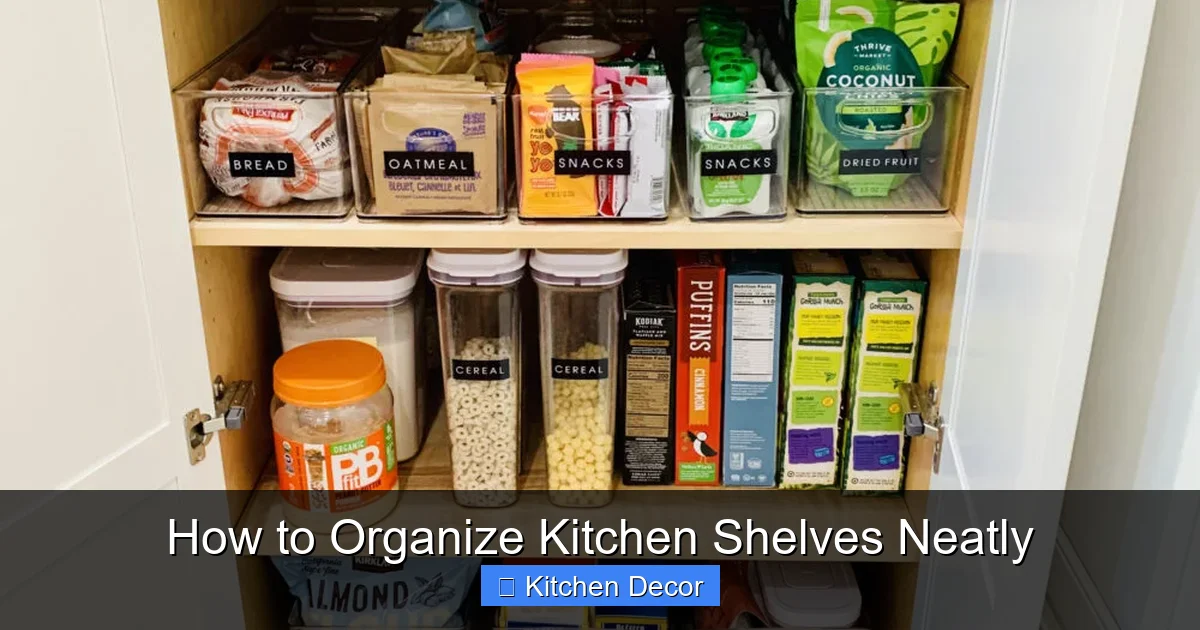
Transform your kitchen with our comprehensive guide on how to organize kitchen shelves neatly. Discover simple, actionable steps to declutter effectively, deep clean every surface, and implement smart storage solutions tailored to your needs. Create a highly functional, beautiful kitchen that makes cooking and entertaining a joy, ensuring lasting order and an inspiring space.
How to Organize Kitchen Shelves Neatly
Are your kitchen shelves a jumbled mess? Do you dread opening those cabinet doors, only to be met with a cascade of forgotten items and disarray? You’re not alone! A messy kitchen can be a source of daily frustration, wasting your time and hindering your cooking flow. But imagine a kitchen where everything has its place, is easy to find, and looks beautiful. That dream can become a reality!
This comprehensive guide will walk you through exactly how to organize kitchen shelves neatly, transforming your chaotic cabinets into models of efficiency and elegance. We’ll cover everything from the initial declutter to clever storage solutions and long-term maintenance tips. By the end, you’ll have a kitchen that not only looks fantastic but also functions perfectly for your lifestyle. Get ready to reclaim your kitchen and enjoy a calmer, more productive cooking space!
Key Takeaways
- Start with a Complete Purge: Empty all your shelves, evaluate every item, and ruthlessly declutter anything expired, unused, or broken to create a clean slate.
- Clean and Prepare Thoroughly: Once empty, deep clean your shelves from top to bottom. Consider adding shelf liners for extra protection and easier maintenance.
- Implement Smart Zoning: Group similar items and assign specific zones for categories like baking, cooking, dinnerware, or snacks. This creates logical homes for everything.
- Utilize Strategic Storage Solutions: Invest in appropriate organizers such as clear containers, shelf risers, lazy Susans, and baskets to maximize space and keep items visible and accessible.
- Place Items Logically: Store frequently used items at eye level, heavy items down low, and less-used items higher up. This enhances ergonomics and efficiency.
- Label for Long-Term Success: Clearly label containers, baskets, and even shelves to ensure everyone in the household knows where things belong, making maintenance simple.
- Establish a Maintenance Routine: Schedule quick tidy-ups regularly and conduct a mini-purge every few months to prevent clutter from accumulating again.
Step 1: The Grand Purge – Empty & Declutter
Before you can begin to organize kitchen shelves neatly, you need to start with a blank canvas. This is often the most daunting but also the most crucial step. It’s time to be brave and decisive!
Remove Everything from Your Shelves
Pull out every single item from your kitchen shelves, cabinets, and pantry. Yes, *everything*. Lay it all out on your countertops, kitchen table, or even the floor. Seeing everything you own in one place can be quite eye-opening! This step is vital because it allows you to truly see the volume of items you possess and identify duplicates or forgotten treasures.
Sort & Decide: Keep, Donate/Sell, Toss
Now, go through each item with a critical eye. Create three distinct piles:
- Keep: These are items you use regularly, love, or truly need. Be honest with yourself.
- Donate/Sell: Items that are still in good condition but you no longer use, need, or have space for. Think about giving them a second life. Small appliances, extra dishes, or specialty bakeware often fall into this category.
- Toss: Anything broken, expired, damaged beyond repair, or truly unusable. Don’t feel guilty; get rid of it!
Check Expiry Dates Rigorously
As you sort, pay close attention to expiry dates on food items, spices, and even cleaning supplies. Old spices lose their potency, and expired food is just taking up valuable space. This is a prime opportunity to clear out stale ingredients that you might have forgotten about.
Practical Tip: When in doubt, ask yourself: “Have I used this in the last six months to a year?” If the answer is no, and it’s not a seasonal or sentimental item, it probably belongs in the donate or toss pile.
Step 2: Clean Your Canvas
With your shelves emptied and decluttered, it’s the perfect time for a deep clean. You wouldn’t paint a dirty wall, right? The same logic applies to organizing your kitchen shelves neatly!
Wipe Down All Surfaces
Using a gentle all-purpose cleaner and a clean cloth, thoroughly wipe down the inside and outside of your shelves and cabinet doors. Pay attention to corners and edges where dust and crumbs love to hide. For wooden shelves, a wood cleaner might be more appropriate. For laminated or painted surfaces, a simple dish soap and water solution often works wonders.
Address Stubborn Stains and Grime
For greasy build-up or sticky spots, you might need a stronger degreaser or a paste of baking soda and water. Let it sit for a few minutes before scrubbing gently. Rinse with a damp cloth and dry thoroughly. Ensure all cleaning product residue is removed before you put items back.
Line Your Shelves (Optional but Recommended)
Shelf liners offer several benefits:
- Protection: They protect your shelves from spills, scratches, and wear and tear.
- Easier Cleaning: If something spills, you can often just remove and clean or replace the liner rather than scrubbing the shelf itself.
- Aesthetics: They can add a pop of color or pattern, or simply create a cohesive, clean look.
Measure your shelves carefully and cut the liners to size. There are various types, from non-adhesive grip liners to decorative adhesive options.
Step 3: Assess Your Inventory & Needs
Now that your shelves are sparkling clean, take a moment to look at your “Keep” pile. This is your inventory. Understanding what you have and how you use it is key to how to organize kitchen shelves neatly and effectively.
Group Similar Items Together
Start consolidating your “Keep” pile into logical categories. For example:
- Baking supplies (flour, sugar, baking soda, extracts)
- Spices and seasonings
- Pots, pans, and bakeware
- Dishes, bowls, and glasses
- Food storage containers
- Small appliances
- Snacks and dry goods
- Cleaning supplies
This step helps you visualize the space requirements for each category.
Consider Usage Frequency
Think about which items you use daily, weekly, or only on special occasions. This will directly influence where you store them for optimal accessibility. Your everyday coffee mugs should be much easier to grab than your holiday serving platter.
Identify Storage Challenges
Are there any items that are particularly awkward to store? Large cutting boards, oddly shaped appliances, or a collection of reusable water bottles? Make a mental note of these “problem” items, as you’ll need creative solutions for them. This assessment is crucial for designing a system that works for *your* kitchen.
Step 4: Design Your Zone System
One of the most effective strategies to organize kitchen shelves neatly is to create a zone system. This means assigning specific areas of your kitchen to specific tasks or item categories.
Assign Dedicated Zones
Think about how you use your kitchen. Common zones include:
- Cooking Zone: Near the stove/oven – pots, pans, cooking utensils, oils, spices.
- Baking Zone: Near a counter space where you prepare baked goods – flour, sugar, mixing bowls, cookie sheets.
- Prep Zone: Near your main cutting board area – knives, cutting boards, small food processor.
- Beverage Zone: Near the coffee maker or water dispenser – mugs, coffee, tea, filters.
- Dishware Zone: Near the dishwasher for easy unloading – plates, bowls, glasses, cutlery.
- Pantry Zone: For dry goods, canned goods, snacks, and less frequently used ingredients.
- Cleaning Zone: Under the sink – cleaning supplies, dish soap, sponges.
This system drastically cuts down on unnecessary movement and makes finding what you need effortless.
Think Ergonomics: Height & Accessibility
When assigning zones, consider who uses what and how often.
- Eye-Level Shelves: These are prime real estate for your most frequently used items (everyday plates, glasses, spices, staple ingredients).
- Lower Shelves: Ideal for heavy items (large pots, small appliances, canned goods) or items used by children (plastic plates, snack boxes).
- Upper Shelves: Reserve these for items you use infrequently (special occasion dinnerware, holiday bakeware, bulk dry goods).
The goal is to minimize bending, stretching, and reaching for everyday items.
Group by Category & Function
Within each zone, reinforce the idea of grouping. For instance, in your baking zone, keep all your flours together, all your sugars together, and all your extracts together. This makes finding ingredients a breeze when you’re in the middle of a recipe. This thoughtful planning is how you truly organize kitchen shelves neatly and efficiently.
Step 5: Implement Smart Storage Solutions
Now comes the fun part: finding tools that help maximize your space and keep things tidy. Investing in the right organizers can make a huge difference in how to organize kitchen shelves neatly.
Utilize Bins, Baskets, & Containers
These are your best friends for corralling items and creating visual order.
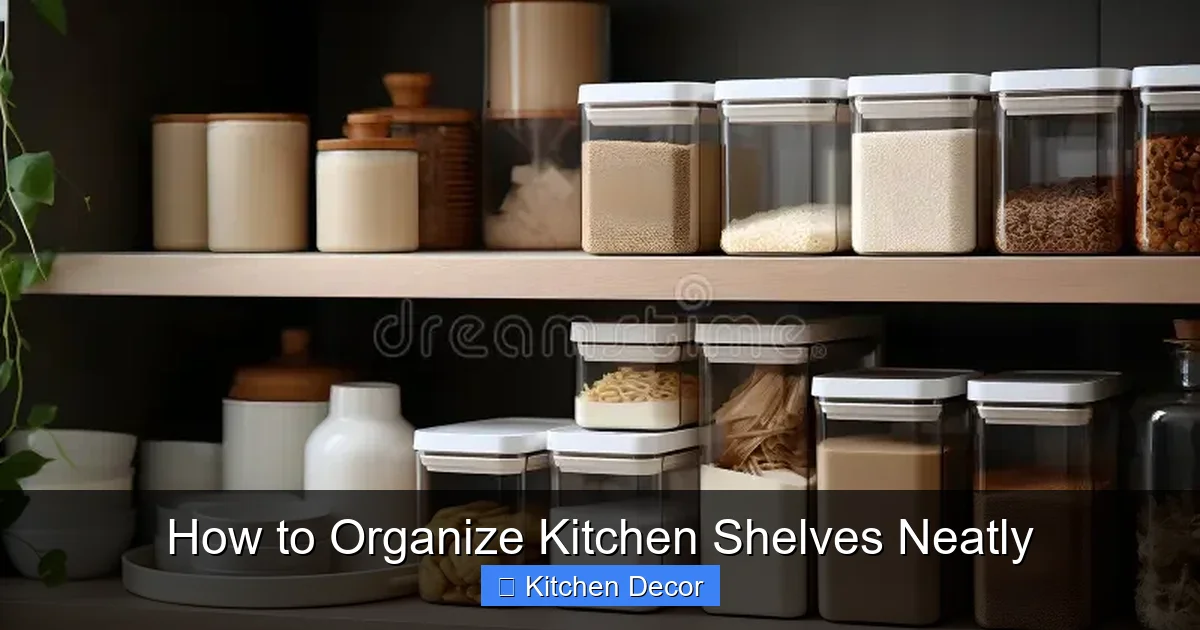
- Clear Air-Tight Containers: Perfect for dry goods like pasta, rice, flour, sugar, cereal, and snacks. They keep food fresh, prevent spills, and allow you to see exactly what you have at a glance.
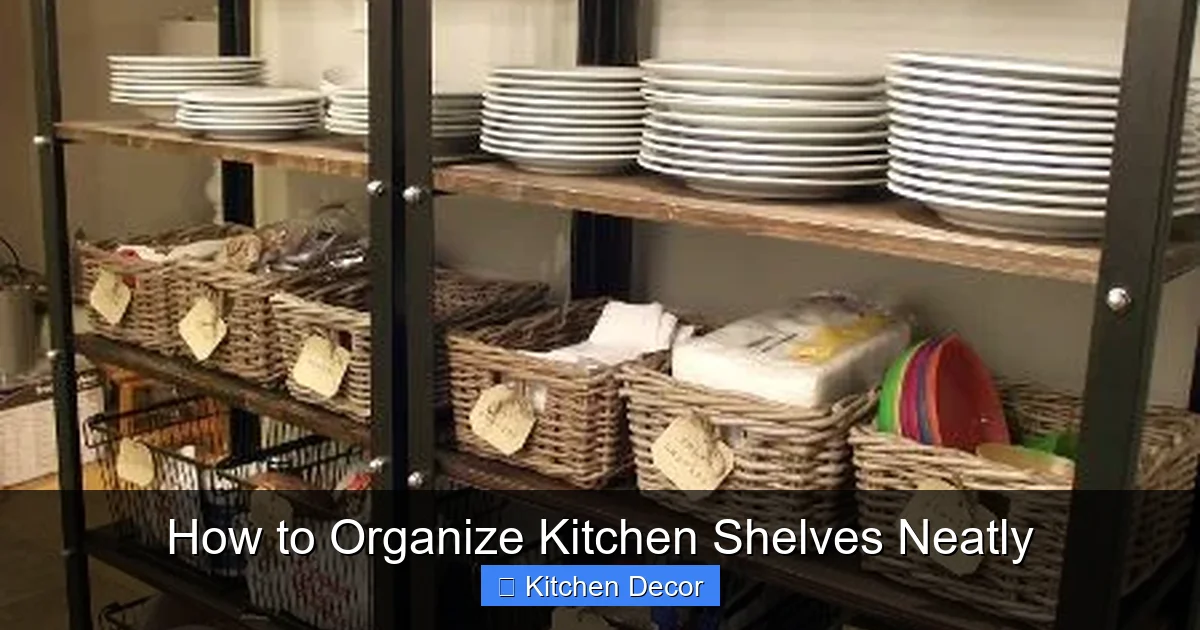
- Baskets (Wicker, Fabric, Wire): Great for grouping odd-shaped items like snack bags, cleaning supplies, or extra linens. They add texture and hide clutter effectively.
- Drawer Dividers/Organizers: Essential for cutlery, cooking utensils, and small gadgets. They prevent items from shifting around and getting tangled.
Employ Shelf Risers & Expanders
These simple tools double your usable vertical space.
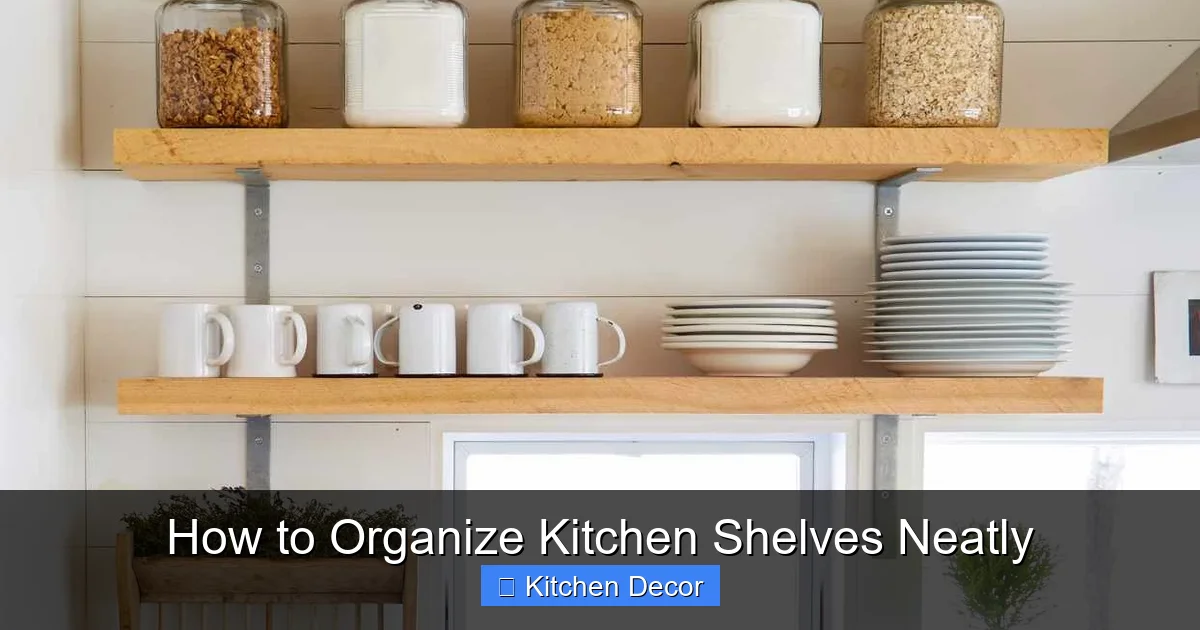
- Shelf Risers: Create an additional “shelf” above existing items, perfect for stacking plates, mugs, or canned goods without making them inaccessible.
- Expandable Shelves: Adjust to fit different shelf widths, providing customizable extra storage.
Maximize Vertical Space
Don’t let empty space above shorter items go to waste.
- Stackable Containers: Choose containers designed to stack securely.
- Under-Shelf Baskets: These clever baskets hook onto the bottom of a shelf, creating instant extra storage space beneath.
- Vertical Dividers: Use these to store baking sheets, cutting boards, and platters upright, making them easy to grab without toppling stacks.
Consider Lazy Susans & Pull-Out Drawers
- Lazy Susans (Turntables): Ideal for corner cabinets or deep shelves where items can get lost at the back. Perfect for spices, oils, condiments, or cleaning supplies.
- Pull-Out Drawers/Baskets: Can be installed in deeper cabinets to bring items at the back forward, eliminating the need to rummage.
Practical Tip: Before buying any organizers, measure your shelves accurately! This prevents frustrating returns and ensures a perfect fit. Start with a few key pieces and expand as you discover what works best for your setup.
Visual guide about How to Organize Kitchen Shelves Neatly
Image source: thumbs.dreamstime.com
Visual guide about How to Organize Kitchen Shelves Neatly
Image source: i.pinimg.com
Visual guide about How to Organize Kitchen Shelves Neatly
Image source: bhg.com
Step 6: Place Items Strategically
Now that you have your zones defined and your storage solutions in hand, it’s time to put everything back. This is where your careful planning really pays off in how to organize kitchen shelves neatly.
Everyday Items at Eye Level and Within Easy Reach
As mentioned in Step 4, your most frequently used items should be the easiest to access. This includes dinner plates, everyday glasses, coffee mugs, staple spices, and commonly used cooking oils. If you use it daily, it deserves prime real estate.
Heavy or Bulky Items Down Low
Store heavy pots, large serving dishes, small kitchen appliances (like stand mixers or blenders), and bulkier items on lower shelves. This makes them safer to retrieve and reduces strain on your back. It also anchors your shelves, making the whole system more stable.
Infrequently Used Items Up High
Seasonal decor, specialty bakeware, large stockpots used only for entertaining, or holiday serving pieces belong on the highest shelves. You might need a step stool to get them, but since you don’t use them often, this is perfectly acceptable.
Decant Dry Goods for Uniformity and Freshness
Transfer dry goods from their original packaging into clear, airtight containers. This isn’t just for aesthetics; it keeps food fresher, prevents pests, and allows you to see inventory levels instantly. Plus, uniform containers create a much cleaner, more organized look on your shelves.
Keep Like with Like
Reinforce your zone system by keeping all items within a category together. All baking flours together, all canned beans together, all coffee-related items together. This logical grouping is fundamental to maintain order.
Step 7: Label for Lasting Order
You’ve done all the hard work to organize kitchen shelves neatly. Don’t let it fall apart because no one knows where things go! Labeling is a simple yet powerful tool for maintaining organization.
Why Labeling Matters
- Clarity: Everyone in the household (and even guests!) will know exactly where to find and return items.
- Consistency: It reinforces your system and makes it easier to put things back in their designated spots.
- Inventory Management: Labels on opaque bins help you quickly identify contents without having to pull them out.
- Aesthetics: Cohesive labeling can add a professional, polished touch to your organized shelves.
Labeling Methods to Consider
- Sticker Labels: Easy to apply and remove, available in many styles.
- Chalkboard Labels: Great for items that change frequently (e.g., “Snacks,” “Baking Mixes”). You can wipe and rewrite.
- Label Maker: Creates a neat, uniform, and professional look.
- Handwritten Tags: Can add a personal or rustic touch, especially if attached to baskets.
Label containers, shelves, and even the inside of cabinet doors if it helps define a zone.
Troubleshooting Common Shelf Organization Issues
Even with the best intentions, you might run into some specific challenges when you organize kitchen shelves neatly. Here are solutions to common problems:
Limited Space Solutions
If you have a small kitchen, every inch counts.
- Utilize Cabinet Doors: Install over-the-door organizers for spices, foil/wrap, or cleaning supplies.
- Add a Pegboard: Hang a pegboard on an unused wall or inside a cabinet door for hanging pots, pans, or utensils.
- Think Multi-Purpose: Can an item serve more than one function? Can storage double as decor?
- Consider Vertical Storage Outside Cabinets: Wall-mounted shelves, magnetic knife strips, or pot racks can free up valuable cabinet space.
- Declutter Ruthlessly & Regularly: For small spaces, frequent decluttering is paramount. Only keep what you truly love and use.
Keeping It Organized Long-Term
The initial setup is just the beginning. The real challenge is maintaining the order you’ve created.
- “One In, One Out” Rule: When you buy something new, get rid of something old. This prevents accumulation.
- Daily Tidy-Up: Take 5-10 minutes each day to put things back where they belong, wipe down counters, and straighten items.
- Monthly Mini-Purge: Quickly scan your shelves once a month for anything that’s gone past its expiry date or migrated out of its zone.
- Involve the Household: Ensure everyone understands the system and takes responsibility for putting items back correctly. Labels help immensely here!
Dealing with Awkward Items
Some kitchen items just don’t fit neatly into standard shelves.
- Large Serving Platters/Cutting Boards: Use vertical dividers within a cabinet or stand them upright in a deep drawer.
- Pot Lids: Install a pot lid organizer inside a cabinet door or use an expandable rack on a shelf.
- Small Appliances: If frequently used, keep them on the counter or a designated appliance garage. If rarely used, store them on high shelves or in a pantry, perhaps in their original boxes for protection.
- Plastic Food Containers: Nest them to save space. Use a dedicated drawer or a large bin on a shelf to keep lids and bases together.
Conclusion
Congratulations! You now have a comprehensive plan for how to organize kitchen shelves neatly. By following these steps – from the initial purge and deep clean to strategic placement, smart storage, and consistent labeling – you’re well on your way to a kitchen that feels calm, efficient, and truly yours.
Remember, organizing is not a one-time event but an ongoing process. Embrace the joy of knowing exactly where everything is, the ease of cooking in an uncluttered space, and the beauty of a well-ordered home. Take pride in your newly organized kitchen shelves, and enjoy the lasting benefits of a system designed to make your daily life smoother and more enjoyable! Your organized kitchen awaits!