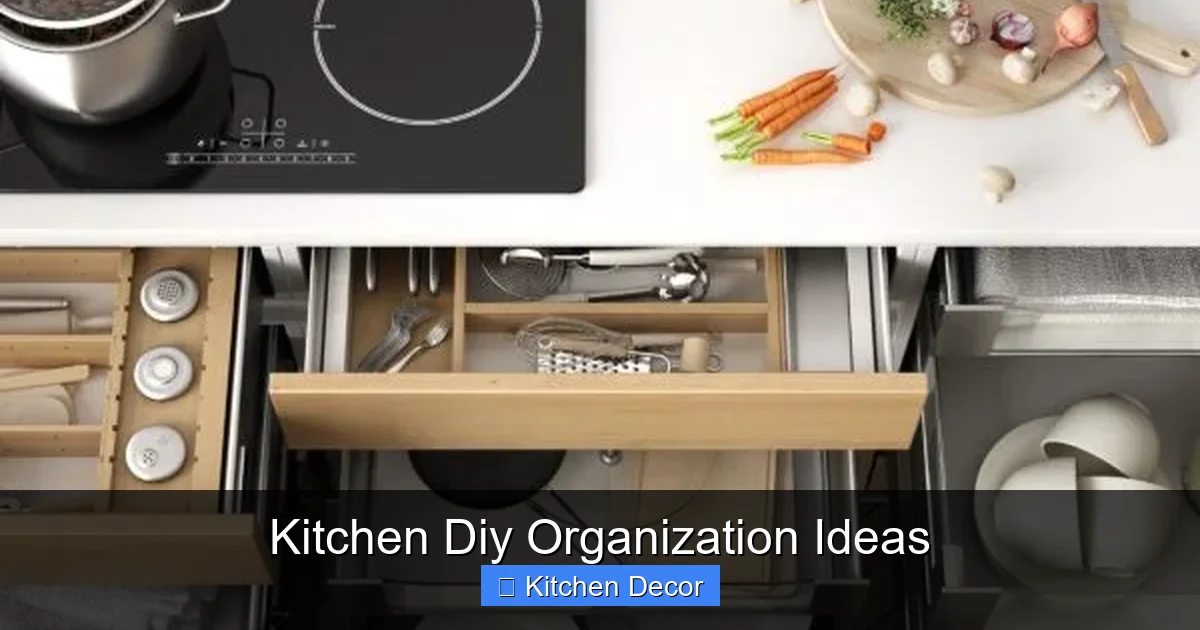
Ready to revolutionize your cooking space? This comprehensive guide offers a wealth of kitchen DIY organization ideas, showing you how to declutter, categorize, and optimize every nook and cranny. Learn to create functional zones, maximize storage with clever hacks, and maintain a beautifully organized kitchen with budget-friendly DIY projects, ensuring a more enjoyable and efficient culinary experience.
Kitchen Diy Organization Ideas
Is your kitchen feeling a little chaotic? Are you constantly searching for that one spice jar or can opener? You’re not alone! The kitchen is often the heart of the home, but it can quickly become a dumping ground for clutter. The good news is, you don’t need a massive renovation to create a functional and beautiful space. With some clever kitchen DIY organization ideas, you can transform your kitchen into an efficient, stress-free zone.
This comprehensive guide will walk you through practical, budget-friendly kitchen DIY organization ideas that you can implement yourself. We’ll cover everything from decluttering to maximizing storage in every corner. Get ready to roll up your sleeves and discover how satisfying it is to have an organized kitchen that truly works for you!
Key Takeaways
- Start with Decluttering: Before you organize, empty and sort everything. This is the crucial first step to identifying what you truly need and use.
- Zone Your Kitchen: Group items by function (e.g., cooking, prep, cleaning zones) to streamline your workflow and make your kitchen more efficient.
- Maximize Vertical Space: Look beyond countertops. Utilize walls, backs of cabinet doors, and open shelving to create valuable storage, especially in smaller kitchens.
- Optimize Cabinet & Drawer Interiors: Implement DIY solutions like drawer dividers, pull-out shelves, and stackable risers to make the most of enclosed spaces.
- Embrace Smart Pantry Solutions: Use clear containers, labels, and tiered shelving to keep your pantry tidy, visible, and easy to manage.
- Personalize and Maintain: Add stylish DIY touches that reflect your taste, and establish a simple routine to keep your newly organized kitchen tidy long-term.
- Budget-Friendly & Creative: Many effective kitchen DIY organization ideas can be achieved using affordable materials and a little creativity, proving that an organized kitchen doesn’t have to break the bank.
Step 1: The Great Kitchen Purge – Assess & Declutter
Before you even think about buying storage containers or building shelves, the most important step is to declutter. Trying to organize clutter is like trying to wallpaper over a dirty wall – it just won’t work in the long run. This step is about honest assessment and letting go.
Empty Everything Out
Pick one area to start, like a single cabinet, a drawer, or your pantry. The bravest among us might tackle the whole kitchen at once! Remove every single item. Yes, every single one. Lay everything out on your countertops, a dining table, or even the floor. This visual display can be a real eye-opener.
Sort, Sort, Sort!
Now, look at each item individually. Don’t rush this part. Hold it in your hand and ask yourself a few key questions:
- Do I use this? When was the last time?
- Do I love this? Does it bring me joy or serve a real purpose?
- Do I have duplicates?
- Is it broken, chipped, or expired?
Be honest with your answers. This is your chance to reclaim your space!
The Three Piles: Keep, Donate/Sell, Trash
As you sort, create three distinct piles:
- Keep: Items you use regularly, genuinely love, or need for specific tasks. These are the items that earn their spot back in your kitchen.
- Donate/Sell: Items that are still in good condition but you no longer need or use. Think about donating to a local charity, selling online, or giving to friends or family.
- Trash/Recycle: Broken items, expired food, worn-out utensils, or anything that’s beyond repair or use. Dispose of these responsibly.
Practical Tip: Don’t let the “Donate/Sell” and “Trash” piles linger. Take them out of your kitchen (and preferably out of your house) immediately after sorting. This prevents them from creeping back into your valuable storage space.
Step 2: Map Your Zones – Function First!
One of the best kitchen DIY organization ideas involves thinking about how you use your kitchen. Creating “zones” means storing items where they are most frequently used. This minimizes steps, saves time, and makes your kitchen feel incredibly efficient.
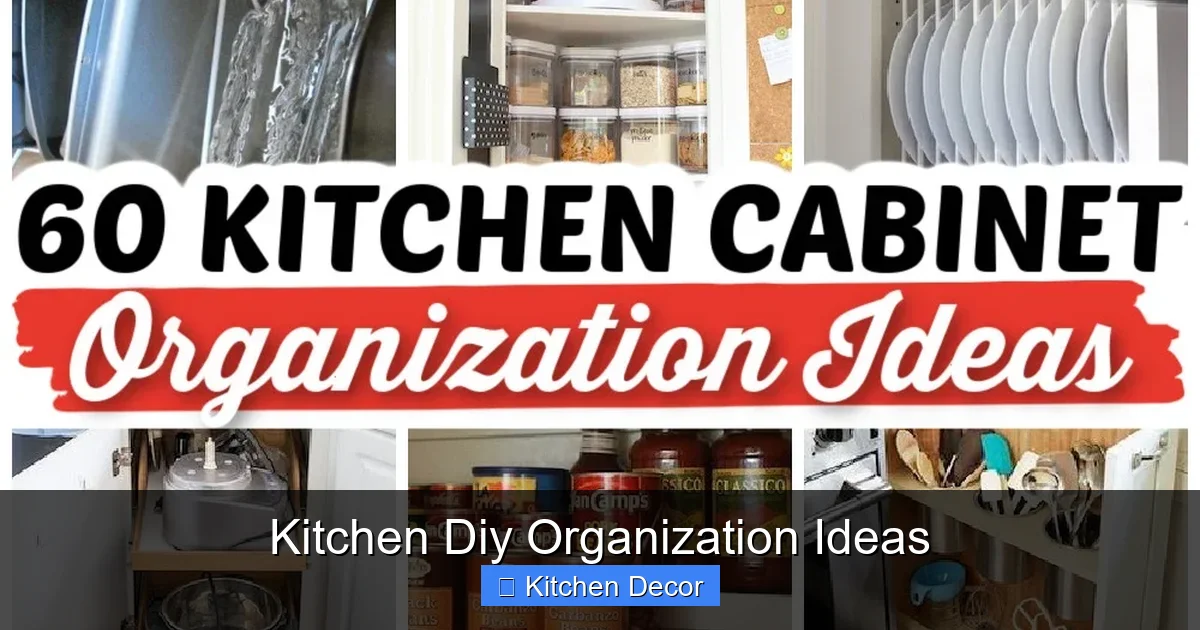
Visual guide about Kitchen Diy Organization Ideas
Image source: prudentpennypincher.com
The Cooking Zone
This area is usually around your stove and oven. Store pots, pans, baking sheets, cooking oils, frequently used spices, and primary cooking utensils here. A pot rack above the stove or a drawer with dividers for lids can be a game-changer.
The Prep Zone
Typically near your main counter space or cutting board. Keep mixing bowls, measuring cups and spoons, cutting boards, knives, and frequently used small appliances (like a food processor or blender) within easy reach. Small kitchen DIY organization ideas often focus heavily on making the prep zone efficient.
The Storage Zone (Pantry & Dry Goods)
This is where you’ll keep non-perishable food items, bulk goods, and perhaps extra dishes or specialty items. A well-organized pantry is a cornerstone of effective kitchen DIY organization. We’ll dive deeper into pantry solutions later.
The Cleaning Zone
Usually under the sink or near the dishwasher. Store dish soap, sponges, cleaning supplies, and dish towels here. Consider a tension rod under the sink for spray bottles to keep the bottom clear.
Practical Tip: Imagine yourself preparing a meal. Where do you reach for things? Organize accordingly. This workflow-based approach is key to effective kitchen organization.
Step 3: Maximize Vertical Space – Look Up!
Often overlooked, walls and the inside of cabinet doors offer prime real estate for storage. When space is tight, vertical kitchen DIY organization ideas are your best friend.
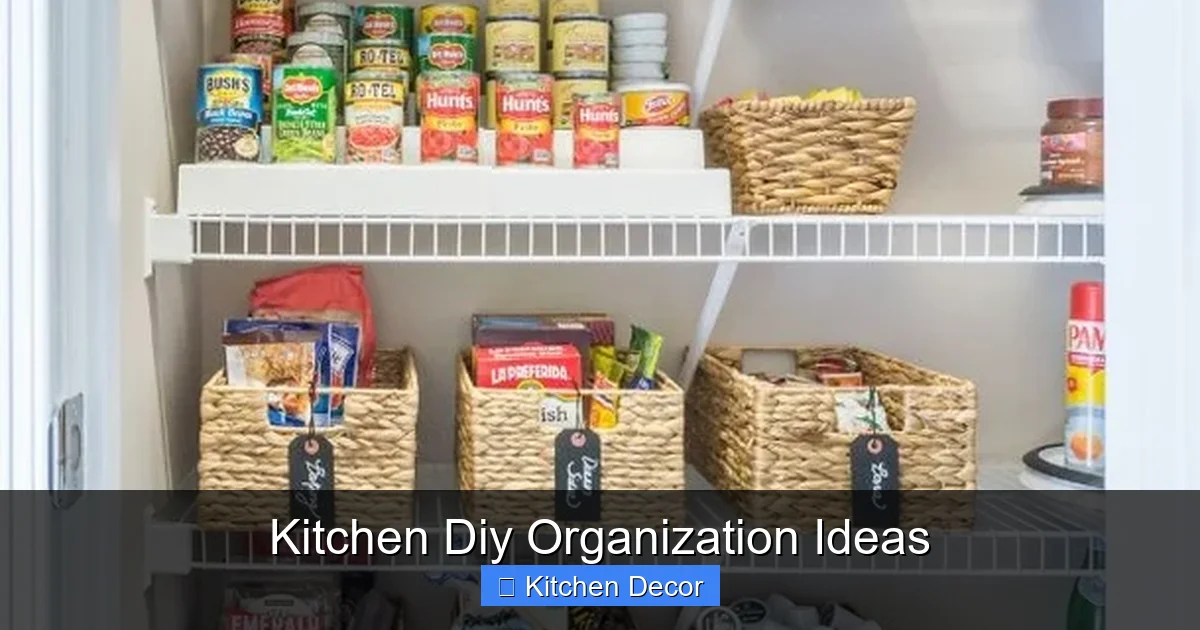
Visual guide about Kitchen Diy Organization Ideas
Image source: cache.lovethispic.com
Install Floating Shelves
Open shelving can be both decorative and functional. Install shelves above your countertops to store everyday dishes, cookbooks, or decorative items. This instantly adds storage without taking up floor space. You can easily find affordable shelves and brackets at hardware stores for a simple DIY project.
Embrace Pegboards and Wall Organizers
A pegboard on an unused wall can become a customizable storage hub. Hang pots, pans, utensils, cutting boards, or even small baskets for spices. Magnetic knife strips are another fantastic wall-mounted solution that free up drawer space and keep knives safely stored.
DIY Example: Paint a pegboard to match your kitchen decor, then use hooks to hang your most-used cooking tools. This is a great kitchen DIY organization project that’s both practical and adds personality.
Utilize Backs of Cabinet Doors
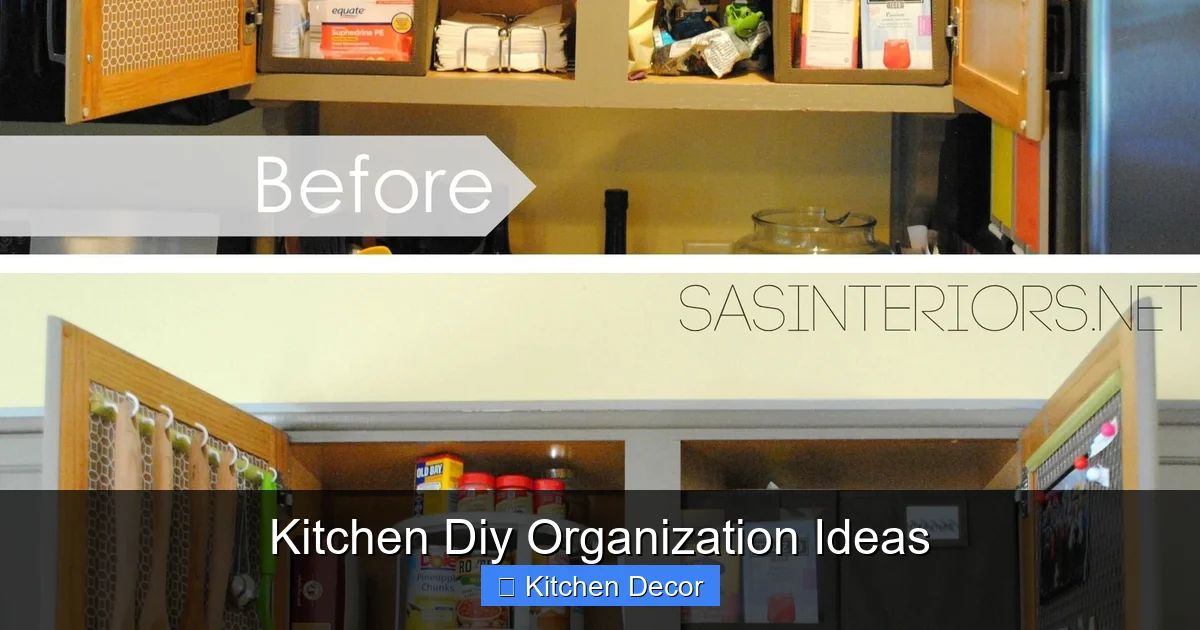
Don’t let these flat surfaces go to waste! Attach small racks for spices, foil/wrap dispensers, measuring cups, or even a mini garbage bin for food scraps while cooking. Over-the-door organizers are readily available, or you can DIY with some small wire baskets and screws.
DIY Example: For a simple spice rack, use thin strips of wood to create shallow shelves on the inside of your pantry door. This keeps spices visible and off your main shelves, a brilliant kitchen DIY organization trick.
Step 4: Conquer Cabinet and Drawer Interiors
Once you’ve decluttered and zoned, it’s time to optimize the hidden spaces. The inside of your cabinets and drawers can be notoriously inefficient, but some smart kitchen DIY organization ideas can change that.
Visual guide about Kitchen Diy Organization Ideas
Image source: s-media-cache-ak0.pinimg.com
Smart Drawer Dividers
Say goodbye to the “junk drawer”! Use expandable drawer dividers, small bins, or even DIY cardboard inserts to categorize utensils, baking tools, or office supplies that inevitably end up in the kitchen. Make sure every item has its own designated spot.
DIY Example: Cut clean cereal boxes or other sturdy cardboard into strips. Glue them together to create custom compartments for your drawers. This is a super budget-friendly kitchen DIY organization project!
DIY Pull-Out Shelves & Baskets
Deep cabinets can be black holes. Installing pull-out shelves or baskets makes items at the back accessible. You can buy ready-made kits, or with a bit of woodworking skill, you can build simple sliding shelves using drawer slides. This is particularly useful for heavy pots and pans or small appliances.
Stacking with Risers and Tiers
Maximize vertical space within your cabinets. Shelf risers allow you to store plates, bowls, or cans on multiple levels. Tiered spice racks are excellent for cabinet interiors, keeping all your seasonings visible and preventing a chaotic rummage.
Practical Tip: Use plate dividers or vertical racks to store cutting boards and baking sheets upright in cabinets. This makes them much easier to grab and prevents them from toppling over.
Corner Cabinet Solutions
Corner cabinets are often the trickiest to organize. Consider a Lazy Susan (turntable) for easy access to small appliances, cleaning supplies, or pantry staples. Some more involved kitchen DIY organization ideas might include installing a swing-out unit, but a simple Lazy Susan can make a huge difference.
Step 5: Tame Your Countertops – Strategic Placement
Cluttered countertops make a kitchen feel small and messy. While some items need to be accessible, effective kitchen DIY organization means being strategic about what lives on your counters.
Group Similar Items
Instead of scattered items, group them together. For example, keep your coffee maker, sugar, and mugs on a small tray in your coffee zone. Or gather all your frequently used cooking oils and salt/pepper shakers on a small caddy near the stove.
Utilize Trays and Baskets
Trays and decorative baskets are fantastic for containing clutter and adding a touch of style. Use them to hold keys, mail, or frequently used condiments. They make cleaning easy too – just lift the tray and wipe underneath.
Smart Small Appliance Storage
Identify which small appliances you use daily (e.g., toaster, coffee maker) and which you use occasionally (e.g., waffle maker, stand mixer). Daily-use items can stay on the counter if space allows and they fit your aesthetic. Occasional-use items should be stored in a cabinet or pantry, perhaps on a pull-out shelf for easy access. These thoughtful kitchen DIY organization ideas help free up valuable counter space.
Practical Tip: Challenge yourself to clear one section of your countertop completely. See how much better your kitchen feels, then try to maintain that clear space.
Step 6: Pantry Perfection – A DIY Dream
Your pantry is a powerhouse of storage, and organizing it effectively can save you time and money. These kitchen DIY organization ideas will help you create a pantry you’ll love.
Clear Bins and Containers
Transfer dry goods like pasta, rice, flour, sugar, and cereals into clear, airtight containers. This not only looks tidy but also keeps food fresh, makes inventory easy, and protects against pests. You can find affordable options at dollar stores or discount retailers.
Labels are Your Best Friend
Once everything is in containers, label them clearly. Include the item name and expiration date. Labels eliminate guesswork and make it easy for everyone in the household to find what they need and put things back in the right spot. Chalkboard labels or simple printed labels are easy DIY options.
Tiered Shelving for Visibility
For cans and jars, tiered shelving units are invaluable. They raise items at the back, so you can see everything you have at a glance. No more buying duplicates because you couldn’t see what was hidden behind taller items!
DIY Example: Build simple wooden risers using scrap wood to create tiers in your pantry. Even stacking sturdy shoeboxes (covered in decorative paper, perhaps) can create effective tiers. This is a very achievable kitchen DIY organization project.
Step 7: Personalize & Maintain Your Organized Kitchen
Your journey with kitchen DIY organization doesn’t end when everything is in its place. Maintenance and adding your personal touch are what make the system truly yours and long-lasting.
Add Style with DIY Touches
Once everything is functional, think about making it beautiful. Paint the inside of a cabinet a fun color, line shelves with decorative contact paper, or add some small plants. These small DIY touches can make your organized kitchen feel truly special.
- Repurpose Old Items: An old ladder can become a pot rack, a vintage crate a produce holder.
- DIY Decor: Create your own artwork, or paint your own custom labels.
Establish a Maintenance Routine
An organized kitchen stays organized with a little effort. Set aside 5-10 minutes each day to do a quick tidy-up. Before bed, put dishes away, wipe down counters, and put items back in their designated spots. Schedule a deeper decluttering session every few months to prevent new clutter from accumulating. This ongoing commitment is crucial for sustained kitchen organization.
Practical Tip: Involve everyone in the household. If everyone knows where things go and participates in the tidying, it’s much easier to maintain your beautifully organized kitchen.
Troubleshooting Common Kitchen Organization Challenges
Even with the best kitchen DIY organization ideas, you might hit a snag. Here are solutions to common problems:
Small Kitchen Syndrome
If your kitchen is tiny, vertical space is your savior. Focus heavily on wall-mounted solutions, over-the-door organizers, and multi-functional items. Consider a rolling cart for extra counter space or storage that can be tucked away. Embrace compact versions of appliances. Every inch counts!
Budget Constraints
Many kitchen DIY organization ideas are inherently budget-friendly. Don’t feel pressured to buy expensive organizers. Repurpose shoe boxes, cereal boxes, or glass jars. Look for inexpensive bins and containers at dollar stores or thrift shops. Use scrap wood for DIY shelves or dividers. Creativity often trumps cost.
Maintaining Motivation
Organizing can be overwhelming. Break it down into small, manageable tasks. Start with just one drawer. Celebrate small victories. Look at “before” and “after” photos to see your progress. Remember the benefits: less stress, easier cooking, and a more enjoyable home!
Conclusion: Enjoy Your Beautifully Organized Kitchen!
Transforming your kitchen with these kitchen DIY organization ideas is a journey, not a sprint. It takes time, effort, and a willingness to make changes. But the reward is immense: a kitchen that’s not only functional and efficient but also a joy to be in. Imagine easily finding what you need, having clear countertops for meal prep, and feeling proud of your organized space.
By decluttering, zoning, maximizing vertical space, optimizing interiors, taming countertops, and perfecting your pantry, you’ve equipped yourself with the tools for lasting kitchen organization. Remember to personalize your space and establish a simple maintenance routine to keep it looking its best. Now, go forth and enjoy your beautifully organized kitchen – you’ve earned it!