Transform your space affordably and creatively with DIY room decor ideas using paper! Discover essential hacks for stunning, budget-friendly transformations that are surprisingly simple to achieve. Elevate your home with unique paper crafts that add personality and style.
Feeling like your room needs a refresh but don’t want to break the bank? You’re not alone! Many of us dream of stylish spaces but are held back by budget or the fear of complicated DIY projects. It’s easy to feel overwhelmed by endless decor options.
But what if I told you that some of the most impactful and beautiful decor can be made from something as simple and accessible as paper? Yes, paper! It’s a versatile material that can be transformed into stunning art, charming accents, and eye-catching features.
This guide is packed with easy-to-follow DIY room decor ideas using paper. We’ll explore simple hacks that even absolute beginners can master, turning plain paper into extraordinary decor that reflects your personal style. Get ready to be inspired and discover how to create a beautiful space without spending a fortune.
Why Paper is Your Decorating Secret Weapon
Paper is incredibly versatile. Think beyond basic printer paper; we’re talking cardstock, craft paper, old newspapers, magazines, tissue paper, and even wallpaper scraps. Each type offers a unique texture and finish, opening up a world of creative possibilities.

Its affordability is a huge plus. Compared to buying new furniture or large decorative items, paper-based decor is incredibly budget-friendly. You can achieve a high-end look for a fraction of the cost. Plus, it’s a fantastic way to upcycle materials you already have.
Working with paper is also very forgiving. Most projects don’t require advanced skills or expensive tools. If you make a mistake, it’s usually easy to fix or start over. This makes it perfect for beginners and those who want to experiment without pressure.
Essential Tools and Materials for Paper Decorating
Before we dive into the fun projects, let’s gather our essential supplies. You likely already have many of these items at home, making this an even more accessible decorating method.
Must-Have Tools:
- Scissors: Sharp scissors are key for clean cuts.
- Craft Knife/X-Acto Knife: For more intricate designs and precise cuts. Always use a cutting mat underneath!
- Ruler: For measuring and making straight lines.
- Pencil: For marking measurements and drawing designs.
- Glue: White craft glue, glue sticks, or a hot glue gun (use with caution!).
- Tape: Double-sided tape is excellent for adhering paper to walls or other surfaces without leaving residue.
- Printer: For printing templates or decorative patterns.
- Bone Folder (Optional): Helps create crisp folds for origami and other paper crafts.
Paper Types to Consider:
- Cardstock: Sturdy and great for 3D shapes, banners, and wall art.
- Construction Paper: Affordable and comes in many colors.
- Craft Paper/Brown Paper Bags: Offers a rustic, natural texture.
- Newspapers and Magazines: Excellent for collages, textured art, or unique wall coverings.
- Tissue Paper: Lightweight and perfect for pom-poms, garlands, and delicate flowers.
- Scrapbook Paper: Available in countless patterns and designs, ideal for accent pieces.
- Old Maps or Book Pages: Adds a vintage or literary touch to your decor.
DIY Room Decor Ideas With Paper: Hacks for Every Style
Now for the exciting part! Here are some beginner-friendly DIY room decor ideas using paper that will instantly elevate your space.
1. Stunning Paper Flower Wall Art
Paper flowers are incredibly popular for a reason – they’re gorgeous and surprisingly easy to make! They add a pop of color and a touch of nature to any room.

What You’ll Need:
- Cardstock or thick craft paper in various colors
- Scissors
- Glue gun or craft glue
- Pencil
- Template for petals (you can find many free ones online)
How to Make Them:
- Cut Petals: Print or draw petal shapes onto your paper. Cut out multiple petals of varying sizes for each flower.
- Shape Petals: Gently curl the edges of each petal around a pencil or your finger to give them a natural, curved look.
- Assemble the Flower: Start with a small circle as the base. Glue the largest petals around the edge of the circle, then layer progressively smaller petals towards the center. For a fuller flower, add more layers.
- Add a Centerpiece: You can add a smaller, tightly rolled paper piece or a few stamens made from paper strips for the center.
- Arrange on Wall: Once dry, arrange your paper flowers on a blank wall. You can create a full floral explosion or scatter them strategically. Use double-sided tape or small Command strips to attach them to the wall.
Pro Tip: Mix and match colors and petal shapes for a dynamic and realistic look. You can also add leaves cut from green paper for extra detail.
2. Chic Geometric Paper Garland
Garlands are a fantastic way to add personality and color to a room without taking up surface space. Geometric shapes are modern and stylish.
What You’ll Need:
- Cardstock in coordinating colors
- Scissors or a paper cutter
- Hole punch
- Twine or string
- Tape
How to Make Them:
- Cut Shapes: Cut your cardstock into various geometric shapes like triangles, squares, circles, or diamonds. Aim for consistent sizes for a clean look, or mix them up for a more eclectic feel.
- Punch Holes: Punch one or two holes at the top of each shape. If using triangles or diamonds, punch holes in the top corners. For circles or squares, punch a hole near the top edge.
- String Them Together: Cut a length of twine or string. Thread the shapes onto the string, spacing them evenly. You can tie a small knot on either side of each shape to keep it in place, or simply let them rest against each other.
- Hang Your Garland: Use tape or small hooks to hang your beautiful garland above a mantelpiece, across a window, or along a shelf.
Hack: Use metallic cardstock for a touch of glamour, or patterned scrapbook paper for added texture and interest.
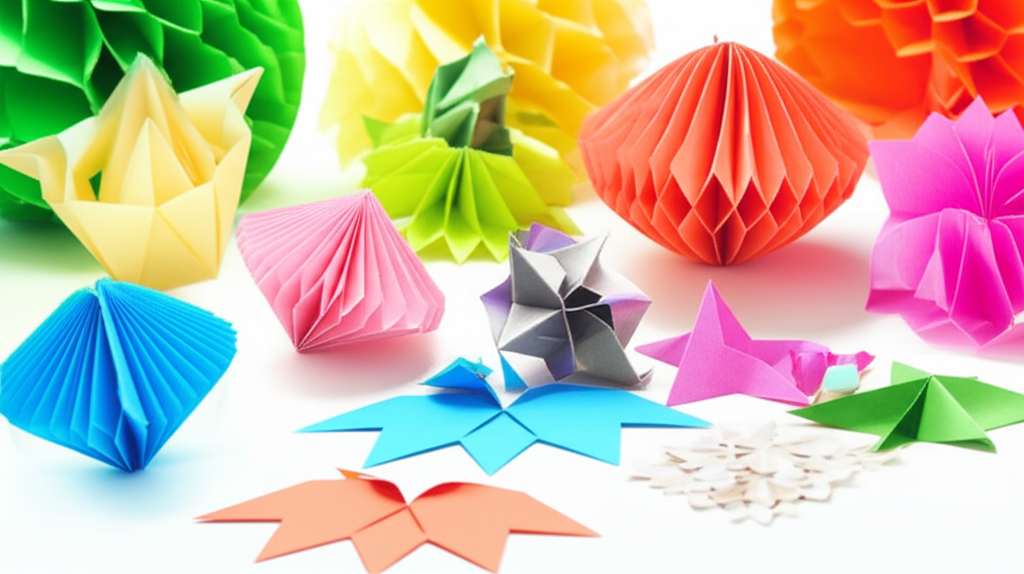
3. Textured Paper Wall Art (3D Effect)
Create a sophisticated piece of wall art by layering and folding paper to create a 3D effect. This looks much more expensive than it is!
What You’ll Need:
- Sturdy cardstock or watercolor paper in a neutral palette (whites, grays, beiges)
- A canvas or a sturdy backing board (e.g., foam board, thick cardboard)
- Craft knife and cutting mat
- Ruler
- Glue (craft glue or hot glue gun)
- Pencil
How to Make Them:
- Prepare Your Base: Cut your cardstock into strips or shapes. The size and shape are up to you – think squares, rectangles, or even abstract pieces.
- Create Texture: Fold the paper strips or shapes in various ways. You can accordion fold them, roll them into tight coils, or create simple angled folds. This layering and folding is what creates the 3D effect.
- Arrange Your Design: Lay out your folded paper pieces on the canvas or backing board. Experiment with different arrangements until you achieve a pattern or composition you like.
- Glue in Place: Once you’re happy with the layout, carefully glue each paper piece onto the backing board. Ensure they are securely attached.
- Frame it (Optional): You can frame the finished piece for a more polished look.
Tip: For a more cohesive look, use papers in a similar color family. Varying the folds and textures within that palette will create visual interest.
4. Upcycled Magazine or Newspaper Collage
Give old magazines and newspapers a new life by turning them into vibrant and personalized art. This is a fantastic way to inject color and personality into your room.
What You’ll Need:
- Old magazines or newspapers
- A canvas, poster board, or thick cardboard
- Scissors
- Glue stick or Mod Podge
- Optional: Acrylic paints or markers for accents
How to Make Them:
- Gather Your Materials: Flip through your magazines and newspapers. Look for interesting colors, textures, images, or words that appeal to you. Tear or cut them out.
- Plan Your Design: Decide if you want to create an abstract collage, a recognizable image, or a textured background. You can also paint a background color on your canvas first.
- Start Gluing: Begin adhering your cut-out pieces onto the canvas or board using a glue stick or Mod Podge. Overlap pieces to create depth and interest.
- Build Layers: Continue adding layers of paper, building up your design. You can create patterns, gradients of color, or specific scenes.
- Add Details: Once the collage is complete and dry, you can add extra details with markers or paint if desired. For example, outline shapes or add small drawn elements.
- Seal Your Work: Apply a coat of Mod Podge over the entire surface to seal and protect your collage.
Budget Hack: This is a virtually free project if you have old magazines or newspapers lying around!
5. Elegant Paper Lanterns
Paper lanterns add a soft, ambient glow to a room. They are surprisingly simple to create and can be customized to match any decor.
What You’ll Need:
- A4 or Letter-sized paper (cardstock works best for structure)
- Scissors
- Ruler
- Glue stick or tape
- A strip of paper for the handle
- Optional: Battery-operated LED tea lights (never use real candles with paper!)
How to Make Them:
- Fold the Paper: Fold your sheet of paper in half lengthwise.
- Cut Slits: Starting from the folded edge, make parallel cuts towards the open edge. Leave about an inch or two uncut at the open edge. The closer the slits, the more delicate the lantern will look.
- Unfold: Unfold the paper. You should now have a sheet with many parallel slits.
- Form the Cylinder: Bring the two open edges together to form a cylinder. Secure them with glue or tape.
- Add the Handle: Cut a strip of paper about 1 inch wide and long enough to go across the top opening. Fold it in half lengthwise and glue or tape it to the inside top edge of the lantern.
- Insert Light: Place a battery-operated LED tea light inside for a safe and beautiful glow.
Customization: Use colored paper, metallic paper, or even paper with interesting textures. You can also cut shapes out of the paper before folding for a patterned effect.
6. DIY Paper Chain Garland
A classic for a reason! Paper chains are simple, fun to make, and can be created in any color or pattern imaginable.
What You’ll Need:
- Construction paper, scrapbook paper, or even strips of old wrapping paper
- Scissors
- Glue stick or tape
How to Make Them:
- Cut Strips: Cut your paper into uniform strips. A good size is about 1 inch wide and 6 inches long.
- Form the First Ring: Take one strip, bring the ends together to form a circle, and secure with glue or tape.
- Add the Next Link: Take a second strip and thread it through the first ring. Bring its ends together to form a second circle, and glue or tape it.
- Continue the Chain: Keep adding strips, threading each new one through the previous ring and securing the ends.
- Vary Colors and Patterns: Alternate colors and patterns to create a visually interesting garland.
- Hang It Up: Drape your paper chain garland along walls, over doorways, or around furniture.
Time-Saving Hack: Get the whole family involved! This is a great activity for kids and adults alike.
7. Rolled Paper Wall Art
This technique involves rolling strips of paper into tight coils and then arranging them to form patterns or images. It creates a beautiful, mosaic-like effect.
What You’ll Need:
- Colored paper or cardstock (various shades)
- A quilling tool or a toothpick/skewer
- Glue
- A backing board or canvas
- Scissors
How to Make Them:
- Cut Paper Strips: Cut your paper into thin strips, about ¼ to ½ inch wide.
- Roll the Paper: Insert the end of a paper strip into your quilling tool (or wrap it around a toothpick/skewer). Tightly roll the strip around the tool.
- Create the Coil: Once the strip is fully rolled, carefully slide the coil off the tool. Pinch one end of the coil to create a teardrop or leaf shape, or leave it as a tight circle. Apply a small dot of glue to secure the end.
- Make Many Coils: Create dozens, or even hundreds, of these paper coils in various colors and shapes.
- Arrange Your Design: Plan your design on the backing board. You can create abstract patterns, floral motifs, or even letters.
- Glue Coils in Place: Apply a small amount of glue to the back of each paper coil and press it onto the backing board according to your design.
Tip: Use a mix of tight coils and looser coils for varied textures. This method is perfect for creating intricate designs.
Paper Decorating: A Sustainable Choice
Choosing paper for your DIY room decor is also a wonderfully sustainable option. By using recycled paper, old books, magazines, or even junk mail, you’re diverting waste from landfills.
Many craft stores also offer recycled paper options. Look for products made from post-consumer waste. You can learn more about the benefits of recycling and sustainable practices from organizations like the Environmental Protection Agency (EPA).
When you’re finished with your paper decor, many items can be recycled again, making it a low-impact way to refresh your space. It’s a win-win for your home and the planet! For more eco-conscious inspiration, check out our guide on eco-friendly kitchen decor tips.
Frequently Asked Questions About DIY Paper Decor
Here are some common questions beginner decorators have about using paper for room decor:
Q1: How do I make paper decorations stick to my walls without damaging the paint?
A1: For lighter decorations, use painter’s tape or specialized adhesive putty like Blu-Tack. For slightly heavier items, consider Command strips, which are designed to be removed cleanly. Always test a small, inconspicuous area first.
Q2: Can I make paper decorations that are durable?
A2: Yes! Using thicker cardstock, multiple layers, and sealing your creations with Mod Podge or a clear sealant can increase their durability. Proper storage when not in use also helps.
Q3: What’s the easiest paper craft for a complete beginner?
A3: Paper chains and simple geometric garlands are incredibly easy. Paper flowers can also be straightforward if you follow a good template. The key is starting with simple shapes and techniques.
Q4: How can I make my paper decor look more professional and less “crafty”?
A4: Pay attention to detail! Use sharp scissors for clean cuts, measure carefully, and choose a cohesive color palette. Using high-quality paper and finishing techniques like sealing or framing can also elevate the look.
Q5: Can I use paper to cover a whole wall?
A5: Absolutely! You can create a feature wall using techniques like a mosaic of cut paper shapes, a collage, or even carefully arranged paper plates. For a more traditional wallpaper look, you can buy actual paper wallpaper or even create your own stamps to pattern plain paper. Ensure you use a strong adhesive suitable for wall applications. For stunning wall transformation ideas, explore our collection of kitchen wall art ideas.
Q6: How do I protect paper decorations from dust and fading?
A6: You can spray your finished paper crafts with a UV-resistant sealant or a clear acrylic spray. This will help protect them from dust and prevent colors from fading over time, especially if they are exposed to sunlight.
Conclusion
See? Transforming your room doesn’t require a huge budget or advanced skills. With a little creativity and the magic of paper, you can craft stunning decor that reflects your unique personality and style.
From vibrant paper flowers and elegant garlands to textured wall art and charming lanterns, the possibilities are endless. These DIY room decor ideas with paper are not only beautiful but also fun to make and budget-friendly. Dive in, experiment, and enjoy the process of making your living space truly your own! If you’re looking to extend your creative upgrades to other areas, discover kitchen decor themes that blend seamlessly with handmade accents.