Discover brilliant DIY kitchen storage hacks to transform your culinary space without breaking the bank. This guide provides step-by-step instructions for creating custom solutions, from wall-mounted shelves and pull-out organizers to pegboards and clever pantry systems. Learn to maximize every inch, declutter effectively, and enjoy a more organized, functional kitchen with simple, budget-friendly projects.
Are you tired of rummaging through cluttered cabinets? Does your kitchen feel like it’s bursting at the seams? You’re not alone! Many of us dream of a perfectly organized kitchen, but the cost of custom storage solutions can be daunting. The good news is, you don’t need a huge budget to achieve a functional and beautiful kitchen. With a little creativity and some elbow grease, you can create incredible DIY kitchen storage hacks that make a big difference.
This comprehensive guide will walk you through several fantastic DIY kitchen storage hacks, providing clear, step-by-step instructions. We’ll cover everything from simple wall-mounted shelves to custom pull-out organizers and versatile pegboard systems. Get ready to transform your kitchen into an efficient and enjoyable space!
Key Takeaways
- Maximize Vertical Space: Look up! Walls are prime real estate for shelves and pegboards, significantly increasing storage capacity in even the smallest kitchens.
- Optimize Cabinet Interiors: Don’t let deep cabinets become black holes. Implement pull-out organizers, drawer dividers, and door-mounted solutions to make every item easily accessible.
- Utilize Under-Sink & Corner Areas: These often-awkward spots can become highly functional with custom-fit storage like tiered shelves, Lazy Susans, or clever C-shaped pull-outs.
- Embrace DIY for Budget-Friendly Custom Solutions: Building your own storage is not only cost-effective but also allows you to tailor every solution precisely to your kitchen’s unique dimensions and your specific needs.
- Declutter Before Organizing: Before starting any DIY project, take the time to purge unused or expired items. An organized space is a less cluttered space.
- Think Multi-functional: Consider storage hacks that serve more than one purpose, like a cutting board that doubles as a stove cover or a rolling cart that adds prep space and storage.
- Personalize Your Storage: DIY allows for personalization. Choose finishes, colors, and designs that match your kitchen’s aesthetic, making your storage solutions both practical and beautiful.
Before You Start: Planning Your DIY Storage Project
Before you dive into building, a little planning goes a long way. This initial phase is crucial for successful DIY kitchen storage hacks. Taking time now will save you headaches later.
Assess Your Needs
Walk around your kitchen with a notepad. What are your biggest pain points? Where do you constantly misplace items? Do you have too many spices, not enough space for pots, or a chaotic pantry? Identify the areas that need the most help. Think about what you use most often and what needs to be easily accessible versus what can be stored away.
- What items need a home?
- What spaces are underutilized?
- What kind of storage would make your life easier? (e.g., vertical, pull-out, open shelf)
Measure Everything
Accuracy is key for any DIY project. Measure the height, width, and depth of your cabinets, walls, and any other areas where you plan to add storage. Double-check your measurements! Consider any obstructions like door hinges, pipes, or electrical outlets. Knowing these dimensions will help you choose the right materials and cut them to the perfect size for your new DIY kitchen storage hacks.
Gather Your Tools and Materials
Having the right tools on hand before you start makes the process smoother and safer. While specific tools will vary by project, some common items you’ll likely need include:
- Tape measure, pencil, level
- Drill and various bits
- Saw (hand saw, circular saw, or miter saw depending on project)
- Screwdriver set
- Safety glasses and gloves
- Sandpaper or a power sander
- Paintbrush or roller (for finishing)
We will list specific materials for each hack, but generally, you’ll be working with wood (plywood, common boards), screws, nails, wood glue, and possibly hardware like drawer slides or shelf brackets.
Hack 1: Build & Install Simple Wall-Mounted Shelves
Wall-mounted shelves are fantastic DIY kitchen storage hacks for utilizing vertical space. They’re perfect for displaying decorative items, storing cookbooks, or keeping frequently used ingredients within reach. Plus, they can add a touch of personal style to your kitchen.
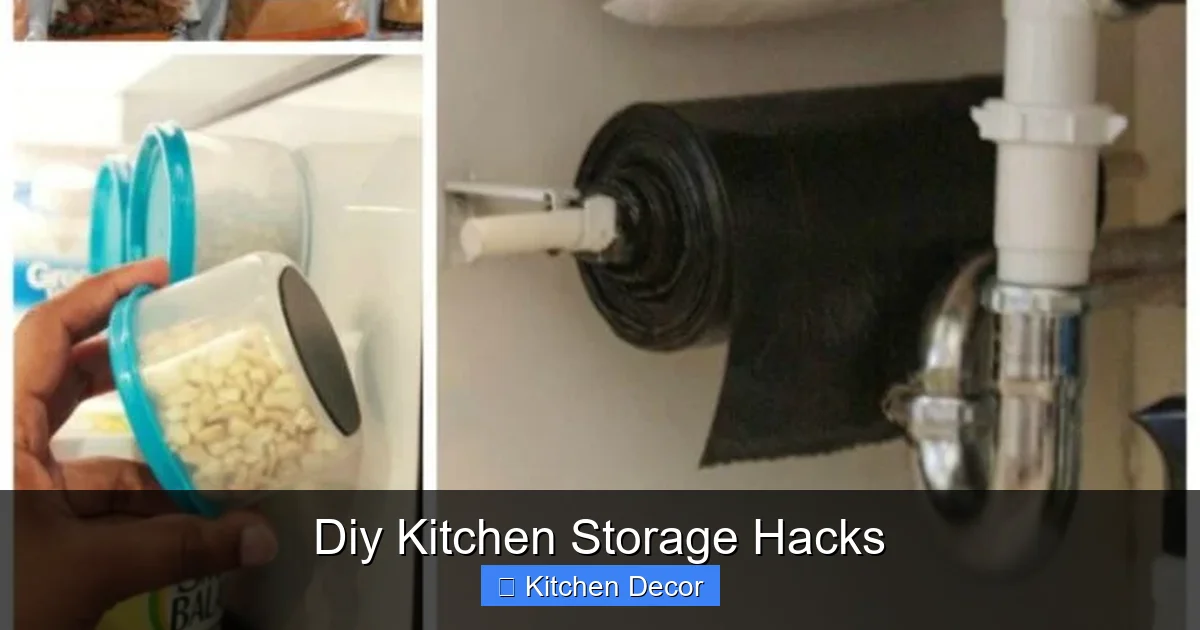
Visual guide about Diy Kitchen Storage Hacks
Image source: i.pinimg.com
Materials Needed
- Wood boards (e.g., 1×8 or 1×10 pine, cut to desired length)
- Shelf brackets (decorative or hidden, based on your style)
- Wood screws (appropriate length for brackets and wall anchors)
- Drywall anchors (if drilling into drywall, not studs)
- Wood filler (optional)
- Paint or stain, and clear coat (optional, for finishing)
Step-by-Step Instructions
Measure and Mark
Decide where you want your shelves to go. Use your tape measure and pencil to mark the desired height on the wall. Use a level to ensure your marks are perfectly straight. Mark the locations for your shelf brackets, making sure they are evenly spaced and will adequately support the length of your shelf. Aim to attach brackets into wall studs for maximum stability; use a stud finder if you have one. If studs aren’t an option, use robust drywall anchors.
Cut and Sand Wood
Measure and cut your wood boards to the exact length you determined. If you’re buying pre-cut lumber, you might skip this step. Once cut, sand all surfaces and edges of the wood until smooth. This is important for both safety (no splinters!) and a professional finish.
Add Finish (Optional)
If you want to paint or stain your shelves, now is the time. Apply your chosen paint or stain according to the product instructions. Once dry, apply a clear protective coat (like polyurethane) to make the shelves durable and easy to clean, especially in a kitchen environment. Let them dry completely.
Install Brackets
Hold one shelf bracket against your marked location on the wall. Use a drill to create pilot holes. Then, secure the bracket firmly to the wall using wood screws into studs or drywall anchors. Repeat for all your brackets, ensuring they are perfectly level with each other. This is crucial for shelves that don’t sag.
Place Shelf
Once all brackets are securely installed, carefully place your finished wooden shelf on top of the brackets. Some brackets might have small holes for screws to attach the shelf from underneath, offering extra security. If so, drill pilot holes through the bracket holes into the bottom of the shelf and secure with screws. This completes one of your most visible DIY kitchen storage hacks!
Tips for Wall Shelves
- Mix and Match: Use different lengths or depths of shelves to create visual interest.
- Hidden Brackets: For a minimalist look, consider “floating” shelves using hidden internal brackets. This is a bit more advanced but creates a very clean aesthetic.
- Corner Shelves: Don’t forget corners! Small corner shelves can be perfect for tiny decorative items or spices.
Hack 2: Create Custom Pull-Out Cabinet Organizers
Deep cabinets can be a nightmare. Items get lost in the back, and retrieving them often means practically emptying the entire cabinet. Custom pull-out organizers are revolutionary DIY kitchen storage hacks, bringing the contents of your cabinet right to you!

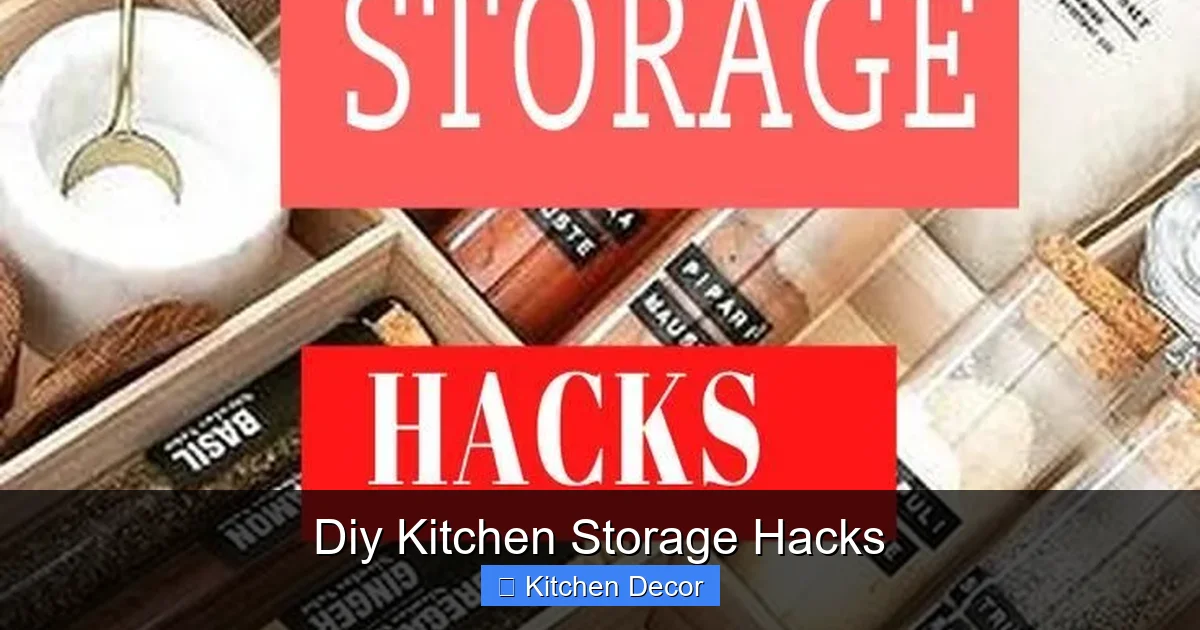
Visual guide about Diy Kitchen Storage Hacks
Image source: familyhandyman.com
Materials Needed
- Plywood (1/2-inch or 3/4-inch thick for sides, front, back, and bottom of drawer box)
- Drawer slides (full-extension slides are best for full access)
- Wood screws (various sizes for assembling the box and mounting slides)
- Wood glue
- Pulls or handles (optional, for easy access)
- Paint or stain (optional)
Step-by-Step Instructions
Measure Cabinet Interior
This is the most critical step. Measure the width, depth, and height of the cabinet opening. Also, measure the available space inside the cabinet, accounting for hinges or other obstructions. Your drawer box will need to be slightly narrower than the opening to accommodate the drawer slides (usually 1/2 inch to 1 inch narrower in total). The depth should be slightly less than the cabinet depth to allow for closure.
Cut Wood for Drawer Box
Based on your measurements, cut your plywood pieces. You’ll need:
- 1 piece for the bottom
- 2 pieces for the sides (length = drawer depth, height = desired drawer height)
- 1 piece for the front and 1 piece for the back (length = inner width of drawer minus thickness of two side pieces, height = desired drawer height)
For example, if your finished box needs to be 10 inches wide, and your plywood is 1/2 inch thick, your front and back pieces will be 9 inches long (10 – 0.5 – 0.5 = 9).
Assemble Drawer Box
Apply wood glue to the edges of the bottom piece where the sides will attach. Place the side pieces against the bottom, aligning edges. Use clamps to hold them in place. Drill pilot holes and then secure with screws. Repeat for the front and back pieces. Ensure the box is square by checking with a measuring tape diagonally from corner to corner; the measurements should match. Wipe away any excess glue. Let the glue dry completely for a strong bond.
Install Drawer Slides
Separate the two parts of your drawer slides. One part attaches to the side of your drawer box, and the other attaches to the inside of your cabinet.
- Attach the cabinet portion of the slides to the inside walls of your cabinet. Use a level and ensure they are perfectly parallel and level with each other. Pre-drill pilot holes to prevent splitting.
- Attach the drawer portion of the slides to the outside of your finished drawer box. Align them carefully so that when the drawer slides are connected, the box will be centered and level within the cabinet.
Insert Pull-Out
Carefully align the drawer box slides with the cabinet slides and push the drawer into place until the slides click together. Test the movement. It should glide smoothly. If needed, attach a decorative pull or handle to the front of your new pull-out organizer. Congratulations, you’ve just conquered one of the most useful DIY kitchen storage hacks!
Tips for Pull-Outs
- Heavy Duty: For storing heavy items like pots and pans, invest in heavy-duty drawer slides.
- Custom Dividers: Once built, you can add custom plywood or even tension rod dividers inside the pull-out for specific items like cutting boards or baking sheets.
- Under-Sink: A C-shaped pull-out can navigate around pipes under the sink, creating valuable storage where none existed.
Hack 3: Design a Versatile Pegboard Storage System
Pegboards are classic DIY kitchen storage hacks that offer incredible flexibility. They are perfect for small kitchens, freeing up counter and drawer space by utilizing wall space for pots, pans, utensils, and even small shelves.
Materials Needed
- Pegboard sheet (1/4-inch thick is common, cut to desired size)
- 1×2 or 1×3 lumber for a frame (optional, but recommended for spacing)
- Wood screws (for frame and mounting pegboard)
- Drywall anchors (if not mounting into studs)
- Pegboard hooks, bins, and small shelves (various sizes and types)
- Paint (optional, for pegboard or frame)
Step-by-Step Instructions
Cut Pegboard to Size
Measure the wall space where you want your pegboard. Use a utility knife and a straight edge (for thinner pegboard) or a circular saw (for thicker pegboard) to cut the sheet to your desired dimensions. If you’re buying it from a hardware store, they can often cut it for you.
Build a Frame (or use spacers)
Pegboard needs space behind it for the hooks to fit. You can achieve this by building a simple frame from 1×2 or 1×3 lumber. Cut four pieces of lumber to create a rectangle that matches the outer dimensions of your pegboard. Assemble the frame using wood glue and screws.
Alternatively, you can use small wooden spacers directly behind the pegboard at each mounting point, but a frame usually provides a sturdier installation and a cleaner look.
Mount Pegboard
If using a frame, attach the pegboard to the frame first with small screws. Then, hold the framed pegboard against the wall at your desired height. Use a level to ensure it’s straight. Mark the stud locations if possible. Drill pilot holes through the frame (and pegboard) and into the wall studs. If studs aren’t available, use sturdy drywall anchors. Secure the frame and pegboard to the wall with wood screws.
If using spacers, place a spacer behind each mounting hole on the pegboard, and secure with screws and anchors directly to the wall.
Add Hooks & Accessories
Now for the fun part! Arrange your pegboard hooks, bins, and small shelves to suit your needs. Hang pots, pans, measuring cups, spatulas, and anything else you want to keep visible and accessible. The beauty of pegboard is its flexibility – you can change the layout whenever your needs change. This is one of the most adaptable DIY kitchen storage hacks out there!
Tips for Pegboard
- Organize by Zone: Group similar items together (e.g., baking tools, cooking utensils).
- Labels: For specific items, you can outline their shape with a marker or add a label for easy identification and return.
- Magnetic Strips: Integrate small magnetic strips onto your pegboard for knives or small metal tools.
- Paint it: Don’t like the utilitarian look? Paint your pegboard to match your kitchen decor!
Hack 4: DIY Pot Lid Holders for Cabinet Doors
Pot lids are notoriously awkward to store. They don’t stack well and can quickly become a jumbled mess. These simple DIY kitchen storage hacks for pot lids use the inside of your cabinet doors, transforming unused space into practical storage.
Materials Needed
- Small diameter wooden dowels, metal rods, or even tension rods (cut to size)
- Small L-brackets, U-shaped hooks, or Command hooks (for tension rods)
- Small screws (if using L-brackets/hooks)
Step-by-Step Instructions
Measure Cabinet Door
Open your cabinet door and measure its width and height. Determine where you want the lids to sit, ensuring they don’t interfere with the shelves inside the cabinet when the door is closed. You’ll likely want two sets of holders per lid: one near the bottom edge of the lid and one near the top handle.
Cut Dowels/Rods (if needed)
Cut your wooden dowels or metal rods to be slightly shorter than the width of your cabinet door. You’ll need two rods per lid you plan to store. For larger lids, you might use three rods.
Install Hooks/Clips
Mark the positions for your brackets or hooks on the inside of the cabinet door. These will hold your dowels/rods. Pre-drill small pilot holes, and then screw the L-brackets or U-shaped hooks into the cabinet door. Ensure they are level and spaced appropriately for your pot lids. The lower set of brackets should hold the bottom edge of the lid, and the upper set should secure the lid’s handle or top edge.
Secure Rods
Place your dowels or rods into the installed brackets/hooks. If using U-shaped hooks, the dowel simply rests in them. If using L-brackets, you might need to use a dab of wood glue to secure the dowel or add a small screw through the bottom of the L-bracket into the dowel. Test it by placing a pot lid into the holders. You’ve now freed up valuable cabinet space with these clever DIY kitchen storage hacks!
Alternative: Command Hooks for Tension Rods
For a super easy, no-drill option, you can use heavy-duty Command hooks. Place two Command hooks horizontally, facing each other, on the cabinet door to create a cradle for a tension rod. Then, simply pop a small tension rod between them. Use two sets for each lid. This is great for renters!
Hack 5: Optimize Your Pantry with Tiered Risers and Dividers
A well-organized pantry makes meal prep a breeze. These DIY kitchen storage hacks will help you see everything at a glance and keep your pantry tidy.
DIY Tiered Risers
Canned goods and spice jars often get lost behind taller items. Tiered risers elevate items, making everything visible.
Materials and Steps
- Materials: Scrap wood (e.g., 1×4, 1×6), wood glue, small nails or screws.
- Steps:
- Measure: Measure the depth and width of your pantry shelf. Decide how many tiers you want (2-3 is common) and how high each step should be (usually 3-4 inches).
- Cut Wood: Cut plywood or scrap wood to create the base and risers. For a 3-tier riser, you might need a long base, then a shorter piece for the second tier, and an even shorter piece for the third, each with a front panel of desired height.
- Assemble: Use wood glue and small nails/screws to assemble your tiered structure. Ensure it’s sturdy. You’re essentially building a small set of stairs for your food.
- Finish (Optional): Sand and paint or seal if desired.
DIY Drawer Dividers
Utensil drawers, junk drawers, and even deep pantry drawers can benefit from dividers to keep categories separate.
Materials and Steps
- Materials: Thin plywood, balsa wood, sturdy cardboard, or even PVC fence pickets, wood glue, saw or utility knife.
- Steps:
- Measure: Measure the internal dimensions of your drawer. Sketch out a plan for how you want your dividers to segment the space.
- Cut Strips: Cut your chosen material into strips that match the height of your drawer sides and the lengths needed for your grid.
- Assemble: For a simple grid, you can create slots in intersecting pieces (halfway cuts) that slide together. For easier installation, you can simply glue or nail the strips into place within the drawer, starting with the longest pieces. Ensure they are secure so items don’t shift underneath.
- Customize: Tailor the size of each compartment for specific items – a long one for spatulas, small squares for spice jars.
Troubleshooting Common DIY Storage Issues
Even with the best plans, DIY projects can sometimes hit a snag. Here’s how to tackle some common issues with your DIY kitchen storage hacks.
Uneven Shelves
Problem: Your newly installed wall shelf is visibly crooked.
Solution: The most likely culprit is an unlevel installation of the brackets. Remove the shelf and use a reliable level to re-mark your bracket positions. If one bracket is slightly off, you might be able to loosen it, adjust, and re-tighten. If the screws are loose in the wall, you may need to use larger screws or better anchors, or even shift the bracket slightly to drill into a fresh spot.
Wobbly Organizers
Problem: Your pull-out organizer or pegboard feels unstable.
Solution: For pull-outs, ensure all screws for the drawer slides are tight and that the slides themselves are securely fastened to both the cabinet and the drawer box. Check that the drawer box itself is square and all joints are firm. For pegboards, ensure it’s securely attached to studs where possible, or that robust drywall anchors were used at every mounting point. Adding more mounting points can help distribute weight and increase stability.
Running Out of Space (Again!)
Problem: You’ve implemented some great DIY kitchen storage hacks, but you still feel like you need more space.
Solution: This often points back to the initial decluttering phase. Take another pass through your kitchen and be ruthless. Do you really need that gadget you haven’t used in two years? Are there duplicate items? Consider a “one in, one out” rule for new purchases. If you truly need more space, think about lesser-used items that can be stored elsewhere, like in a basement, garage, or even a dining room buffet. Also, revisit vertical space – are there any missed opportunities for a small shelf or hook?
Conclusion: Enjoy Your Organized Kitchen
Congratulations! You’ve taken the first steps, or perhaps several giant leaps, toward a more organized and functional kitchen. Implementing these DIY kitchen storage hacks not only saves you money but also gives you the satisfaction of creating something custom with your own hands. From wall-mounted shelves that display your personality to ingenious pull-out organizers that tame cabinet chaos, you’ve transformed your culinary space.
Remember, an organized kitchen isn’t just about neatness; it’s about efficiency, enjoyment, and reducing stress. Take pride in your DIY accomplishments, keep exploring new ideas, and most importantly, enjoy cooking and living in your beautifully organized kitchen!