DIY Room Decor Aesthetic: Effortless Style can be achieved by focusing on a few key elements: choosing a cohesive color palette, incorporating personal touches through DIY art and decor, utilizing smart storage solutions, and prioritizing comfort with soft textiles. This approach blends personal style with practical, budget-friendly ideas to create a beautiful and inviting space without the overwhelm.
Feeling like your room is missing that special something? You’ve scrolled through endless inspiration on Pinterest and Instagram, but translating those gorgeous photos into your own space feels… well, impossible. It’s totally normal to feel a bit lost when starting your room decor journey.
The good news is, creating a stylish and personal “aesthetic” doesn’t require a huge budget or professional design skills. We’re going to break down how to achieve that effortless charm you love, step by step.
Get ready to discover simple, creative ways to make your room a reflection of you. We’ll cover everything from picking colors to adding those perfect DIY touches that make a big difference. Let’s dive in and transform your space!
What is a Room Decor Aesthetic?
Think of a room decor aesthetic as the overall vibe or personality of your space. It’s the feeling you get when you walk into a room – is it cozy, minimalist, bohemian, modern, or something else entirely? It’s created by the colors, textures, furniture, and decorative items you choose.
An aesthetic isn’t about following fleeting trends; it’s about curating a look that feels right for you. It’s the visual language that tells your story and makes your room a comfortable sanctuary. Getting this right means your space feels cohesive and intentional, rather than a random collection of items.
Why DIY Room Decor is Your Secret Weapon
DIY (Do It Yourself) room decor is amazing for so many reasons, especially when you’re aiming for a specific aesthetic. It allows you to:
- Save Money: Store-bought decor can add up quickly. DIY projects often use affordable materials, letting you achieve a high-end look for less.
- Personalize Your Space: You can create pieces that are uniquely yours, perfectly matching your chosen aesthetic and adding sentimental value.
- Unleash Creativity: It’s a fun way to express yourself and try new things. Plus, there’s a huge sense of accomplishment when you create something beautiful with your own hands.
- Reduce Waste: Upcycling old items or using sustainable materials is a great way to be eco-friendly.
DIY isn’t just about saving money; it’s about infusing your personality and creativity into every corner. It makes your room truly one-of-a-kind.
Step 1: Define Your Room Decor Aesthetic
Before you pick up a paintbrush or glue gun, take a moment to figure out what kind of vibe you’re going for. This is the foundation of your entire room decor project.
Think about what makes you feel happy and relaxed. What styles do you see in magazines or online that make you say, “Wow, I love that!”?
Gather Inspiration
This is the fun part! Dive into platforms like Pinterest, Instagram, or even home decor magazines. Create a board or a folder where you save images of rooms, furniture, colors, and decor items that catch your eye.
Don’t overthink it at this stage. Just save anything that resonates with you. Look for common themes that emerge – do you keep saving pictures with lots of plants? Or rooms with soft, neutral colors? Maybe you’re drawn to vintage-inspired pieces.
Identify Key Elements
Once you have a good collection of inspiration images, start analyzing them. Look for recurring patterns:
- Color Palette: What colors appear most often? Are they warm (reds, oranges, yellows) or cool (blues, greens, purples)? Are they bold or muted?
- Textures: Do you see a lot of soft fabrics like velvet or linen? Or maybe rougher textures like wood grain or woven baskets?
- Materials: What materials seem prevalent? Think wood, metal, glass, natural fibers, etc.
- Overall Mood: How do these rooms make you feel? Cozy? Energetic? Serene?
This analysis will help you pinpoint a few core elements that define your desired aesthetic. For example, if you love cozy, rustic vibes, you might identify: warm wood tones, chunky knit blankets, earthy colors, and natural elements like plants and stone.
Popular Aesthetics for Beginners
To help you get started, here are a few beginner-friendly aesthetics that are easy to achieve with DIY:
| Aesthetic | Key Characteristics | DIY Friendly Ideas |
|---|---|---|
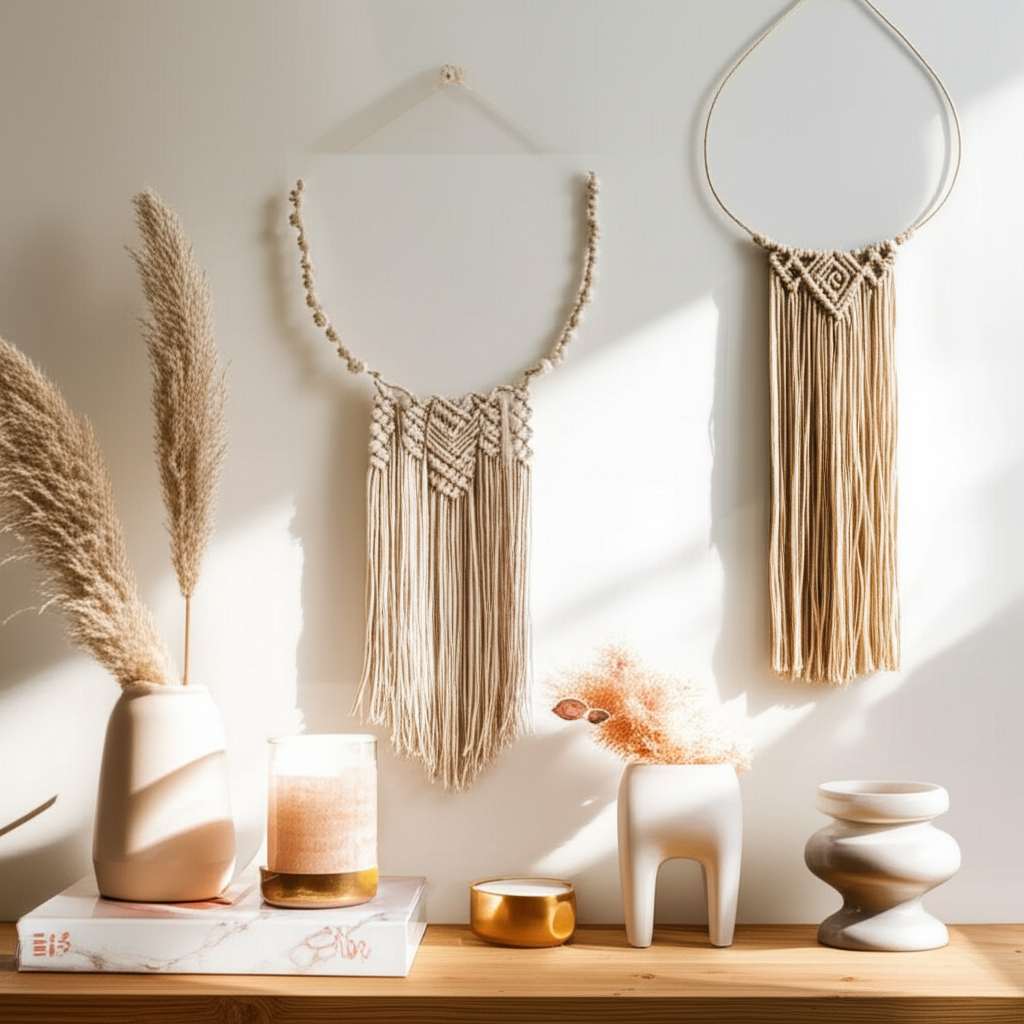
| Bohemian (Boho) | Relaxed, eclectic, natural, global influences, lots of plants, mix of patterns and textures. | Macrame plant hangers, DIY dreamcatchers, painted terracotta pots, thrifted furniture with a fresh coat of paint. |
| Minimalist | Clean lines, uncluttered, neutral color palette, functional, intentional use of space. | Simple floating shelves, monochromatic art, DIY storage boxes, minimalist planters. |
| Scandinavian (Scandi) | Light and airy, natural materials (especially light wood), functional, cozy (hygge), neutral colors with pops of muted color. | Painted furniture in white or light grey, DIY wooden wall art, simple geometric designs, cozy throws. |
| Modern Farmhouse | Rustic charm meets modern simplicity, neutral colors, natural wood, shiplap accents, cozy textiles. | DIY pallet wood signs, distressed furniture, painted mason jars for storage, framed vintage prints. |
| Coastal/Beach | Light, breezy, inspired by the sea, natural textures, soft blues and whites, driftwood elements. | Painted seashells, DIY driftwood art, rope-wrapped decor, beach-inspired wall hangings. |
Step 2: Choose Your Color Palette
Color is one of the most powerful tools in creating an aesthetic. A well-chosen palette will tie all your decor elements together and set the mood for your room.
Aim for 2-3 main colors and 1-2 accent colors. This provides balance without being overwhelming. Think about how different colors make you feel. Blues and greens are calming, yellows and oranges are energizing, while neutrals like beige, grey, and white offer a sense of peace and sophistication.
Understanding Color Harmony
You don’t need to be an artist to pick great colors. A simple way to start is by looking at a color wheel. Complementary colors (opposite each other on the wheel, like blue and orange) create high contrast, while analogous colors (next to each other, like blue and green) create a harmonious, soothing feel.
For a beginner-friendly approach, consider starting with a neutral base. This makes it easier to add pops of color and swap out accent pieces later. A great resource for color inspiration and understanding combinations is Coolors.co, which helps you generate and explore color palettes.
Applying Your Palette
Once you have your palette, think about where each color will go:
- Walls: This is your biggest canvas. Consider a neutral or a soft color from your palette.
- Large Furniture: Your sofa, bed, or main armchair.
- Accent Pieces: Think throw pillows, blankets, rugs, curtains, and smaller decor items.
- DIY Projects: Use your palette when painting furniture, creating art, or crafting new decor.
For example, if your aesthetic is Scandinavian, you might choose soft white walls, a light grey sofa, and then add accents of muted blue, pale yellow, and natural wood tones through pillows, art, and small decor items.
Step 3: Embrace DIY Wall Art and Decor
Your walls and surfaces are prime real estate for showcasing your chosen aesthetic. DIY art and decor pieces are perfect for adding personality without breaking the bank.
Don’t be intimidated by the idea of creating art! Many DIY projects are simple and forgiving, and the imperfections often add to their charm.
Easy DIY Art Ideas
Here are some ideas to get your creative juices flowing:
- Abstract Canvas Painting: Grab a blank canvas (or even thick cardboard), a few acrylic paints in your palette colors, and some brushes. Experiment with different techniques – pouring, splattering, or using a palette knife. There are tons of beginner-friendly tutorials online.
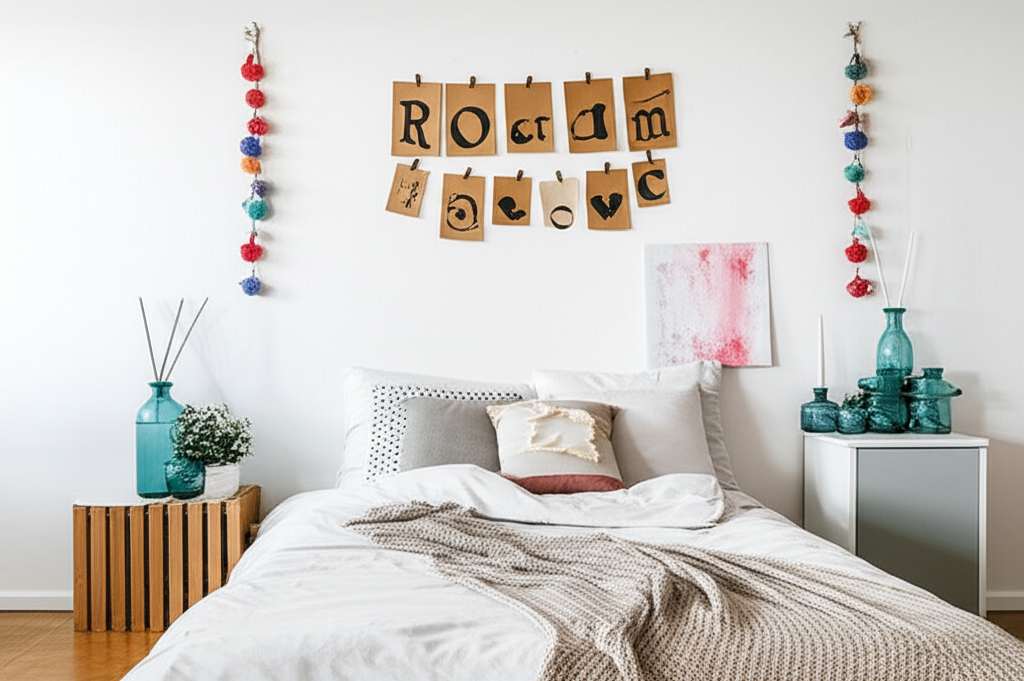
- Gallery Wall with Personal Photos: Print your favorite photos in black and white or sepia tones for a cohesive look. Mix them with some inexpensive prints from online art shops or even pressed flowers. Arrange them in a pleasing way on your wall.
- DIY Macrame or Weaving: These textile art forms add wonderful texture. You can find beginner kits or follow simple video tutorials to create wall hangings. They’re perfect for boho or modern aesthetics.
- Pressed Flower Art: Collect beautiful flowers and leaves, press them flat in a heavy book for a few weeks, and then arrange and glue them onto cardstock. Frame them for an elegant, natural touch.
- Geometric Wall Stencils: Use painter’s tape to create geometric patterns on a wall or a large piece of wood/canvas. Paint within the lines for a sharp, modern look.
DIY Decorative Objects
Beyond wall art, think about smaller items that add flair:
- Painted Vases or Jars: Give old jars or plain vases a new lease on life with chalk paint, spray paint, or even textured finishes.
- Coasters: Use tiles, wood slices, or even resin to create custom coasters that match your aesthetic.
- Candle Holders: Decorate plain glass or metal candle holders with paint, twine, or mosaic tiles.
- Upcycled Furniture Accents: Add new hardware to an old dresser, paint a side table in your palette color, or add decorative stencils to a wooden chest.
Remember to search for tutorials on platforms like YouTube. Visual guides make these projects incredibly accessible. For instance, sites like Annie Sloan’s website offer fantastic tips and tutorials for chalk painting furniture, a popular method for achieving distressed or matte finishes.
Step 4: Focus on Textiles and Soft Furnishings
Texture is key to making a room feel inviting and comfortable. Textiles like rugs, curtains, throw pillows, and blankets are your best friends for adding warmth and depth to your chosen aesthetic.
These items are also fantastic for injecting your color palette and desired textures into the space. Plus, many can be DIYed or found affordably!
Choosing the Right Textiles
Consider the feeling you want to evoke:
- Cozy & Warm: Think chunky knits, faux fur, velvet, thick cotton, and fleece.
- Light & Airy: Opt for linen, light cotton, sheer fabrics, and natural weaves.
- Bohemian: Look for global-inspired prints, tassels, fringe, and natural fibers like jute or rattan.
- Modern: Simple, clean lines, solid colors, and smooth textures often work best.
DIY Textile Projects
You don’t need to be a master seamstress to work with textiles:
- No-Sew Pillow Covers: Many tutorials show you how to create simple envelope-style pillow covers using fabric glue or fusible webbing.
- Tassel Garlands or Curtain Tie-Backs: Easily create stylish tassels from yarn to add decorative accents.
- DIY Rugs: Braided rag rugs are a classic DIY project using old fabric scraps. You can also paint patterns onto a plain jute or sisal rug.
- Custom Curtains: Buy inexpensive plain curtains and add trim, pom-poms, or a dip-dye effect using fabric dye.
Don’t forget about layering! Layering different textures – like a soft rug under a woven basket, or a chunky knit throw over a linen sofa – adds visual interest and coziness.
Step 5: Smart Storage and Organization
A beautiful aesthetic quickly falls apart if your space is cluttered. Smart storage is essential for maintaining that effortless style and keeping your room looking tidy.
The goal is to have everything have its place, making it easy to put things away and maintain order. This is where DIY storage solutions can be incredibly creative and budget-friendly.
DIY Storage Solutions
- Decorative Storage Boxes: Cover plain cardboard boxes with fabric, wallpaper scraps, or paint to match your aesthetic. They’re perfect for hiding remotes, chargers, or clutter.
- Painted Baskets: Give plain wicker or seagrass baskets a refresh with a coat of spray paint in your palette colors.
- Floating Shelves: Simple wooden planks mounted on brackets can create stylish display and storage space without taking up floor area. You can paint or stain them to match your decor.
- Pegboards: A versatile solution for organizing craft supplies, jewelry, or even small kitchen items. Paint them in a fun color to make them a decor piece.
- Repurposed Furniture: An old bookshelf can become a display for your favorite items, or a vintage trunk can serve as both storage and a coffee table.
Organizing Tips
Beyond DIY, simple organizing habits make a huge difference:
- Declutter Regularly: Go through your belongings periodically and get rid of anything you no longer need or love.
- “A Place for Everything”: Assign a specific home for each item.
- Vertical Space: Utilize wall space with shelves and wall-mounted organizers to keep surfaces clear.
- Contain Small Items: Use small trays, bowls, or drawer organizers for things like keys, jewelry, or office supplies.
A well-organized room feels calmer and allows your carefully chosen decor to shine. For more on organizing principles, resources like the EPA’s “Reducing and Reusing” page offer great insights into mindful consumption and decluttering.
Step 6: Personalize with DIY Greenery and Accents
No room is complete without those final touches that make it feel truly yours. Plants add life and color, while carefully chosen decorative accents tie everything together.
DIY allows you to create these personalized elements perfectly suited to your aesthetic and budget.
Bringing in Nature with DIY Plants
Plants are fantastic for any aesthetic, adding a touch of life and freshness.
- DIY Planters: As mentioned before, painting terracotta pots, old cans, or jars can create custom planters. You can also wrap them in twine, fabric, or even mosaic tiles.
- Terrariums: Create a miniature ecosystem in a glass container. They’re beautiful, low-maintenance, and a fun DIY project.
- Kokedama: This Japanese art involves creating a moss ball for a plant to grow in, often hung or placed on a surface. It’s a unique and elegant look.
- Faux Plants: If you don’t have a green thumb, high-quality faux plants can still add greenery. You can even “dress them up” by placing them in stylish DIY planters.
Adding Those Final DIY Touches
These are the small details that make a big impact:
- DIY Trays: Use a wooden tray or a painted serving tray to group items like candles, remotes, or decorative objects on a coffee table or dresser.
- Custom Book Covers: Wrap books you already own in decorative paper or fabric that matches your color palette to create a cohesive bookshelf display.
- DIY Candles: Make your own scented candles using soy wax, essential oils, and your favorite jars.
- Painted Furniture Knobs/Hardware: A small but impactful DIY that can instantly update a piece of furniture.
The key is to select items that genuinely bring you joy and reflect your personality. Don’t be afraid to mix and match styles slightly, as long as they feel harmonious within your overall aesthetic.
Maintaining Your DIY Room Decor Aesthetic
Creating your aesthetic is just the first step! Keeping it looking fresh and intentional requires a little ongoing effort.
Think of it as tending to a garden – regular, small actions keep it beautiful. This isn’t about constant redecorating, but simple habits.
Regular Tidying
Make it a habit to put things back where they belong at the end of each day. A quick 10-minute tidy can prevent clutter from accumulating and keep your space looking its best.
Seasonal Swaps
You don’t need to buy new decor every season. Instead, rotate items you already own. Perhaps your darker, cozier throws come out in autumn, and lighter, brighter cushions appear in spring.
You can also easily update small DIY items. Maybe you repaint a vase a new color for a season, or swap out photos in your gallery wall. This keeps your space feeling dynamic without a big overhaul.
DIY Maintenance
If you have painted furniture, keep a small amount of touch-up paint handy for minor scratches. If you have textile art, give it a gentle shake or brush to keep it looking neat.
Embrace the idea that your space evolves. Your aesthetic might shift slightly over time as your tastes change, and that’s perfectly okay!
Conclusion
Transforming your room into a stylish sanctuary doesn’t have to be complicated or expensive. By defining your DIY room decor aesthetic, choosing a cohesive color palette, and embracing creative DIY projects, you can craft a space that truly reflects your personality and makes you feel at home.
Remember, it’s about progress, not perfection. Start with small, manageable projects, focus on what brings you joy, and don’t be afraid to experiment. Your home is your canvas, and with these simple, effortless style tips, you can create a beautiful and inspiring space that you’ll love coming back to.
Frequently Asked Questions (FAQs)
Q1: How do I choose an aesthetic if I like many different styles?
A1: It’s common to love multiple styles! Try to identify the feeling you want your room to evoke most. Is it calm and serene (minimalist, Scandi), vibrant and energetic (boho, eclectic), or cozy and welcoming (farmhouse, bohemian)? You can also create a hybrid aesthetic by picking a base style and adding elements from another that complement it. For example, a Scandinavian base with boho accents can feel very chic.
Q2: What are the easiest DIY decor projects for absolute beginners?
A2: Some of the easiest projects include painting existing items (vases, jars, furniture), creating simple abstract art on canvas, making no-sew pillow covers, or arranging a gallery wall with personal photos and inexpensive prints. Look for projects that require minimal tools and forgiving techniques.
Q3: How much money do I need to spend on DIY room decor?
A3: You can spend very little! Many DIY projects use materials you already have or can find affordably at thrift stores, dollar stores, or craft supply sales. Focus on repurposing and upcycling. Even a small budget can yield significant results by prioritizing a few key projects.
Q4: Do I need to paint my walls to create a new aesthetic?
A4: Not necessarily! While wall color is a big factor, you can create a strong aesthetic through textiles, furniture, and decor. Think about adding a statement rug, hanging curtains in your chosen colors, or creating a DIY art piece that introduces your palette. These elements can significantly transform a room without touching the walls.
Q5: How do I make my small room look bigger with DIY decor?
A5: Use lighter colors for walls and large furniture pieces. Incorporate mirrors – DIY a custom frame or find an affordable one. Opt for furniture with visible legs to create a sense of openness. DIY floating shelves also draw the eye upward and save floor space. Keep decor intentional and avoid clutter.
Q6: Where can I find free or cheap materials for DIY projects?
A6: Thrift stores are goldmines for furniture, vases, frames, and fabric. Look for discarded items on the curb (with permission if needed!). Ask friends and family if they have items they’re getting rid of. Old clothing can be repurposed for fabric projects, and cardboard boxes can be transformed into storage. Natural elements like branches or stones can also be collected (responsibly!).