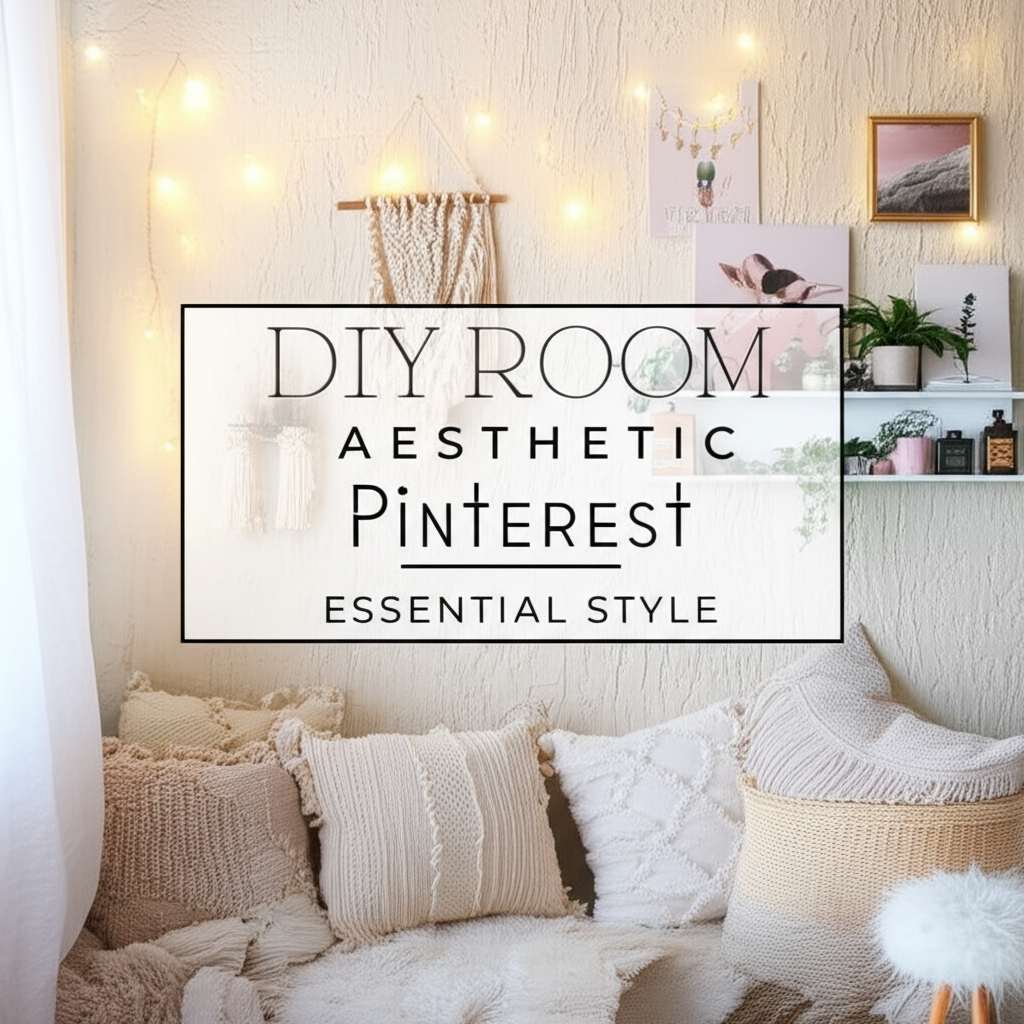
Diy Room Decor Aesthetic Pinterest: Essential Style
Looking to create a room that feels straight out of your Pinterest dreams? DIY room decor with a Pinterest aesthetic is achievable for everyone! This guide breaks down how to find inspiration, choose a style, and craft beautiful, budget-friendly decor pieces that reflect your personality. Get ready to transform your space with simple, creative projects.
Feeling a little overwhelmed by all the gorgeous room photos on Pinterest? You’re not alone! It’s easy to scroll endlessly, wishing your own space looked just as stylish.
But here’s the good news: achieving that coveted “Pinterest aesthetic” doesn’t require a huge budget or professional design skills.
With a little creativity and some simple DIY magic, you can bring those dream room vibes to life. This guide will walk you through everything, step-by-step.
Let’s get ready to make your space uniquely you, inspired by the best of Pinterest!
Frequently Asked Questions
What exactly is a “Pinterest aesthetic” for room decor?
A “Pinterest aesthetic” refers to a cohesive visual style or theme that you see frequently on Pinterest. It’s about creating a mood or vibe in your room, like “cozy minimalist,” “boho chic,” or “dark academia.” It’s less about specific items and more about the overall feeling and look.
How do I find my own room aesthetic?
Start by browsing Pinterest for room inspiration! Save images you love, even if they seem unrelated at first. Look for common colors, textures, furniture styles, or feelings in the pins you’ve saved. Do you lean towards light and airy, or dark and moody? Do you love plants, or prefer clean lines? Your saved pins will reveal your natural preferences.
Is DIY decor really cheaper than buying new?
Often, yes! DIY decor can be significantly cheaper, especially if you use materials you already own, shop at thrift stores, or find affordable craft supplies. It allows you to get a high-end look for less by investing your time and creativity instead of a lot of money.
What are some easy DIY projects for beginners?
Great beginner projects include painting furniture, creating wall art (like abstract canvas paintings or macrame hangings), making your own throw pillows, customizing plain vases, or building simple shelves. These projects don’t require specialized tools and offer a big impact.
How can I make my DIY decor look professional and not “crafty”?
Pay attention to details! Use good quality paint, sand surfaces smoothly before painting, and ensure clean lines. For fabric projects, use sharp scissors and consider hemming for a polished look. Always measure twice and cut once. Sometimes, a good coat of spray paint or varnish can elevate a project significantly.
How often should I update my room decor?
This is entirely up to you! Some people like to refresh their decor seasonally, while others make bigger changes only once a year or when they feel a strong desire for something new. DIY allows for easy updates; you can repaint a vase or swap out pillow covers without a big expense.
Where can I find affordable DIY supplies?
Thrift stores (for furniture, frames, vases, fabric), dollar stores (for craft supplies, paint, basic tools), craft stores with coupons or sales, online marketplaces like Facebook Marketplace or Etsy (for unique materials or secondhand finds), and even your own home (repurposing old items) are great places to look.
Finding Your Perfect Pinterest Aesthetic
Scrolling through Pinterest for room decor can feel like a treasure hunt! You’ll see so many beautiful styles, from cozy and rustic to sleek and modern. The key is to figure out which of these styles truly speaks to you.
Think about how you want your room to feel. Do you want it to be a calming sanctuary, a vibrant creative hub, or a stylish place to entertain? Your room’s purpose can help guide your aesthetic choice.
Step 1: Create a Mood Board (Digital or Physical)
Start saving every room image that catches your eye on Pinterest. Don’t overthink it at this stage; just save what you love. Once you have a good collection, look for recurring themes. Are most of your pins filled with plants and natural materials? That might point to a boho or biophilic design. Do you see a lot of clean lines, neutral colors, and minimalist furniture? You might be drawn to modern or Scandinavian styles.
Consider these popular aesthetics to see if any resonate:
- Boho Chic: Earthy tones, rattan, macrame, plants, layered textiles, vintage finds.
- Minimalist: Clean lines, neutral palettes, uncluttered spaces, functional pieces.
- Modern Farmhouse: Rustic wood, shiplap, neutral colors with pops of black, cozy textiles.
- Scandi-Style: Light woods, white or gray palettes, cozy textures (hygge), functional and simple.
- Industrial: Exposed brick, metal accents, raw wood, neutral colors, utilitarian feel.
- Coastal/Beach: Light blues, whites, natural textures like driftwood and linen, airy feel.
- Dark Academia: Rich woods, vintage books, moody colors (deep greens, burgundies), classic furniture.
Step 2: Analyze Your Saved Pins
Once you have a collection, take a closer look. What colors keep appearing? What textures do you gravitate towards (e.g., soft velvet, rough wood, smooth metal)? What kind of lighting do you prefer (bright and airy, or dim and moody)? What objects or types of decor are consistently present?
You can even create a simple spreadsheet or a physical collage to see the patterns emerge. This analysis is the foundation for choosing your DIY projects.
Step 3: Define Your Color Palette and Materials
Based on your mood board, pick a core color palette. Most aesthetics have a dominant color and a few accent colors. Also, consider the primary materials you want to incorporate. For example, a boho aesthetic might use rattan, wood, and cotton, while an industrial look might favor metal, concrete, and leather.
Essential DIY Techniques for Pinterest Style
Now that you have a clear idea of your desired aesthetic, it’s time to get creative with DIY! These techniques are fundamental for achieving that polished Pinterest look without breaking the bank.
Painting and Refinishing
Painting is one of the most transformative DIY skills. It can completely change the look of furniture, walls, and decor items. For a professional finish, proper preparation is key.
- Surface Prep: Always clean the item thoroughly. Sand down glossy surfaces to help paint adhere. For furniture, use a primer if you’re painting a dark color over a light one, or vice versa.
- Paint Choice: Use good quality paint. Chalk paint is popular for a matte, vintage finish, while acrylics work well for smaller decor items and canvas art. For walls or furniture, consider a durable enamel or latex paint.
- Application: Use the right brushes or rollers. Apply thin, even coats, allowing each to dry completely before applying the next.
Upcycling and Repurposing
This is where true DIY magic happens! Give old items new life. This is not only budget-friendly but also great for the environment. For inspiration on upcycling, check out resources from the Environmental Protection Agency for general waste reduction and reuse principles.
- Thrift Store Finds: Look for old wooden crates, picture frames, vases, or furniture that have good bones but are outdated.
- Home Treasures: Repurpose glass jars into candle holders or vases, old t-shirts into rugs or cushion covers, or even tin cans into planters.
- Creative Transformations: A ladder can become a bookshelf, an old door can be a tabletop, and fabric scraps can be turned into unique wall art.
Textile and Sewing Projects
Soft furnishings add comfort and style to any room. You don’t need to be a master seamstress to create beautiful pieces.
- Pillow Covers: Simple envelope-style pillow covers are easy to make. You can use new fabric or upcycle old clothes or curtains.
- Throws and Blankets: Arm knitting or simple no-sew fleece tie blankets are popular and create cozy textures.
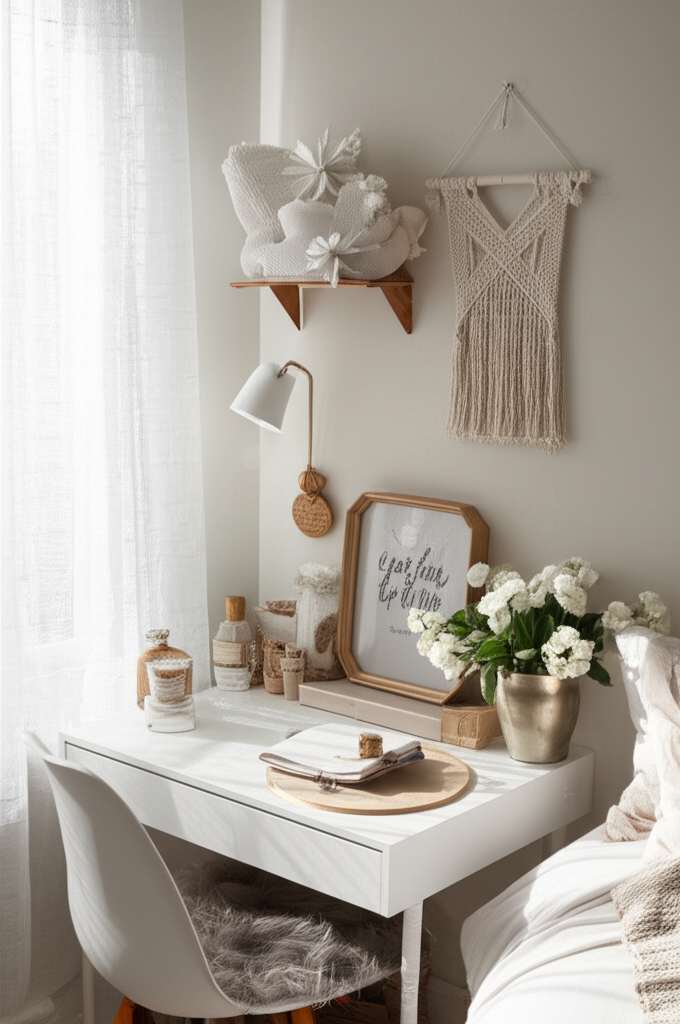
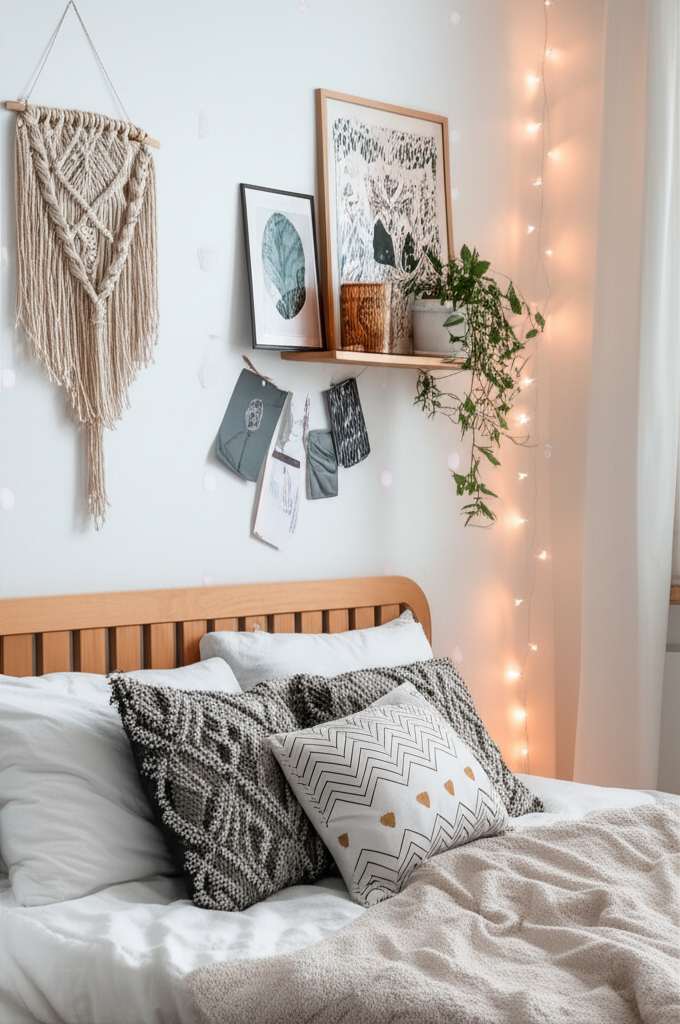
- Wall Hangings: Macrame, fabric tapestries, or framed fabric swatches can add personality to your walls.
Wall Art Creation
Your walls are a blank canvas! DIY art can be surprisingly impactful and personal.
- Abstract Painting: Grab a canvas, some acrylic paints in your chosen palette, and a few brushes. Experiment with different techniques – dripping, layering, using palette knives.
- Gallery Walls: Collect various frames (thrifted or painted alike) and fill them with prints, photos, postcards, or even pressed leaves.
- String Art: Hammer nails into a piece of wood in a pattern and then wrap string or yarn around them.
- Textured Art: Use joint compound or texture paste on a canvas to create raised, dimensional art pieces.
Top DIY Room Decor Projects by Aesthetic
Let’s get specific! Here are some popular DIY projects tailored to different aesthetics, perfect for your Pinterest-inspired room.
Boho Chic Projects
Embrace natural textures, global influences, and a relaxed vibe.
- Macrame Plant Hangers/Wall Hangings: Learn a few basic knots and create intricate designs. You’ll need cotton cord and a dowel rod.
- Painted Terracotta Pots: Use acrylic paints in earthy tones or geometric patterns to decorate plain terracotta pots.
- Rattan or Wicker Updates: Find secondhand rattan furniture or baskets. A light sanding and a coat of natural wood stain or white paint can modernize them.
- DIY Dreamcatcher: A classic boho element. Use embroidery hoops, yarn, feathers, and beads.
Minimalist Projects
Focus on simplicity, functionality, and a neutral palette.
- Floating Shelves: Clean, simple shelves that appear to “float” on the wall. Many tutorials use basic lumber and mounting hardware.
- Concrete Planters/Decor: Mix concrete and water in a container, pour into molds (like plastic cups), and let set. You can make planters, coasters, or small decorative objects.
- Monochromatic Art: Create simple abstract art using only shades of one color, or a black and white palette.
- Minimalist Vases: Paint plain glass vases in matte white, black, or gray. Consider adding subtle texture with a spray-on textured paint.
Modern Farmhouse Projects
Blend rustic charm with clean, modern lines.
- Wooden Crate Shelving: Stack and secure painted or stained wooden crates to create unique wall storage.
- DIY Signage: Create rustic signs with inspiring quotes or family names using wood planks, stencils, and paint.
- Shiplap Accent Wall (DIY Kits): While a full shiplap wall can be a bigger project, you can find DIY-friendly peel-and-stick shiplap panels for a smaller accent area.
- Mason Jar Decor: Paint mason jars in farmhouse colors (white, gray, navy) and use them for flowers, storage, or even as candle holders.
Scandi-Style Projects
Prioritize light, natural materials, and cozy comfort (hygge).
- Light Wood Furniture Updates: Sand down dark wood furniture and refinish with a light, natural wood stain or a whitewash.
- Textured Throws: Learn to arm knit a chunky blanket or make a simple fringed throw from soft yarn.
- Simple Wall Art: Frame botanical prints, minimalist line drawings, or simple geometric patterns in light wood frames.
- Cozy Poufs: Sew simple fabric poufs or cover existing ottomans in soft, textured fabrics like boucle or faux fur.
Essential Tools and Materials for DIY Decor
You don’t need a professional workshop to start crafting! Many basic tools and materials are versatile and affordable.
Must-Have Tools
These are the workhorses for most DIY decor projects.
- Measuring Tape: For accurate measurements.
- Screwdrivers: A basic set with Phillips and flathead.
- Hammer: For nails and light demolition/assembly.
- Utility Knife: For cutting fabric, paper, and other soft materials.
- Paint Brushes & Rollers: A variety pack is useful.
- Sandpaper: Various grits (e.g., 80, 120, 220) for smoothing surfaces.
- Glue Gun & Glue Sticks: For quick, strong adhesion on many materials.
- Scissors: A good pair for fabric and general cutting.
- Safety Glasses: Always protect your eyes!
Versatile Materials
Stock up on these to be ready for inspiration!
- Paint: Acrylics, chalk paint, spray paint (in your chosen colors).
- Wood: Scrap wood, dowel rods, plywood scraps.
- Fabric: Fat quarters, remnants, old clothing, linen, cotton.
- Yarn/Twine/Cord: For macrame, knitting, or decorative wrapping.
- Glue: Wood glue, fabric glue, super glue.
- Screws & Nails: Assorted sizes.
- Canvas: Various sizes for painting.
- Vases/Jars/Cans: For repurposing.
- Frames: For gallery walls or framing art.
Budget-Friendly Shopping Tips
Creating a Pinterest-worthy aesthetic on a budget is all about smart shopping.
Shop Secondhand First
Thrift stores, consignment shops, and flea markets are goldmines for furniture, decor items, and materials. You can find unique pieces at a fraction of the retail price.
Utilize Dollar Stores and Craft Sales
Dollar stores are fantastic for basic craft supplies, spray paints, small tools, and even faux plants. Keep an eye out for sales at craft stores – coupons and holiday promotions can save you a lot.
Repurpose What You Have
Before buying anything new, look around your home. Can an old t-shirt become a rug? Can glass jars be transformed into stylish vases? Upcycling is the ultimate budget decor strategy.
Buy in Bulk for Common Supplies
If you plan to do a lot of painting or crafting, buying larger quantities of paint or supplies can be more cost-effective in the long run.
Learn Basic Repair Skills
Knowing how to fix a wobbly chair leg or re-glue a loose trim piece can save furniture that might otherwise be discarded. Resources like This Old House offers excellent guides on basic home repair and woodworking.
Getting Started with Your First DIY Project
The most important step is to just begin! Don’t wait for the “perfect” time or the “perfect” idea. Choose one simple project that excites you and dive in.
Start Small and Simple
A good first project might be painting a small accent piece like a picture frame or a side table, creating a simple abstract canvas painting, or making a few DIY coasters. These projects are less time-consuming and have a lower risk of feeling overwhelming.
Gather All Your Supplies Beforehand
Once you’ve chosen your project, make a list of everything you’ll need. Visit your local craft store, hardware store, or thrift shop to gather your materials. Having everything ready to go makes the actual crafting process smoother and more enjoyable.
Follow Tutorials Closely at First
For your initial projects, find a clear, step-by-step tutorial online (YouTube is fantastic for visual learners!). Follow the instructions precisely. As you gain confidence, you can start experimenting and putting your own spin on things.
Don’t Fear Mistakes
Everyone makes mistakes, especially when learning something new! A wobbly line, a slightly uneven paint coat, or a glue smudge can often be fixed. If not, sometimes those imperfections add character and make your piece uniquely yours.
Celebrate Your Progress
Every DIY project you complete is a step towards your dream room. Take a moment to admire your handiwork and appreciate the effort you’ve put in. This positive reinforcement will encourage you to tackle more projects!
Conclusion
Transforming your room into a Pinterest-worthy sanctuary is a journey, not a destination, and the most rewarding part is doing it yourself! By understanding your personal aesthetic, embracing fundamental DIY techniques, and shopping smart, you can create a space that is both beautiful and uniquely yours.
Remember, the “Pinterest aesthetic” is really about capturing a feeling – a sense of style, comfort, and personality. Whether you’re drawn to the earthy vibes of boho chic, the clean simplicity of minimalism, the cozy charm of farmhouse style, or the light and airy feel of Scandi design, there’s a DIY project waiting for you.
Start with small, manageable projects, gather your supplies, and don’t be afraid to experiment. Each piece you create adds a personal touch that mass-produced items can’t replicate. Your room will not only look amazing but will also tell your story. Happy crafting, and enjoy your beautifully transformed space!