Transform your small space with these easy DIY room decor ideas! Discover clever hacks and budget-friendly solutions to make any room feel bigger, brighter, and more stylish, even on a beginner’s budget.
Feeling a little cramped in your living space? You’re not alone! Many of us dream of spacious, beautifully decorated rooms, but often end up with cozy corners that feel more like clutter traps than cozy retreats. It can be frustrating when your square footage doesn’t match your design dreams.
But don’t worry! Decorating a small room doesn’t have to be a headache. With a few smart DIY ideas, you can unlock the hidden potential of your space and create a home that feels both functional and fabulous.
This guide is packed with simple, creative solutions that will make your small room feel brand new. Get ready to be inspired and discover how easy it is to make your space work for you!
Maximize Your Space with Smart DIY Decor
When you’re working with limited space, every inch counts. The key is to be strategic with your decor choices, focusing on items that serve multiple purposes or create an illusion of more space. DIY is perfect for this because you can tailor everything to your exact needs and style.
Think vertical, think multi-functional, and think light and bright! These principles will be your guiding stars as we explore some fantastic DIY room decor ideas for small rooms. For even more space-saving inspiration, check out our guide on cozy small kitchen ideas that maximize every square inch.
Clever Storage Solutions That Look Good
Storage is king in a small room. Instead of bulky furniture that eats up precious floor space, let’s get creative with DIY storage that blends seamlessly into your decor.
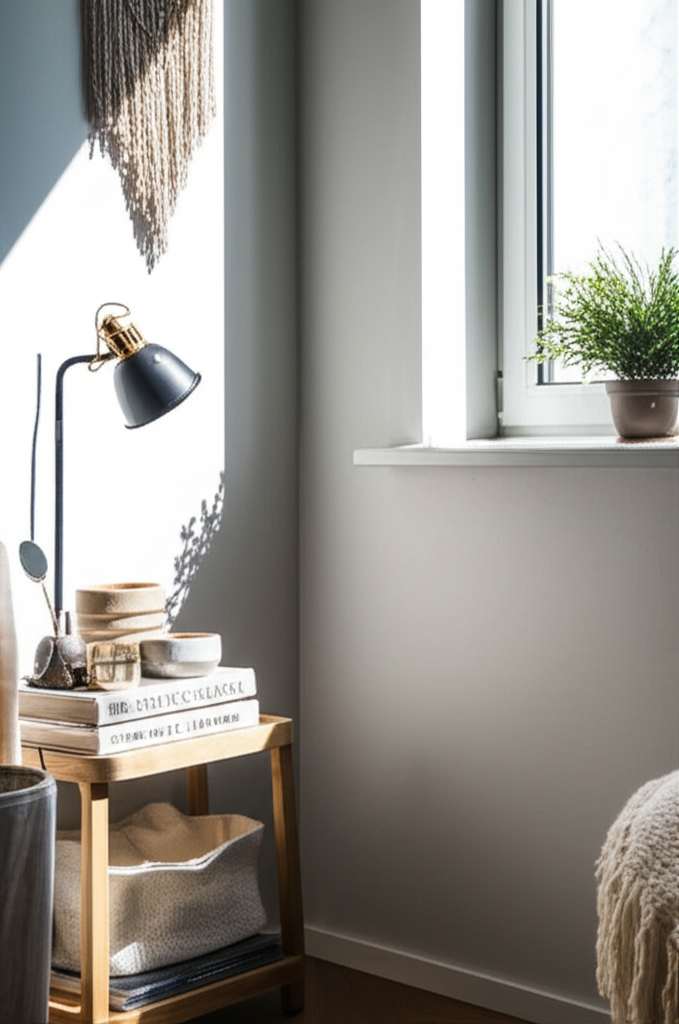
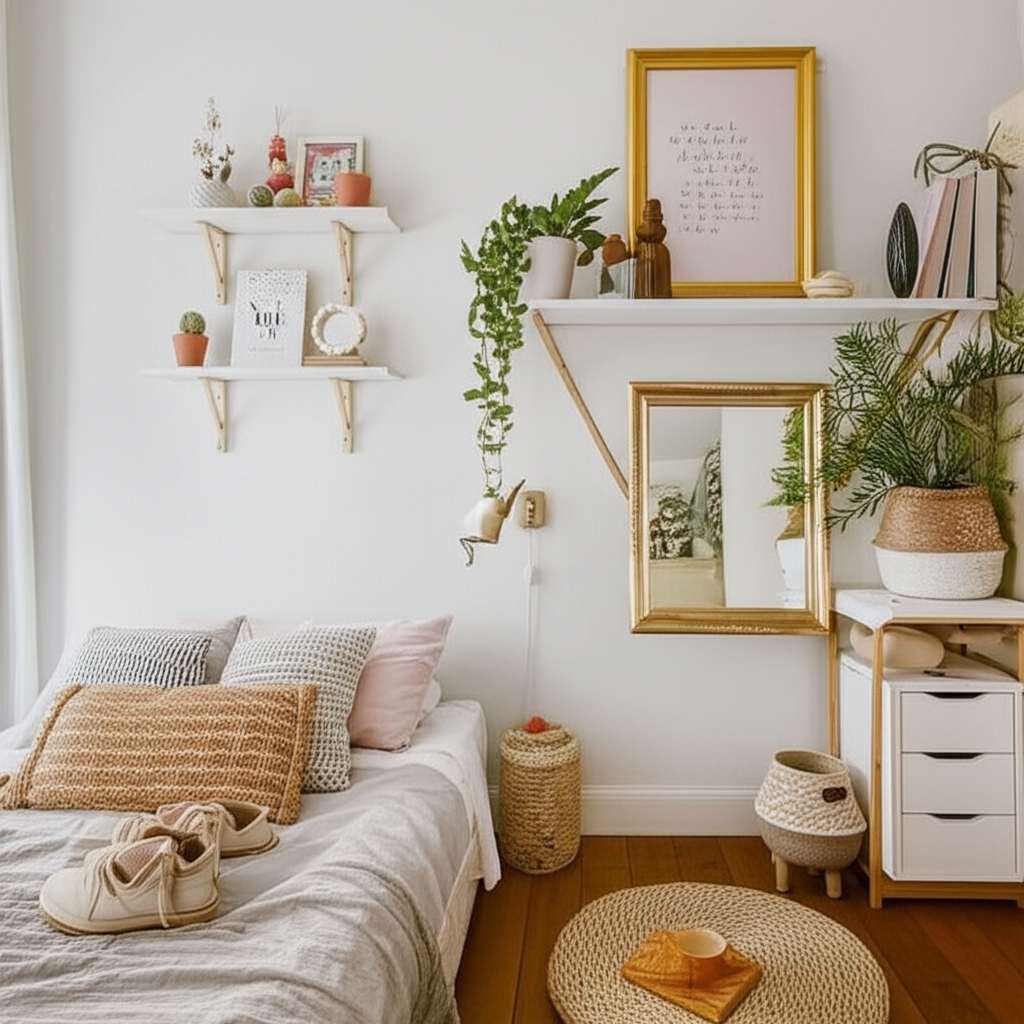
Floating Shelves for Instant Display and Storage
Floating shelves are a game-changer for small rooms. They draw the eye upward, creating a sense of height, and provide ample space for books, plants, photos, or decorative items without taking up floor space.
How to DIY:
- Materials: Wooden planks (cut to your desired size), shelf brackets (ensure they are strong enough for your intended items), screws, wall anchors (if not drilling into studs), a drill, a level, and sandpaper.
- Steps:
- Sand down your wooden planks until smooth. You can paint, stain, or leave them natural.
- Measure and mark where you want your shelves to go on the wall. Use a level to ensure they are straight.
- Install the shelf brackets according to their instructions, using wall anchors if necessary for a secure fit.
- Place the wooden plank on top of the brackets. You can secure it with a few screws from underneath for extra stability.
Style Tip: Group shelves of different lengths or staggering them can add visual interest. Don’t overcrowd them; negative space is your friend in a small room!
DIY Pegboard Organizer
A pegboard is an incredibly versatile tool for organizing almost anything. You can hang it in a kitchen, craft room, entryway, or even behind a door to store tools, craft supplies, jewelry, or accessories.
How to DIY:
- Materials: A pegboard (available at hardware stores), pegboard hooks and accessories (baskets, shelves, clips), screws, wall anchors, a drill, and a measuring tape.
- Steps:
- Decide on the location for your pegboard. Measure the space to ensure it fits.
- Mark the drill holes for mounting the pegboard onto the wall, using wall anchors for a secure installation.
- Drill the holes and attach the pegboard firmly to the wall.
- Add your chosen hooks, baskets, and shelves to customize the organization to your needs.
Budget-Friendly Hack: You can often find pre-cut pegboards at affordable prices. Consider painting the pegboard a color that matches your room for a more polished look.
Under-Bed Storage with a Twist
The space under your bed is prime real estate for storage. Instead of just shoving boxes, create a more stylish and accessible solution.
How to DIY:
- Materials: Rolling storage bins or shallow wooden crates, casters (optional), paint or stain, screws (if attaching casters).
- Steps:
- Clean out the under-bed space. Measure to ensure your chosen bins or crates will fit.
- If using wooden crates, you can paint or stain them to match your decor.
- If you want them to roll easily, attach casters to the bottom of the bins or crates. This is a simple DIY project using screws.
- Fill them with bedding, seasonal clothes, shoes, or anything you need to store.
Pro Tip: For a more seamless look, consider building a simple wooden frame around your bed that incorporates built-in drawers or open cubbies for storage. Check out resources from FEMA’s building codes for safe construction practices if you’re tackling a larger project.
Creating Illusions of Space
Sometimes, making a room feel bigger is all about tricking the eye. These DIY decor ideas focus on visual expansion.
Mirror Magic: Placement and DIY Frames
Mirrors are essential for small spaces. They reflect light and create depth, making a room feel larger and more open. The key is strategic placement.
DIY Mirror Frame:
- Materials: A plain mirror, decorative molding or wood strips, wood glue, screws, paint or stain, and a way to hang it (heavy-duty mirror hangers).
- Steps:
- Cut your molding or wood strips to the desired frame size.
- Glue and screw the pieces together to form a frame.
- Attach the frame to the edges of your mirror using wood glue and small screws from the back if possible.
- Paint or stain the frame to match your room’s aesthetic.
- Securely hang the mirror on the wall using appropriate hangers.
Placement Ideas: Hang a large mirror opposite a window to maximize natural light and the view. A grouping of smaller mirrors can also create a dazzling effect.
Light and Airy Window Treatments
Heavy, dark curtains can make a small room feel even smaller. Opt for DIY window treatments that allow light to filter through.
Simple DIY Roman Blinds:
- Materials: Fabric of your choice, blackout lining (optional), wooden slat (for the bottom hem), Velcro strips, cord and cleat (for operation), sewing machine or fabric glue, scissors, and a curtain rod.
- Steps:
- Measure your window and cut the fabric and lining to size, adding extra for seams and hems.
- Sew or glue the fabric and lining together, creating channels for the slats and cords.
- Attach the Velcro strip to the top edge of the blind for easy attachment to the rod.
- Thread the operating cord through the channels and attach it to the cleat on the wall.
- Insert the wooden slat into the bottom hem to give the blind weight and shape.
Tip: Hang your curtain rod higher and wider than the window frame to make the window appear larger. Lightweight, sheer fabrics in light colors are ideal.
Vertical Stripes for Height
Painting a feature wall with vertical stripes can visually elongate your room. This is a surprisingly simple DIY project.
How to DIY:
- Materials: Painter’s tape, measuring tape, pencil, level, paint in your chosen colors, paint rollers, and brushes.
- Steps:
- Clean and prep your wall.
- Decide on the width of your stripes. Use your measuring tape and pencil to mark the desired stripe widths.
- Use a level to ensure your lines are perfectly straight.
- Apply painter’s tape precisely along the edges of where you want your stripes to be.
- Paint your stripes. For a clean line, paint the stripe color over the tape edge first, let it dry, then paint the rest of the stripe. This seals the tape.
- Once dry, carefully peel off the painter’s tape.
Color Choice: Lighter, cooler colors tend to recede, making a space feel larger. Consider a soft grey, pale blue, or a crisp white for your stripes. For more color inspiration, explore our post on warm kitchen color ideas that can be adapted to any small room.
Making Your Room Feel Welcoming and Cozy
Even small rooms deserve to feel inviting and comfortable. These DIY touches add personality and warmth without clutter.
DIY Gallery Wall with Personality
A gallery wall is a fantastic way to add personality and art to your walls without taking up floor space. The trick is to curate it well.
How to DIY:
- Materials: A collection of art prints, photos, postcards, or small decorative objects; picture frames (can be thrifted and spray-painted); command strips or nails; a measuring tape; and a level.
- Steps:
- Gather your items. Consider a theme or color palette to create cohesion.
- Lay everything out on the floor first to experiment with arrangement.
- Measure and mark where each piece will hang on the wall. Aim for consistent spacing.
- Use command strips for a damage-free hanging solution, or nails for a more permanent fixture.
- Hang your gallery wall, using a level to ensure everything is straight.
Small Room Tip: Keep the frames consistent in size or color for a more organized look. Don’t be afraid to mix personal photos with art.
Upcycled Furniture Makeovers
Giving old furniture a new lease on life is not only budget-friendly but also a creative way to add character to your small room. Think small-scale pieces.
DIY Side Table Refresh:
- Materials: An old side table (thrift store find or existing piece), sandpaper, primer, paint or stain, and a sealant.
- Steps:
- Clean the table thoroughly.
- Lightly sand the surface to create a good base for paint or stain.
- Apply a coat of primer.
- Paint or stain the table in your chosen color.
- Once dry, apply a sealant to protect the finish.
Small Room Furniture Ideas: Look for narrow console tables, small stools that can double as side tables or plant stands, or nesting tables that can be tucked away when not in use.
DIY Throw Pillows and Textiles
Soft furnishings can instantly transform the feel of a room. Making your own throw pillows is a quick and rewarding DIY project.
No-Sew Pillow Covers:
- Materials: Fabric of your choice, fabric glue or iron-on hem tape, scissors, and a pillow insert.
- Steps:
- Cut two pieces of fabric slightly larger than your pillow insert.
- Lay one piece right-side up. Place the insert on top.
- Lay the second piece right-side down on top of the first, aligning the edges.
- Using fabric glue or hem tape, seal three sides of the pillow cover, creating a pocket for the insert.
- Turn the cover right-side out and insert your pillow.
- Seal the final side.
Impactful Additions: A few well-placed throw pillows and a cozy blanket can make even the smallest sofa or chair feel luxurious and inviting. Consider textured fabrics like velvet or chunky knits for added warmth.
Lighting Tricks for a Brighter Space
Good lighting can make a small room feel much larger and more pleasant. DIY lighting solutions can add both function and style.
String Light Ambiance
Fairy lights or string lights can add a magical, cozy glow to any small room. They are incredibly versatile.
DIY Ideas:
- Drape them around a mirror for a glamorous effect.
- Weave them through a DIY headboard or around a bookshelf.
- Hang them along the ceiling for a starry-night feel.
- Place them inside a large glass vase or lantern for a decorative accent.
Safety Note: Always use LED string lights, as they stay cool and are energy-efficient. Ensure they are securely attached and away from flammable materials. For more on electrical safety in the home, consult Consumer Product Safety Commission guidelines.
DIY Lampshade Update
A tired lampshade can bring down the mood of a room. A simple update can make a big difference.
How to DIY:
- Materials: An existing lampshade, fabric or decorative paper, spray adhesive or fabric glue, scissors, and a craft knife.
- Steps:
- Carefully remove the old fabric or paper from the lampshade frame, or use a plain existing shade.
- Cut your new fabric or paper to size, allowing for overlap.
- Apply spray adhesive or fabric glue evenly to the lampshade frame.
- Carefully wrap your new material around the frame, smoothing out any wrinkles.
- Trim any excess material with scissors or a craft knife.
Tip: Consider adding trim, tassels, or beads for extra flair. Choose lighter colors or patterns that don’t overwhelm the small space.
Maximizing Vertical Space Creatively
When floor space is limited, looking up is the answer!
DIY Hanging Planters
Plants add life and color to any room. Hanging planters are a brilliant way to incorporate greenery without using up valuable surface space.
Easy Macrame Plant Hanger:
- Materials: Macrame cord, scissors, a metal or wooden ring, and a small plant pot.
- Steps:
- Cut several equal lengths of macrame cord.
- Fold them in half and loop them through the ring.
- Gather the cords below the ring and tie a knot.
- Divide the cords into sections and create knots to form a basket-like structure that will hold your pot.
- Ensure the knots are secure and evenly spaced.
- Place your plant pot inside.
Placement: Hang them in corners, near windows, or from ceiling hooks to add a touch of nature without clutter. For more plant-inspired decor ideas, see our post on kitchen plant decor ideas that bring greenery into compact spaces.
Tall and Narrow Bookshelves or Display Units
Instead of wide, bulky units, opt for tall and narrow ones. They draw the eye upward and provide significant storage and display potential.
DIY Considerations:
- Materials: Lumber (e.g., 1×10 or 1×12 boards), screws, wood glue, a saw, a drill, sandpaper, and paint or stain.
- Design: Keep the depth minimal to avoid making the room feel smaller. The height is where you gain your storage.
- Assembly: Build a simple rectangular frame and add shelves at your desired intervals. Ensure it’s securely anchored to the wall for safety. Resources like Wood Magazine’s project plans can offer detailed guidance.
Style Tip: Don’t fill every shelf to the brim. Leave some empty space for visual breathing room.
DIY Room Decor Ideas for Small Rooms Summary Table
Here’s a quick reference for some of the most effective DIY decor strategies for small spaces:
| Strategy | Description | DIY Focus | Impact on Small Rooms |
|---|---|---|---|
| Smart Storage | Utilize every available space efficiently. | Floating shelves, pegboards, under-bed solutions. | Reduces clutter, creates more open floor space. |
| Visual Expansion | Trick the eye to make the room feel larger. | Mirrors, light window treatments, vertical stripes. | Reflects light, enhances natural light, creates a sense of height. |
| Cozy Touches | Add personality and warmth without bulk. | Gallery walls, upcycled furniture, DIY textiles. | Personalizes the space, adds comfort and style. |
| Strategic Lighting | Illuminate the room to feel more open and inviting. | String lights, updated lampshades. | Creates ambiance, makes the room feel brighter and more spacious. |
| Vertical Maximization | Draw the eye upwards and utilize wall space. | Hanging planters, tall & narrow shelves. | Increases storage and display without sacrificing floor area. |
FAQs About DIY Decor for Small Rooms
Q1: What is the best color to paint a small room to make it look bigger?
A1: Light, cool colors like soft blues, greens, grays, and whites are excellent choices. They reflect light and create a sense of spaciousness. Avoid dark, heavy colors that can make a room feel smaller.
Q2: How can I add storage to a small room without making it look cluttered?
A2: Focus on multi-functional furniture, vertical storage solutions like shelves and wall organizers, and hidden storage like under-bed bins. Keep storage items stylish and organized.
Q3: Is it a good idea to use large furniture in a small room?
A3: Generally, no. Opt for furniture that is proportionate to the room’s size. Look for pieces with a smaller footprint, like armless chairs, slim-profile sofas, and multi-functional items (e.g., an ottoman with storage).
Q4: How can I make a small bedroom feel more personal and stylish?
A4: Personalize your space with a DIY gallery wall, unique textiles like custom throw pillows, and decorative accents. Focus on quality over quantity, and choose items that truly reflect your style.
Q5: What is the most important thing to consider when decorating a small room?
A5: The most important thing is to maximize functionality and create a sense of openness. Think about how you use the space and choose decor that enhances both its usability and its visual appeal.
Q6: Can I use bold colors or patterns in a small room?
A6: Yes, but strategically! Use bold colors as accent pieces (like a single throw pillow or a small piece of art) or on a single feature wall. For patterns, consider smaller-scale prints or use them sparingly to avoid overwhelming the space.
Conclusion: Your Small Space Transformed
Decorating a small room is an exciting opportunity to get creative and make a big impact with thoughtful DIY solutions. By focusing on smart storage, visual tricks, and personal touches, you can turn any compact space into a stylish, functional, and incredibly cozy haven.
Remember, the goal isn’t to fight against your room’s size, but to embrace it and work with it. Each DIY project you tackle brings you closer to a home that feels perfectly tailored to you. So, gather your supplies, unleash your creativity, and start transforming your small room into a space you’ll love spending time in. Happy decorating!