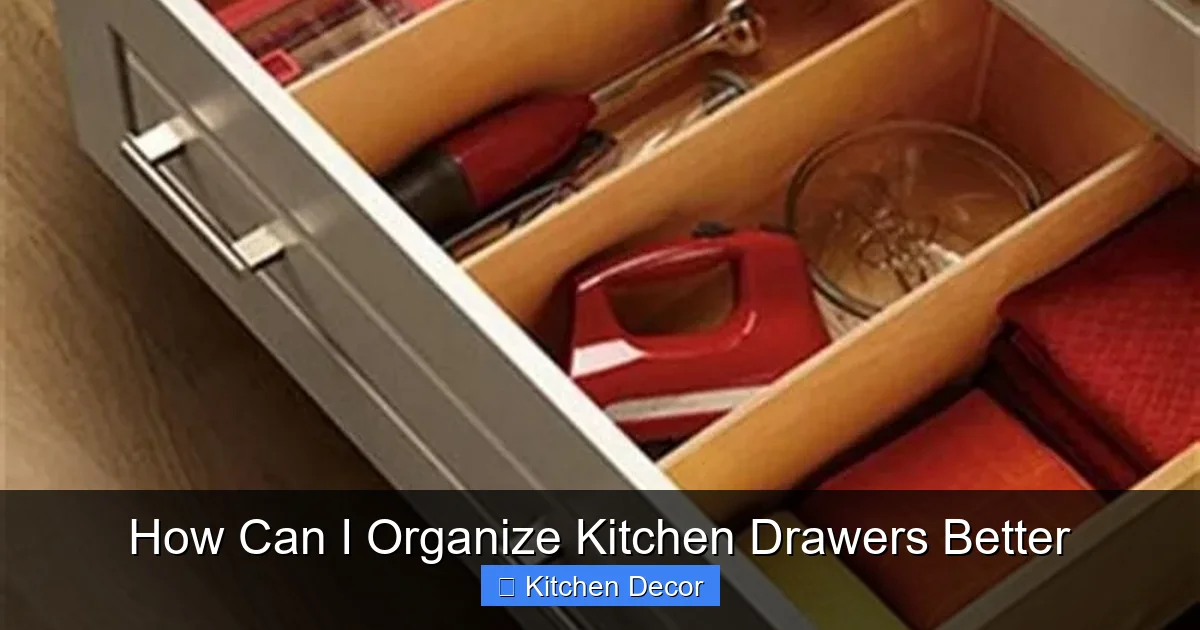
Tired of rummaging through cluttered kitchen drawers? This comprehensive guide will show you exactly how to organize kitchen drawers better, step by step. You’ll learn effective strategies for decluttering, choosing the right drawer organizers, and creating a functional system that stays tidy. Get ready to transform your kitchen into an efficient and joyful space!
How Can I Organize Kitchen Drawers Better
Do you ever find yourself digging through a mountain of mismatched utensils, searching endlessly for that one elusive spatula? Does opening a kitchen drawer feel less like a helpful action and more like a chaotic adventure? If so, you’re not alone! Cluttered kitchen drawers are a common frustration, turning what should be a functional space into a source of stress. But imagine a kitchen where everything has its place, where opening a drawer brings calm efficiency, not clutter. A world where you can find exactly what you need, exactly when you need it.
Good news! Achieving that dream is entirely possible. Organizing your kitchen drawers better isn’t just about making things look neat; it’s about transforming your cooking experience, saving you time, reducing stress, and making your kitchen a more enjoyable place to be. This comprehensive guide will walk you through a simple, step-by-step process to reclaim your drawers, turning them from messy catch-alls into perfectly organized havens. We’ll cover everything from decluttering and deep cleaning to choosing the right organizers and maintaining your new system. Let’s get started on creating the organized kitchen you deserve!
Key Takeaways
- Start with a Complete Emptying and Purge: The most crucial first step is to remove everything from your drawers, clean them thoroughly, and then ruthlessly declutter, getting rid of unused, broken, or duplicate items.
- Categorize and Zone Strategically: Group similar items together and assign dedicated “zones” within your kitchen for specific categories (e.g., baking, cooking utensils, cutlery). Place frequently used items in easily accessible drawers.
- Measure Accurately for Custom Organizers: Before buying any organizers, carefully measure the interior dimensions of your drawers. This ensures a snug fit and maximizes space, preventing items from shifting.
- Invest in the Right Drawer Organizers: Choose a variety of inserts, dividers, and trays that match the items you need to store and the dimensions of your drawers. Adjustable or expandable options offer great flexibility.
- Utilize Vertical Space and Layering Wisely: Don’t just think horizontally. Use stackable trays or tiered organizers where appropriate to make the most of the height within deeper drawers, especially for small items.
- Implement a “One In, One Out” Rule: To maintain your newly organized kitchen drawers, adopt a habit of replacing old items when new ones come in. This prevents clutter from accumulating again over time.
- Conduct Regular Quick Tidy-Ups: Schedule short, frequent check-ins (e.g., weekly or monthly) to put items back in their designated spots and prevent minor disarray from becoming a full-blown mess.
Step 1: Prepare for Success – Gather Your Tools and Mindset
Before you dive headfirst into the drawers, taking a moment to prepare will make the entire process smoother and more efficient. Think of it as setting the stage for your organizing triumph. A little planning goes a long way in ensuring you organize kitchen drawers better.
Get Ready to Declutter
First, clear a large workspace. This could be your kitchen counter, your dining room table, or even a clean spot on the floor. You’ll need somewhere to empty the contents of your drawers and sort them out. Next, grab a few empty boxes, bins, or bags. Label them clearly: “Keep,” “Donate/Sell,” and “Toss.” Having these ready will streamline the decluttering process and help you make quick decisions. Most importantly, adopt an organizational mindset. Be ready to be a little ruthless, to let go of things you don’t use, and to create a system that truly serves your daily needs.
Essential Organizing Tools
You won’t need many fancy tools, but a few basics will be incredibly helpful:
- Measuring Tape: Absolutely crucial for getting accurate dimensions of your drawers before buying organizers.
- Cleaning Supplies: All-purpose cleaner, sponges, or cloths to wipe down drawers once empty.
- Drawer Organizers (various types): While we’ll discuss choosing these later, having a general idea or even some existing ones on hand can be a good starting point. Think about cutlery trays, small bins, adjustable dividers, or expandable inserts.
- Labels (optional but recommended): A label maker or even simple paper and tape can help designate zones.
With your workspace clear, your bins ready, and your mindset focused, you’re perfectly set up to begin the transformation of your kitchen drawers.
Step 2: Empty, Clean, and Assess – The Foundation of Organization
This step might seem obvious, but it’s the absolute bedrock of successful kitchen drawer organization. You cannot truly organize kitchen drawers better until you know exactly what you’re working with and what you’re storing.
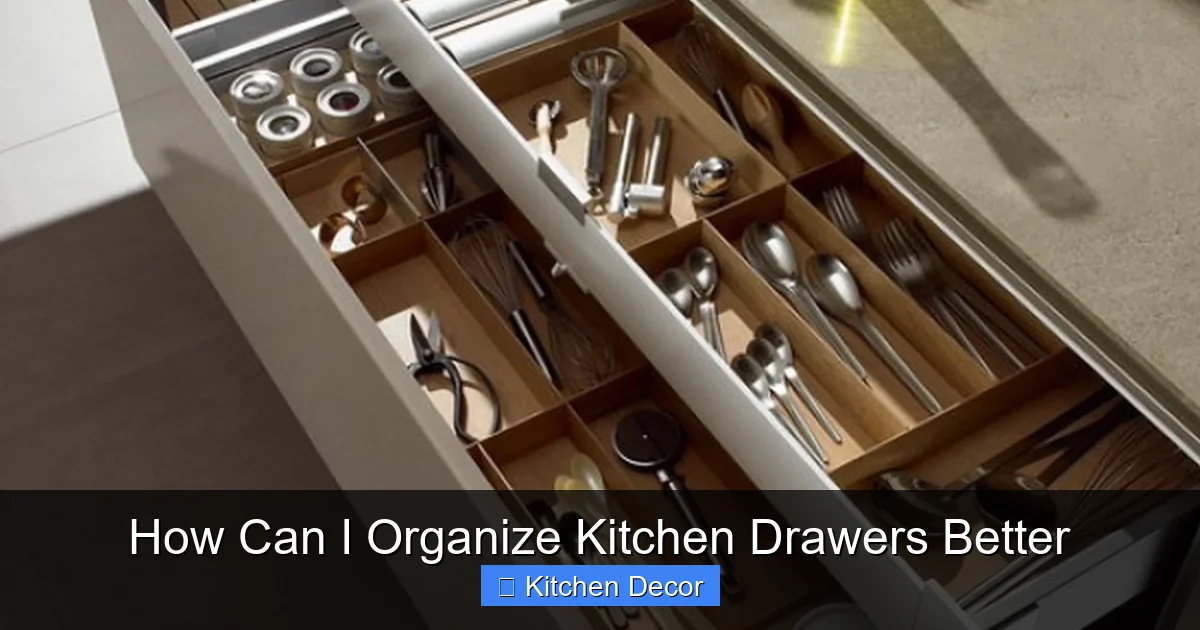
Visual guide about How Can I Organize Kitchen Drawers Better
Image source: pulpdesignstudios.com
Completely Empty Each Drawer
Do not try to organize around items already in the drawer. Pull everything out! Yes, every single item, down to the last crumb and stray rubber band. Place the contents onto your prepared workspace (your counter or table). This might look like a chaotic mess at first, but trust the process. Seeing everything laid out helps you visualize what you own and how much of it there is. Tackle one drawer at a time to avoid feeling overwhelmed.
Deep Clean Your Drawers
Once empty, take the opportunity to give your drawers a thorough cleaning. Use your all-purpose cleaner and a damp cloth or sponge to wipe away crumbs, dust, spills, and any sticky residue. Pay attention to corners and edges. Make sure the drawers are completely dry before putting anything back in them. A clean slate is essential for a fresh start and helps prevent future messes.
Evaluate Drawer Functionality
While the drawer is empty, take a moment to assess its physical condition. Do the drawer slides work smoothly? Are there any splinters or damage? This is the ideal time to make minor repairs or consider if a drawer needs more serious attention. Also, think about the drawer’s location. Is it near the stove? The sink? The pantry? This will be vital information for deciding what items should ultimately live there. For example, a drawer next to the stove is prime real estate for cooking utensils.
Step 3: Declutter and Purge – The Ruthless Edit
This is where the real magic happens. Decluttering is the most impactful step in learning how to organize kitchen drawers better. Be honest, be brave, and be ruthless!
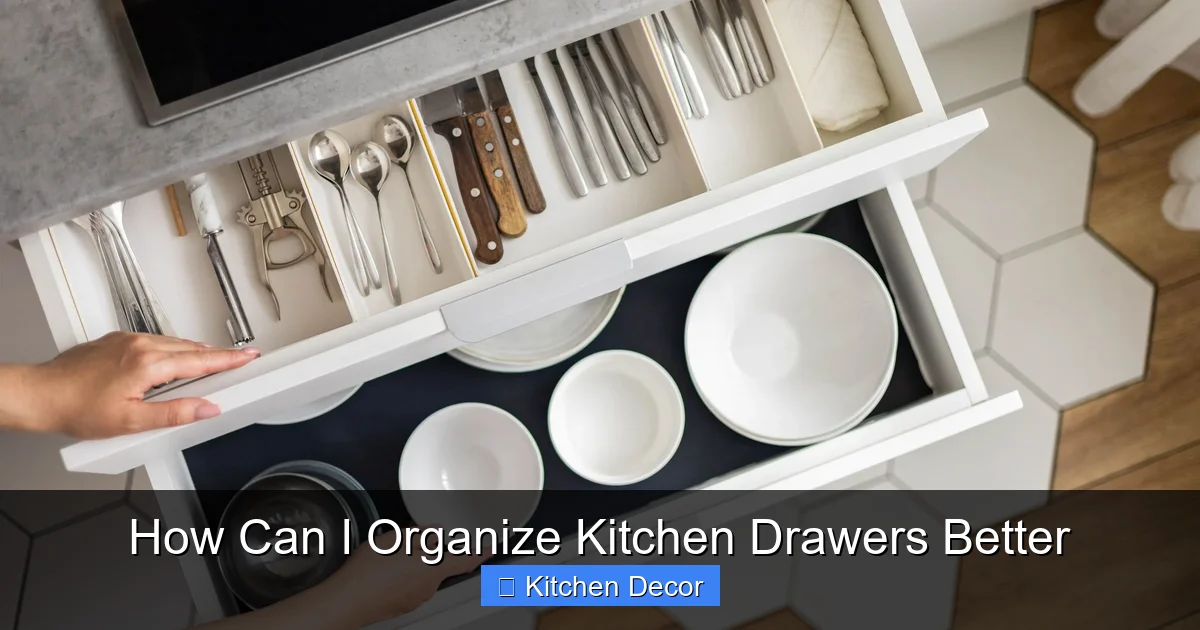
Visual guide about How Can I Organize Kitchen Drawers Better
Image source: storables.com
The “Keep, Donate/Sell, Toss” Method
As you look at each item you pulled from the drawer, make an immediate decision and place it into one of your labeled bins:
- Keep: These are items you use regularly, love, and are in good condition.
- Donate/Sell: Items that are still perfectly functional and in good shape but you no longer need or use. Think duplicate items, gifts you never quite liked, or specialized gadgets you used once. Consider donating to local charities, a friend, or selling them online.
- Toss: Anything broken, chipped, rusted, stained beyond repair, or truly unusable. Be brave and let these items go. They’re just taking up valuable space.
Be Honest About Usage
A good rule of thumb is: “Have I used this in the last year?” If the answer is no, seriously consider letting it go. Be realistic about future use. That specialized avocado slicer seemed like a good idea at the time, but if it’s been gathering dust, it’s probably not essential. Remember, you’re creating space for what you actually use and need, not for what you *might* use someday.
Address Duplicates and Broken Items
It’s amazing how many duplicates we accumulate! How many can openers do you really need? Keep the best one and let the others go. The same goes for broken items. That spatula with the melted handle? Time to toss it. That whisk with half its wires missing? It’s done its duty. Holding onto broken or redundant items only adds to clutter and reduces efficiency when trying to organize kitchen drawers better.
Step 4: Categorize and Zone – Give Everything a Home
Once you’ve decluttered, what’s left are the items you truly want and need. Now, it’s time to group them logically and decide where they should live. This strategic step is crucial to making sure you can organize kitchen drawers better and maintain that organization.
Visual guide about How Can I Organize Kitchen Drawers Better
Image source: practicallyfunctional.com
Group Similar Items
Begin by grouping your “keep” pile into categories. This might include:
- Cooking Utensils: Spatulas, ladles, whisks, tongs.
- Baking Tools: Measuring spoons, measuring cups, small spatulas, cookie cutters.
- Cutlery: Forks, knives, spoons.
- Gadgets: Can openers, bottle openers, peelers, graters.
- Linens: Dish towels, pot holders.
- Small Food Storage: Lids, small containers (consider a separate cabinet for larger ones).
- Odds and Ends: Rubber bands, twist ties, pens, notepads.
The categories will depend on your specific kitchen and cooking habits. The goal is to make intuitive groups.
Assign Zones Based on Function and Proximity
Now, look at your kitchen layout. Where do you typically perform certain tasks? This will help you assign “zones” to your drawers:
- Prep Zone (near cutting board): Peeling tools, chopping knives (if stored in a drawer block), small measuring tools.
- Cooking Zone (near stove/oven): Spatulas, ladles, tongs, whisks, cooking thermometers, pot holders.
- Dishwashing Zone (near sink/dishwasher): Dish towels, sponges (if you keep them in a drawer), small cleaning brushes.
- Baking Zone (if you have a dedicated spot): Measuring cups/spoons, cookie scoops, piping bags.
- Dining Zone (near dining area): Everyday cutlery, serving utensils.
The key here is to store items where they are used most frequently. This minimizes steps and makes your kitchen workflow much smoother. When you organize kitchen drawers better with zones, you create an intuitive system.
Consider “Prime Real Estate”
The drawers closest to your most active workspaces (like near the stove or sink) are “prime real estate.” Reserve these for your most frequently used items. Less frequently used items can go into lower or less accessible drawers. For example, holiday cookie cutters don’t need to be in the top drawer next to the stove.
Step 5: Measure and Select Drawer Organizers – Custom Solutions
This is where your measuring tape becomes your best friend! Don’t skip this step, as ill-fitting organizers can make your drawers messier than they were before.
Measure Inside Your Drawers Accurately
Before you buy anything, get out your measuring tape and carefully measure the interior length, width, and depth of each drawer you plan to organize. Write these dimensions down. Also, consider any obstructions like screws or drawer slides. Knowing these precise measurements will prevent you from buying organizers that are too big or too small, which can lead to wasted space or items shifting around.
Explore Different Types of Organizers
There’s a vast world of drawer organizers out there, designed to help you organize kitchen drawers better. Consider a mix of these to suit your needs:
- Cutlery Trays: Essential for forks, knives, and spoons. Look for expandable or modular options to fit your drawer size perfectly.
- Adjustable Dividers: These are fantastic for creating custom compartments for larger utensils or oddly shaped gadgets. They can be spring-loaded or interlocking.
- Small Bins/Containers: Great for corralling smaller items like bag clips, rubber bands, pens, or small kitchen gadgets. Clear acrylic ones allow you to see contents at a glance.
- Tiered Inserts: For deeper drawers, tiered inserts can help utilize vertical space, perfect for spices or small containers.
- Non-Slip Liners: These aren’t organizers themselves, but they prevent items and organizers from sliding around, keeping your system intact.
Choose Materials Wisely
Organizers come in various materials, each with pros and cons:
- Plastic: Affordable, easy to clean, and often comes in clear options.
- Bamboo/Wood: Aesthetically pleasing, durable, but can be pricier and may require more specific cleaning.
- Mesh/Metal: Good for airflow, durable, but small items might fall through holes.
- Silicone/Rubber: Excellent non-slip properties, flexible, easy to clean.
Consider your budget, aesthetic preferences, and how easy the material is to clean when making your choice. The best organizers are those that fit well and help you organize kitchen drawers better for the long haul.
Step 6: Implement Your Organization System – Putting It All Back
Now that you have your cleaned drawers, decluttered and categorized items, and perfectly sized organizers, it’s time to put your plan into action! This is the satisfying part where your vision comes to life.
Start with Larger Items
When arranging your items within the organizers, begin with the largest or longest items first. For example, if you’re organizing a utensil drawer, place your spatulas, ladles, and tongs into their designated sections first. Then, fit the smaller items around them. This approach ensures that your most substantial tools have adequate space and are easily accessible.
Utilize Vertical Space
Don’t just think horizontally! For deeper drawers, consider using vertical storage solutions. Tiered spice racks that fit inside a drawer, stackable bins for small items, or even small cups or jars within larger compartments can help you maximize the height of the drawer. This is especially useful for items like measuring spoons, tea bags, or small baking extracts. Utilizing vertical space allows you to organize kitchen drawers better and fit more without creating clutter.
Create Visual Separation
Even if you don’t use rigid dividers for every single item, aim for clear visual separation. This means grouping similar items closely and leaving small gaps or using subtle visual cues to define different zones within a drawer. For instance, all your silicone spatulas might be in one section, separated from your metal whisks in the next. This makes it easier for your brain to quickly locate items.
Think About Accessibility
When placing items, always consider how frequently you use them. The most frequently used items should be the easiest to grab. For example, your everyday forks, spoons, and knives should be in the most convenient slots of your cutlery tray. Seldom-used specialty tools can be placed towards the back of a compartment or in a less accessible drawer. The goal is to make your kitchen workflow as smooth as possible.
Step 7: Label and Document – The Finishing Touches
While not strictly necessary for every drawer, labeling can add an extra layer of organization and help maintain your system, especially if you share your kitchen with others.
Why Labeling Matters
Labeling clearly communicates where items belong. This is particularly helpful in a shared household, ensuring everyone knows where to put things back. It also serves as a gentle reminder for yourself, reinforcing your new system. For drawers with specific categories (like “Baking Tools” or “Snack Wraps”), a label on the outside of the drawer or a small label within the drawer organizer itself can be incredibly useful. It eliminates guesswork and keeps your organized kitchen drawers tidy.
Simple Labeling Techniques
- Label Maker: Provides a professional and consistent look. You can label the outside of the drawer or the individual bins inside.
- Handwritten Labels: Simple paper and tape or sticky notes work just as well. They are easy to change if you adjust your system.
- Chalkboard Labels: A charming and changeable option for drawer fronts.
- Visual Cues: Sometimes, the item itself serves as the best label. For example, a cutlery tray doesn’t need a “cutlery” label.
Choose a method that suits your style and practicality. The most important thing is that the labels are clear and helpful.
Step 8: Maintain Your Organized Drawers – Long-Term Success
Congratulations! You’ve successfully organized your kitchen drawers. But the work isn’t over yet. The real challenge is keeping them that way. Maintenance is key to enjoying your beautifully organized kitchen for years to come.
The “One In, One Out” Rule
To prevent new clutter from accumulating, adopt the “one in, one out” rule. If you buy a new kitchen gadget or utensil, consider whether you have an old, similar item that can be donated or tossed. This ensures that your drawer capacity doesn’t get overwhelmed and helps you continuously curate your kitchen items to only what you truly need and use. This simple habit is incredibly powerful for long-term organization.
Regular Quick Tidy-Ups
Don’t wait for your drawers to become a complete mess again. Schedule quick, regular tidy-ups. This could be once a week, once a month, or whenever you notice a few items have strayed from their homes. A 5-minute “reset” can prevent minor disarray from escalating into a full-blown reorganization project. Simply open each drawer, quickly put misplaced items back in their designated spots, and wipe away any new crumbs. This proactive approach helps you organize kitchen drawers better permanently.
Periodic Deep Reassessment
About once or twice a year, consider doing a mini-version of Steps 2 and 3. Empty the drawers again, clean them, and quickly re-evaluate if the current system is still working for you. Our needs and habits change, so what worked perfectly six months ago might need slight adjustments. Are you using all the items? Do you need a different type of organizer for a new item? This periodic reassessment ensures your kitchen drawer organization remains perfectly tailored to your evolving lifestyle.
Troubleshooting Common Kitchen Drawer Organization Challenges
Even with the best intentions, you might encounter a few hurdles. Here are solutions to common problems:
What if I don’t have enough drawer space?
If you genuinely have more items than drawer space, it’s time for another round of ruthless decluttering. Seriously consider if you need every item. If you still have too much, think about vertical storage solutions in cabinets (like tiered risers for spices) or on your countertop (knife blocks, utensil crocks). Wall-mounted magnetic strips for knives or hooks for utensils can also free up valuable drawer space. Sometimes, the solution isn’t more drawers, but fewer items.
My drawers are unusually shaped or sized.
Oddly shaped drawers can be tricky, but not impossible. Look for modular drawer organizers that can be arranged in various configurations to fit unique spaces. Adjustable or expandable dividers are also excellent for custom sizing. If standard organizers don’t fit, consider DIY solutions: cut pieces of sturdy cardboard, foam core, or even thin plywood to create custom dividers. Line them with non-slip material to keep them in place. The goal is to organize kitchen drawers better, no matter their shape.
How do I get my family to keep it organized?
This is a common challenge! The best strategies are:
- Involve Them: If possible, involve family members in the initial organizing process. When they help create the system, they’re more likely to respect it.
- Clear Labeling: As discussed in Step 7, clear labels eliminate guesswork.
- Lead by Example: Consistently put things back where they belong.
- Gentle Reminders: Offer polite reminders when things are out of place, explaining that it helps everyone find what they need faster.
- Make it Easy: Ensure the system is logical and easy to use. If it’s too complicated, people won’t follow it.
Conclusion
You’ve done it! By following these steps, you’ve learned how to organize kitchen drawers better, transforming them from chaotic catch-alls into zones of efficiency and calm. Imagine the joy of opening a drawer and instantly finding what you need, every single time. No more rummaging, no more frustration – just smooth, effortless cooking and baking.
Remember, an organized kitchen is a more functional, enjoyable, and less stressful kitchen. This process might seem daunting at first, but taking it one drawer at a time, being intentional with your choices, and committing to regular maintenance will yield lasting results. Embrace the peace of mind that comes with knowing everything has its place. Your kitchen drawers are now a testament to thoughtful organization, ready to support all your culinary adventures. Happy cooking!