To create a custom drawer divider, measure your drawer carefully, cut your materials to size, and assemble the pieces using glue and screws for a sturdy fit. You can personalize the design to suit your storage needs, making organization effortless and stylish. Whether you’re adding dividers for utensils, jewelry, or tools, building your own allows you to tailor it precisely to your space and preferences.
Building a custom drawer divider is a simple project that can significantly improve your organization. First, assess the space inside your drawer and decide how many sections you need. Measure each division carefully, then cut your wood or acrylic to match. Assemble the pieces with glue and screws, ensuring they fit snugly and securely. Finish with paint or stain if desired, and slide your new dividers into place for a neat, customized storage solution. This DIY approach saves money and gives you the freedom to design dividers that perfectly match your needs.

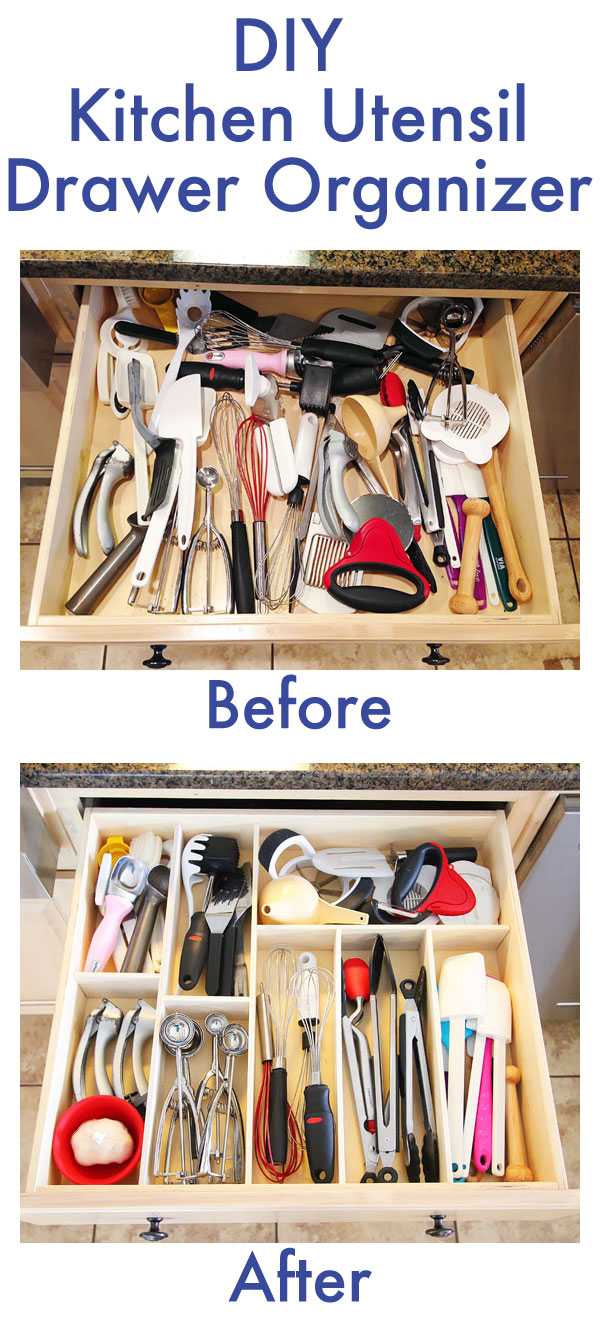
How to build a custom drawer divider
Creating a custom drawer divider can help organize your belongings and make your drawers easier to use. By building your own divider, you can customize the size and shape to fit your specific needs. This guide will walk you through each step, making the process simple and accessible.
Understanding the benefits of a custom drawer divider
A well-made drawer divider keeps items neat and prevents clutter. It allows you to separate small items like utensils, jewelry, or tools effectively. Moreover, building your own divider saves money compared to buying pre-made organizers.
Materials and tools you’ll need
Before starting, gather all necessary supplies. This ensures a smooth process without interruptions. Here is a list of common materials and tools:
- Plywood or MDF board: Choose a smooth, durable wood for the divider.
- Measuring tape: For accurate measurements.
- Pencil: To mark cutting lines.
- Saw: A handsaw or power saw depending on your preference.
- Drill and screws: For assembling the parts securely.
- Sandpaper: To smooth edges and surfaces.
- Paint or stain (optional): To finish the divider for a polished look.
- Clamps: To hold pieces while assembling.
Measuring and planning your divider layout
Proper planning ensures the divider fits perfectly in your drawer. Start by measuring your drawer’s interior dimensions: length, width, and depth. Decide how many compartments you want and their sizes based on your storage needs.
Sketch a simple diagram showing your planned divider layout. Mark the measurements carefully, including the thickness of the material you will use. Planning helps visualize the final product and simplifies cutting.
Cutting the materials accurately
Transfer your measurements onto the wood using a pencil and ruler. Use a saw to cut the pieces following your plan. Always cut slowly and steadily to ensure straight, clean edges.
Cut the main horizontal pieces first—these form the top and bottom of your compartments. Then, cut the vertical dividers according to the heights needed for each section. Keep safety in mind and wear protective gear if necessary.
Assembling the divider pieces
Arrange the cut pieces on a flat surface to verify fit before assembly. Use clamps to hold pieces in place temporarily. Drill small pilot holes to prevent the wood from splitting when inserting screws.
Secure the vertical dividers to the horizontal pieces using screws. Pre-drill holes where necessary, then tighten screws with the drill. Assemble one section at a time for better control and accuracy.
Sanding and finishing touches
Sand all surfaces and edges to remove splinters and rough spots. Start with medium-grit sandpaper, then move to fine-grit for a smooth finish. Wipe off dust with a damp cloth.
If desired, paint or stain your divider to match your decor or protect the wood. Apply a thin, even coat, and let it dry fully before placing the divider in your drawer. Additional coats may improve durability and appearance.
Installing your custom drawer divider
Place the finished divider into your drawer, making sure it fits snugly. If you want extra stability, you can glue the bottom edges to the drawer base or attach small brackets. Be cautious to leave space for smooth drawer operation.
Adjust the divider as needed, and add inserts or small containers within compartments for extra organization. Your customized divider is now ready to keep your items tidy and accessible.
Additional tips for a successful project
Always double-check measurements before cutting to avoid mistakes. Use quality tools for cleaner cuts and better results.
Consider modular designs that can be reconfigured as your storage needs change. Using lightweight materials like MDF keeps the divider easy to handle and install.
Label compartments if you store different categories of items for even better organization. Regularly inspect and adjust your divider to maintain its effectiveness over time.
Related topics to enhance your drawer organization
Besides building dividers, explore other ways to maximize drawer space:
- Using drawer inserts: pre-made or DIY options for specific items.
- Customizing storage boxes: to compartmentalize larger or oddly shaped items.
- Implementing pull-out trays or shelves: for easier access to deep drawers.
These additional ideas complement your DIY divider and contribute to a highly organized drawer system. Combining various solutions can make everyday tasks more manageable and pleasant.
Maintaining and adjusting your DIY divider
Check your divider periodically for stability and wear. Tighten screws if they loosen over time. Sand and refinish surfaces if they become scratched or stained.
Adjust your layout as your collection of items grows or changes. Flexibility in design allows your organization system to adapt to your lifestyle with ease.
With patience and attention to detail, building a custom drawer divider is an achievable project that results in a neat, organized space. It offers tailored solutions that fit your belongings perfectly and keeps clutter at bay. Enjoy customizing your storage area and making your everyday routines smoother!
Organize your drawers with dividers #shorts
Frequently Asked Questions
What materials are best suited for creating a custom drawer divider?
Select durable and easy-to-cut materials like hardwood, plywood, or MDF to ensure that your divider maintains its shape over time. Hardwood offers strength and a refined appearance, while plywood and MDF provide a more budget-friendly option with good stability. Consider using materials that match your drawer interior for a seamless look and ensure they are free from splinters and defects for safe handling and long-lasting results.
How can I measure my drawer accurately before building a divider?
Remove the drawer from its cabinet to get precise measurements. Use a tape measure or a ruler to determine the interior width, depth, and height of the drawer. Record these dimensions carefully, allowing some extra space for easy insertion and removal of the divider. It’s helpful to measure at multiple points in case your drawer has slight variations, ensuring the divider fits snugly and functions properly.
What steps should I follow to assemble the pieces of my custom drawer divider?
Start by cutting your chosen material into the desired sections according to your measurements. Sand the edges to eliminate splinters. Use wood glue and clamps to join the pieces securely, ensuring the connections are square. For added strength, drill pilot holes and drive in screws or nails at junctions. Allow the glue to dry fully before placing the divider into the drawer for a secure fit.
How do I ensure my custom divider stays in place within the drawer?
Design the divider with snug-fitting dimensions that match the interior of the drawer. Consider adding small rubber pads or non-slip strips on the bottom edges to prevent movement. Alternatively, you can create a slight lip or flange that rests on the interior edges of the drawer, providing stability. Regularly check and adjust the divider if you notice it shifting to maintain organization.
Can I customize the divider for different types of items in my drawer?
Yes, tailor your divider sections based on what you plan to store. Use adjustable or removable partitions for versatile organization, or create specific compartments for items like utensils, tools, or office supplies. Incorporate different heights, widths, or even curved cutouts to accommodate varied objects, making your drawer more functional and easier to access every item.
Final Thoughts
Pour construire un diviseur de tiroir personnalisé, commencez par mesurer l’intérieur du tiroir pour déterminer la taille nécessaire. Choisissez un matériau adapté, comme du bois ou du plastique, pour assurer durabilité et facilité de manipulation. Coupez le matériau aux dimensions appropriées, puis assemblez-le en utilisant de la colle ou des vis pour plus de stabilité.
En suivant ces étapes, vous pouvez facilement créer un diviseur de tiroir qui optimise votre espace de rangement. La clé réside dans la précision des mesures et la sélection des matériaux appropriés. Conclure en disant que la meilleure façon de construire un diviseur de tiroir personnalisé consiste à suivre ces conseils simples pour un résultat parfait.