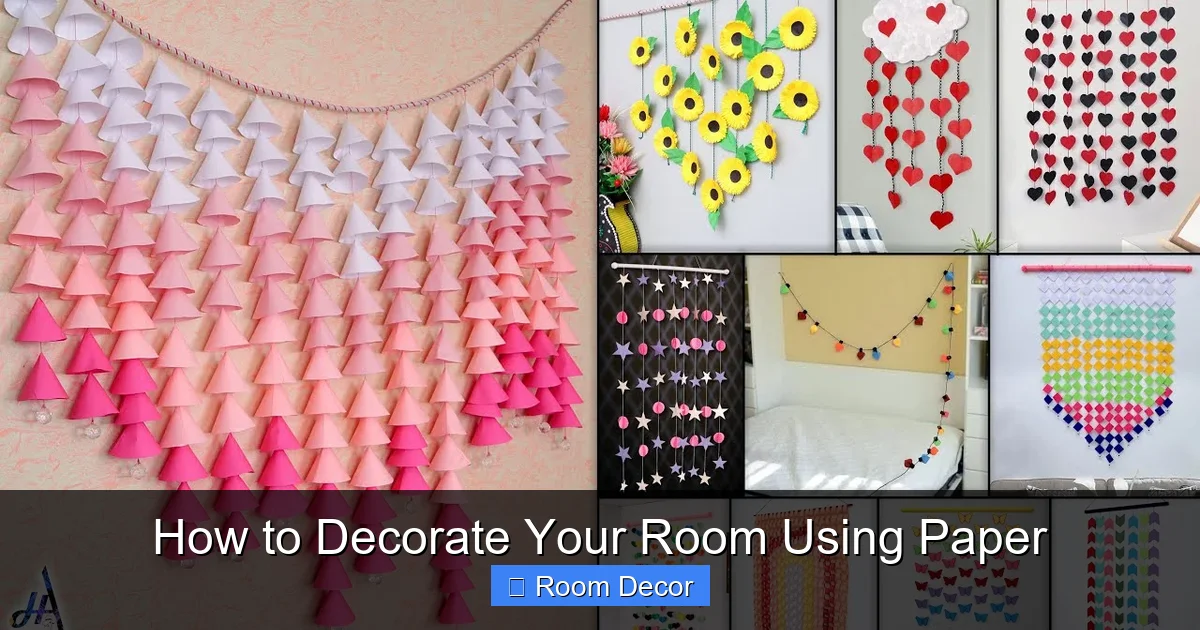
Discover the magic of paper crafts for room decoration! This guide offers a comprehensive approach to transforming your living space using readily available paper materials. From creating stunning wall art and unique lighting fixtures to adding charming accents, you’ll learn a variety of easy and budget-friendly DIY projects. Unleash your creativity and make your room a personalized sanctuary with these simple yet impactful paper decorating techniques.
How to Decorate Your Room Using Paper
Are you looking for a way to inject personality and style into your room without breaking the bank? Do you love the idea of crafting unique, eye-catching decor that reflects your individual taste? If so, get ready to be inspired! Decorating with paper is an art form that’s both accessible and incredibly rewarding. This comprehensive guide will walk you through everything you need to know to transform your living space using this versatile and budget-friendly material.
From delicate origami creations to bold statement pieces, paper offers endless possibilities for room decoration. We’ll explore a variety of techniques, from simple wall art to charming lighting solutions and accent pieces that will add a touch of magic to your sanctuary. You’ll learn how to choose the right types of paper, gather essential tools, and execute projects that are both beautiful and achievable. So, gather your supplies and let’s dive into the wonderful world of paper decorating!
Key Takeaways
- Affordable Transformation: Paper offers an incredibly budget-friendly way to completely refresh your room’s look and feel without a significant investment.
- Endless Creative Possibilities: From intricate origami to bold paper sculptures and simple cutouts, paper can be manipulated into countless decorative forms.
- Personalized Style: DIY paper decorations allow for complete customization, enabling you to match your room’s aesthetic perfectly, whether it’s minimalist, bohemian, or vibrant.
- Eco-Friendly Decor: Utilizing recycled paper or sustainably sourced paper options makes this a more environmentally conscious decorating choice.
- Variety of Techniques: This guide covers a range of paper decorating methods, including folding, cutting, layering, and even incorporating lighting to enhance the visual impact.
- Easy to Implement: The projects are designed to be accessible for all skill levels, requiring minimal tools and materials, making it easy for anyone to get started.
Understanding the Magic of Paper Decor
Why paper, you ask? The answer is simple: its versatility, affordability, and inherent charm. Paper is a material that’s readily available in an astonishing array of colors, textures, and weights. This means you can tailor your decorations to perfectly match your existing room scheme or create a completely new, vibrant atmosphere. Furthermore, paper crafting is a fantastic way to express your creativity and produce truly unique pieces that no one else will have. It’s also an incredibly eco-friendly option, especially if you opt for recycled or repurposed paper.
Gathering Your Paper Decorating Arsenal
Before you begin your decorating journey, it’s essential to have the right tools and materials on hand. Don’t worry; paper decorating doesn’t require a vast or expensive collection of supplies.
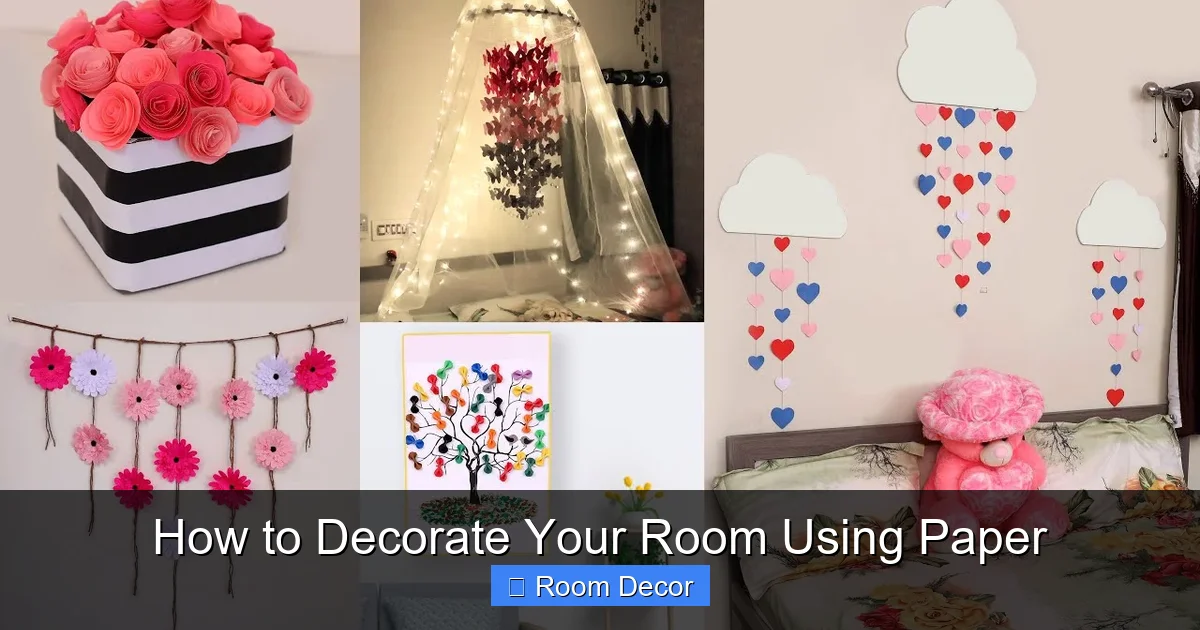
Visual guide about How to Decorate Your Room Using Paper
Image source: i.ytimg.com
Essential Paper Types
- Cardstock: Thicker and more durable than regular paper, cardstock is excellent for structural elements, layered art, and anything that needs to hold its shape.
- Construction Paper: Available in a rainbow of colors, construction paper is great for larger projects, cutting, and layering.
- Scrapbooking Paper: This often features beautiful patterns and textures, adding a sophisticated touch to your creations.
- Newspaper and Magazine Pages: For an upcycled and bohemian look, old newspapers and magazines can be transformed into unique art.
- Tissue Paper: Delicate and translucent, tissue paper is perfect for creating ethereal flowers, lanterns, and decorative fringes.
- Crepe Paper: Its textured surface and stretchability make crepe paper ideal for creating realistic-looking flowers and detailed embellishments.
- Origami Paper: Specifically designed for folding, this paper comes in various sizes and beautiful patterns.
Key Tools and Adhesives
- Scissors: Sharp scissors are a must for clean cuts. Consider having a variety of sizes, including small detail scissors.
- Craft Knife and Cutting Mat: For intricate designs and precise cutting, a craft knife is invaluable.
- Ruler and Pencil: For measuring and marking lines.
- Glue Stick: Great for general paper-to-paper adhesion, especially for layering.
- White Craft Glue (PVA Glue): Provides a stronger bond for more robust projects.
- Hot Glue Gun: Excellent for quick, strong adhesion for more dimensional projects. Use with caution.
- Hole Punch: For creating hanging points or decorative patterns.
- String, Twine, or Fishing Line: For hanging your paper creations.
- Pushpins or Command Strips: For attaching paper art to your walls.
Step-by-Step Paper Decorating Projects
Now for the fun part! Let’s explore some exciting DIY projects you can undertake to liven up your room.
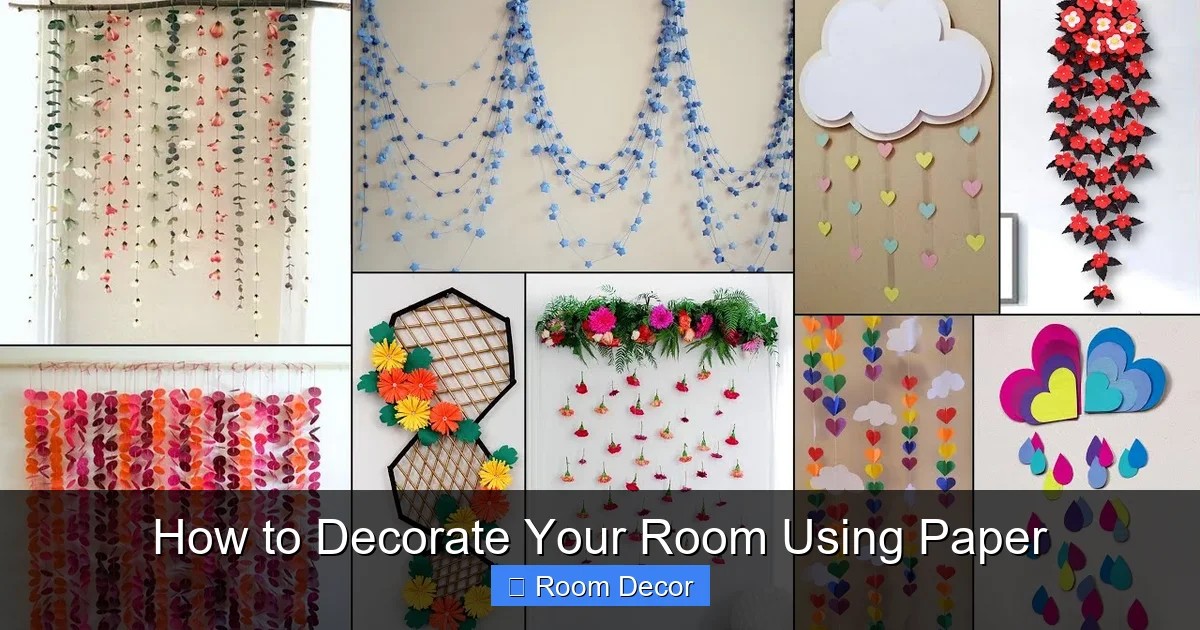
Visual guide about How to Decorate Your Room Using Paper
Image source: i.ytimg.com
1. Stunning Paper Wall Art
Walls are often the largest canvas in a room, making them the perfect place to showcase your paper decorating skills. Wall art can range from simple geometric patterns to intricate3D designs.
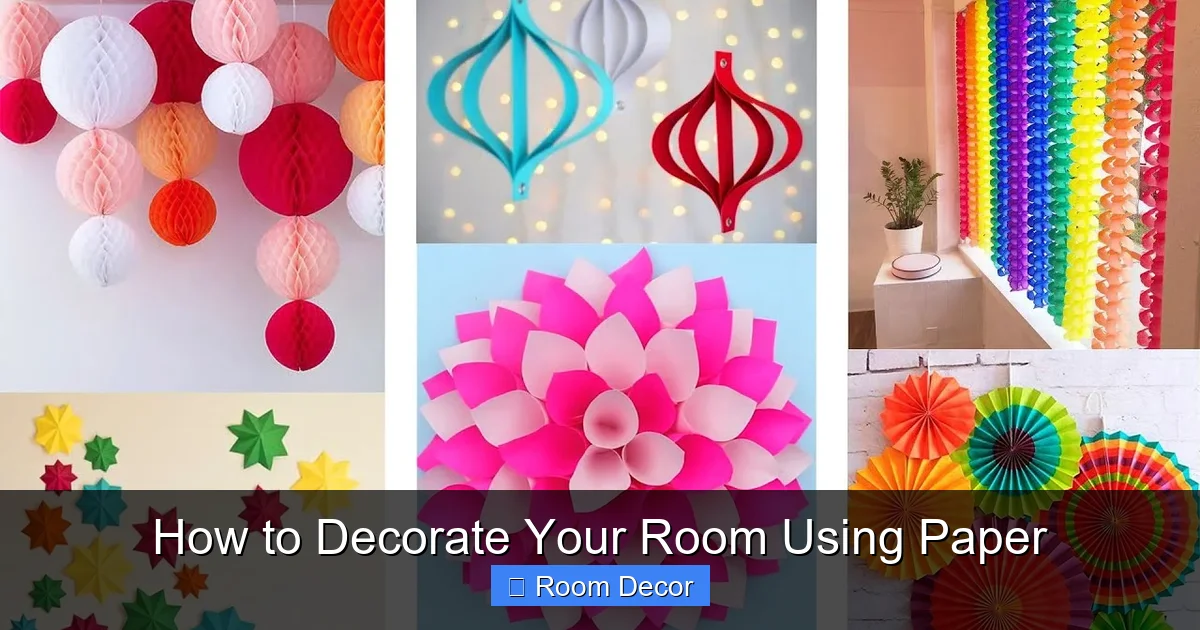
Visual guide about How to Decorate Your Room Using Paper
Image source: i.ytimg.com
A. Geometric Paper Wall Garland
This project is fantastic for adding a pop of color and modern flair to any wall.
- Choose your paper: Select a few complementary colors of cardstock or patterned scrapbooking paper.
- Cut shapes: Using a ruler and pencil, draw and cut out geometric shapes like triangles, squares, or diamonds. Aim for consistent sizes for a cohesive look.
- Assemble the garland: Punch a small hole at the top of each shape. Thread string or twine through the holes, leaving a few inches between each shape. You can secure the shapes in place with a dab of glue or by tying knots in the string.
- Hang your garland: Use pushpins or Command strips to hang your beautiful new wall art.
B. 3D Paper Flower Wall
Create a breathtaking floral display that will be a true statement piece.
- Select paper: Use cardstock or construction paper in various shades of your chosen flower colors.
- Cut petals: Cut out multiple petal shapes. You can find templates online or design your own. For 3D flowers, cut multiple layers of petals.
- Shape petals: Gently curl the edges of the petals with a pencil or your finger to give them a more natural, three-dimensional look.
- Assemble flowers: Layer the petals, starting from the outside and working your way in. Glue them together at the base. You can add a small circle of a contrasting color for the center.
- Attach to wall: Once your flowers are dry, arrange them on your wall and attach them using strong double-sided tape or Command strips. For a more organic look, vary the sizes and colors of your flowers.
C. Paper Quilling Art
Quilling, or paper filigree, involves rolling, shaping, and gluing strips of paper to create decorative designs. It’s a delicate and elegant art form.
- Gather supplies: You’ll need quilling paper strips (or cut your own from colored paper), a quilling tool (or a toothpick/needle), glue, and a backing surface (cardstock or canvas).
- Create basic shapes: Roll a strip of paper around the quilling tool to create a tight coil. Then, release the coil slightly to form a loose coil. You can pinch and shape these coils into teardrops, leaves, and other forms.
- Arrange and glue: Arrange your rolled shapes on your backing surface to form a picture or pattern. Glue the shapes together and then glue them to the backing.
- Frame your art: Once dry, you can frame your quilled masterpiece for an extra touch of polish.
2. Enchanting Paper Lighting
Paper can be used to create soft, diffused lighting that adds a warm and inviting ambiance to your room.
A. DIY Paper Lanterns
Classic and charming, paper lanterns are a fantastic way to add mood lighting.
- Choose your paper: Thin paper like tissue paper, vellum, or even thin cardstock works well.
- Prepare the paper: For a simple lantern, cut a rectangle of paper. For a more decorative effect, you can cut slits from the bottom edge up towards the top, leaving a border at the top.
- Form the cylinder: Overlap the edges of your paper rectangle and glue or tape them together to form a cylinder.
- Add a base and top (optional): Cut out two circles slightly larger than the diameter of your cylinder. Glue one to the bottom for stability and the other to the top.
- Add a handle: Punch holes on opposite sides of the top rim and attach a paper strip or string as a handle.
- Insert light source: For safety, use only battery-operated LED lights or fairy lights inside your paper lanterns. Never use real candles.
B. Paper String Lights Embellishment
Transform ordinary fairy lights into something magical.
- Cut paper shapes: Cut out small shapes like stars, hearts, or simple circles from cardstock or patterned paper.
- Make a slit: Cut a small slit into each paper shape, just large enough to slide over the bulb of your fairy lights.
- Attach to lights: Carefully slide each paper embellishment onto a bulb of your fairy lights. Arrange them along the string for a beautiful, twinkling effect.
3. Charming Paper Accents and Details
Beyond wall art and lighting, paper can be used to create smaller decorative touches that complete your room’s look.
A. Paper Tassels for Garlands or Mobiles
Add a playful and bohemian touch with these easy-to-make tassels.
- Prepare paper strips: Cut strips of tissue paper or thin craft paper about 6-8 inches long.
- Fold and cut: Fold the strip in half lengthwise. Cut fringe from the folded edge up towards the open edge, stopping about an inch from the fold.
- Roll and secure: Apply glue along the unfolded edge and tightly roll the fringed strip. This will create a tassel.
- Attach to string: You can tie a knot at the top to secure the tassel and then attach it to a string for a garland or mobile.
B. Folded Paper Bookmarks or Tabletop Decor
Even small paper creations can add a personal touch.
- Origami: Explore simple origami folds for animals, flowers, or geometric shapes. These can be placed on shelves or used as decorative accents.
- Paper cutouts: Create intricate silhouettes or simple shapes from colored paper. You can then glue these onto cardstock to create small framed art pieces or use them as decorative elements on gift boxes or other surfaces.
Tips for Success in Paper Decorating
To ensure your paper decorating projects are a success, keep these tips in mind:
- Work on a clean surface: This prevents dust and debris from getting into your glue or on your paper.
- Measure twice, cut once: Accuracy in your measurements will lead to more professional-looking results.
- Experiment with layering: Different colors and textures of paper layered together can create beautiful depth and visual interest.
- Don’t be afraid to mix materials: Paper can be combined with fabric, beads, or even small natural elements for unique effects.
- Consider the lighting: How will the light in your room interact with your paper decorations? Some papers can be translucent, while others are opaque.
- Patience is key: Especially for intricate projects, take your time and enjoy the process.
Troubleshooting Common Paper Decorating Issues
Even with the best intentions, you might encounter a few snags. Here’s how to deal with them:
Issue: Paper Curling or Warping
Solution: This often happens with thinner papers due to moisture in the glue or humidity. Ensure you’re using the right amount of glue and allow pieces to dry flat under a heavy book. For very humid environments, consider using a sealant spray on your finished pieces.
Issue: Glue Showing Through
Solution: Use glue sparingly, especially on thinner papers. A glue stick is often best for flat layering. If using liquid glue, apply it thinly and evenly. For tricky spots, a fine-tip applicator can be helpful.
Issue: Uneven Cuts
Solution: Ensure your scissors or craft knife are sharp. Practice making smooth, consistent cuts. For straight lines, use a ruler as a guide.
Issue: Decorations Falling Down
Solution: Use appropriate adhesive for the weight of your decoration and the surface you’re attaching it to. For heavier items or delicate walls, Command strips are a good option. Ensure surfaces are clean and dry before applying any adhesive.
Conclusion
Decorating your room with paper is an accessible, affordable, and incredibly creative way to express yourself and transform your personal space. From the simple elegance of a paper garland to the dramatic impact of a 3D flower wall or the cozy glow of paper lanterns, the possibilities are truly endless. By following the steps and tips outlined in this guide, you can easily craft beautiful, unique decorations that will make your room feel truly special. So, embrace the versatility of paper, unleash your inner artist, and get ready to create a room that is a reflection of you!