
Transform your kitchen with a rewarding DIY project! Our comprehensive guide teaches you how to make a simple kitchen cabinet from scratch, empowering you to create custom storage that perfectly fits your space and style. You’ll learn essential woodworking techniques, from accurate panel cutting and sturdy assembly to applying a flawless finish, all while enjoying the satisfaction of building a practical and beautiful addition to your home.
How to Make a Simple Kitchen Cabinet?
Building your own kitchen cabinets might sound like a daunting task, but with the right guidance, it’s a surprisingly achievable and incredibly rewarding DIY project. Imagine having custom storage that perfectly fits your space, designed exactly how you want it, and all built with your own two hands! This comprehensive guide will walk you through every step of learning how to make a simple kitchen cabinet, transforming raw materials into a functional and beautiful addition to your home.
Whether you need a base cabinet for new countertop space, an upper cabinet for extra pantry storage, or a small custom unit for a tricky corner, this tutorial focuses on fundamental techniques that you can adapt to various designs. We’ll cover everything from planning and cutting to assembly, finishing, and installing. By the end, you’ll not only have a fantastic new simple kitchen cabinet but also a newfound confidence in your woodworking skills. Let’s grab our tools and get started on building your very own simple kitchen cabinet!
Key Takeaways
- Start with a Plan: Before cutting, thoroughly design your simple kitchen cabinet, determine its dimensions, and create a detailed cut list. This minimizes errors and ensures your cabinet fits perfectly.
- Gather the Right Tools and Materials: Having the correct plywood, wood glue, screws, and essential tools like a saw, drill, and measuring tape will make the building process smoother and more efficient.
- Prioritize Squareness and Accuracy: Throughout the assembly of your simple kitchen cabinet, constantly check for square corners and precise measurements. This is crucial for a stable, functional, and professional-looking finished product.
- Invest Time in Sanding and Finishing: The preparation before painting or staining, especially thorough sanding, dictates the final appearance. Don’t rush this stage; a smooth finish elevates the entire simple kitchen cabinet.
- Master Joinery Techniques: Whether using pocket holes, butt joints with screws, or dados, understanding how to create strong and stable connections between your plywood panels is fundamental for a durable cabinet.
- Personalize with Hardware and Finish: The choice of paint, stain, handles, and hinges allows you to truly customize your simple kitchen cabinet to match your existing decor, making it uniquely yours.
What You’ll Need: Tools & Materials
Before we dive into the exciting part of cutting and assembling, let’s ensure you have everything required. Having the right tools and materials for your simple kitchen cabinet project will make the process much smoother and more enjoyable.
Essential Tools:
- Measuring Tape & Pencil: For precise marking and measuring.
- Circular Saw or Table Saw: For cutting plywood accurately. A straight edge guide is highly recommended for circular saws.
- Drill/Driver: For pre-drilling holes and driving screws.
- Kreg Jig (Pocket Hole Jig): Highly recommended for strong, concealed joints, especially when building a simple kitchen cabinet.
- Wood Clamps: Essential for holding pieces together during assembly and while glue dries.
- Safety Glasses & Hearing Protection: Always prioritize safety!
- Sander (Orbital Sander Recommended): For smoothing surfaces and preparing for finishing.
- Block Plane or Chisel: For minor adjustments (optional).
- Level & Speed Square: To ensure everything is plumb, level, and square.
Materials List:
- Plywood (3/4″ thick): This will be the main material for the cabinet box (sides, top, bottom, shelves, face frame). High-grade cabinet-grade plywood like birch or maple is ideal for its smooth finish.
- Plywood (1/4″ thick): For the cabinet back panel.
- Wood Screws: Various sizes, suitable for plywood (e.g., 1-1/4″ pocket hole screws, 1″ flat-head screws).
- Wood Glue: For strong, lasting joints.
- Shelf Pins: If you plan to have adjustable shelves.
- Sandpaper: Various grits (80, 120, 180, 220) for sanding.
- Paint, Stain, or Clear Coat: Your chosen finish.
- Primer: If you plan to paint.
- Hinges: For cabinet doors (concealed Euro-style hinges are popular and adjustable).
- Handles/Knobs: For doors and drawers.
- Optional: Drawer Slides: If adding a drawer to your simple kitchen cabinet.
- Optional: Leveling Feet: For base cabinets to ensure stability on uneven floors.
Planning Your Simple Kitchen Cabinet
Proper planning is the cornerstone of any successful woodworking project, especially when you’re learning how to make a simple kitchen cabinet. Taking the time to plan will save you headaches and wasted materials later on.
Design Considerations:
Think about the purpose and placement of your simple kitchen cabinet.
- Base Cabinet vs. Wall Cabinet: Base cabinets support countertops and typically sit on the floor, while wall cabinets are mounted above them.
- Dimensions: Standard kitchen cabinet depths are 24″ for base and 12-13″ for wall. Widths and heights vary based on your specific needs.
- Door Configuration: Single door, double door, or open shelving?
- Shelves: Fixed or adjustable? How many?
- Drawers: Will you incorporate drawers? This adds complexity but offers great storage.
Measuring and Drawing Plans:
Measure the space where your simple kitchen cabinet will go meticulously. Consider any existing appliances, windows, or other structures. Then, create a detailed drawing of your cabinet. This doesn’t need to be professional-grade, but it should include all dimensions (height, width, depth) and clearly show the placement of shelves, doors, and any other features.
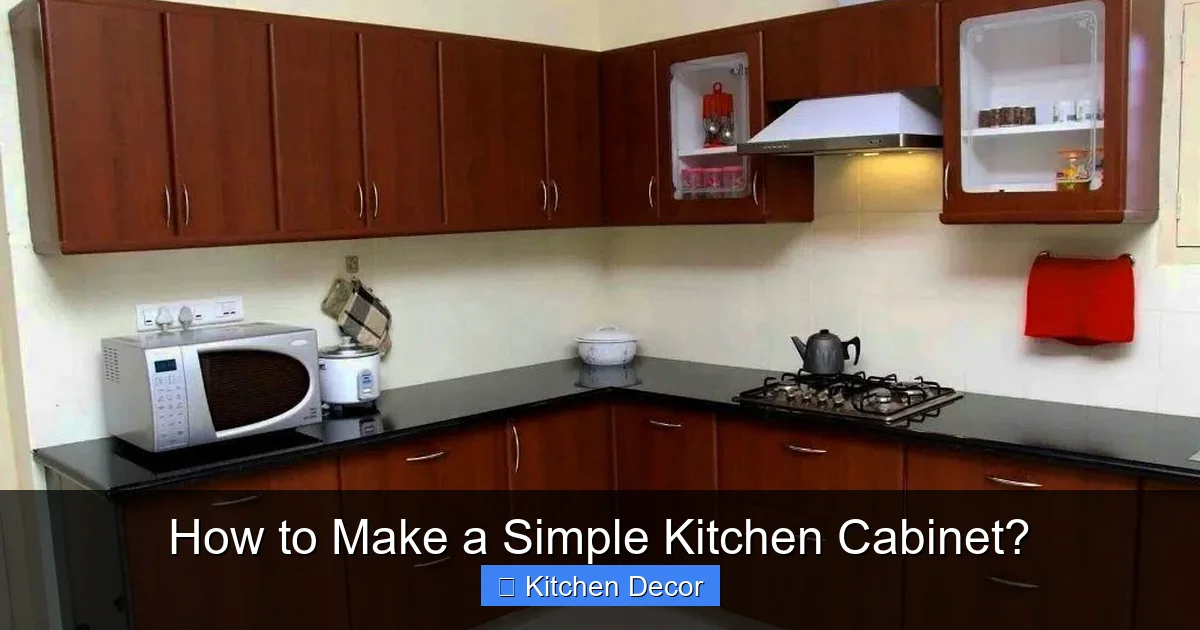
Visual guide about How to Make a Simple Kitchen Cabinet?
Image source: i.pinimg.com
From your drawing, create a cut list. This is a list of every single piece of plywood you’ll need, along with its exact dimensions. For example:
- 2x Side Panels (3/4″ plywood): 30″ H x 22.5″ D
- 1x Bottom Panel (3/4″ plywood): 15″ W x 22.5″ D
- 1x Top Panel (3/4″ plywood): 15″ W x 22.5″ D (if it’s a closed top, otherwise, use rails for wall cabinets)
- 1x Back Panel (1/4″ plywood): 30″ H x 16.5″ W
- 1x Shelf (3/4″ plywood): 14.5″ W x 22″ D
- 2x Face Frame Stiles (3/4″ plywood): 30″ H x 1.5″ W
- 2x Face Frame Rails (3/4″ plywood): 12″ W x 1.5″ H
- 1x Door Panel (3/4″ plywood): 29.5″ H x 14.75″ W
Remember to account for the thickness of the plywood itself. For instance, if your simple kitchen cabinet needs to be 16.5″ wide overall, and your side panels are 3/4″ thick, then your bottom and top panels (and shelves) should be 16.5″ – (2 x 0.75″) = 15″ wide.
Step 1: Cutting Your Plywood Panels
Accuracy is paramount here. Take your time, measure twice, and cut once.
Marking and Cutting:
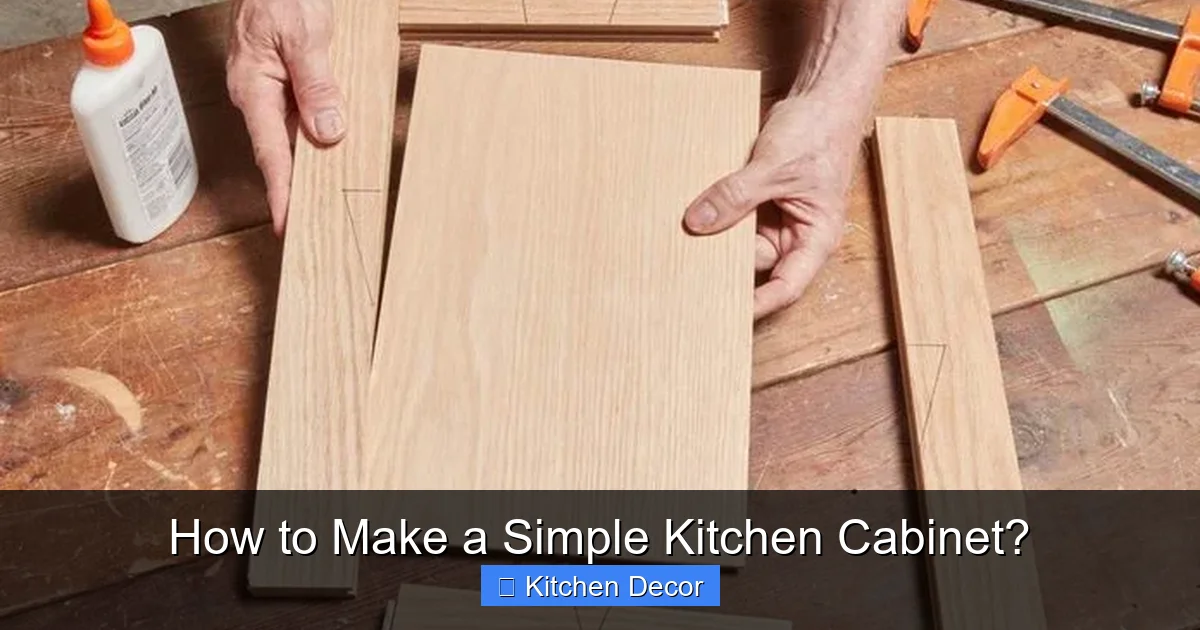
Lay out your cut list onto your plywood sheets, optimizing to minimize waste. Use a straight edge and pencil to mark all your cuts clearly. When cutting with a circular saw, use a guide for straight cuts. If using a table saw, ensure the fence is set correctly and use a push stick for safety. Always wear safety glasses and hearing protection.
Visual guide about How to Make a Simple Kitchen Cabinet?
Image source: i.pinimg.com
Cut all the pieces for the cabinet box: the side panels, bottom panel, top panel (if applicable), and back panel. Then cut your shelves, face frame pieces (stiles and rails), and door panel(s).
Tip: Label each piece as you cut it (e.g., “Side A,” “Bottom”) to avoid confusion during assembly. This makes building a simple kitchen cabinet much easier.
Step 2: Assembling the Cabinet Box
This is where your simple kitchen cabinet starts to take shape! We’ll be focusing on building a sturdy box. Pocket hole joinery with a Kreg jig is highly recommended for strong, hidden joints.
Attaching Sides to Bottom/Top:
- Drill Pocket Holes: On the bottom (and top, if applicable) panel, drill pocket holes along the edges that will connect to the side panels. Ensure the holes are on the inside face of the panels, so they’ll be hidden.
- Apply Glue: Apply a bead of wood glue along the edges of the bottom panel where it will meet the side panels.
- Attach Sides: Position one side panel perpendicularly to the bottom panel. Clamp them together securely. Drive pocket hole screws through the bottom panel into the side panel. Repeat for the other side.
- Add Top (if applicable): If your simple kitchen cabinet has a full top panel, attach it in the same manner as the bottom, drilling pocket holes into the top panel and screwing it to the side panels.
- Check for Squareness: Use a speed square or measure diagonally from corner to corner. The measurements should be identical. If not, gently adjust the cabinet until it’s square. This is crucial for doors to hang properly.
Adding the Back Panel:
- Square the Box: The back panel helps lock the cabinet into square. Before attaching, double-check that your cabinet box is perfectly square.
- Attach Back Panel: Place the 1/4″ plywood back panel onto the rear of your assembled cabinet box. Align it flush with all edges. You can use wood glue along the edges of the cabinet box where the back panel will sit.
- Secure with Fasteners: Use small brad nails or 1″ wood screws (pre-drill to prevent splitting) to secure the back panel to the sides, top, and bottom of the simple kitchen cabinet. Space fasteners every 4-6 inches.
Practical Tip: Use corner clamps or large band clamps if you have them. They can really help hold the assembly square while the glue dries and you drive the screws, resulting in a much stronger and squarer simple kitchen cabinet.
Visual guide about How to Make a Simple Kitchen Cabinet?
Image source: familyhandyman.com
Step 3: Building and Attaching the Face Frame (Recommended)
While optional for a truly simple kitchen cabinet, a face frame adds significant rigidity, covers the exposed plywood edges, and gives your cabinet a more finished, traditional look.
Cutting Face Frame Pieces:
Cut your face frame stiles (vertical pieces) to the full height of your cabinet box. Cut your face frame rails (horizontal pieces) to fit horizontally between the stiles. Typically, face frames are 1.5″ wide. For a simple kitchen cabinet, you might just use a top and bottom rail, and two side stiles.
Assembling the Face Frame:
Use pocket holes to join the rails to the stiles. Drill pocket holes on the ends of the rails. Apply glue to the joints, clamp them together, and drive pocket hole screws. Ensure the assembly is square.
Attaching to the Cabinet Box:
Apply a thin bead of wood glue along the front edges of your simple kitchen cabinet box. Carefully position the assembled face frame onto the front, ensuring it’s flush with the top, bottom, and sides. Clamp it securely. Then, use 1-1/4″ screws from the inside of the cabinet box, through the plywood, and into the face frame. countersink these screws. Let the glue dry completely before removing clamps.
Step 4: Installing Shelves
You have options here: fixed shelves or adjustable shelves.
Fixed Shelves:
If you prefer fixed shelves, you can attach them using pocket holes drilled into the underside of the shelf, screwing them into the side panels. Alternatively, you can cut dadoes (grooves) into the side panels before assembly for a very strong joint, but this requires more advanced tools.
Adjustable Shelves:
- Mark Shelf Pin Holes: Decide on the range for your adjustable shelves. Use a shelf pin jig or carefully measure and mark where you want the shelf pin holes to be on the inside faces of the cabinet side panels. Ensure marks are identical on both sides.
- Drill Holes: Using a drill bit with a stop collar (or tape on the bit), drill shallow holes at each mark. Don’t drill all the way through!
- Insert Pins: Push the shelf pins into the drilled holes.
- Place Shelf: Cut your shelf panel(s) to fit the inside dimensions of your simple kitchen cabinet. Place the shelf onto the pins.
Step 5: Preparing for Finishing
This step is critical for a professional-looking simple kitchen cabinet. Don’t skimp on sanding!
Sanding:
Start with a coarser grit sandpaper (e.g., 80 or 120) to remove any major imperfections, glue squeeze-out, or pencil marks. Then move to a medium grit (150 or 180), and finish with a fine grit (220) for a silky-smooth surface. Sand with the grain of the wood. Ensure all surfaces, especially the face frame and door, are perfectly smooth.
Dust Removal:
After sanding, thoroughly clean your simple kitchen cabinet. Use a shop vacuum to remove most of the dust, then wipe down all surfaces with a tack cloth to pick up any remaining fine particles. A dust-free surface is essential for a smooth finish.
Practical Tip: A well-sanded surface accepts paint or stain much more evenly and looks infinitely better. Patience here pays off immensely.
Step 6: Finishing Your Simple Kitchen Cabinet
Now for the fun part that brings your simple kitchen cabinet to life!
Priming (if painting):
If you’re painting your simple kitchen cabinet, apply one to two coats of a good quality wood primer. Primer helps seal the wood, provides a uniform base, and ensures better adhesion and coverage for your paint. Lightly sand with 220-grit sandpaper between coats of primer if recommended by the manufacturer.
Painting or Staining:
- Painting: Apply thin, even coats of your chosen paint. Using a high-quality brush or a foam roller can help achieve a smooth finish. Allow each coat to dry completely according to manufacturer instructions. Lightly sand with 220-grit sandpaper between coats for the best results.
- Staining: Apply stain evenly with a brush or rag, wiping off any excess after a few minutes to achieve your desired color intensity. Always test stain on a scrap piece of the same wood first.
Sealing (if staining):
If you’ve stained your simple kitchen cabinet, or if you want extra durability for a painted one, apply a protective clear coat like polyurethane or polycrylic. Follow the manufacturer’s instructions for application and drying times, usually applying 2-3 thin coats and lightly sanding between coats.
Step 7: Building and Attaching the Cabinet Door(s)
The door is the focal point of your simple kitchen cabinet.
Cutting Door Panel(s):
Cut your door panel(s) from 3/4″ plywood. Typically, doors are cut slightly smaller than the cabinet opening to allow for proper clearance and smooth operation. For a face-frame cabinet, the door will usually overlap the frame by about 1/4″ to 1/2″ on all sides.
Attaching Hinges:
For concealed Euro-style hinges, you’ll need to drill a 35mm cup hole into the back of the door panel using a Forstner bit. Use a hinge jig for accuracy if you have one. Follow the hinge manufacturer’s instructions for exact placement. Attach the hinges to the door first.
Installing Door(s):
Position the door onto your simple kitchen cabinet, aligning the hinge plates with the inside of the face frame (or the inside edge of the cabinet box for frameless cabinets). Screw the hinge plates into place. Most Euro hinges offer 3-way adjustability, allowing you to fine-tune the door’s alignment (up/down, left/right, in/out) for perfect gaps.
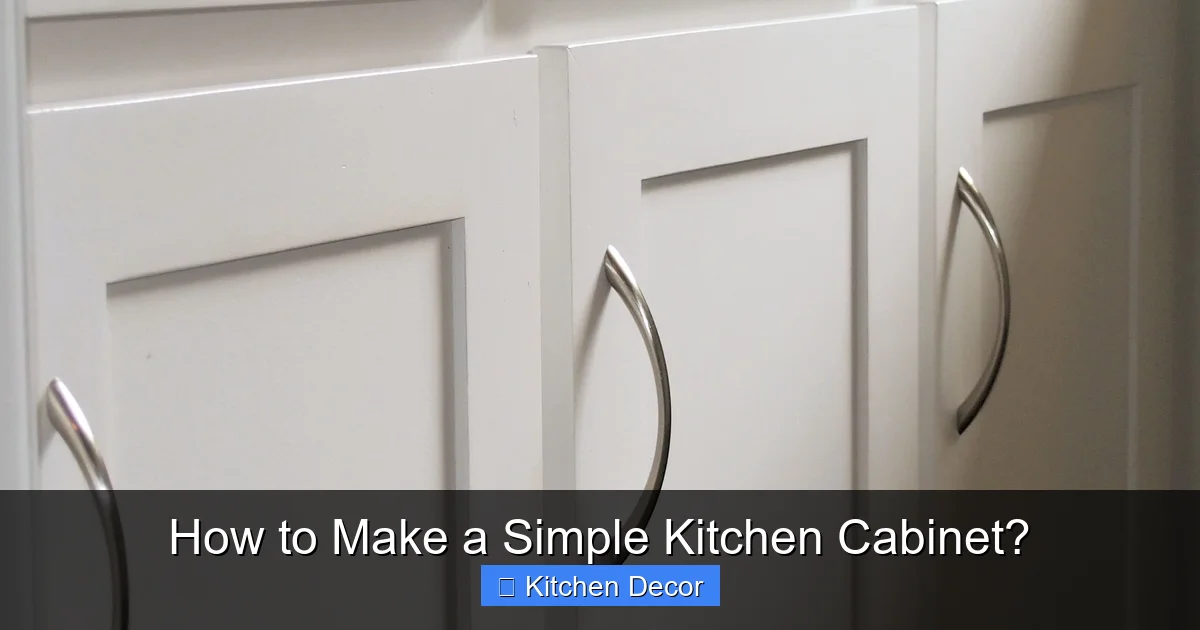
Step 8: Adding Hardware and Final Touches
The finishing touches make your simple kitchen cabinet truly functional and beautiful.
Installing Handles/Knobs:
Measure and mark the desired placement for your handles or knobs on the door(s). Use a drilling template for consistency if you’re installing multiple pieces of hardware. Pre-drill carefully and attach the hardware.
Adding Leveling Feet (for base cabinets):
Screw adjustable leveling feet into the bottom corners of your base simple kitchen cabinet. These allow you to adjust the cabinet’s height to compensate for uneven floors, ensuring it’s perfectly level and stable.
Wall Mounting (for wall cabinets):
If you’re installing a wall cabinet, locate wall studs using a stud finder. Mark their positions. It’s often helpful to screw a temporary ledger board (a straight piece of wood) to the wall, perfectly level, at the bottom height of your cabinet. This gives you a ledge to rest the cabinet on while you secure it. Drive long wood screws (3″ or more) through the back of your simple kitchen cabinet, into the wall studs. Ensure it’s level and securely fastened.
Troubleshooting Common Issues
Even with careful planning, sometimes things don’t go perfectly. Here are a few common issues and how to fix them when building a simple kitchen cabinet:
- Wobbly Cabinet: If your simple kitchen cabinet feels unstable, it’s likely not perfectly square. Double-check squareness with a speed square. Adding additional screws to joints or installing small corner braces (from the inside) can help stiffen it up.
- Doors Not Closing Properly: Most modern hinges (especially Euro-style) have adjustment screws that allow you to fine-tune the door’s position. Refer to your hinge manufacturer’s guide. If the issue is severe, the hinge cup might be drilled incorrectly, or the cabinet box itself isn’t square.
- Uneven Finish (Paint/Stain): This usually indicates insufficient sanding or improper application. Re-sand the affected area down to bare wood (or primer), clean thoroughly, and reapply the finish in thin, even coats. Avoid applying too much product at once.
- Gaps in Joints: Minor gaps can sometimes be filled with wood filler before sanding and finishing. For larger gaps, careful use of caulk after finishing might be an option, but prevention through accurate cuts and tight clamping is best.
Conclusion
Congratulations! You’ve learned how to make a simple kitchen cabinet, from initial design to the final installation. This project is a fantastic way to enhance your kitchen’s functionality and aesthetics while developing valuable woodworking skills. Each step, from the precise cuts to the meticulous finishing, contributes to a durable and beautiful piece of furniture you can proudly say you built yourself.
Enjoy the satisfaction of using your custom-made simple kitchen cabinet. Whether it’s holding your spices, dishes, or pantry items, it’s a testament to your hard work and creativity. Don’t hesitate to tackle more challenging projects now that you have these fundamental skills under your belt. Happy building!