
Reclaim your kitchen from clutter with our comprehensive guide on how to organize kitchen using DIY solutions. Discover practical, budget-friendly ways to declutter, create custom storage, and maximize every inch of your space. Transform your cooking area into an efficient, beautiful hub without breaking the bank, enhancing both functionality and aesthetics with smart DIY hacks.
Welcome to the heart of your home – your kitchen! For many of us, it’s a bustling hub of activity, creativity, and… sometimes, a little bit of chaos. If you’ve ever felt overwhelmed by overflowing drawers, cluttered countertops, or a pantry that hides more than it reveals, you’re not alone. The good news is, you don’t need a huge budget or a professional organizer to bring order to your cooking space. In fact, learning how to organize kitchen using DIY solutions can be incredibly effective, satisfying, and easy on your wallet.
This comprehensive guide will walk you through transforming your kitchen from cluttered to calm, using smart, creative, and budget-friendly DIY hacks. We’ll cover everything from the crucial first step of decluttering to designing custom storage solutions, maximizing every inch of space, and maintaining your newly organized sanctuary. Get ready to roll up your sleeves and discover how simple materials can make a monumental difference in your kitchen’s functionality and aesthetic!
Key Takeaways
- Start with a Thorough Declutter: Before organizing, empty your kitchen and sort items into “keep, donate, toss” piles to eliminate unnecessary clutter and make space for what truly matters.
- Assess Your Space and Needs: Take inventory of your current storage, identify problem areas, and map out functional zones in your kitchen to tailor DIY solutions effectively.
- Maximize Vertical Space: Utilize cabinet interiors, walls, and pantry doors with DIY additions like tension rods, pegboards, and floating shelves to create extra storage where you thought there was none.
- Repurpose and Upcycle Materials: Embrace creativity by transforming everyday items like cardboard boxes, old cans, PVC pipes, and reclaimed wood into custom drawer dividers, utensil holders, and shelf risers.
- Implement Smart Drawer and Cabinet Solutions: Create custom dividers, use shelf risers, and employ vertical storage hacks within your cabinets and drawers to keep items neatly separated and easily accessible.
- Label Everything for Easy Access: Once organized, use DIY labels to clearly identify contents of containers and bins, making it simple to find what you need and maintain order over time.
Step 1: The Grand Purge – Decluttering Your Kitchen
Before you can organize, you must declutter. This step is non-negotiable and arguably the most impactful. Think of it as hitting the reset button for your entire kitchen.
Empty Everything Out
Start by completely emptying one area at a time: a cabinet, a drawer, or a section of your pantry. Lay everything out on your countertops, dining table, or even the floor. Seeing everything you own in one place can be eye-opening!
The “Keep, Donate, Toss” Method
As you go through each item, sort it into one of three categories:
- Keep: Items you use regularly, love, or truly need.
- Donate/Sell: Items that are still in good condition but you no longer use, need, or have multiples of. Think about that extra set of mixing bowls, the appliance you only used once, or those chipped mugs.
- Toss: Broken items, expired food, things beyond repair, or anything that truly has no value.
Be Ruthless (and Realistic)
This is where honesty comes in. Ask yourself:
- When was the last time I used this? (A good rule of thumb is if you haven’t used it in a year, it might be time to let it go).
- Do I have duplicates?
- Is this item still functional and in good condition?
- Does it bring me joy or serve a practical purpose?
Don’t just move clutter around; eliminate it. This step is fundamental to truly organize kitchen using DIY solutions effectively, as it clears the canvas for your creative projects.
Step 2: Assess Your Space and Needs
Once the clutter is gone, it’s time to understand the canvas you’re working with. This assessment will guide your DIY projects.
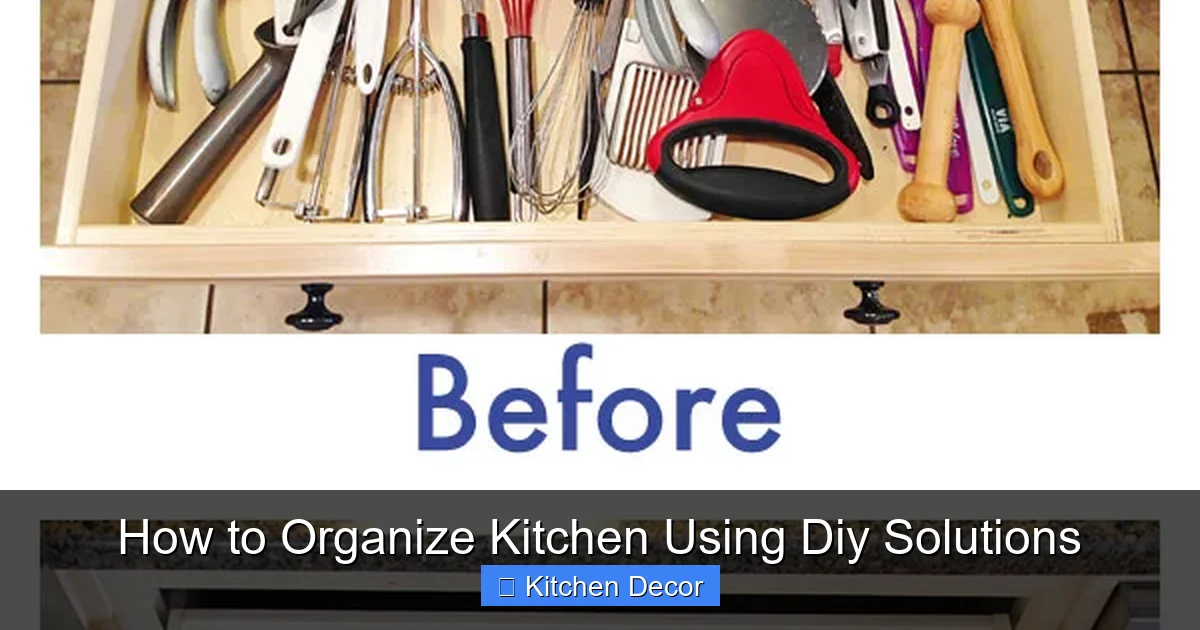
Visual guide about How to Organize Kitchen Using Diy Solutions
Image source: kevinandamanda.com
Identify Problem Areas
Walk around your kitchen. What areas constantly get messy? Which cabinets are hard to reach? Where do you wish you had more storage? Pinpointing these pain points will help you prioritize your DIY efforts.
Map Out Zones (Cooking, Prep, Storage, Cleaning)
Think about how you use your kitchen. Divide it into functional zones:
- Cooking Zone: Stove, oven, pots, pans, frequently used spices.
- Prep Zone: Counter space, cutting boards, knives, mixing bowls.
- Storage Zone: Pantry, food storage, infrequently used appliances.
- Cleaning Zone: Sink, dishwasher, cleaning supplies.
Organizing items within their zones makes your kitchen flow much better. For instance, storing cooking utensils near the stove is a logical way to organize kitchen using DIY solutions.
Measure, Measure, Measure
Before you start any DIY project, grab a tape measure. Measure the height, width, and depth of your cabinets, drawers, and pantry shelves. Note down any obstructions like pipes under the sink. These measurements are crucial for creating custom-fit solutions.
Practical Tip: Take photos of your empty cabinets and drawers. They’ll be helpful when planning your DIY projects, allowing you to visualize solutions without constantly running back to the kitchen.
Step 3: DIY Solutions for Cabinet and Drawer Organization
Cabinets and drawers are prime real estate in any kitchen. Let’s make them work harder for you with clever DIY solutions.
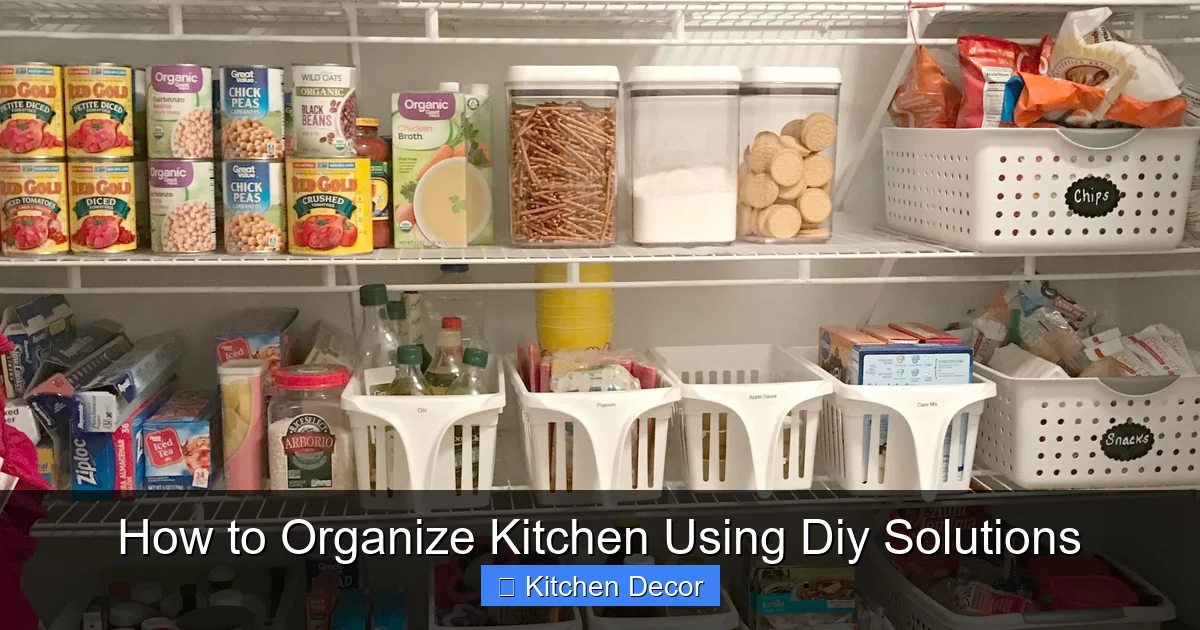
Visual guide about How to Organize Kitchen Using Diy Solutions
Image source: i.pinimg.com
DIY Drawer Dividers
Say goodbye to junk drawers! Custom dividers keep utensils, gadgets, and spices neatly separated.
- Cardboard Dividers: Repurpose sturdy cardboard (from old cereal boxes or shipping boxes). Measure your drawer, cut strips to fit, and create a grid pattern using slots or glue. Cover with decorative paper or contact paper for a polished look.
- Thin Wood or PVC Strips: For a more durable solution, cut thin pieces of wood or PVC trim to fit. You can glue them in place, or for a removable option, use small L-brackets or even just a tight friction fit if cut precisely. This is an excellent way to organize kitchen using DIY solutions for the long term.
Vertical Storage for Cabinets
Don’t let vertical space go to waste, especially in deep cabinets.
- Tension Rods: Install small tension rods vertically or horizontally inside cabinets. Use them to stand up cutting boards, baking sheets, or pot lids. Horizontally, they can create a shelf for lightweight items like dish towels or spray bottles under the sink.
- Magazine Holders: Repurpose old magazine holders (plastic or metal) to store cutting boards, baking sheets, or even aluminum foil and plastic wrap boxes vertically in a pantry or deep cabinet.
Under-Sink Solutions
The space under the sink is often a jumbled mess. Not anymore!
- Tension Rods Revisited: A horizontal tension rod can be installed just below the sink basin to hang spray bottles by their nozzles, freeing up the bottom of the cabinet.
- Stackable Bins from Repurposed Containers: Use old plastic food containers, sturdy shoe boxes, or small crates. Decorate them if you wish. Stack them strategically to hold sponges, dish soap refills, gloves, and other cleaning supplies. Remember to measure around pipes!
Shelf Risers and Expanders
Double your cabinet storage capacity by adding risers.
- DIY Wooden Risers: Cut small pieces of scrap wood to desired heights and widths, then nail or glue a top piece of wood to create a simple, sturdy riser. You can paint or stain them to match your cabinets.
- Repurposed Metal Racks: Old cooling racks or small wire baskets can be flipped upside down and used as impromptu shelf risers for plates or bowls, creating space underneath for smaller items like saucers or cups. This smart hack helps organize kitchen using DIY solutions without buying expensive organizers.
Step 4: Wall-Mounted and Vertical Storage Hacks
Walls are your friends! Look beyond cabinets for storage opportunities.

Visual guide about How to Organize Kitchen Using Diy Solutions
Image source: i1.wp.com
Pegboards for Utensils and Tools
A classic for a reason, pegboards offer incredibly versatile storage.
- Installation: Purchase a pegboard (available at hardware stores), cut it to size if needed, and mount it to your wall. Ensure it’s mounted securely, especially if you plan to hang heavy items.
- Customization: Use pegboard hooks, small baskets, and shelves designed for pegboards. Hang pots, pans, measuring cups, spatulas, and even small spice jars. You can paint the pegboard to match your kitchen decor for a cohesive look.
Magnetic Knife Strips
Free up drawer space and keep knives safely within reach.
- DIY with Strong Magnets: You can create your own magnetic strip by embedding strong rare-earth magnets into a strip of wood. This requires some woodworking skills (drilling precise holes for the magnets and securing them). Ensure the magnets are strong enough to hold your knives securely.
- Ready-Made with DIY Finish: Purchase an inexpensive magnetic knife strip and customize its look by painting the visible parts or mounting it on a decorative piece of wood.
DIY Floating Shelves
Floating shelves add both storage and decorative appeal.
- Reclaimed Wood: Source reclaimed wood (old pallets, barn wood, or even sturdy fence planks). Clean, sand, and finish the wood to your liking. Install with hidden brackets for a true “floating” look.
- Simple Wood Planks: Purchase inexpensive pine or MDF planks. Cut to size, paint or stain, and mount with sturdy shelf brackets. Use them for cookbooks, frequently used spices, or displaying charming kitchen items. They are fantastic for showing how to organize kitchen using DIY solutions for open concepts.
Command Hooks and Adhesive Solutions
For quick, damage-free hanging storage, these are your best friends.
- Inside Cabinet Doors: Attach small Command hooks to the inside of cabinet doors to hang measuring spoons, oven mitts, lightweight aprons, or even small pot holders.
- Backsplash Area: Use adhesive hooks to hang cooking utensils, dish towels, or even small baskets for sponges or scrubbers near the sink.
Step 5: Pantry Power – DIY Storage for Food Items
A well-organized pantry makes meal prep a breeze and prevents food waste.
Repurposed Bins and Baskets
Give new life to old containers to corral similar items.
- Shoe Boxes and Gift Boxes: Cover sturdy shoe boxes or gift boxes with pretty contact paper, fabric, or paint. Use them to store snacks, baking supplies, pasta, or packets.
- Old Crates and Wooden Boxes: Clean and sand old wooden crates. You can paint them or leave them natural. They’re great for storing potatoes, onions, or larger items, and can even be stacked.
DIY Tiered Spice Racks
No more digging for spices at the back of the shelf!
- Cardboard Riser: Cut sturdy cardboard into three progressively shorter strips for the tiers. Fold and glue them into a staircase shape. Cover with contact paper.
- Small Wood Planks: Cut thin wood planks to create a tiered stand. Glue or nail them together. This provides a sturdy, long-lasting solution to organize kitchen using DIY solutions for spices.
Jar and Container System
Decanting dry goods creates a uniform, attractive, and fresh pantry.
- Matching Jars: Collect clear glass jars (old pasta sauce jars, pickle jars, mason jars) or inexpensive plastic containers. Ensure they have tight-fitting lids.
- Labels: Create your own labels using chalk paint, a label maker, or simply write on decorative paper and attach. Store dry goods like flour, sugar, pasta, rice, oats, and snacks. This makes inventory easy and keeps pests out.
Door-Mounted Storage
Don’t forget the back of your pantry door!
- Over-the-Door Shoe Organizer: A clear over-the-door shoe organizer is perfect for small pantry items. Use the pockets for spice packets, granola bars, small snacks, tea bags, or even plastic wrap and foil boxes.
- DIY Shelving: If your door is sturdy enough, you can attach small, shallow shelves made from scrap wood for extra storage of cans or jars.
Step 6: Countertop Clarity and Appliance Management
Clear countertops make your kitchen feel larger and more inviting. Only keep out what you use daily.
Designate Appliance Homes
Each appliance needs a specific home, whether it’s on the counter or tucked away.
- Frequent Use: Keep your coffee maker, toaster, or most-used blender on the counter in a dedicated spot.
- Infrequent Use: Store less-used appliances (stand mixer, food processor, waffle maker) in a cabinet or pantry. Use DIY shelf risers to make them easier to access.
DIY Utensil Crocks and Holders
Keep cooking utensils close to the stove without cluttering drawers.
- Decorated Cans: Clean out large food cans (like coffee cans or tomato cans). Remove sharp edges, then paint, wrap with twine, or cover with fabric to create attractive utensil holders.
- Small Buckets or Planters: Repurpose small galvanized buckets, ceramic planters, or even old ceramic vases. Group similar utensils together (e.g., spatulas in one, whisks in another).
Keep Only Essentials on Display
Resist the urge to over-decorate or display too many items. A fruit bowl, a small plant, and your utensil crock might be all you need.
DIY Charging Station
Hide phone chargers and electronic clutter.
- Repurposed Bread Box: Clean out an old bread box. Drill small holes in the back for power cords to pass through. Place a power strip inside and use it to charge phones, tablets, or even smartwatches, keeping them out of sight.
- Hidden Basket: Use a decorative basket with a lid. Cut small holes for cables and place a power strip inside. This is a simple yet effective way to organize kitchen using DIY solutions for electronic devices.
Step 7: Labeling and Personal Touches
Once everything is in its place, labeling and adding personal touches will solidify your organization system.
The Power of Labels
Labels are not just for aesthetics; they are crucial for maintaining order. Everyone in the household will know where things belong.
- DIY Labels: Use simple paper and a nice pen, chalk paint on containers, or cut-out shapes from cardstock. You can even print labels from your computer.
- Label Maker: For a clean, uniform look, a basic label maker is an excellent investment.
Add Personality
Your DIY solutions don’t have to be purely utilitarian. Embrace your style!
- Paint and Fabric: Decorate your repurposed bins, shelves, and dividers with colors and patterns that match your kitchen decor.
- Knobs and Pulls: If you added new drawer dividers or small wooden boxes, consider adding decorative knobs or pulls.
Troubleshooting Common Kitchen Organization Challenges
Even with the best intentions, you might run into specific challenges. Here are some quick DIY fixes.
Limited Counter Space
If your counters are still feeling cramped, embrace verticality even more. Install more floating shelves for items usually found on counters. Utilize a rolling cart or a small kitchen island if space permits, as it can be moved away when not in use. Consider a DIY over-the-sink cutting board that expands your prep area.
Awkward Cabinets
Deep, dark corner cabinets or narrow spaces can be tricky. For corners, DIY pull-out shelves or rotating lazy Susans (made from plywood circles and a swivel base) can be game-changers. For narrow spaces, customize tension rod setups or slim, tall containers made from PVC pipes cut lengthwise for tools like rolling pins or umbrellas (if your kitchen has a utility closet).
Maintaining Order After Organizing
The biggest challenge is often keeping things organized. Implement the “one in, one out” rule: if you buy a new kitchen gadget, donate or toss an old one. Schedule quick weekly tidy-ups. Encourage everyone in the household to put things back immediately after use. This continuous effort is key to ensuring your hard work to organize kitchen using DIY solutions pays off long-term.
Conclusion
Organizing your kitchen using DIY solutions is more than just tidying up; it’s about creating a more functional, enjoyable, and personalized space. By decluttering thoughtfully, assessing your needs, and getting creative with everyday materials, you can craft a kitchen that perfectly suits your lifestyle without a hefty price tag. Remember, every small DIY project contributes to a larger, more harmonious whole.
Start small, celebrate your victories, and don’t be afraid to experiment. Your dream kitchen, one that’s efficient, beautiful, and uniquely yours, is well within reach. Happy organizing, and enjoy the renewed joy of cooking in your perfectly tailored space!