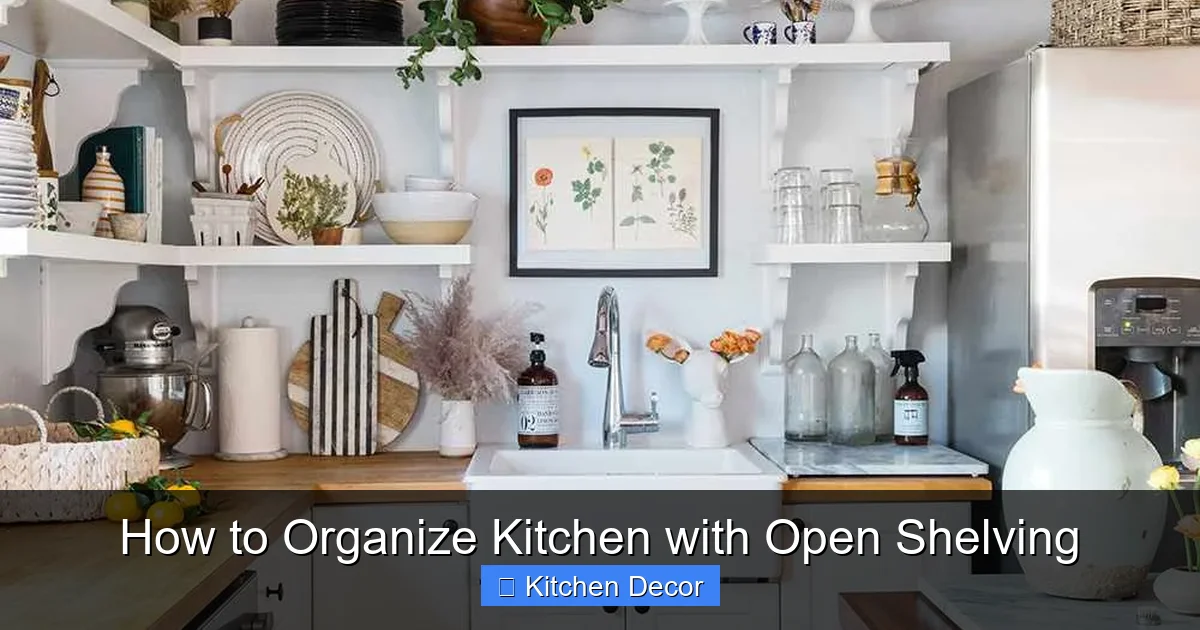
Organizing your kitchen with open shelving transforms it into a stylish and functional hub. This guide provides a clear roadmap, from strategic decluttering and layout planning to clever storage solutions and expert styling tips. Learn how to create a visually appealing, clutter-free space that reflects your personality and makes daily cooking a joy, ensuring your open shelves are both beautiful and practical.
How to Organize Kitchen with Open Shelving
Open shelving in the kitchen has become a beloved design trend. It offers an airy, spacious feel, allows you to display beautiful dishware, and can make grabbing everyday items super convenient. But let’s be honest, it can also quickly devolve into a chaotic mess if not properly managed. The key to making open shelving work its magic is thoughtful organization. It’s about blending functionality with aesthetics, creating a space that feels both welcoming and efficient.
If you’re wondering how to organize kitchen with open shelving in a way that truly shines, you’ve come to the right place. This guide will walk you through every step, from the initial decluttering to the final styling touches. We’ll explore practical tips, clever storage solutions, and design principles to help you create a beautifully organized kitchen that you’ll love to show off.
Whether you’re just installing new open shelves or looking to revamp your existing setup, these strategies will empower you to transform your kitchen. Get ready to embrace the beauty and practicality of a well-organized open-shelf kitchen!
Key Takeaways
- Start with a Ruthless Declutter: Before arranging anything, remove all unnecessary items. Keep only what you truly use, love, or find beautiful enough to display.
- Plan Strategic Zones: Group items by function and frequency of use. Place everyday essentials within easy reach and heavier, less-used items on lower shelves.
- Invest in Cohesive Storage Solutions: Use matching canisters, bins, and baskets to unify your look and conceal less attractive items. This creates visual harmony and reduces clutter.
- Master the Art of Styling: Balance functional items with decorative accents. Vary heights, textures, and incorporate personal touches like plants or artwork to add visual interest.
- Prioritize Visual Flow and Balance: Arrange items thoughtfully, considering negative space and the “rule of three” to create an appealing, non-overwhelming display.
- Implement a Maintenance Routine: Open shelving requires ongoing effort. Regularly dust, declutter, and re-evaluate your arrangements to keep them looking fresh and organized.
- Address Practical Challenges: Learn strategies for common issues like dust, grease, and maintaining a tidy appearance, ensuring your open shelving remains a joy, not a chore.
Step 1: Assess and Declutter Ruthlessly
The very first and most crucial step to successfully organize kitchen with open shelving is to declutter. Open shelves offer no hiding place for clutter, so every item you choose to display (or even store) needs to earn its spot. This isn’t just about tidiness; it’s about making conscious choices about what you own and what you truly need.
Evaluate Every Single Item
Start by taking everything off your shelves, counters, and out of your cabinets. Yes, everything! Lay it all out on your dining table or a clean floor space. This “everything out” approach gives you a full picture of what you actually have.
- Keep: Items you use regularly, love, or that are beautiful enough to display. Think matching dish sets, elegant glassware, cookbooks you frequently reference, or attractive canisters.
- Donate/Sell: Items that are still functional but you no longer use, items you have duplicates of, or gifts you never truly loved.
- Discard: Broken items, chipped plates, expired food, or anything that’s simply beyond repair or usefulness.
- Relocate: Items that don’t belong in the kitchen at all. (Think office supplies, bathroom essentials, or tools.)
Be honest with yourself. Ask questions like: “Have I used this in the last six months?” “Is this purely decorative, and does it add value?” “Do I have another item that serves the same purpose?” This initial declutter will significantly reduce the number of items you need to organize kitchen with open shelving.
Prioritize Visibility and Aesthetic Appeal
When you have open shelving, anything that goes on it becomes part of your kitchen’s decor. This means prioritizing items that are visually appealing or at least blend in seamlessly. Less attractive but essential items will need clever containment strategies (which we’ll cover later).
- Display the “Good Stuff”: Your best dinnerware, pretty mixing bowls, unique mugs, or vintage finds are perfect candidates for display.
- Hide the “Ugly Stuff”: Cereal boxes, mismatched plastic containers, or odd-shaped gadgets are best kept in closed cabinets or cleverly tucked away in opaque bins on the open shelves.
- Think Color and Material: Try to keep a consistent color palette or material theme for the items you plan to display. This creates a cohesive, calming look.
This thorough decluttering phase is the foundation for successfully organizing your kitchen with open shelving. Don’t skip it!
Step 2: Plan Your Layout and Zones
Once you’ve pared down your belongings, it’s time to strategize where everything will go. Planning is key to making your open shelving both functional and beautiful. You want to create zones that make sense for your cooking habits and ensure visual balance.
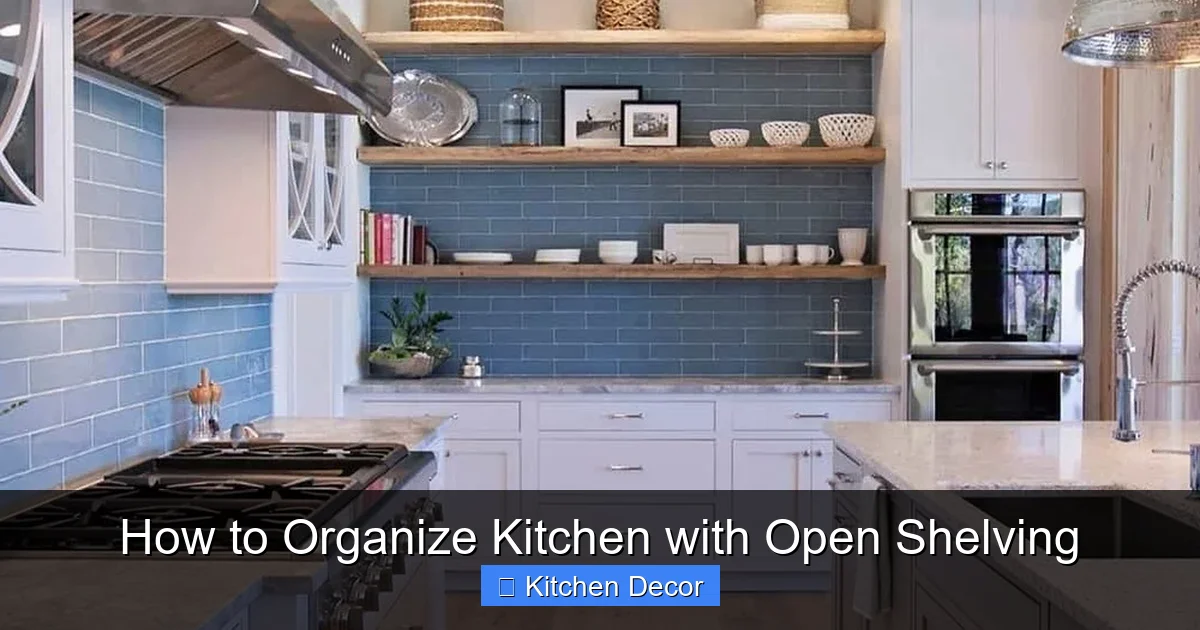
Visual guide about How to Organize Kitchen with Open Shelving
Image source: foter.com
Define Functional Zones
Think about how you use your kitchen. What tasks do you perform where? Grouping items by function makes your kitchen highly efficient.
- Coffee/Tea Station: If your shelves are near your coffee maker, keep mugs, coffee beans (in attractive canisters), tea bags, and sugar there.
- Baking Zone: Store mixing bowls, measuring cups, and flour/sugar canisters (again, in nice containers) near your primary baking area.
- Prep Zone: Everyday plates, bowls, and glasses should be easily accessible near your food prep area or dishwasher.
- Cooking Zone: Salt, pepper, olive oil (in pretty cruets), and frequently used spices can go on a shelf near your stove.
By establishing these zones, you reduce unnecessary movement and make daily tasks smoother. It’s a smart way to organize kitchen with open shelving for maximum utility.
Consider Visual Balance and Accessibility
Open shelving isn’t just about function; it’s about aesthetics. You need to balance the look of your shelves while ensuring frequently used items are easy to grab.
- Bottom Shelves: These are best for heavier items (stacks of plates, large bowls, small appliances) or items you use constantly. They’re easy to reach and provide a stable base.
- Middle Shelves: The “eye-level” shelves are prime real estate for your most beautiful items or things you use daily. Think curated displays of attractive dishware, favorite cookbooks, or decorative pieces.
- Top Shelves: Reserve these for less frequently used items, seasonal decor, or purely decorative elements that you want to display but don’t need to access often. You might also use these for lighter, perhaps sentimental, items that add personality without cluttering the main functional zones.
Remember to distribute visual weight evenly across your shelves. Avoid having one shelf look too heavy or sparse compared to others. The goal is to create a harmonious flow that is pleasing to the eye.
Map Out Placement (Even Sketch It!)
Before you start putting things back, take a moment to visualize or even sketch out your plan. This can save you time and effort. You can use painter’s tape to mark out shelf heights on a wall if you’re installing new shelves, or simply draw a rough diagram of where you envision everything going. This planning stage is critical to effectively organize kitchen with open shelving.
Step 3: Choose the Right Storage Solutions
Even with open shelving, not everything needs to be “open” for display. Strategic use of storage solutions can hide clutter, add texture, and create a more polished look. These tools are your secret weapon to organize kitchen with open shelving effectively.
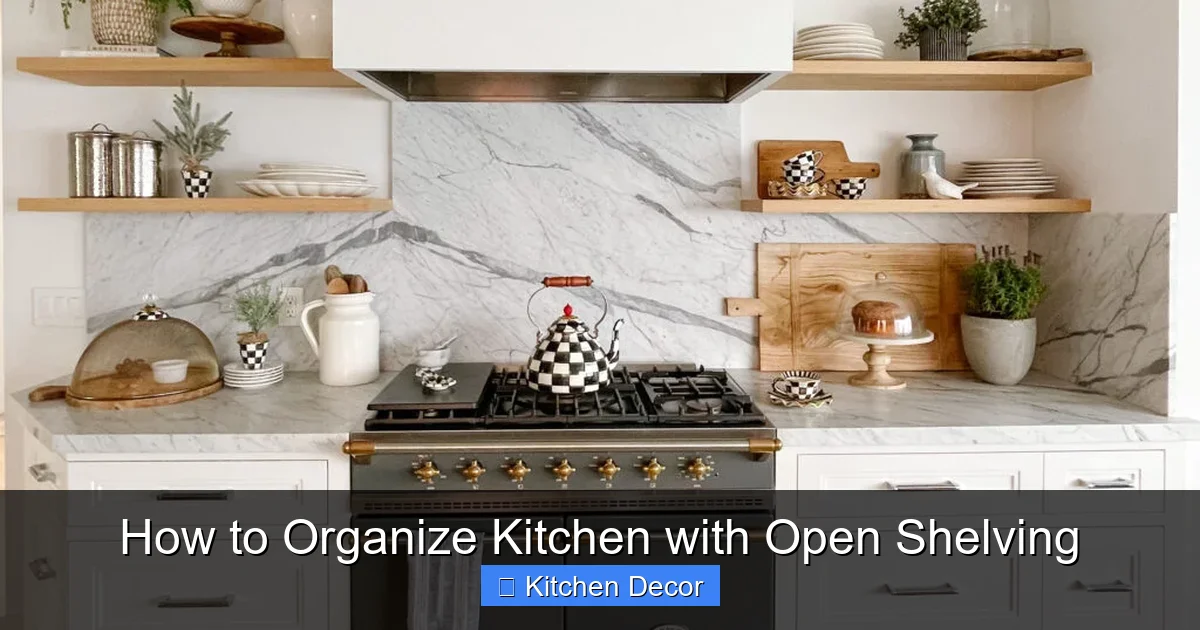
Visual guide about How to Organize Kitchen with Open Shelving
Image source: sanctuaryhomedecor.com
Baskets and Bins: The Master Concealers
Baskets and bins are your best friends for open shelving. They are perfect for stashing away items that aren’t pretty enough to display but still need to be accessible. Look for options that complement your kitchen’s style.
- Woven Baskets: Add warmth and texture. Great for small snacks, kids’ dishes, dish towels, or even less attractive food packaging.
- Wire Baskets: Offer a more industrial or farmhouse look. Good for fruit, vegetables (like onions or potatoes), or cookbooks.
- Opaque Bins: Ideal for hiding anything you truly don’t want seen, like medicine, small tools, or a collection of mismatched plastic lids.
Choose baskets or bins that are the right size for your shelves and, ideally, match in color or material for a cohesive look. Uniformity makes a huge difference in visual appeal.
Canisters and Jars: Stylish and Functional
When it comes to dry goods, clear glass or ceramic canisters are a must. They instantly elevate the look of your shelves while keeping ingredients fresh and visible.
- Clear Glass Jars: Perfect for flour, sugar, pasta, rice, coffee beans, or spices. They allow you to see contents at a glance and look elegant.
- Ceramic Canisters: Great for items you don’t need to see, like tea bags, pet treats, or a collection of cookie cutters. They add a touch of rustic charm or modern sleekness depending on their design.
Opt for matching sets or at least a consistent style of canisters. Labeling them neatly can add a touch of organization and charm.
Plate and Bowl Stacks: The Foundation
Your everyday dishware will likely form the backbone of your open shelf display. Stacking plates and bowls neatly is both practical and visually appealing.
- Stack Neatly: Group plates of the same size and color together. Do the same for bowls. Avoid overly tall stacks that might look precarious or be difficult to access.
- Use Plate Dividers: If you have delicate plates or want to ensure stability, plate dividers can be helpful.
- Consider Small Stacks: Instead of one giant stack, perhaps two smaller stacks of plates side-by-side or separated by a decorative item, can look more appealing.
The goal is to make these frequently used items easily accessible and attractive. This is a core component when you organize kitchen with open shelving.
Decorative Elements: Adding Personality
While functionality is key, don’t forget the decorative aspect. Open shelves are a canvas to express your style.
- Small Plants or Herbs: Add a touch of living greenery. Potted herbs like basil or rosemary are both beautiful and functional.
- Cookbooks: Display your favorite cookbooks, either stacked horizontally or standing upright with decorative bookends.
- Artwork or Photos: A small framed print or photo can break up the monotony of dishes.
- Vases or Sculptural Pieces: Non-functional but aesthetically pleasing items can add personality and softness.
Remember the “less is more” principle here. A few well-chosen decorative items are more impactful than a shelf crowded with trinkets.
Step 4: The Art of Styling and Arrangement
Now for the fun part: arranging everything in a way that’s both functional and visually stunning. This is where your kitchen truly starts to look like something out of a magazine. Styling is crucial when you organize kitchen with open shelving.
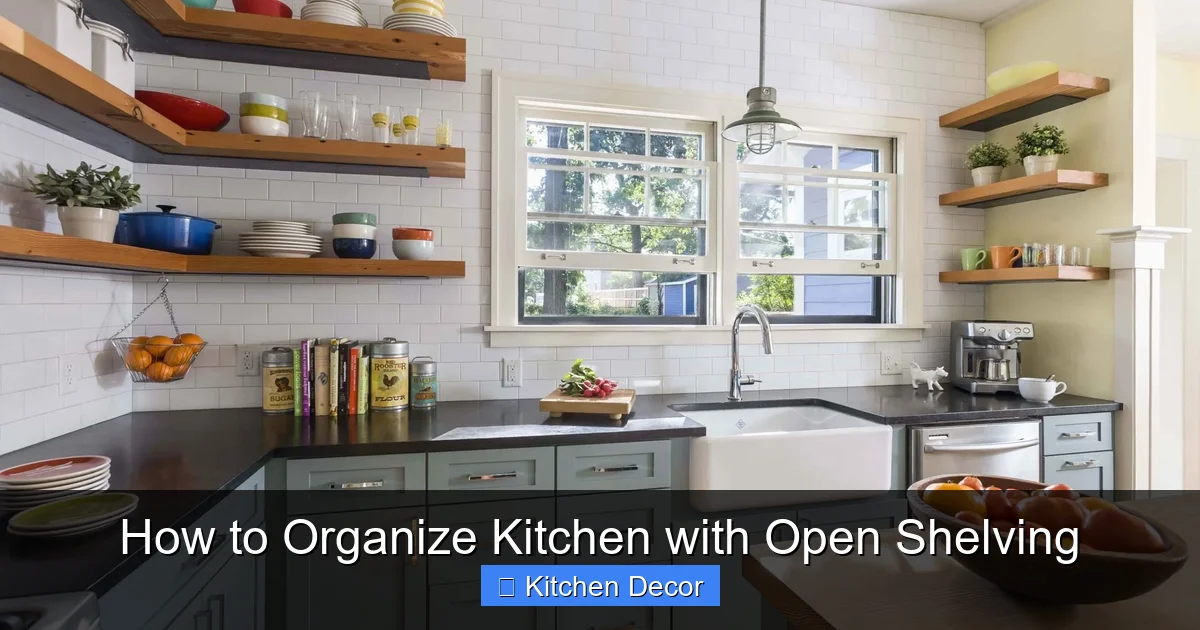
Visual guide about How to Organize Kitchen with Open Shelving
Image source: foter.com
Group Similar Items Together
This goes back to the zoning principle, but it’s also a styling technique. Grouping items by type (all mugs together, all glasses together, all baking supplies together) creates a sense of order and makes it easy to find what you need. It also looks cleaner than having items scattered randomly.
- Color-Coordinated Displays: If you have a collection of colorful mugs, consider arranging them by color family for a rainbow effect or by a single dominant color for a minimalist look.
- Material Grouping: All wooden items on one shelf, or all ceramic items.
Vary Heights and Textures
A shelf with items all the same height or texture can look flat and uninteresting. Introduce variety to create visual interest.
- Tall and Short: Place a tall pitcher next to a stack of short bowls, or a small plant next to a stack of cookbooks.
- Smooth and Rough: Combine smooth ceramic dishes with a woven basket or a wooden cutting board.
- Layering: Place a small piece of art leaning against the back of the shelf, with a stack of plates in front of it.
This variation guides the eye across the shelves, making the display more dynamic.
Utilize the “Triangle” Rule
This is a classic design trick. When arranging groups of items, try to create visual “triangles.” Place a taller item in the center, flanked by two shorter items, or arrange three items of varying heights to form a triangle. This creates a balanced and pleasing composition. Apply this concept to each individual shelf and also to the overall arrangement of your open shelves.
Incorporate Personal Touches (Thoughtfully)
Your kitchen should feel like *your* kitchen. Incorporate items that reflect your personality and style.
- Family Heirlooms: A cherished serving platter or a grandmother’s teapot can add sentimental value.
- Travel Souvenirs: A unique ceramic bowl from a trip or a small piece of pottery.
- Art and Books: As mentioned, these can add character.
The key here is thoughtfulness. Don’t display every sentimental item; choose a few special pieces that genuinely enhance the space without creating clutter.
Don’t Overfill – Embrace Negative Space
This is perhaps one of the hardest but most important tips for open shelving. Resist the urge to fill every single inch. Negative space (empty areas) is crucial for making your shelves look curated, not cluttered. It allows the eye to rest and highlights the items you’ve chosen to display.
- Leave Breathing Room: Ensure there’s space around each grouping of items.
- Consider the “Rule of Three”: Often, arranging items in odd numbers (like three or five) is more visually appealing than even numbers.
When you organize kitchen with open shelving, remember that less is often more. A few beautifully arranged items will always look better than a packed, overwhelming display.
Step 5: Maintain and Adapt
The work doesn’t stop once you’ve beautifully styled your open shelves. Open shelving requires ongoing maintenance to stay looking its best. Think of it as a living display that needs occasional tending.
Regular Decluttering and Wiping
Because everything is exposed, dust and grime are more visible. Make a habit of:
- Weekly Wipe-Down: Quickly wipe down the shelves and exposed items to prevent dust buildup.
- Monthly Deep Clean: Every month or so, take everything off a shelf, wipe it thoroughly, and replace the items. This also gives you a chance to re-evaluate what’s there.
- Quick Tidy: After washing dishes, ensure they go back in their designated, neat stacks. Don’t let new items disrupt your carefully planned arrangement.
This routine maintenance is vital to keep your efforts to organize kitchen with open shelving from unraveling.
Seasonal Refresh
Open shelves are perfect for seasonal decor! Take advantage of this to keep your kitchen feeling fresh and festive.
- Spring/Summer: Introduce brighter colors, fresh flowers, or lighter textiles.
- Fall: Add warm tones, small pumpkins, or rustic elements.
- Winter/Holidays: Incorporate festive mugs, themed serving dishes, or subtle holiday greenery.
This also gives you another opportunity to re-evaluate and declutter.
Adapt as Your Needs Change
Life happens! Your cooking habits, family size, or decor preferences might change over time. Your open shelving should be flexible enough to adapt.
- New Kitchen Gadget: If you get a new appliance, consider if it truly needs to be on display or if a less prominent spot is better.
- Growing Family: You might need more kid-friendly storage solutions or fewer delicate decorative items.
- Changing Tastes: If your style evolves, don’t be afraid to completely rearrange or swap out items to reflect your new aesthetic.
The beauty of open shelving is its versatility. Embrace the ability to change things up whenever you feel inspired!
Troubleshooting Common Open Shelving Challenges
While open shelving is beautiful, it comes with its own set of challenges. Knowing how to tackle them will help you maintain your beautifully organized space.
Dust Accumulation
This is the most common complaint! Since everything is exposed, dust will settle.
- Solution: Regular dusting is key. Wipe down items and shelves frequently, perhaps daily for very visible spots and weekly for a full shelf wipe. For items you rarely use, consider storing them in closed cabinets or placing them within closed, attractive containers on your open shelves.
- Tip: If you live in a very dusty environment, try to display only items you use frequently, ensuring they are washed often.
The “Cluttered” Look
Even with careful styling, shelves can sometimes feel overwhelming.
- Solution: Revisit Step 1 (Declutter!) and Step 4 (Embrace Negative Space). Remove one or two items from each shelf. Use more opaque bins to hide visual noise. Ensure there’s a consistent color palette or material theme. Sometimes, simply rotating a few items to closed storage can make a big difference.
- Tip: Step back and look at your shelves from across the room. What immediately jumps out as distracting?
Lack of Privacy for Less Attractive Items
Not everything can be picture-perfect!
- Solution: This is where baskets, bins, and opaque canisters truly shine. Use them strategically to store medications, cleaning supplies, mismatched Tupperware lids, or small kitchen gadgets that don’t contribute to the aesthetic. Place these containers on lower shelves or within a grouping of more attractive items.
- Tip: Measure your shelves carefully before buying bins to ensure a perfect fit that looks built-in.
Greasy Residue Near the Stove
If your open shelves are close to your cooktop, grease and cooking splatter can be an issue.
- Solution: Avoid placing delicate or porous decorative items directly above or next to the stove. For essential items like spices or oils, ensure they are in easily washable containers. Wipe down shelves and items more frequently in this area with a degreasing cleaner. Consider a strong range hood to minimize airborne grease.
- Tip: Use easy-to-clean materials like glass, ceramic, or metal for items in this zone.
Conclusion
Learning how to organize kitchen with open shelving is a journey, not a one-time event. It’s about creating a harmonious blend of form and function, where every item serves a purpose or brings joy. By following these steps – from ruthless decluttering and strategic planning to thoughtful styling and consistent maintenance – you can transform your open shelves from a potential headache into a beautiful focal point of your home.
Embrace the process, experiment with different arrangements, and don’t be afraid to let your personality shine through. A well-organized open-shelf kitchen is a testament to mindful living and a space that truly feels like home. Enjoy the airy, beautiful, and highly functional kitchen you’ve created!