Transform your cluttered kitchen drawers into models of efficiency with our comprehensive guide. Learn how to declutter ruthlessly, choose the right organization tools, and implement smart strategies for every drawer, from cutlery to spices. Discover practical kitchen drawer organization hacks that make finding what you need a breeze and maintain a tidy kitchen effortlessly.
Kitchen Drawer Organization Hacks
Do you dread opening your kitchen drawers? Are you tired of rummaging through a tangled mess of spatulas, measuring spoons, and forgotten gadgets just to find what you need? You’re not alone! Cluttered kitchen drawers are a common headache, turning simple tasks into frustrating searches. But imagine a kitchen where everything has its place, where opening a drawer brings a sense of calm and efficiency instead of chaos.
This comprehensive guide is your roadmap to achieving just that. We’ll walk you through practical kitchen drawer organization hacks that will transform your kitchen from chaotic to functional. From decluttering strategies to choosing the perfect organizers and implementing smart layouts, you’ll learn everything you need to know. Get ready to reclaim your kitchen and make every drawer a joy to open!
Key Takeaways
- The Purge is Paramount: Before buying any organizers, empty every kitchen drawer and ruthlessly sort through its contents. Get rid of anything broken, unused, or duplicate to create a clean slate.
- Customization is Key: Not all kitchen drawers are the same, nor are their contents. Invest in adjustable or modular organizers that can be customized to fit your specific items and drawer dimensions for optimal efficiency.
- Utilize Specialized Tools: Beyond basic dividers, explore specialized kitchen drawer organization hacks like tiered inserts for spices, magnetic strips for knives, or tension rods for lids to maximize vertical and horizontal space.
- Zone Your Kitchen Effectively: Organize items based on where they’re used. Keep cooking utensils near the stove, baking tools near the prep area, and everyday flatware close to the dining table for improved workflow.
- Maintenance is Ongoing: Kitchen drawer organization isn’t a one-time project. Establish simple routines, like a quick tidy after unloading the dishwasher or a monthly mini-purge, to keep your drawers from reverting to chaos.
- Measure Everything: Before purchasing any organizational products, measure the length, width, and depth of your drawers. This ensures a perfect fit and prevents wasted money on ill-fitting solutions.
- Don’t Forget the “Junk” Drawer: Even the infamous utility drawer can be organized. Use small bins or compartments to give a home to batteries, pens, and rubber bands, turning it into a functional catch-all.
Step 1: The Great Purge – Empty and Declutter
Before you even think about buying organizers, the first and most crucial step in any successful kitchen drawer organization project is to declutter. This is your chance to start fresh, getting rid of anything that no longer serves a purpose.
Empty Every Drawer
Start by choosing one drawer at a time. This prevents overwhelming yourself. Pull everything out of that drawer. Yes, everything! Lay it all out on your counter or a clean tablecloth on the floor. Seeing everything outside its usual spot gives you a clear perspective on what you actually have.
Sort, Keep, Donate, or Toss
Now comes the tough part: making decisions. Go through each item you’ve pulled out and categorize it. Be honest with yourself. Here’s how to think about each piece:
- Keep: These are items you use regularly, love, and are in good condition. Make sure they truly belong in a kitchen drawer.
- Donate/Give Away: Items that are still in good condition but you no longer use or need. Maybe you have duplicates, or you’ve upgraded to a new version. Someone else could benefit from these.
- Toss/Recycle: Broken items, rusty tools, expired food items (yes, sometimes old spices or forgotten snacks end up in drawers!), or anything that’s beyond repair or usefulness. Don’t feel guilty about letting go of junk.
- Relocate: Items that don’t belong in the kitchen at all, or items that belong in a different kitchen drawer or cabinet. For example, batteries might go to a utility drawer elsewhere in the house, or baking sprinkles might go into a pantry cabinet.
Focus on functionality. If you haven’t used an item in a year, chances are you don’t need it. Be ruthless. The less you have, the easier kitchen drawer organization becomes.
Clean the Drawer
Once empty, take the opportunity to give the drawer a thorough cleaning. Wipe away crumbs, dust, and any sticky residue. A clean drawer is a happy drawer, and it provides a fresh start for your new organizational system.
Step 2: Assess Your Needs and Habits
With decluttered and clean drawers, it’s time to think strategically. Effective kitchen drawer organization isn’t just about putting things back neatly; it’s about creating a system that works for your specific kitchen, your cooking habits, and your family.
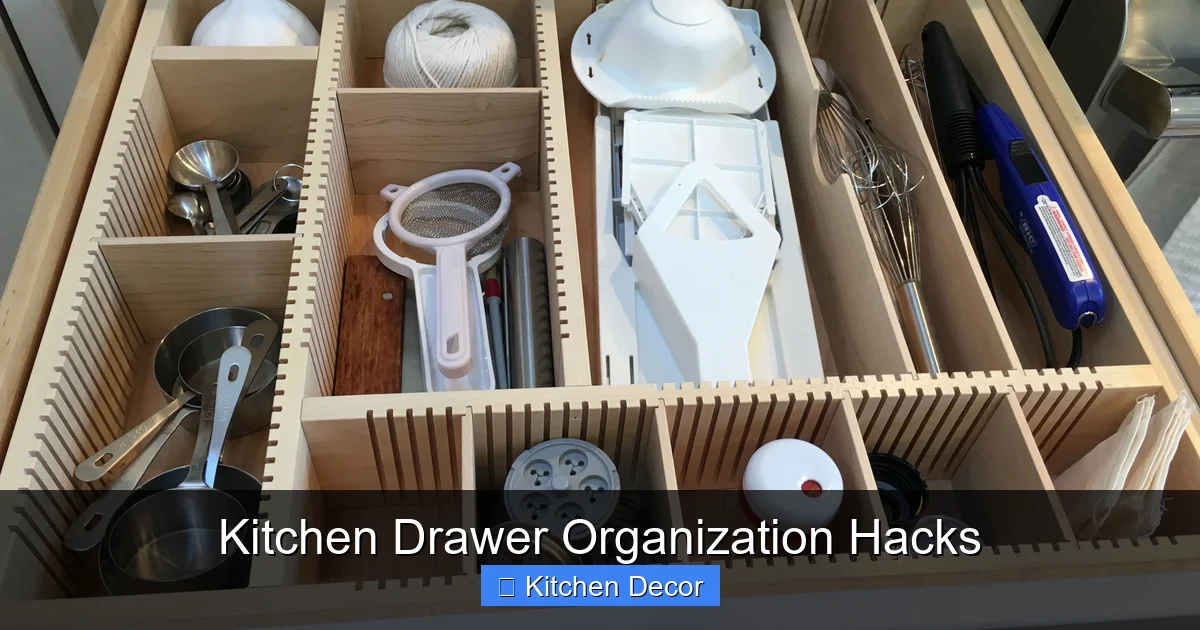
Visual guide about Kitchen Drawer Organization Hacks
Image source: i.pinimg.com
What’s Used Most Often?
Consider which items you reach for every single day. Your flatware, everyday spatulas, can opener, or often-used measuring spoons. These items should be in the most accessible drawers, ideally those closest to your main prep or cooking areas. Less frequently used items, like seasonal cookie cutters or specialty gadgets, can be stored in deeper or less convenient drawers.
Zone Your Kitchen
Think about how your kitchen is naturally divided into “zones.” This is a key hack for intuitive kitchen drawer organization:
- Cooking Zone (near the stove): Store cooking utensils like spatulas, ladles, tongs, and perhaps a thermometer.
- Prep Zone (near the main counter space): Keep knives, cutting board accessories, peelers, graters, and measuring tools.
- Dining Zone (near the eating area or dishwasher): This is ideal for flatware, napkins, and perhaps serving utensils.
- Baking Zone (if you have one): Measuring cups, spoons, whisks, and smaller baking tools.
- Beverage Zone (near coffee maker/kettle): Teaspoons, sugar packets, stirrers.
Organizing by zone means less walking around, making your kitchen more efficient and enjoyable to work in.
Measure Your Drawers
This is a step many people skip, leading to frustration later. Before buying any organizers, grab a measuring tape. Measure the interior length, width, and depth of each drawer you plan to organize. Write these dimensions down! This information is critical for choosing organizers that fit perfectly and maximize every inch of space. Remember to account for any lip or hardware inside the drawer.
Step 3: Choose the Right Organization Tools
Now that you know what you have, where it needs to go, and the dimensions you’re working with, it’s time to select the perfect tools. There’s a vast array of products designed to help with kitchen drawer organization. Choose wisely based on your items and your budget.
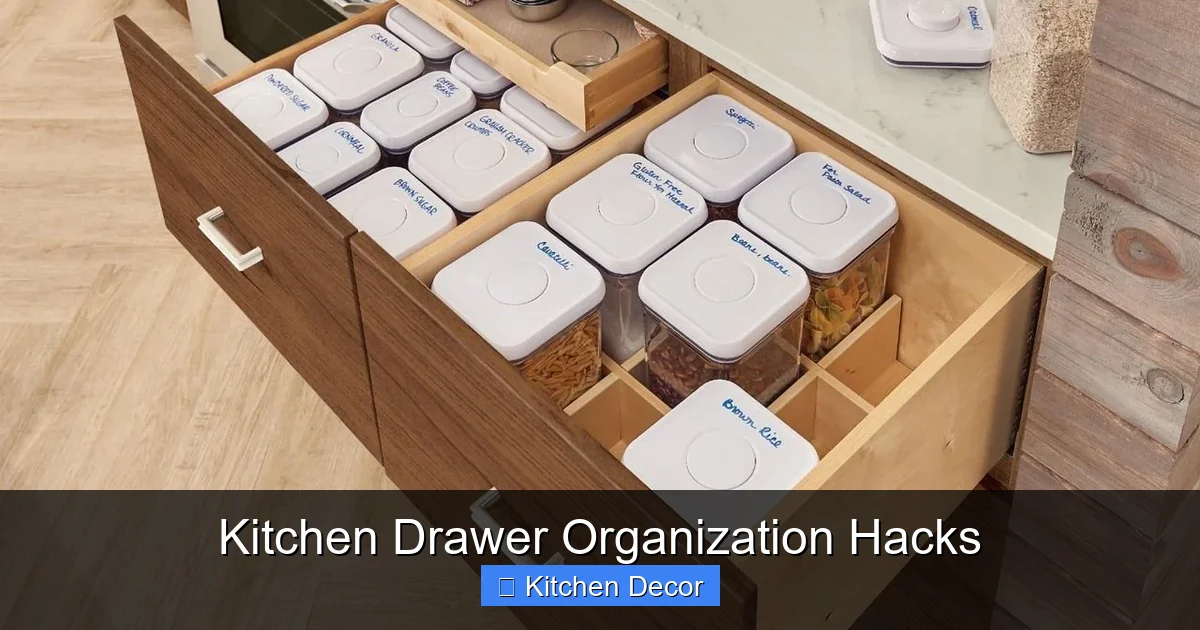
Visual guide about Kitchen Drawer Organization Hacks
Image source: cdn.apartmenttherapy.info
Drawer Dividers & Organizers
These are the backbone of most kitchen drawer organization hacks. They prevent items from sliding around and creating chaos.
- Fixed Dividers: Often made of bamboo, plastic, or wood, these come in standard sizes for cutlery or specific gadget slots. They offer a neat, permanent solution.
- Adjustable Dividers: These are fantastic for custom layouts. They usually feature spring-loaded ends that expand to fit the width or length of your drawer, allowing you to create custom compartments for varying items. They are perfect for utensils, bakeware, or linens.
- Tiered Inserts: Especially popular for spice drawers, these allow you to store multiple rows of jars, elevated so you can see the labels at the back. They are a game-changer for spice organization.
- Custom Built-ins: For a more premium look, some kitchens feature custom-fit wooden inserts for cutlery or knives. These offer a seamless, high-end feel.
Drawer Liners
While not strictly an organizer, liners protect your drawers from scratches, spills, and general wear and tear. They also provide a non-slip surface, helping to keep your organizers and their contents from shifting around. Choose washable, non-adhesive liners for easy cleaning and repositioning.
Small Containers & Bins
For smaller items that might get lost in larger compartments, individual small containers or bins are invaluable. Think about organizing:
- Batteries
- Rubber bands
- Pens and markers
- Small clips or ties
- Loose sprinkles or food coloring
- Wine stoppers or bottle openers
Look for modular sets that fit together like puzzle pieces, allowing you to create custom configurations within your drawer.
Tension Rods
These aren’t just for curtains! Small tension rods can be incredibly versatile for kitchen drawer organization. Use them:
- To create vertical dividers for storing cutting boards or baking sheets on their sides in deep drawers.
- To separate lids from pots in deep pot drawers.
- To create custom compartments in a utility drawer.
Magnetic Strips
While often mounted on walls for knives, smaller magnetic strips can be installed inside a shallow drawer. This is an excellent hack for:
- Storing a knife set securely and visibly.
- Keeping small metal measuring spoons or cooking tools from scattering.
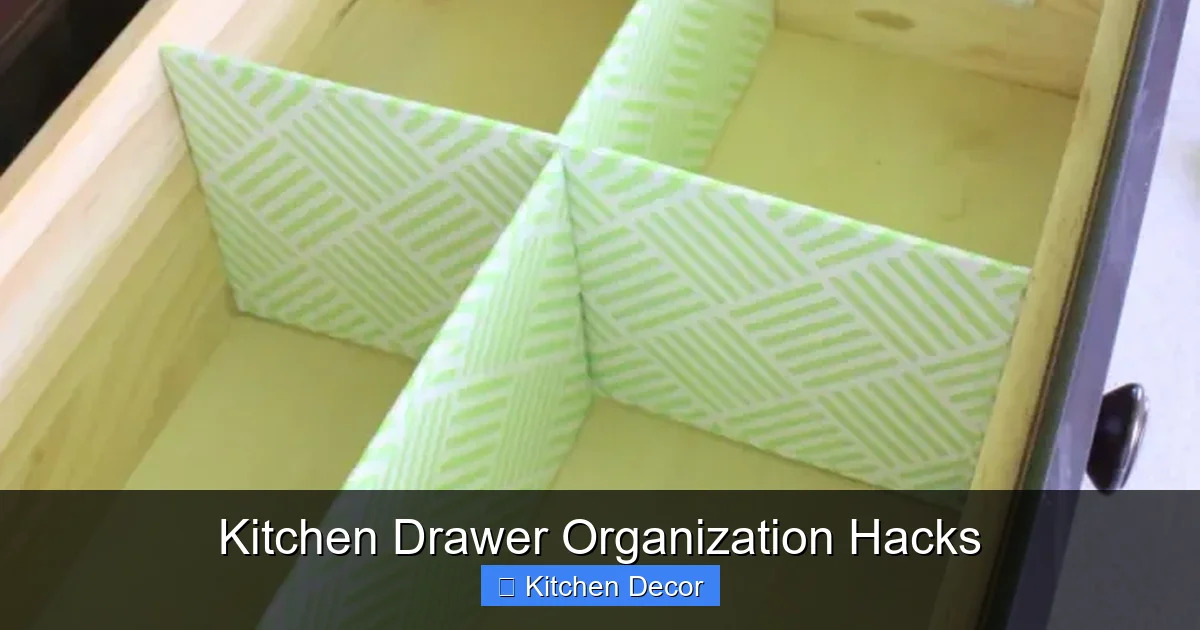
Step 4: Implement Your Organization Strategy
Now that you have your tools, it’s time to put everything back into your drawers using your new system. Remember to follow your zone strategy and place frequently used items in the most accessible spots.
Visual guide about Kitchen Drawer Organization Hacks
Image source: i.pinimg.com
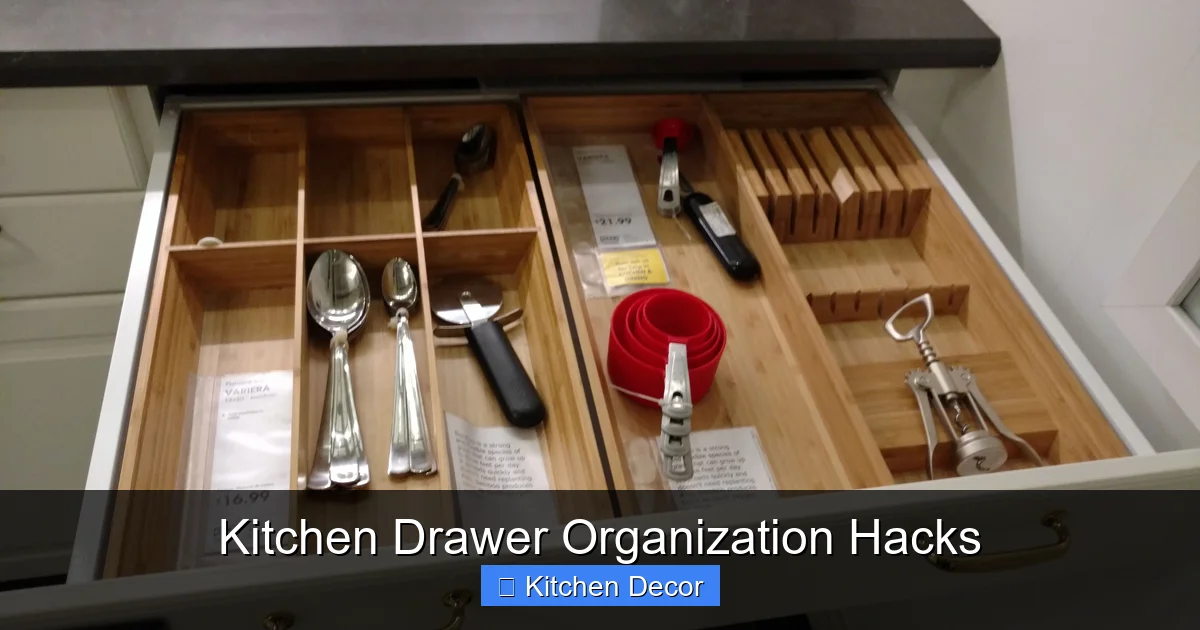
Cutlery Drawers (Flatware & Knives)
This is often the first drawer people tackle. Use a flatware organizer with dedicated slots for forks, knives, and spoons. If you have a separate set of steak knives or specialty knives, consider a knife block insert that safely stores blades horizontally within the drawer. This is a much safer option than letting sharp knives rattle around loose.
Utensil Drawers (Spatulas, Ladles, Tongs)
These items tend to be bulky and unwieldy. Deep, adjustable drawer dividers work best here. Group similar items together: all spatulas in one section, all ladles in another. Consider storing longer items diagonally if your drawer isn’t quite long enough, or using a two-tiered organizer if your drawer is very deep, to stack shorter items underneath.
Gadget Drawers (Can Openers, Peelers, Whisks)
This is where small bins and modular organizers shine. Create individual compartments for each type of gadget. Think about grouping them by function (e.g., all baking gadgets together, all prep gadgets together). Don’t be afraid to stack smaller, flatter items if they won’t get lost or damage each other.
Spice Drawers
A well-organized spice drawer is a joy. The best kitchen drawer organization hacks for spices involve making labels visible:
- Tiered Inserts: As mentioned, these are perfect for keeping spice jars angled so you can see their labels.
- In-Drawer Spice Racks: These are custom-made trays with sloped sections designed to hold spice jars flat, making all labels visible at a glance.
- Labeling: No matter how you store them, ensure the tops of your spice jars are clearly labeled if you’re storing them flat, or the front labels are visible if angled.
Organize spices alphabetically or by cuisine type for quick retrieval.
Linen/Towel Drawers
If you keep dishcloths, hand towels, or placemats in a drawer, folding them neatly is essential. Use the KonMari folding method (folding vertically so they stand up) to save space and make every item visible. Adjustable dividers or small bins can help keep different sizes or types of linens separated.
Junk Drawers (The “Utility” Drawer)
Every kitchen seems to have one. The trick to organizing the junk drawer is to embrace its purpose as a utility drawer, but give everything a home. Use a multi-compartment tray or a collection of small, modular bins. Designate sections for:
- Batteries
- Pens/pencils
- Small tools (screwdriver, tape measure)
- Rubber bands/twist ties
- Chargers or small cables
- A small notepad
Resist the urge to just toss things in. If it doesn’t fit in a designated spot, it likely doesn’t belong in that drawer.
Kids’ Zone Drawers
If you have kids and want them to be able to help themselves, dedicate a lower, easily accessible drawer for their plates, cups, or snacks. Use sturdy, simple dividers to keep their items separate and easy for little hands to reach and put away. This empowers them and lightens your load.
Step 5: Maintain Your Organized Drawers
The biggest challenge after organizing is keeping it that way. Regular maintenance is key to long-term kitchen drawer organization success.
A Place for Everything
The golden rule: “A place for everything, and everything in its place.” Once you’ve established your system, make it a habit to put items back in their designated spots immediately after use or after unloading the dishwasher. This small effort prevents clutter from accumulating.
Regular Mini-Purges
Set a schedule for quick check-ins. Once a month or every few months, open each drawer and do a speedy re-evaluation. Are there new items that don’t belong? Are any items broken or unused? It only takes a few minutes to course-correct before small messes become big problems.
Involve the Family
If others use the kitchen, communicate your new system. Explain where things belong. Visual cues, like drawer labels, can be helpful initially. When everyone understands and participates, maintaining kitchen drawer organization becomes much easier.
Troubleshooting Common Drawer Dilemmas
Even with the best intentions, you might encounter some common challenges.
Limited Drawer Space
If your kitchen has very few or very small drawers, you’ll need to be extra creative.
- Vertical Storage: Maximize cabinets with vertical dividers for platters or baking sheets.
- Wall Storage: Use magnetic knife strips on walls, or hang utensils from a rail.
- Countertop Solutions: A decorative utensil crock can free up a drawer.
- Multi-functional Tools: Invest in items that serve multiple purposes to reduce overall inventory.
Awkwardly Sized Items
Some kitchen gadgets just don’t fit neatly into standard organizers.
- Custom Dividers: Use adjustable dividers to create a custom-sized slot for that extra-long rolling pin or specific whisk.
- Deep Drawers for Bulky Items: Designate one deep drawer for large, bulky items like food processor attachments or immersion blenders. Use tension rods or stackable bins to keep accessories organized around them.
- Consider Cabinets: If an item truly won’t fit a drawer, it might belong in a cabinet or pantry.
Drawers That Don’t Stay Organized
If your drawers quickly revert to chaos, revisit Step 2.
- Re-assess Habits: Is the current organization truly intuitive for how you cook and move? Maybe the flatware drawer is too far from the dishwasher, or your most-used spatula is in an inconvenient spot. Don’t be afraid to rearrange.
- Wrong Tools: Are your dividers too flimsy? Do items slip underneath them? Invest in more robust or better-fitting organizers.
- Too Much Stuff: Sometimes, despite the purge, you still have too many items for the space. Revisit Step 1 and be even more ruthless.
Conclusion
Achieving perfectly organized kitchen drawers is a game-changer for any home cook. It reduces stress, saves time, and makes your kitchen a more enjoyable place to be. By following these kitchen drawer organization hacks – from the initial declutter to strategic placement and ongoing maintenance – you’ll create a system that works for you. No more rummaging, no more frustration. Just a beautiful, functional kitchen where everything is exactly where it should be. Happy organizing!