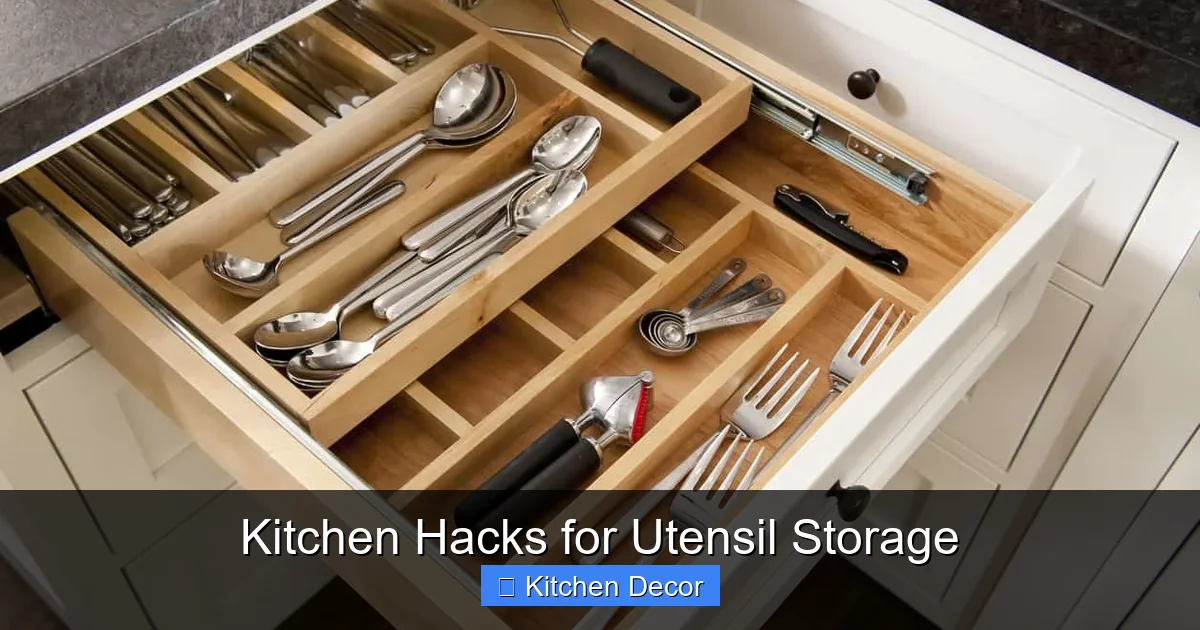
Tired of messy drawers and cluttered counters? This guide unveils effective kitchen hacks for utensil storage, offering practical solutions to organize your cooking tools. Learn to maximize space using drawer dividers, wall mounts, and creative DIYs, transforming your kitchen into a functional and beautiful space. Achieve a streamlined, stress-free cooking environment with these smart storage strategies.
Kitchen Hacks for Utensil Storage
Picture this: You’re in the middle of cooking your favorite meal. You need a spatula, but your utensil drawer is a chaotic jumble. Spoons, whisks, and ladles are all tangled together. Or maybe your countertops are covered in utensil crocks, leaving little room for actual food prep. Sound familiar?
If your kitchen feels more like a battlefield than a culinary haven, don’t worry! You’re not alone, and help is here. This comprehensive guide will show you how to transform your kitchen from cluttered to organized with clever and practical kitchen hacks for utensil storage. We’re talking about smart solutions that not only bring order but also add a touch of style to your space.
You’ll discover a world of possibilities, from simple drawer tricks to ingenious vertical storage and even creative DIY projects. Our goal is to make your kitchen more functional, more beautiful, and a joy to cook in. Get ready to declutter, streamline, and find a perfect home for every single cooking tool you own. Let’s dive into the best kitchen hacks for utensil storage!
Key Takeaways
- Start with a Purge: Before organizing, always declutter. Get rid of broken, unused, or duplicate utensils to free up valuable space and make subsequent organization efforts more effective.
- Maximize Drawer Space: Utilize adjustable dividers, custom inserts, and tiered organizers to sort and separate utensils within drawers. This prevents clutter and makes finding items much easier.
- Embrace Vertical Storage: Walls and cabinet doors offer untapped potential. Implement magnetic strips, pegboards, rail systems, or over-the-door organizers to free up counter and drawer space.
- Strategic Countertop Solutions: Keep frequently used utensils within easy reach using decorative crocks, rotating caddies, or tool turners. Choose options that complement your kitchen decor.
- Unlock Cabinet Potential: Don’t forget the inside of cabinet doors and undershelf spaces. Adhesive hooks, pull-out organizers, and undershelf baskets can provide clever spots for less-used items.
- Get Creative with DIY: Simple, budget-friendly DIY projects like PVC pipe inserts or repurposed containers can offer customized storage solutions tailored to your specific needs and kitchen layout.
- Maintain with Good Habits: Consistency is key. Implement routines like a “one in, one out” rule and regular mini-purges to keep your utensil storage organized and functional long-term.
Step 1: The Essential First Step – Decluttering Your Utensil Collection
Before you even think about buying a single organizer, the most crucial step is to declutter. Trying to organize too many items is like trying to fit a square peg in a round hole – it just won’t work efficiently. This step is about making space and recognizing what you truly need.
Empty Everything Out
Start by taking every single utensil out of your drawers, crocks, and any other storage spots. Lay them all out on a clean counter or table. Seeing everything you own in one place can be quite an eye-opener!
Sort and Categorize
Now, go through each item. Create piles:
- Keep: Utensils you use regularly and love.
- Donate/Give Away: Items in good condition that you no longer use, or duplicates you don’t need.
- Trash/Recycle: Broken, rusted, or truly unusable items.
Be honest with yourself. Do you really need four spatulas? When was the last time you used that melon baller? Less is often more when it comes to effective kitchen hacks for utensil storage.
Purge with Purpose
The goal is to keep only what you truly need and use. This makes finding items easier and ensures that your storage solutions aren’t overwhelmed from day one. A good rule of thumb: if you haven’t used it in a year and it doesn’t hold significant sentimental value, consider letting it go.
Step 2: Conquer Your Drawers with Smart Inserts and Dividers
Drawers are often the first place utensils end up, and they can quickly become a tangled mess. But with the right approach, they can be incredibly efficient. These kitchen hacks for utensil storage focus on bringing order to the drawer chaos.
Visual guide about Kitchen Hacks for Utensil Storage
Image source: cdn.homedit.com
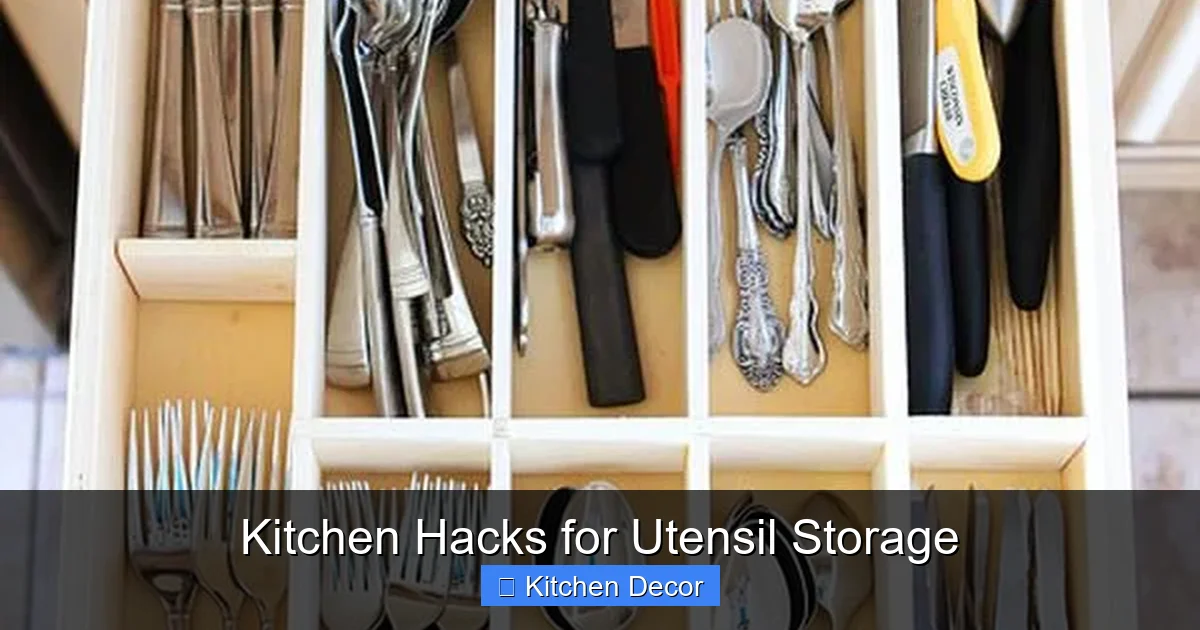
Adjustable Drawer Dividers
These are a game-changer! Adjustable dividers come in various materials (bamboo, plastic, metal) and can expand or contract to fit your drawer width. They allow you to create custom compartments for different types of utensils. Imagine: one section for serving spoons, another for spatulas, and a third for whisks. No more rummaging!
Custom DIY Inserts
For a truly tailored fit, consider making your own drawer inserts. You can use thin plywood, foam core, or even sturdy cardboard covered with decorative paper. Measure your drawer precisely and design compartments for each utensil category. This is one of the most effective kitchen hacks for utensil storage for oddly shaped items or unique collections.
Tiered Drawer Organizers
If you have deep drawers, tiered organizers are fantastic for maximizing vertical space. They provide multiple levels, allowing you to store more items while keeping them visible and accessible. These are perfect for smaller gadgets, measuring spoons, or cutlery that you want to keep separate from larger cooking tools.
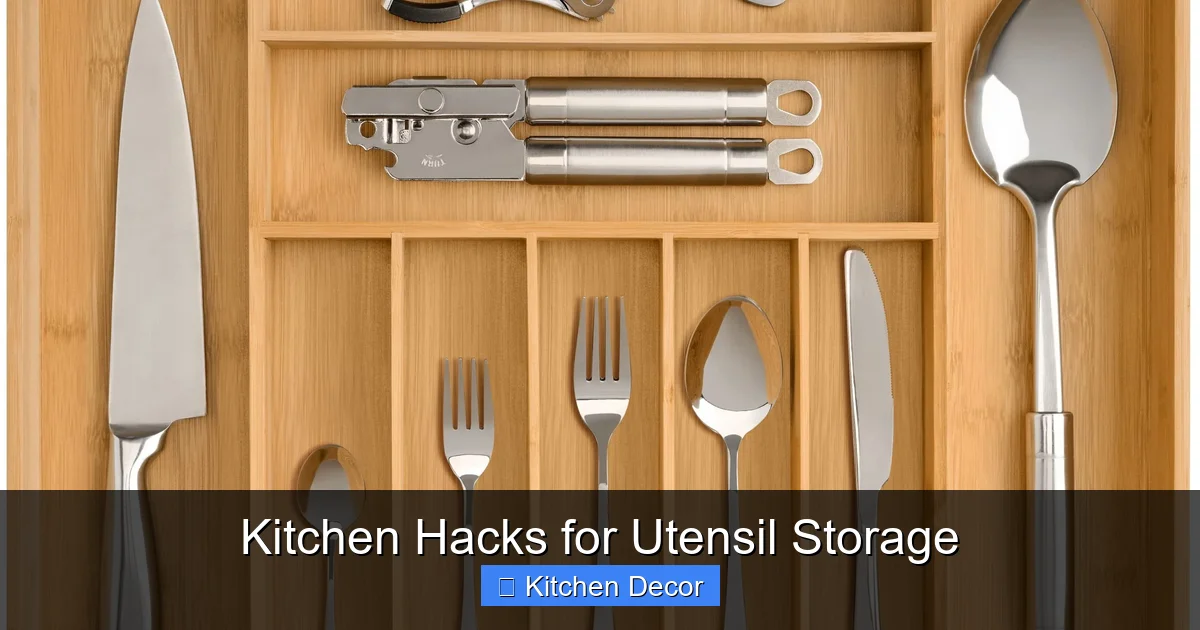
Silverware Trays Reimagined
Don’t just think of silverware trays for forks and knives. Many broader trays with multiple compartments can be repurposed for smaller cooking utensils like can openers, bottle openers, corn holders, or even pastry brushes. Look for trays with varying compartment sizes to accommodate different items.
Step 3: Embrace Vertical Space with Wall-Mounted Solutions
When counter and drawer space is limited, look up! Your walls are prime real estate for expanding your utensil storage. Vertical kitchen hacks for utensil storage are both practical and can be very stylish.
Visual guide about Kitchen Hacks for Utensil Storage
Image source: m.media-amazon.com
Magnetic Knife Strips (for Metal Utensils Too!)
While primarily for knives, strong magnetic strips are excellent for holding any metal utensil. Think metal spatulas, whisks, ladles, or even scissors. Mounted on a backsplash or an empty wall space, they keep items visible, within easy reach, and free up drawer space. Plus, they look sleek and modern.
Pegboards for Ultimate Customization
A pegboard system is incredibly versatile. You can install a large pegboard section on an empty wall and use various hooks, baskets, and shelves to organize all sorts of utensils. It’s fully customizable, allowing you to change the layout as your needs evolve. This is a favorite among kitchen hacks for utensil storage for those who love flexibility and a touch of industrial chic.
Rail Systems with S-Hooks
Install a simple rail or bar on your kitchen wall, perhaps above your stove or sink. Then, use S-hooks to hang utensils with holes in their handles – spatulas, ladles, strainers, and even oven mitts. This keeps essential tools right where you need them and adds a professional, chef-like feel to your kitchen.
Wall-Mounted Caddies and Bins
Small wall-mounted caddies or bins are perfect for storing items that don’t have hanging loops, such as wooden spoons, tongs, or even smaller cutting boards. They come in various styles, from rustic to contemporary, and can add a decorative element while serving a practical purpose.
Step 4: Smart Countertop Storage for Easy Access
For your most frequently used utensils, keeping them on the countertop makes perfect sense. The trick is to do it smartly and stylishly, so they enhance your kitchen, rather than clutter it. These kitchen hacks for utensil storage focus on both form and function.
Visual guide about Kitchen Hacks for Utensil Storage
Image source: rev-a-shelf.com
Decorative Utensil Crocks
A classic for a reason! A beautiful crock or canister can hold a collection of your go-to wooden spoons, spatulas, and whisks. Choose one that matches your kitchen decor – ceramic, stainless steel, marble, or even a repurposed antique jug. The key is not to overfill it; keep it to the essentials you reach for daily.
Rotating Utensil Caddies
If you have many frequently used tools, a rotating caddy is a fantastic solution. It often has multiple compartments, allowing you to spin it to find exactly what you need without digging. This keeps a larger collection tidy in one compact footprint.
Tool Turners and Stands
Some utensil sets come with their own stands, which can be a neat and uniform way to store specific tools. There are also stands designed to hold a variety of tools upright, often with a small footprint. These are particularly good for delicate tools or those with unique shapes that don’t fit well in a standard crock.
Step 5: Unlock Hidden Potential – Cabinet Door & Interior Storage
Don’t overlook the inside of your cabinet doors or the unused space within your cabinets. These often-forgotten areas offer fantastic opportunities for smart kitchen hacks for utensil storage.
Over-the-Door Organizers
These are not just for bathrooms! Slim, over-the-door organizers can hang on the inside of a pantry or cabinet door. They’re excellent for small, lightweight utensils like measuring spoons, cookie cutters, or even smaller spatulas. Look for wire baskets or mesh pockets.
Adhesive Hooks on Cabinet Interiors
Simple adhesive hooks can be a minimalist’s dream. Stick them to the inside of a cabinet door to hang measuring cups, oven mitts, or any utensil with a loop. This keeps them out of sight but incredibly accessible. Ensure the adhesive is strong enough for the weight of your items.
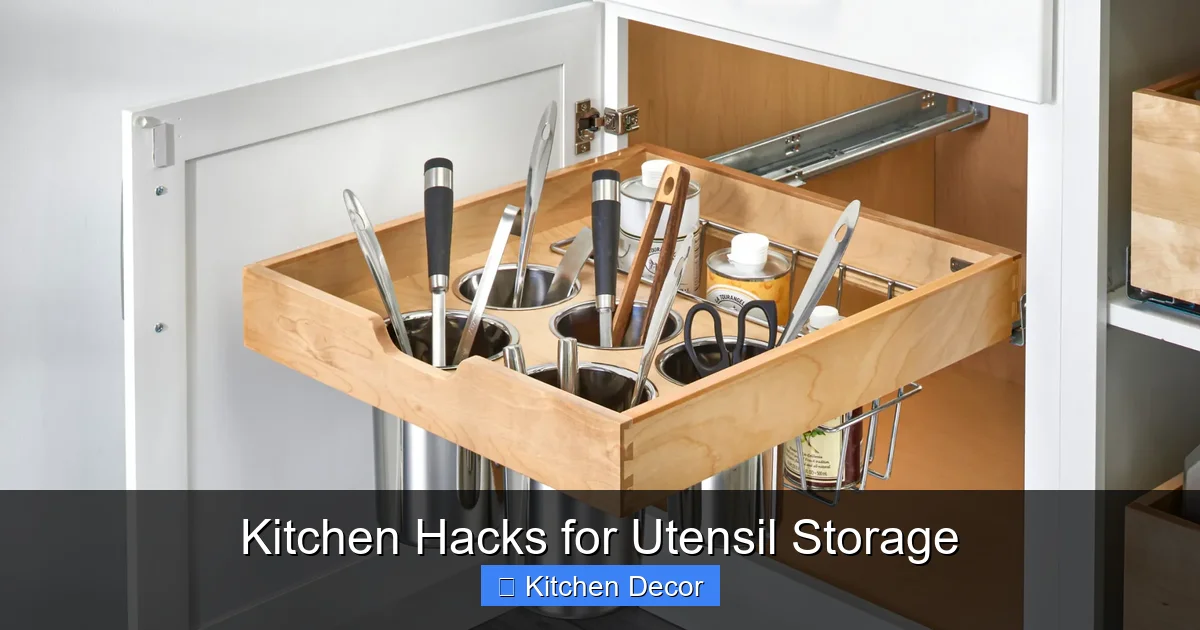
Pull-Out Organizers and Baskets
For deeper base cabinets, pull-out organizers or sliding baskets can transform a jumbled space into an efficient one. You can categorize and store larger utensils, pot lids, or even cutting boards vertically, making them easy to retrieve without rummaging through the entire cabinet.
Undershelf Baskets
These clever baskets clip onto the underside of existing shelves, creating instant additional storage space. They’re perfect for flat items like baking sheets, cooling racks, or even a few seldom-used, lightweight utensils that you want to keep separate.
Step 6: Get Creative with DIY and Upcycled Storage Ideas
You don’t need to spend a lot of money to get organized. Many effective kitchen hacks for utensil storage can be created with items you already have or inexpensive materials. Embrace your inner DIY enthusiast!
PVC Pipe Drawer Organizers
Cut PVC pipes into sections of varying lengths. Arrange them in your drawer to create individual compartments for each utensil. This is especially good for long, skinny items like rolling pins, wine openers, or specific baking tools. You can glue them together or just let them sit freely.
Repurposed Cans and Jars
Clean tin cans (like coffee cans) or sturdy glass jars (mason jars, old pickle jars) can be transformed into charming utensil holders. Decorate them with paint, fabric, or twine to match your kitchen style. They’re perfect for holding sets of wooden spoons, serving spoons, or whisks on your counter or inside a cabinet.
Cereal Box Dividers
Don’t throw away those empty cereal boxes! Cut them into desired shapes and sizes to create custom drawer dividers. Cover them with contact paper or decorative wrapping paper for a neat finish. This is an incredibly budget-friendly way to organize a messy drawer quickly.
Custom Wooden Blocks
If you’re handy, carve slots into a wooden block to create a custom knife or utensil holder. This can be a beautiful and functional addition to your countertop or inside a drawer. It’s a more advanced DIY but offers a highly personalized solution.
Step 7: Optimize for Specialty Utensils
Some utensils just don’t fit neatly into standard categories. These kitchen hacks for utensil storage address those unique items that need a special home.
Knife Blocks and Sheaths
For knives, safety and blade protection are paramount. A traditional knife block on the counter, an in-drawer knife block, or individual blade sheaths will keep them safe and sharp. Never toss loose knives into a drawer where they can be a hazard.
Baking Tool Holders
If you’re a baker, you likely have specialty spatulas, cookie scoops, dough cutters, and piping bags. A dedicated clear bin or a small drawer organizer just for baking tools keeps them separate and easy to find when inspiration strikes.
Gadget Bins
For those quirky, less-frequently-used gadgets like apple corers, garlic presses, or cherry pitters, a small, clear bin inside a cabinet or pantry works wonders. This keeps them contained without taking up prime real estate in your main utensil drawers.
Troubleshooting Common Utensil Storage Challenges
Every kitchen has its quirks. Here are solutions to common problems you might encounter while implementing these kitchen hacks for utensil storage.
Limited Counter Space
If your counters are already packed, prioritize vertical storage solutions like wall-mounted rails, magnetic strips, or pegboards. Also, consider inside-cabinet door storage or pull-out organizers for base cabinets to keep items out of sight.
Shallow Drawers
Shallow drawers make it hard to store larger utensils flat. In this case, focus on vertical drawer inserts (like PVC pipes or custom wooden blocks that hold items upright). If that’s not possible, move larger utensils to wall-mounted systems or countertop crocks, using shallow drawers for smaller, flatter items.
Awkwardly Shaped Utensils
Utensils like potato mashers, pizza cutters, or large whisks can be tricky. Custom DIY drawer inserts are excellent here, allowing you to create a specific cutout for each item. Alternatively, hang them on a pegboard or rail system, or group them in an oversized countertop crock.
Small Kitchens
Small kitchens benefit most from maximizing every inch. Combine vertical solutions (walls, cabinet doors) with multi-functional items (e.g., a cutting board that doubles as a knife block). Think “out-of-the-box” – perhaps a rolling cart with utensil holders on the side, or even dedicated pantry space if available.
Maintaining Your Organized Kitchen
Organization isn’t a one-time event; it’s a habit. To keep your kitchen tidy and functional, integrate these practices into your routine.
The “One In, One Out” Rule
Whenever you buy a new utensil, commit to getting rid of an old one. This prevents clutter from accumulating and ensures your storage solutions remain effective.
Regular Mini-Purges
Once or twice a year, quickly review your utensil collection. Check for any broken items or things you haven’t used. This keeps your system lean and efficient.
Assign a Home for Everything
After using a utensil, always return it to its designated spot. This simple habit prevents items from migrating to the “miscellaneous” drawer and keeps your system working smoothly.
Conclusion
Congratulations! You’ve just explored a comprehensive guide to transforming your kitchen with clever kitchen hacks for utensil storage. From decluttering and conquering unruly drawers to embracing vertical space and getting creative with DIY, you now have a wealth of ideas to implement.
Imagine a kitchen where every utensil has its place, where cooking is more efficient, and where your countertops are clear and inviting. It’s not just about tidiness; it’s about creating a more enjoyable and stress-free cooking environment. Start small, tackle one area at a time, and don’t be afraid to experiment with different solutions.
With a little effort and these smart strategies, you can achieve the organized and beautiful kitchen you’ve always dreamed of. Happy organizing!