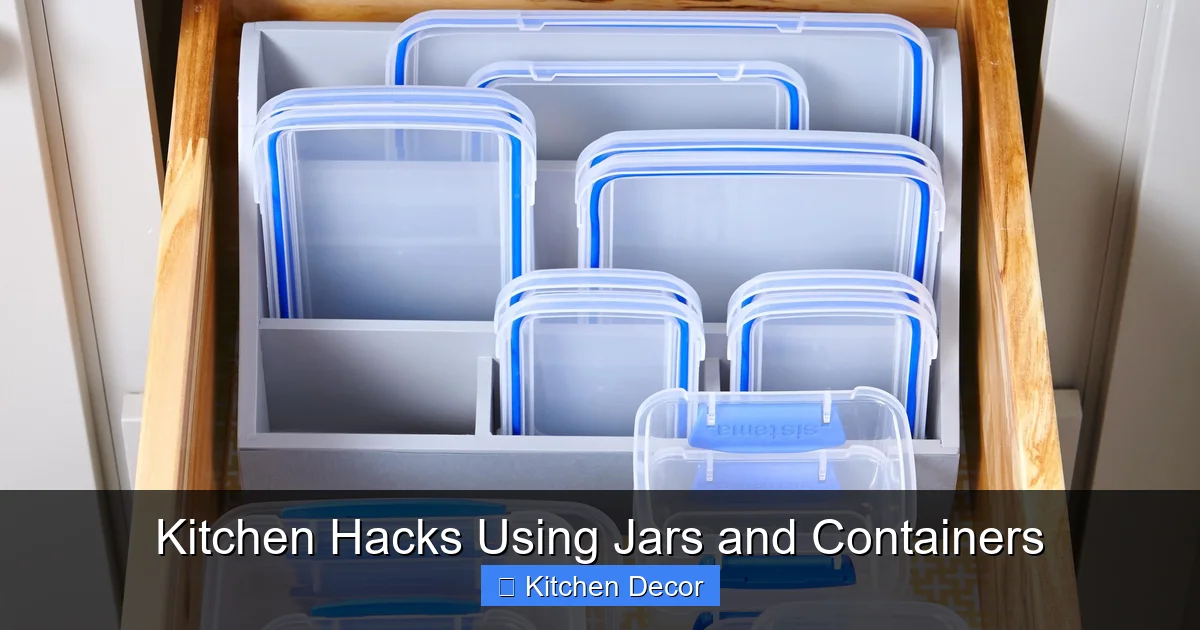
Discover clever kitchen hacks using jars and containers to revolutionize your space. From decluttering pantries to styling countertops, learn how these simple tools can bring order, efficiency, and a touch of elegance to your home. Embrace smarter storage and enjoy a more functional and beautiful kitchen with these easy-to-implement organization solutions.
Kitchen Hacks Using Jars and Containers
Do you dream of a kitchen that feels calm, organized, and effortlessly stylish? Are you tired of rummaging through cluttered cabinets or searching for that elusive spice jar? You’re in the right place!
Your kitchen is the heart of your home. It should be a place of joy, not stress. The good news is, achieving that dream kitchen is simpler than you think. You don’t need a massive renovation or expensive custom solutions. Often, the best answers are already hiding in plain sight: jars and containers!
In this comprehensive guide, we’ll dive deep into ingenious kitchen hacks using jars and containers. We’ll explore how these humble items can transform your pantry, revolutionize your fridge, declutter your countertops, and even add a touch of personal flair to your kitchen decor. Get ready to discover practical, budget-friendly ways to organize, store, and beautify every corner of your culinary space. Let’s make your kitchen work smarter, look better, and feel wonderfully serene.
Key Takeaways
- Embrace Versatility: Jars and containers are not just for storage; they are powerful tools for organization, decoration, and even DIY projects across your entire kitchen.
- Master Pantry Perfection: Use clear jars to store dry goods, spices, and baking supplies. This keeps items fresh, makes inventory easy, and creates a visually appealing, clutter-free pantry.
- Optimize Fridge & Freezer Space: Repurpose containers for meal prep, leftovers, and sorted produce. This reduces waste, streamlines cooking, and maximizes every inch of cold storage.
- Elevate Countertop Clarity: Utilize decorative jars for utensils, coffee stations, or small appliance accessories. This keeps frequently used items accessible yet tidy, enhancing kitchen decor.
- Unlock Creative Repurposing: Go beyond traditional storage. Jars are perfect for infused oils, small herb gardens, homemade gifts, or organizing cleaning supplies, adding personal touches.
- Add Aesthetic Appeal: Strategic use of uniform jars, elegant labeling, and thoughtful arrangements can transform mundane storage into charming kitchen decor, especially on open shelving.
- Maintain with Ease: Implement simple cleaning routines and smart organizational habits. This ensures your jar and container hacks remain effective, beautiful, and sustainable long-term.
The Power of Jars and Containers in Your Kitchen
Before we jump into specific hacks, let’s appreciate why jars and containers are such game-changers. They offer incredible versatility and a host of benefits:
- Visibility: Clear jars let you see exactly what you have. No more buying duplicates!
- Freshness: Airtight seals keep food fresh longer, reducing waste.
- Organization: Uniform containers create a cohesive, tidy look. They make stacking and storage easier.
- Space-Saving: Many containers are designed to stack, maximizing vertical space.
- Sustainability: Reusing glass jars is an eco-friendly choice.
- Aesthetics: Beautiful jars and containers can elevate your kitchen’s style. They turn everyday items into decorative elements.
From simple glass canning jars to sleek plastic containers, each type has its place. Choose what works best for your needs and your budget. Remember, the goal is functionality meets beauty!
Mastering Pantry Organization with Jars
Your pantry can quickly become a chaotic mess. Jars are your secret weapon for a neat, efficient, and beautiful pantry. These kitchen hacks using jars and containers will transform your shelves.

Visual guide about Kitchen Hacks Using Jars and Containers
Image source: i2.wp.com
Organize Dry Goods
This is where jars truly shine. Think about flour, sugar, pasta, rice, lentils, oats, and cereals. Transferring them from their original packaging to clear, airtight jars makes a huge difference.
- Step 1: Choose Your Jars. Opt for clear glass or BPA-free plastic jars with airtight lids. Square or rectangular containers often fit better on shelves than round ones.
- Step 2: Transfer and Label. Empty your dry goods into the chosen jars. Use attractive labels to clearly identify the contents and expiration dates. Chalkboard labels or simple printed labels work wonderfully for kitchen decor.
- Step 3: Arrange by Category. Group similar items together. All your baking supplies in one area, all your pasta in another. This makes finding ingredients a breeze.
- Tip: Keep a measuring scoop inside larger jars for easy access to flour or sugar.
Streamline Spices and Herbs
Small jars are perfect for spices. This not only looks great but also keeps your spices fresh and easy to find.
- Step 1: Decant Spices. Transfer spices from their original bags or containers into uniform spice jars. Small glass jars with shaker tops are ideal.
- Step 2: Create a System. Arrange them alphabetically, by frequency of use, or by cuisine. Consider a tiered spice rack or magnetic strips for easy access.
- Step 3: Label Clearly. Labels on the top of the lids are great if you store them in a drawer. Side labels work for shelves.
- Tip: Buy spices in bulk to save money. Store the excess in a cool, dark place in larger, airtight containers, and refill your smaller jars as needed.
Tidy Up Snacks and Baking Supplies
Snack bags can quickly make shelves look messy. Baking supplies like chocolate chips, sprinkles, and nuts also benefit from jar storage.
- Step 1: Use Varied Sizes. Keep larger containers for bulk snacks like pretzels or granola, and smaller ones for individual portions or baking ingredients.
- Step 2: Group and Stack. Use stackable containers for items like protein bars or tea bags. Stack them vertically to maximize space.
- Step 3: Create Grab-and-Go Stations. Dedicate a bin or a set of jars for kid-friendly snacks. This empowers everyone to find what they need without tearing apart the pantry.
Revolutionizing Fridge and Freezer Storage
The fridge and freezer are often overlooked areas for organization. But with smart kitchen hacks using jars and containers, you can extend food freshness and make meal prep a joy.

Visual guide about Kitchen Hacks Using Jars and Containers
Image source: m.media-amazon.com
Prepped Meals and Leftovers
Clear containers are essential for managing prepped food and leftovers. They help you see what needs to be eaten, reducing food waste.
- Step 1: Invest in Quality Containers. Choose glass containers with airtight lids for maximum durability and visibility. They are oven-safe, microwave-safe (without lid), and look great.
- Step 2: Portion and Store. After cooking, immediately portion leftovers into individual containers. This makes healthy eating easier during busy weekdays.
- Step 3: Label and Date. Always label your containers with the contents and the date they were stored. This is crucial for food safety.
- Tip: Stackable containers are a must for fridge organization. Create rows for different types of food.
Organize Produce and Herbs
Keep your fruits, vegetables, and herbs fresh longer with smart container use.
- Step 1: Wash and Chop. As soon as you bring groceries home, wash and chop veggies like carrots, celery, and bell peppers. Store them in airtight containers with a paper towel at the bottom to absorb moisture.
- Step 2: Herb Hydration. Store herbs like parsley and cilantro upright in a small jar with an inch of water at the bottom, just like a bouquet of flowers. Cover loosely with a plastic bag.
- Step 3: Berry Boxes. For berries, line a container with a paper towel and gently place clean, dry berries inside. This helps prevent mold.
Freezer-Friendly Containers
Freezer organization is key to preventing forgotten food and mysterious freezer burn.
- Step 1: Choose Freezer-Safe. Opt for containers specifically designed for freezing. Glass jars with straight sides are great for liquids, as they allow for expansion. Leave headspace!
- Step 2: Batch Cook and Freeze. Make larger batches of soups, stews, or pasta sauces. Freeze them in individual portions in containers.
- Step 3: Flat Freezing for Space. For items like ground meat or purees, seal them in freezer bags and lay them flat to freeze. Once solid, you can store them vertically like files.
Elevating Countertop and Drawer Organization
Your countertops are prime real estate. Keep them clear and beautiful with strategic jar and container placement. These are ideal kitchen hacks using jars and containers to enhance your kitchen decor.

Visual guide about Kitchen Hacks Using Jars and Containers
Image source: m.media-amazon.com
Utensil Crocks and Holders
Decorative jars are perfect for holding frequently used kitchen utensils. This keeps them handy and adds visual appeal.
- Step 1: Select Stylish Jars. Choose jars that match your kitchen decor. Mason jars offer a rustic look. Ceramic crocks or sleek metallic containers provide a modern touch.
- Step 2: Group by Function. Keep cooking spatulas and ladles in one jar, whisks and measuring spoons in another.
- Step 3: Position Thoughtfully. Place them near your stove or main prep area for convenience.
Coffee and Tea Stations
Create an inviting coffee or tea station using jars for an organized and stylish setup.
- Step 1: Store Essentials. Use jars for coffee beans, ground coffee, tea bags, sugar, and stirrers.
- Step 2: Add Accessories. A small tray can hold your jars, mugs, and a creamer. This keeps everything contained and neat.
- Tip: Choose jars with different textures or colors to add visual interest to your coffee bar decor.
Small Appliance Accessories
Mixer attachments, blender accessories, or even cooking gadget parts can be neatly stored.
- Step 1: Contain Loose Parts. Use clear, stackable containers or baskets to hold smaller components for appliances.
- Step 2: Label for Quick Finds. Clearly label each container so you know exactly what belongs where.
Drawer Dividers and Organizers
Containers aren’t just for countertops. They are fantastic inside drawers too.
- Step 1: Customize Your Drawers. Use small containers, especially repurposed takeout containers or small jars, to create custom dividers within your drawers.
- Step 2: Sort by Item. Dedicate a container for rubber bands, one for twist ties, one for batteries, and one for small tools.
- Tip: Use non-slip mats under containers to keep them from sliding around when you open and close the drawer.
Creative Repurposing and DIY Jar Hacks
Jars are incredibly versatile. Beyond standard food storage, they can become tools for creativity and sustainable living. These kitchen hacks using jars and containers are truly innovative.
Infused Oils and Vinegars
Make your own gourmet oils and vinegars. They are perfect for cooking or as beautiful, homemade gifts.
- Step 1: Choose Fresh Ingredients. Combine olive oil or white vinegar with fresh herbs (rosemary, thyme), garlic, chili flakes, or citrus peel.
- Step 2: Infuse and Store. Place ingredients in a clean jar, fill with oil or vinegar, and let it infuse for a week or two in a cool, dark place.
- Step 3: Strain and Label. Strain out the solids, then transfer to a decorative bottle or jar. Label with the contents and date.
Indoor Herb Gardens
Brighten your kitchen with a mini herb garden. Jars make charming planters.
- Step 1: Select Herbs. Small herbs like basil, mint, or chives thrive indoors.
- Step 2: Prepare Jars. Place a layer of pebbles at the bottom for drainage. Add potting soil and plant your herbs.
- Step 3: Arrange and Water. Place your jar garden on a sunny windowsill. Water regularly but sparingly.
- Tip: Consider painting or decorating the jars to match your kitchen decor.
Gifts in a Jar
Homemade gifts presented in jars are always a hit. This shows thoughtfulness and creativity.
- Step 1: Choose a Recipe. Layer dry ingredients for cookies, brownies, or soup mixes in a jar.
- Step 2: Add Instructions. Attach a tag with the recipe and cooking instructions.
- Step 3: Decorate. Tie a ribbon, add a fabric cover, or include a small utensil.
Cleaning Supply Storage
Keep your cleaning supplies organized and accessible, even under the sink.
- Step 1: Repurpose Containers. Use larger plastic containers or buckets to hold bottles of cleaner, sponges, and rags.
- Step 2: Create a Cleaning Caddy. A single container with a handle can become a portable cleaning caddy. Fill it with your most-used cleaning supplies.
- Step 3: DIY Cleaners. Store homemade cleaning solutions (like vinegar and water) in labeled spray bottles or jars.
Adding Style and Decor with Jars
Jars and containers aren’t just practical; they are powerful design elements. Integrate these kitchen hacks using jars and containers to boost your kitchen’s aesthetic appeal, aligning with “Kitchen Decor” category.
Labeling for Aesthetics
Uniform, attractive labels instantly elevate the look of your pantry or open shelving.
- Step 1: Choose a Style. Decide on a labeling style: handwritten chalkboard, elegant script, or minimalist printed tags.
- Step 2: Apply Consistently. Ensure all labels are applied at the same height or in a similar fashion for a cohesive look.
- Tip: Use waterproof labels for items that might be handled often or exposed to moisture.
Themed Displays
Create visual interest by grouping jars into themed displays.
- Step 1: Seasonal Decor. Fill clear jars with seasonal items like colorful candies, pinecones, or fairy lights.
- Step 2: Color Coordination. Group jars with contents of similar colors, or choose jars that complement your kitchen’s color scheme.
- Tip: Use a simple tray or a small wooden crate to contain your display, making it easy to move or clean around.
Open Shelving Showcase
Open shelving provides a perfect stage for beautifully organized jars.
- Step 1: Curate Your Collection. Display your most attractive jars filled with colorful ingredients like pasta, legumes, or spices.
- Step 2: Mix Textures. Combine glass jars with ceramic canisters or wooden containers for visual depth.
- Step 3: Maintain Tidiness. Open shelving demands consistent organization. Keep only the most presentable items on display.
Troubleshooting and Maintenance
Even the best organization systems need a little love to stay effective. Here are some tips for maintaining your kitchen hacks using jars and containers.
Staying Organized Long-Term
The initial setup is just the beginning. Long-term success requires ongoing effort.
- Routine Check-ins: Do a quick scan of your pantry and fridge once a week. Straighten items, re-label if needed, and make a note of anything running low.
- One In, One Out: When buying new jars or containers, try to repurpose or declutter an old one. This prevents accumulation.
- Adjust as Needed: Your needs will change. Don’t be afraid to reorganize or re-purpose jars if your storage requirements shift.
Cleaning and Care
Cleanliness is next to godliness, especially in the kitchen.
- Regular Washing: Wash jars thoroughly when refilling, or before repurposing. Dishwashers are great for glass.
- Drying: Ensure jars are completely dry before filling with dry goods to prevent moisture issues.
- Stain Removal: For stubborn food stains or odors, soak jars in a mixture of warm water and white vinegar, or baking soda.
Dealing with Mismatched Items
It’s okay if not every jar is perfectly uniform.
- Strategic Placement: Place mismatched items in less visible areas, like inside cabinets. Keep your most uniform or decorative items on open shelves.
- Unify with Labels: Even mismatched jars can look cohesive with consistent labeling.
- Group by Color: Grouping items by color or type can create visual order even with varied container styles.
Conclusion
You now have a complete toolkit for transforming your kitchen. Implementing these kitchen hacks using jars and containers will do more than just tidy your space. It will create a more efficient, enjoyable, and beautiful environment for cooking, eating, and gathering. From a perfectly organized pantry to a sparkling, clutter-free countertop, the benefits are endless.
Start small. Pick one area, like your spice rack or a single pantry shelf. Experience the immediate satisfaction of a beautifully organized space. Then, gradually expand your efforts. Remember, consistency and creativity are your best friends on this journey. Embrace the power of jars and containers, and watch your kitchen evolve into the functional and fabulous heart of your home you’ve always dreamed of!