
Transform your cooking haven with our essential Kitchen Space Management Checklist. Discover how to effectively declutter, organize, and maximize every corner of your kitchen, creating a more functional and enjoyable environment. This guide offers practical steps and smart solutions to conquer kitchen chaos, ensuring everything has its place for effortless cooking and entertaining.
Kitchen Space Management Checklist
Is your kitchen feeling more like a storage unit than a culinary sanctuary? Do you spend more time searching for ingredients or tools than actually cooking? You’re not alone! Many of us struggle with making the most of our kitchen space. But don’t worry, help is here!
This comprehensive kitchen space management checklist is designed to guide you through transforming your kitchen from chaotic to calm, from cluttered to brilliantly organized. We’ll cover everything from a grand purge to smart storage solutions and sustainable maintenance tips. By the end of this guide, you’ll have a clear, functional, and beautiful kitchen that inspires joy, not stress.
Get ready to roll up your sleeves and embark on a journey to a more organized and efficient kitchen. Let’s make every inch count!
Key Takeaways
- Declutter Ruthlessly: The first and most critical step is to empty your kitchen and sort items into keep, donate, or trash piles. Be honest about what you truly use.
- Zone Your Kitchen for Efficiency: Organize your kitchen into functional zones (prep, cooking, cleaning, storage). This minimizes movement and makes tasks smoother.
- Maximize Vertical Space: Look up! Utilize shelves, stackable organizers, and wall-mounted solutions to take advantage of every inch from floor to ceiling.
- Embrace Smart Containment: Use bins, baskets, and drawer dividers to group similar items and prevent clutter. Labeling is key for easy identification.
- Maintain Clear Countertops: Keep only essential, frequently used items on your counters. This creates a calm, spacious feel and makes cleaning easier.
- Implement Regular Maintenance: A successful kitchen space management checklist isn’t a one-time event. Schedule mini-declutters and reviews to keep your system working.
Step 1: The Grand Purge – Decluttering Your Kitchen
Before you can organize, you must declutter. This is arguably the most crucial step in any kitchen space management checklist. Think of it as hitting the reset button. It might seem daunting, but breaking it down makes it manageable.
Empty Everything Out
Start with one area, like a single cabinet, or go big and empty out all your cabinets, drawers, and pantry shelves. Seeing everything you own laid out can be a powerful motivator. It highlights duplicates, unused items, and things that simply don’t belong in the kitchen.
Sort into Categories (Keep, Donate/Sell, Trash)
As you empty, immediately sort items into three distinct piles or boxes:
- Keep: These are items you use regularly, love, and are in good condition.
- Donate/Sell: Items that are still functional but you no longer need or use. Think kitchen gadgets you’ve used once, extra serving dishes, or duplicate bakeware. Consider giving them a new life elsewhere.
- Trash: Broken items, expired food, rusty tools, stained containers without lids, or anything beyond repair. Be honest and let these go.
Practical Tip: Have a “Maybe” pile if you’re truly struggling, but try to limit it. Give yourself a deadline to make a final decision on those items, perhaps within a week.
Be Ruthless
This is where the magic happens. Ask yourself these questions for every item:
- When was the last time I used this? (If it’s been over a year, seriously consider letting it go, unless it’s a seasonal or special occasion item).
- Do I truly need this?
- Do I have duplicates? (You probably don’t need five spatulas).
- Is it broken or chipped? (If so, trash it).
- Does it bring me joy or serve a real purpose?
Don’t fall into the “what if I need it someday” trap. Future you will thank present you for a clear, functional space. This intense decluttering is the foundation of your kitchen space management checklist.
Step 2: Deep Cleaning and Assessment
With your kitchen now empty (or mostly empty!), it’s the perfect time for a thorough clean and a strategic assessment of your space.
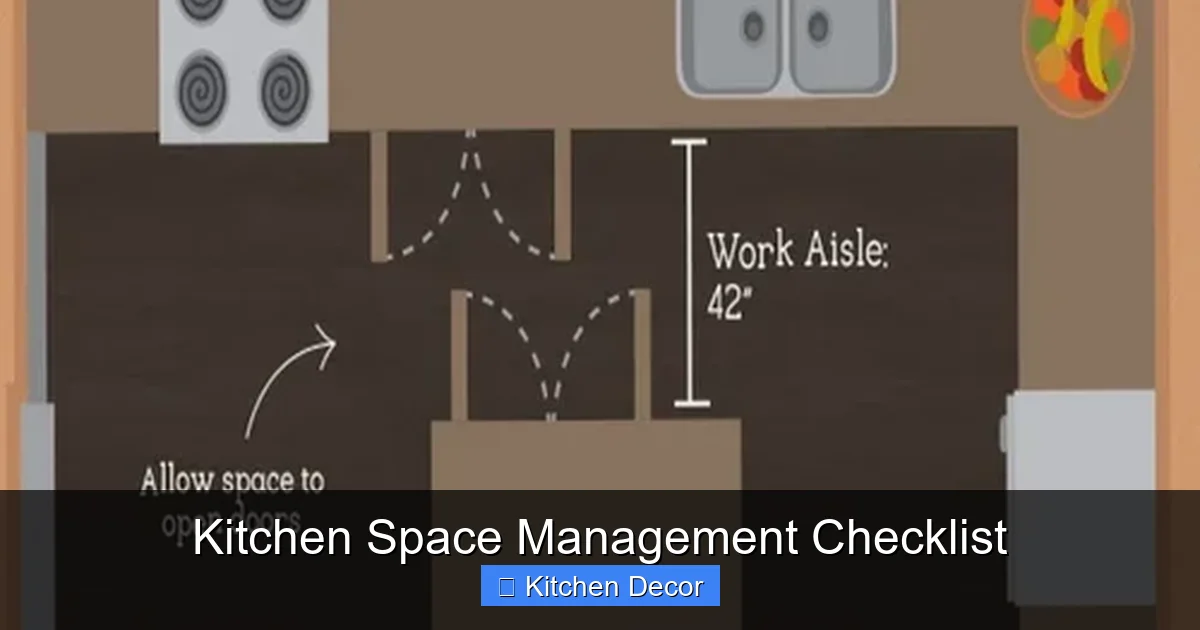
Visual guide about Kitchen Space Management Checklist
Image source: 5.imimg.com
Clean Every Surface
Before putting anything back, deep clean every cabinet, drawer, countertop, and appliance. Wipe down walls, clean the sink, and mop the floor. This provides a fresh, hygienic start for your newly organized kitchen. Use liners for shelves and drawers if you like extra protection and an easy-to-clean surface.
Assess Your Storage Needs
Now that you have a clearer picture of what you’re keeping, take stock of your remaining items. This is crucial for planning your organization strategy:
- How many pots and pans do you actually have?
- What’s the volume of your dry goods?
- How many plates, bowls, and mugs do you use daily?
- What oversized or awkwardly shaped items need a special spot?
This assessment helps you understand your real storage requirements before you start buying new organizers. Remember, the goal of this kitchen space management checklist is to fit your items to your space, not the other way around.
Step 3: Zoning for Efficiency – Creating Designated Areas
One of the most effective strategies for an organized kitchen is to create functional zones. This minimizes unnecessary movement and makes cooking and cleaning much more efficient. Think about the flow of your kitchen tasks.
The Prep Zone
This is where you do most of your chopping, mixing, and ingredient preparation. Ideally, it’s near your sink and has ample counter space. Store cutting boards, knives, mixing bowls, measuring cups, and common spices in this area for easy access.
The Cooking Zone
Located around your stovetop and oven. Keep pots, pans, baking sheets, cooking utensils (spatulas, ladles, tongs), oven mitts, and frequently used cooking oils and spices close at hand. A utensil crock next to the stove is a classic for a reason.
The Cleaning Zone
Centered around your sink. Store dish soap, sponges, dish towels, cleaning supplies, and your dish rack here. If space allows, trash and recycling bins should also be nearby.
The Storage Zone (Pantry, Fridge, Dishware)
This zone includes your pantry, refrigerator, and cabinets for dishes and glassware. Group similar items together: all dry goods in the pantry, all plates together, all snacks in one easy-to-reach bin. For food storage, the “first in, first out” (FIFO) rule applies – place newer items at the back so older ones are used first.
Practical Tip: Don’t forget a “landing zone” near your fridge or pantry for groceries when you bring them home, making unpacking easier.
Step 4: Smart Storage Solutions – Maximizing Vertical and Horizontal Space
Once you know what you have and where it generally belongs, it’s time to optimize your actual storage. This step on our kitchen space management checklist is all about clever tools and techniques.
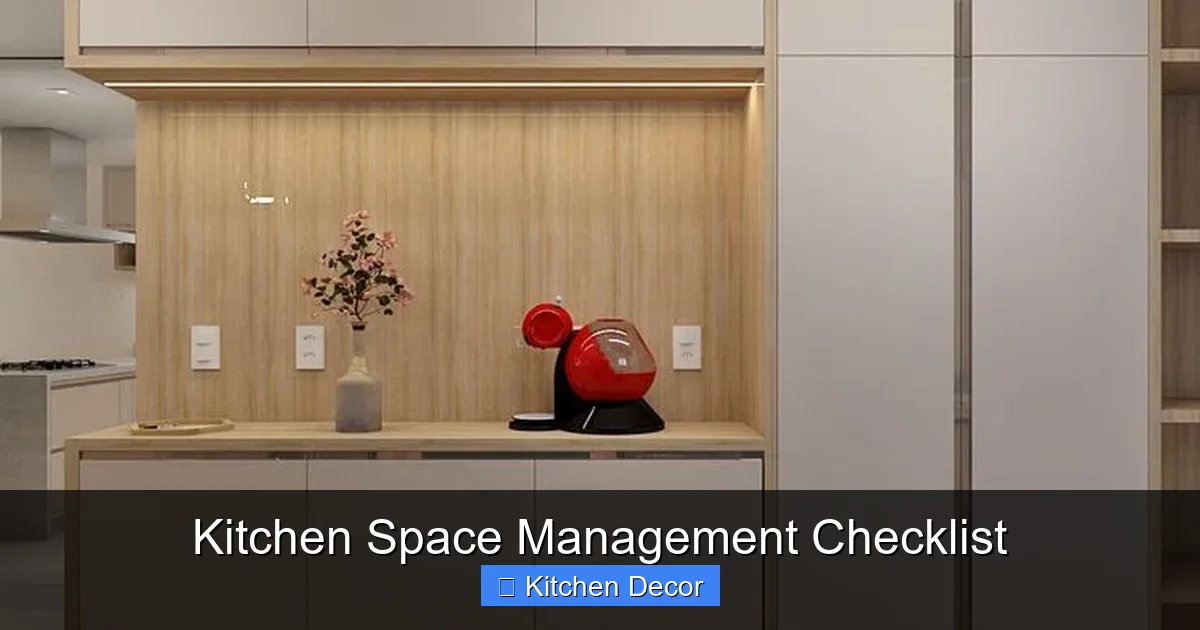
Visual guide about Kitchen Space Management Checklist
Image source: i.pinimg.com
Utilize Vertical Space
Most kitchens have untapped vertical potential. Look for:
- Stackable Shelves/Inserts: Double your cabinet space for plates, mugs, or pantry items.
- Tiered Spice Racks: Keep spices visible and accessible in cabinets or drawers.
- Wall-Mounted Organizers: Pegboards, magnetic knife strips, or wall shelves can store utensils, pots, or decorative items, freeing up counter and drawer space.
- Over-the-Fridge Cabinets: Often underutilized, these are great for seasonal or rarely used items.
Master Cabinet and Drawer Organization
Open a cabinet or drawer and aim for immediate clarity:
- Drawer Dividers: Essential for cutlery, cooking utensils, and small gadgets.
- Deep Drawer Organizers: Perfect for pots, pans, and their lids. Look for adjustable dividers or racks specifically designed for cookware.
- Pull-Out Shelves: Can make deep lower cabinets much more accessible, especially for heavy items.
- Under-Sink Organizers: A pull-out or multi-tiered unit can transform this awkward space for cleaning supplies.
Practical Tip: Store heaviest items in lower cabinets, and frequently used items at eye level. Rarely used items can go higher up.
Leverage Doors and Walls
Don’t forget these often-overlooked surfaces:
- Over-the-Door Racks: Great for pantry doors to hold snacks, wraps, or small cooking supplies.
- Cabinet Door Organizers: Attach small racks or hooks to the inside of cabinet doors for pot lids, measuring spoons, or aluminum foil.
- Magnetic Strips: Not just for knives! Use them for small metal spice containers or even frequently used small tools.
Think Outside the Box
- Movable Carts: A rolling cart can provide extra counter space, storage for appliances, or even a coffee station.
- Corner Solutions: Lazy Susans are fantastic for corner cabinets or pantries, making items easy to reach.
- Under-Shelf Baskets: Create instant extra storage under existing shelves.
Step 5: The Art of Containment – Bins, Baskets, and Labels
Now that you’ve got your zones and storage solutions, it’s time to keep everything neat and tidy within those systems. This is where containment comes in as a vital part of your kitchen space management checklist.
Choose the Right Containers
Containers are not just for aesthetics; they are functional tools. Select containers that fit your space and your items:
- Clear Bins: Ideal for pantry items, snacks, or fridge organization so you can easily see what’s inside.
- Baskets: Great for grouping similar items in open shelving, like linens or produce.
- Airtight Canisters: Essential for dry goods like flour, sugar, pasta, and cereals. They keep food fresh and deter pests.
- Matching Food Storage: Invest in a set of food storage containers with universal lids. This saves space and prevents the “lid-search” frustration.
Practical Tip: Measure your cabinets and drawers before buying containers to ensure a perfect fit.
Embrace Labels
Labels are your best friends in an organized kitchen. They help everyone in the household know where things belong and where to find them. Label:
- Pantry bins (e.g., “Snacks,” “Pasta,” “Baking Supplies”)
- Spice jars
- Food storage containers
- Drawers for specific items
You can use a label maker, chalkboard labels, or even just masking tape and a marker for a quick solution.
Decant When Possible
Transfer bulk items like cereals, rice, pasta, and sugar from their original packaging into airtight, uniform containers. This not only looks tidier but also helps with portion control, food preservation, and creates a consistent look in your pantry.
Step 6: Countertop Clarity – Keep Surfaces Clear and Functional
Your countertops are prime real estate in the kitchen. Keeping them as clear as possible is key to both functionality and a sense of calm. This is an often-overlooked but crucial part of your kitchen space management checklist.
Only Essentials on Display
Resist the urge to clutter your countertops with decorative items or appliances you rarely use. Only keep items that you use daily or almost daily, such as:
- Coffee maker
- Toaster
- Knife block
- Salt and pepper shakers
- A small fruit bowl
Everything else should have a designated home inside a cabinet or drawer. If you have an appliance you love but use infrequently, consider a designated appliance garage or a spot in a less accessible cabinet.
Group Similar Items
If you must have items on your counter, group them. For example, a small tray can hold your oils and vinegars near the stove, or a caddy can contain your dish soap and sponge by the sink. This creates visual order.
Create Landing Zones
Ensure there’s enough clear counter space near your fridge for groceries, near your stove for hot dishes, and near your sink for dirty dishes. These functional zones prevent immediate clutter build-up.
Step 7: Maintenance and Review – Keeping It Sustainable
An organized kitchen isn’t a one-time project; it’s an ongoing lifestyle. This final step in your kitchen space management checklist ensures your hard work pays off long-term.
The “One In, One Out” Rule
For every new item you bring into your kitchen, consider whether an old item can leave. Buying a new coffee mug? Donate an old one. This prevents clutter from creeping back in.
Regular Mini-Declutters
You don’t need another grand purge every month. Instead, schedule quick, 15-minute “resets.” For example:
- Once a week, quickly tidy countertops and wipe them down.
- Once a month, go through one drawer or a small section of your pantry, checking expiration dates and returning items to their proper spots.
These small efforts prevent overwhelming build-up.
Seasonal Reviews
About two to four times a year, do a slightly deeper dive. This is a good time to revisit your entire kitchen space management checklist. Check the fridge and pantry for expired items, assess if your current organization still meets your needs, and declutter any seasonal items like holiday bakeware or picnic supplies. This helps ensure your system adapts as your needs change.
Troubleshooting Common Kitchen Space Management Challenges
Even with the best kitchen space management checklist, you might encounter some bumps. Here are solutions to common dilemmas:
“I don’t have enough cabinet space!”
This is a common lament. Revisit Step 1 with an even more critical eye. Could you really get rid of more? Then, focus intensely on vertical solutions: stackable shelves, wall-mounted racks, pegboards, and using the tops of your cabinets for infrequently used items. Consider a kitchen island or cart for extra storage and prep space. Can you store any less-used kitchen items (like large serving platters) in another room, like a dining room buffet or a garage? Sometimes, less truly is more, especially when space is at a premium.
“My kitchen is really small and awkward.”
Small kitchens demand extreme efficiency. Your kitchen space management checklist should prioritize multi-functional items. Think about nesting bowls, collapsible colanders, and appliances that do double duty. Leverage doors and narrow spaces with slim carts or hanging organizers. Magnetic strips are fantastic for freeing up drawer space. Mirroring or light colors can also make a small space feel larger, visually enhancing your improved organization.
“My family keeps messing up my system!”
This is a partnership problem, not just an organization one! Involve your family in the organization process. Explain the “why” – a clear kitchen makes cooking easier and reduces stress for everyone. Assign specific zones or responsibilities, especially for kids. Use clear labels so everyone knows where things belong. Be patient and offer gentle reminders rather than criticism. Consistency from you will eventually pay off. This shared responsibility is a critical part of maintaining your kitchen space management checklist.
Conclusion
Congratulations! You’ve navigated our comprehensive kitchen space management checklist. By following these steps, you’re well on your way to a kitchen that’s not only visually appealing but also incredibly efficient and a joy to use. Remember, the goal isn’t perfection, but progress and functionality.
A well-managed kitchen space reduces stress, saves time, and can even inspire you to cook more. Take pride in your efforts and enjoy the benefits of a beautifully organized home. Keep this kitchen space management checklist handy, and use it as a living document to adapt and maintain your culinary haven. Happy organizing!