Transforming your kitchen walls doesn’t have to be complicated or expensive. This guide offers a wealth of simple kitchen wall art ideas, from downloadable prints and functional chalkboards to DIY projects and curated floating shelves. You’ll learn how to choose, plan, and install art that personalizes your space beautifully, making it both stylish and inviting without breaking the bank.
Simple Kitchen Wall Art Ideas
Your kitchen is often the heart of your home. It’s where meals are made, coffee is brewed, and memories are shared. But sometimes, those walls can feel a little… bare. You might dream of a stylish, inviting space, but complex decorating projects seem daunting. What if we told you transforming your kitchen walls could be easy, fun, and totally budget-friendly?
This comprehensive guide is all about simple kitchen wall art ideas. We’re here to help you ditch the intimidation factor. We’ll show you how to choose, create, and install beautiful kitchen decor without special skills or a massive budget. Get ready to personalize your kitchen with charm and personality. Let’s make those blank walls a canvas for creativity!
Key Takeaways
- Embrace Simplicity and DIY: Focus on easy-to-implement, budget-friendly wall art solutions that you can create or install yourself, such as printables, repurposed items, or functional art.
- Assess Your Kitchen Environment: Consider heat, moisture, and grease when selecting materials. Opt for wipeable surfaces, glass frames, or items that can be easily cleaned or replaced to protect your simple kitchen wall art ideas.
- Plan Your Layout First: Before drilling holes, experiment with different arrangements using paper templates or by laying pieces on the floor to visualize your simple kitchen wall art ideas effectively.
- Mix Function with Aesthetics: Integrate functional elements like pegboards, chalkboards, or open shelves with decorative items to create art that is both beautiful and practical for a busy kitchen.
- Personalize with Theme and Style: Choose a consistent theme (e.g., farmhouse, modern, food-centric) and incorporate personal touches to make your kitchen wall art truly yours and reflect your taste.
- Don’t Be Afraid to Repurpose: Look for items around your home or in thrift stores that can be given a new life as charming kitchen wall decor, adding character and uniqueness to your space without great cost.
Step 1: Assess Your Kitchen Space and Needs
Before diving into specific simple kitchen wall art ideas, take a moment to look at your kitchen with fresh eyes. Understanding your space is the first step to choosing the right decor. Think about what will work best and last longest in a kitchen environment.
Consider Wall Dimensions and Layout
Walk around your kitchen. Which walls are truly available for art? Do you have a large, open wall above a dining nook? Or perhaps just a small sliver between a window and a cabinet? The size and shape of your available wall space will influence your choices. A large wall might be perfect for a gallery wall. A small space might call for a single, impactful piece or a narrow floating shelf. Don’t forget the height of your ceilings and how much natural light your kitchen receives. These factors play a big role in how your art will look.
Factor in Kitchen Conditions
The kitchen isn’t like a living room or bedroom. It’s a high-traffic area with unique conditions. Heat, steam, grease, and food splatters are all part of the daily routine. When considering simple kitchen wall art ideas, durability and easy cleaning are key. Delicate fabrics or unframed paper prints might not be the best choice near a stovetop. Opt for materials that can be easily wiped down or are protected by glass. This practicality ensures your wall art stays looking great for years.
Reflect on Existing Decor and Appliances
Take stock of what’s already in your kitchen. What color are your cabinets? What style are your appliances? Do you have any existing backsplash tiles or accent colors? Your simple kitchen wall art should complement these elements, not compete with them. If your kitchen is very modern, rustic farmhouse signs might feel out of place. If you have stainless steel appliances, perhaps some metallic accents in your art would tie things together. Aim for harmony and a cohesive look.
Step 2: Choose Your Simple Kitchen Wall Art Style and Theme
Now that you know your space, let’s think about your personal style. What kind of atmosphere do you want to create in your kitchen? This will guide your simple kitchen wall art choices.

Visual guide about Simple Kitchen Wall Art Ideas
Image source: wildlifeartstore.b-cdn.net
Define Your Aesthetic
Do you lean towards modern and minimalist? Or do you prefer a cozy, rustic vibe? Maybe you love vintage charm or a bright, eclectic feel. Identifying your preferred aesthetic makes decision-making much easier. Browse online inspiration boards or magazines to pinpoint styles you love. Don’t feel pressured to pick just one; often, a blend of styles can create a unique, personalized look.
Explore Popular Kitchen Themes
Many simple kitchen wall art ideas revolve around classic kitchen themes. Here are a few popular ones:
- Food & Drink: Think vibrant fruit prints, coffee bar signs, vintage advertisements for baking ingredients, or elegant wine bottle sketches. This is a natural fit for a kitchen.
- Farmhouse & Rustic: Distressed wood signs with charming sayings, botanical prints of herbs, woven baskets, or vintage measuring cups displayed as art.
- Modern & Minimalist: Abstract geometric prints, monochrome photography, clean line drawings of kitchen utensils, or simple typography art.
- Botanical & Nature: Leafy green prints, pressed flowers in frames, or small living plants on shelves. Bringing nature indoors always feels fresh.
- Travel & Culture: Maps of your favorite city, photos from vacations, or art inspired by international cuisine.
Choosing a theme helps keep your simple kitchen wall art cohesive. It provides a roadmap for all your decorating decisions.
Step 3: Discover Inspiring Simple Kitchen Wall Art Ideas
This is where the fun really begins! Let’s explore a variety of easy, affordable, and impactful simple kitchen wall art ideas that you can implement today.
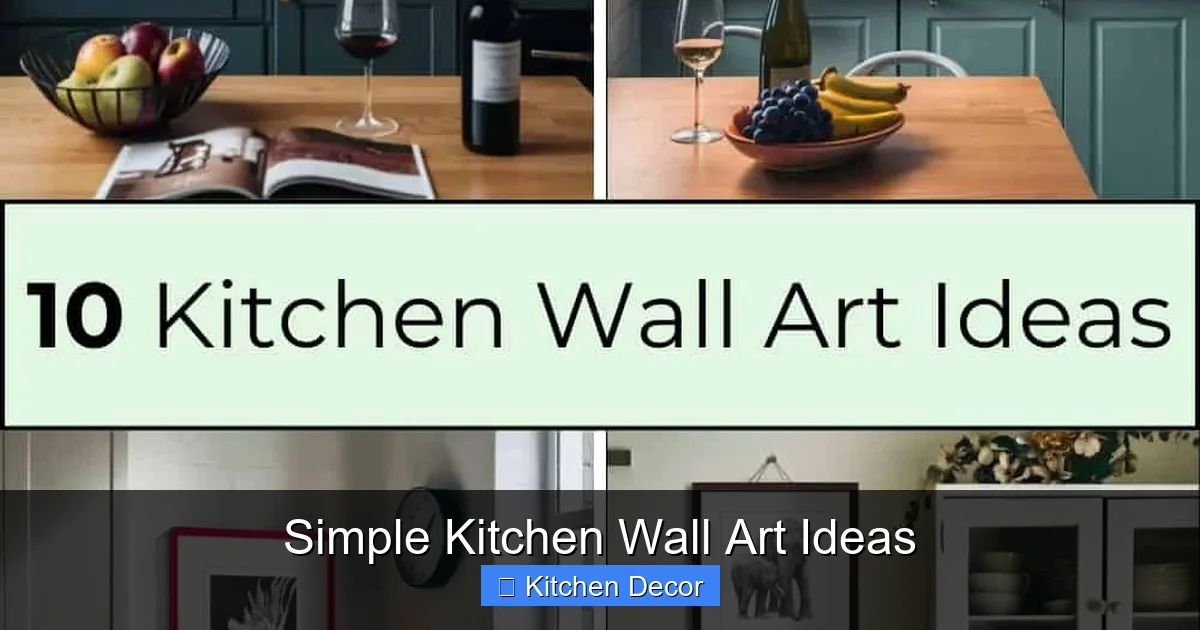
Visual guide about Simple Kitchen Wall Art Ideas
Image source: wildlifeartstore.b-cdn.net
Printable Art and Posters
One of the quickest and most budget-friendly ways to add art to your kitchen is with printables. Thousands of free and affordable digital prints are available online. You can find everything from charming food-related quotes to beautiful botanical illustrations or abstract patterns. All you need is a printer (or a local print shop) and some inexpensive frames.
- How to do it: Search for “free kitchen printables” or “food art downloads” on sites like Etsy or Pinterest. Download your favorites. Print them at home on good quality paper or send them to a professional printer for a crisp finish. Pop them into frames – thrift store frames painted a fresh color work wonderfully.
- Tip: Mix and match different sizes and styles of frames for an eclectic look, or use matching frames for a more uniform feel. This is a core element of simple kitchen wall art ideas.
Curated Floating Shelves
Floating shelves offer a fantastic way to display a rotating collection of items. They add dimension to your walls and combine aesthetics with a touch of practicality. This is a versatile way to create simple kitchen wall art.
- What to display: Think small potted herbs, vintage cookbooks, a collection of unique mugs, small framed photos, decorative jars, or even a few of your prettiest serving dishes.
- How to do it: Install one or two floating shelves on an empty wall. Arrange your items in varying heights and textures. Don’t overcrowd them; less is often more.
- Tip: Change out the decor on your shelves seasonally to keep your kitchen feeling fresh and updated.
Easy Gallery Walls
A gallery wall might sound complex, but it doesn’t have to be. For simple kitchen wall art, focus on a manageable number of pieces (3-7) and a clear theme. This creates a big impact without much fuss.
- What to use: Combine prints, small mirrors, decorative plates, a framed recipe card, or even a small cutting board. The key is to have a common thread, like a color palette or a theme.
- How to do it: Lay out your chosen items on the floor first to get an idea of the arrangement. Use paper templates cut to the size of your frames to plan their exact placement on the wall before drilling any holes.
- Tip: Don’t be afraid to incorporate non-traditional “art” pieces, like a vintage whisk or a small framed tea towel.
Functional Wall Art: Chalkboards and Pegboards
Why choose between pretty and practical when you can have both? Functional wall art is one of the most brilliant simple kitchen wall art ideas.
- Chalkboards: A large chalkboard can serve as a meal planner, grocery list holder, or a place for inspiring quotes or doodles. It’s interactive and easily changeable. You can buy pre-made chalkboards or paint a section of your wall with chalkboard paint.
- Pegboards: Pegboards are perfect for organizing and displaying kitchen essentials. Hang measuring cups, cooking utensils, small pots, or even clip on some small art prints. It’s customizable and visually interesting. Paint the pegboard a fun color to make it pop!
- Magnetic Strips: Install a sleek magnetic strip to hold knives, metal spices, or even small magnetic planters. It keeps counters clear and adds a modern, industrial touch.
Repurposed and DIY Creations
Get creative with items you already own or can find cheaply! DIY simple kitchen wall art adds unique character that store-bought pieces can’t match.
- Framed Recipe Cards: Take a beloved family recipe card, perhaps handwritten, and frame it. It’s sentimental and unique.
- Coffee Sack Art: If you’re a coffee lover, clean and frame an old burlap coffee bean sack. It adds texture and a rustic touch.
- Stenciled Art: Buy a stencil with a fun design (e.g., a lemon, an herb sprig, a geometric pattern) and paint it directly onto a wall or a piece of wood for custom wall decor.
- Fabric Frames: Frame interesting kitchen-themed fabric swatches or tea towels for a soft, textured look.
Decorative Plates and Utensils
Your serving ware can be art! This is a classic and elegant approach to simple kitchen wall art.
- Plate Walls: Collect unique, decorative plates from thrift stores or antique shops. Use plate hangers to arrange them in a cluster or a line on your wall. Mix patterns, sizes, and colors for a dynamic display.
- Vintage Utensil Displays: Find old wooden spoons, whisks, or even small graters. Clean them up and hang them on small hooks or artfully arrange them in a shadow box.
Mirrors for Light and Space
Mirrors aren’t just for bedrooms. A strategically placed mirror can make a small kitchen feel larger and brighter by reflecting light. It’s a chic and simple kitchen wall art idea.
- How to use them: Choose a mirror with an interesting frame that complements your kitchen’s style. Hang it opposite a window to maximize natural light or on a wall that reflects an attractive part of your kitchen, like a neat backsplash.
- Tip: A round mirror can soften the many straight lines often found in a kitchen.
Step 4: Gather Your Materials and Tools
Once you’ve chosen your simple kitchen wall art ideas, it’s time to get everything ready. Having your materials and tools at hand makes the installation process smooth and frustration-free.

Visual guide about Simple Kitchen Wall Art Ideas
Image source: cdn.shortpixel.ai
For Prints and Frames
- Prints: Your downloaded or purchased art prints.
- Frames: New frames or repurposed ones. Make sure they are clean and have glass if needed for protection.
- Matting (Optional): Can elevate the look of a print and make it seem more professional.
- Mounting Tape/Adhesive: To secure prints inside frames.
For Shelves and Hooks
- Floating Shelves: Choose a material and finish that matches your kitchen (wood, metal, etc.).
- Shelf Brackets: If your shelves require them.
- Hooks/Hangers: For plates, utensils, or lighter items.
Basic Installation Tools
- Measuring Tape: Essential for accurate placement.
- Pencil: For marking drilling spots.
- Level: To ensure your art hangs straight.
- Drill and Drill Bits: For shelves or heavier items that require wall anchors.
- Hammer: For nails if using picture hooks.
- Screwdriver: For screws.
- Wall Anchors: Crucial for hanging heavier items in drywall.
- Command Strips/Hooks: Great for lighter items and avoiding drill holes.
Always read the instructions for any hanging hardware you purchase. This helps ensure proper installation of your simple kitchen wall art.
Step 5: Plan Your Layout Like a Pro
This step is crucial, especially for gallery walls or multiple pieces. A little planning prevents unnecessary holes in your walls and ensures your simple kitchen wall art looks fantastic.
Mock-Up with Paper Templates
The best way to visualize your layout is to create paper templates. Cut out pieces of newspaper or craft paper to the exact size of your frames or art pieces. Tape these templates to your wall using painter’s tape. Move them around until you find an arrangement you love. This allows you to experiment without committing to nail holes.
Consider Eye Level
As a general rule, the center of your art or gallery wall should be at eye level. This is typically around 57-60 inches from the floor. Adjust this if you’re hanging art above furniture or a countertop. Ensure it feels comfortable to view.
Balance and Spacing
When creating a gallery wall or grouping multiple simple kitchen wall art pieces, pay attention to balance. Don’t put all the heavy or dark pieces on one side. Distribute colors, sizes, and textures evenly. For spacing, aim for about 2-4 inches between frames in a gallery wall. Too much space makes it look disjointed; too little makes it feel cluttered.
Step 6: Install Your Simple Kitchen Wall Art
Now that your planning is done, it’s time to hang your beautiful simple kitchen wall art!
Measure Twice, Drill Once
Once your paper templates are exactly where you want them, use a pencil to mark where the nail or screw will go. This mark should correspond to the hanging hardware on the back of your art. Double-check your measurements. Use your level before drilling to ensure everything is perfectly straight.
Secure Hanging Methods
- For Lightweight Items: Command strips or small picture hooks are perfect for lightweight framed prints, small signs, or tea towels. They are easy to use and leave minimal wall damage.
- For Medium-Weight Items: Standard picture hangers (nails with small hooks) work well for most framed art. Ensure the nail is inserted at an angle for maximum hold.
- For Heavier Items (Shelves, Large Mirrors): Always use wall anchors appropriate for your wall type (drywall, plaster, etc.). This prevents your art from falling and damaging your wall or the item itself. Follow the anchor instructions carefully.
Safety First
Always be mindful of electrical wires or plumbing behind your walls, especially when drilling. Use a stud finder that also detects wires if you’re unsure. If in doubt, err on the side of caution or consult a professional. Safety ensures your simple kitchen wall art project is a success from start to finish.
Step 7: Accessorize and Maintain Your New Decor
Your simple kitchen wall art is up! But the job isn’t quite finished. A few final touches and regular care will keep your kitchen looking its best.
Add Small Touches
Step back and admire your work. Does anything else feel missing? Perhaps a small LED light strip under a floating shelf to highlight your items? Or a tiny plant on a nearby windowsill to complement your botanical prints? These small additions can elevate the entire look of your simple kitchen wall art.
Regular Cleaning
Remember those kitchen conditions we talked about? Dust, grease, and grime can accumulate on wall art. Make it a habit to gently wipe down frames and surfaces when you clean your kitchen. Use a soft, damp cloth for most surfaces and glass cleaner for framed prints. This keeps your simple kitchen wall art looking vibrant and fresh.
Refresh Seasonally
The beauty of many simple kitchen wall art ideas is how easy they are to change. Consider swapping out prints, rearranging items on shelves, or updating your chalkboard messages with the seasons. A few pumpkin-themed prints in the fall or some bright floral designs in the spring can completely transform the feel of your kitchen without much effort or expense.
Troubleshooting Common Wall Art Hurdles
Even with simple kitchen wall art ideas, sometimes things don’t go exactly as planned. Here are solutions to common issues.
“It Doesn’t Look Right!”
If you’ve hung your art and it just doesn’t feel cohesive or balanced, don’t despair. This is where the beauty of simple kitchen wall art ideas comes in: they are often easy to change! Remove the pieces. Revisit Step 5 (Plan Your Layout) using your paper templates. Try different groupings, adjust spacing, or even swap out one or two pieces for something else. Sometimes, a fresh perspective or taking a break can help you see the perfect arrangement.
Protecting Against Kitchen Splatters
If you have art near your stovetop or sink, protection is key. For prints, always use frames with glass or acrylic covers. For items like signs or shelves, consider a clear protective coating (like a matte sealant spray) or ensure they are made of easily wipeable materials such as painted wood or metal. If an item is particularly prone to grease, consider moving it to a less vulnerable wall, or choose a functional piece that can withstand the environment, like a chalkboard that can be wiped clean.
Wall Damage Concerns
Worried about making too many holes? For lighter items, command strips and hooks are your best friends. They hold well and remove cleanly without damaging paint. For heavier items that require drilling, invest in good quality wall anchors. If you do make a mistake or decide to move art, keep a small container of spackle and touch-up paint handy. Repairing small holes is a simple DIY task that keeps your walls looking pristine.
There you have it! Transforming your kitchen walls doesn’t require a design degree or a massive budget. With these simple kitchen wall art ideas, you have everything you need to create a space that feels uniquely yours. From stylish printables to clever functional displays, the possibilities are endless.
So, go ahead, grab some inspiration, and start making your kitchen walls beautiful. You’ll be amazed at the difference a little art can make. Happy decorating!