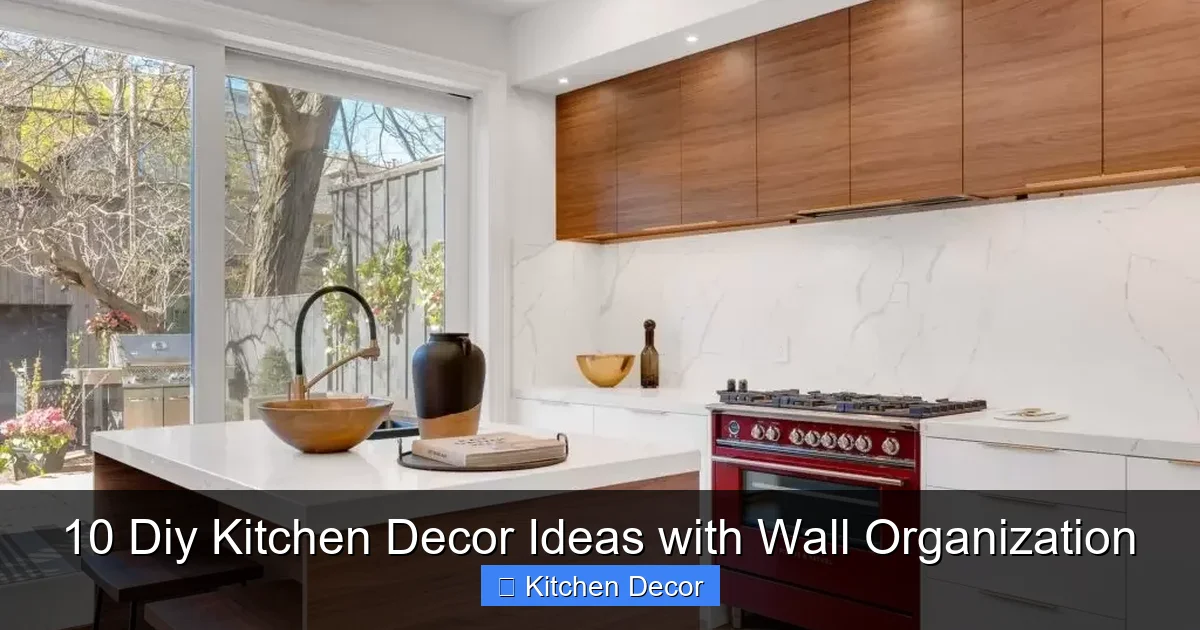
Revamp your kitchen with our guide to 10 DIY kitchen decor ideas with wall organization. Discover how to create clever storage solutions like pegboards, floating shelves, and magnetic racks to declutter countertops and add personality. These practical, budget-friendly projects will help you optimize your space, making your kitchen more efficient and aesthetically pleasing. Get ready to transform your culinary haven with creative DIY wall organization!
10 Diy Kitchen Decor Ideas with Wall Organization
Welcome, fellow home improvers and kitchen enthusiasts! Are you dreaming of a more organized, functional, and beautiful kitchen without breaking the bank? You’re in the right place! Your kitchen is the heart of your home, and it deserves to be both practical and stylish. Counter space often feels limited, and cabinets can quickly become cluttered. That’s where the magic of wall organization comes in.
In this comprehensive guide, we’re diving deep into 10 fantastic DIY kitchen decor ideas with wall organization that will not only declutter your countertops but also add a personalized touch to your culinary space. We’ll show you how to transform plain walls into smart storage solutions and charming display areas, all with a friendly, step-by-step approach. Get ready to roll up your sleeves and bring some incredible DIY flair into your kitchen!
Key Takeaways
- Embrace Vertical Space: Wall organization is key to maximizing kitchen storage, especially in smaller areas, by utilizing often-overlooked vertical surfaces.
- Budget-Friendly Transformations: Many DIY kitchen decor ideas with wall organization can be achieved using affordable materials, repurposed items, and simple tools, saving you money while enhancing style.
- Personalize Your Kitchen: DIY projects allow you to infuse your unique style and preferences into your kitchen decor, making it truly your own.
- Improve Efficiency and Access: Organizing items on walls keeps frequently used tools and ingredients easily accessible, streamlining your cooking process and reducing clutter on countertops.
- Versatility is Key: From pegboards and floating shelves to magnetic strips and vertical gardens, there’s a wide range of DIY wall organization solutions to suit different needs and aesthetic tastes.
- Plan Before You Build: Always measure your space, assess your storage needs, and gather all materials before starting any DIY project to ensure a smooth and successful outcome.
- Safety First: When installing wall-mounted decor or organization, ensure you use appropriate anchors and fasteners for your wall type and consider weight limits to prevent accidents.
1. The Versatile Pegboard System
One of the most beloved and adaptable DIY kitchen decor ideas with wall organization is the classic pegboard system. It’s incredibly versatile, allowing you to customize your storage needs as they evolve. From hanging utensils and small pots to displaying plants and spice jars, a pegboard keeps frequently used items within reach and adds a functional design element to your kitchen.
Gather Your Materials
- Pegboard sheet (wood, metal, or fiberboard)
- Paint (optional, but recommended for aesthetics)
- Standoffs or furring strips (to create space behind the board for pegs)
- Drill, screws, wall anchors (if needed)
- Level
- Pegs, hooks, small baskets, and shelves designed for pegboards
Step-by-Step Installation
Measure and Prepare Your Space
First, decide where you want your pegboard. Measure the wall area. If you plan to paint your pegboard, do so before mounting. This gives it a personalized touch and can match your existing kitchen decor beautifully. Allow the paint to dry completely.
Install Standoffs or Furring Strips
Pegboards need a gap behind them for the pegs to insert properly. Attach small wood strips (furring strips) or use specialized pegboard standoffs to the wall first. These create the necessary clearance and provide mounting points for the pegboard itself. Ensure they are level and securely fastened to wall studs if possible, or use appropriate wall anchors.
Mount the Pegboard
Carefully lift the pegboard onto the mounted standoffs or strips. Use a level to ensure it’s perfectly straight. Screw the pegboard into the standoffs or strips, making sure it’s stable and secure. This is crucial for its weight-bearing capacity.
Accessorize and Organize
Now for the fun part! Start arranging your pegboard accessories. Hang pots, pans, measuring cups, and even small art. This truly transforms a plain wall into a dynamic storage and display area, showcasing your personality through DIY kitchen decor.
Tips for Your Pegboard
- Color Power: Paint your pegboard a bold accent color or a subtle shade to blend with your kitchen’s palette.
- Mix and Match: Use a variety of hooks, cups, and small shelves to hold different items.
- Beyond Utensils: Don’t limit yourself to kitchen tools. Use it for small spice jars, cleaning supplies, or even a tiny succulent garden.
2. Chic Floating Shelves
Floating shelves are a perennial favorite for DIY kitchen decor ideas with wall organization because they offer both aesthetic appeal and practical storage. They provide an open, airy feel, perfect for displaying decorative items, cookbooks, or everyday dishes. This idea is fantastic for making a kitchen feel more spacious while keeping essentials within reach.
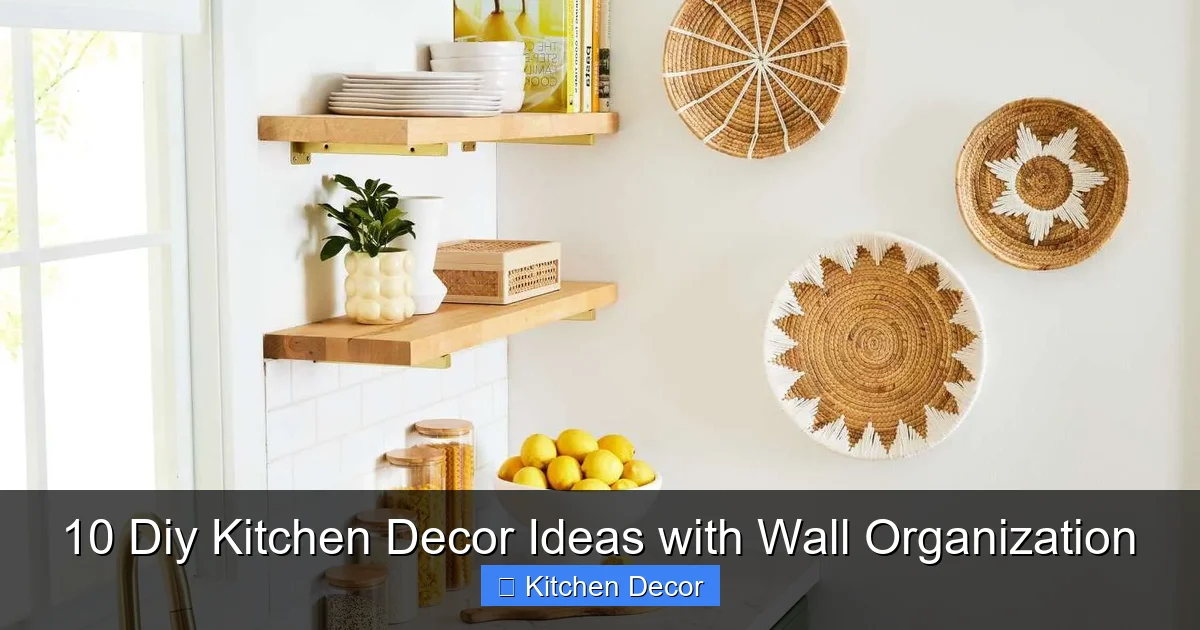
Visual guide about 10 Diy Kitchen Decor Ideas with Wall Organization
Image source: twigandthistle.com
Gather Your Materials
- Wood planks (choose your desired length and thickness)
- Floating shelf brackets (concealed or visible, depending on your style)
- Drill, screws, wall anchors
- Level, measuring tape, pencil
- Sandpaper, wood stain or paint (optional)
Step-by-Step Installation
Prepare Your Shelves
Measure and cut your wood planks to the desired length. Sand them smooth, paying attention to the edges. If you wish, stain or paint them to match your kitchen’s style. Let them dry completely.
Mark Bracket Placement
Hold a shelf against the wall in your desired location. Use a level to ensure it’s straight, then mark the positions for your floating shelf brackets. It’s best to attach at least one bracket into a wall stud for maximum stability. If studs aren’t available for all mounting points, use heavy-duty wall anchors.
Install the Brackets
Drill pilot holes, then securely screw the brackets into the wall. Make sure they are perfectly level with each other if you’re using multiple brackets for one shelf, or across multiple shelves.
Mount the Shelves
Slide your prepared wooden planks onto the installed floating shelf brackets. Depending on the bracket type, you might need to secure the shelf to the bracket with small screws from underneath or on top. Ensure the shelves are stable and can hold the weight you intend to place on them.
Tips for Floating Shelves
- Styling is Key: Arrange items aesthetically. Mix functional items with decorative pieces like small plants or framed photos.
- Vary Heights: If installing multiple shelves, vary their heights for visual interest.
- Weight Watch: Be mindful of the weight capacity of your shelves and brackets. Heavier items should go on shelves anchored into studs.
3. Magnetic Knife Strip & Spice Wall
This idea for DIY kitchen decor with wall organization is a fantastic space-saver and keeps frequently used items safe and easily accessible. A magnetic strip for knives frees up drawer space and protects blades, while a complementary magnetic spice wall makes cooking a breeze.
Visual guide about 10 Diy Kitchen Decor Ideas with Wall Organization
Image source: suite101.com
Gather Your Materials
- Magnetic knife strip (strong enough for your knives)
- Small, empty spice jars with magnetic bottoms OR a magnetic board and small magnetic containers for spices
- Drill, screws, wall anchors
- Level, measuring tape, pencil
Step-by-Step Installation
Choose Your Location
Select a convenient spot near your prep area, but out of reach of small children for knives. For spices, an area close to the stove is ideal. Ensure the wall surface is clean and dry.
Mount the Knife Strip
Hold the magnetic knife strip against the wall, use a level to ensure it’s straight, and mark the screw holes. Drill pilot holes, then securely attach the strip to the wall using screws. If you can, screw into wall studs for the strongest hold. Otherwise, use appropriate wall anchors.
Create Your Spice Wall (Option 1: Magnetic Jars)
If using jars with magnetic bottoms, simply fill them with your favorite spices and arrange them directly onto a metal surface like the side of your fridge or a thin metal sheet mounted to the wall. This offers incredible flexibility.
Create Your Spice Wall (Option 2: Magnetic Board)
Alternatively, mount a magnetic board (like a thin sheet of galvanized steel or a magnetic whiteboard) to an empty wall space, following similar installation steps as the knife strip. Then, place magnetic spice containers onto this board. You can even label the containers with chalkboard paint or sticker labels.
Tips for Your Magnetic Wall
- Safety First: Always ensure knives are placed securely on the strip.
- Labeling is Key: Clearly label your spice jars for quick identification.
- Beyond Spices: Use magnetic containers for small office supplies or craft items in other areas of the kitchen.
4. Wall-Mounted Mason Jar Storage
Add a touch of rustic charm with this beautiful and functional DIY kitchen decor idea with wall organization. Mason jars are perfect for storing dry goods like pasta, rice, beans, or even snacks, keeping them visible and organized. This project is charming and super practical!
Visual guide about 10 Diy Kitchen Decor Ideas with Wall Organization
Image source: digsdigs.com
Gather Your Materials
- Wooden plank (reclaimed wood adds character!)
- Mason jars (various sizes work well)
- Hose clamps (one per jar) OR metal pipe straps
- Drill, screws, wall anchors
- Sandpaper, wood stain or paint (optional)
- Measuring tape, pencil, level
Step-by-Step Installation
Prepare the Wooden Plank
Cut your wooden plank to the desired length. Sand it smooth. If desired, stain or paint it to match your kitchen. Let it dry completely.
Attach Jar Holders to the Plank
Place your Mason jars along the plank to determine even spacing. For each jar, loop a hose clamp or pipe strap around the neck of the jar, then position it on the plank. Mark where the clamp/strap needs to be screwed into the wood. Pre-drill small pilot holes, then use short screws to secure the clamps/straps to the plank. Make sure the clamps are tight enough to hold the jar securely without slipping.
Mount the Plank to the Wall
Hold the assembled plank (with clamps) against the wall in your chosen location. Use a level to ensure it’s straight. Mark the spots where you’ll screw the plank into the wall. Drill pilot holes and use long screws, ideally into wall studs, or heavy-duty anchors for secure mounting. This is important as the jars can get heavy when full.
Fill and Organize
Once the plank is securely mounted, insert your Mason jars into the clamps. Fill them with dry goods, utensils, or anything you wish to store or display. This instantly becomes a decorative and functional piece of DIY kitchen decor.
Tips for Mason Jar Storage
- Variety is the Spice: Use different sized jars for visual interest and varied storage needs.
- Labels Love: Add chalkboard labels or custom printed labels to each jar for easy identification.
- Get Creative: Beyond dry goods, use jars to hold fresh herbs, small kitchen gadgets, or even craft supplies.
5. Vertical Herb Garden
Bring the freshness of the outdoors in with a beautiful vertical herb garden, one of the most vibrant DIY kitchen decor ideas with wall organization. Not only does it add a pop of green to your kitchen, but it also provides fresh herbs for your cooking!
Gather Your Materials
- Small planters or pots (with drainage holes)
- Mounting system:
- Option A: Small hooks and a sturdy rail/curtain rod
- Option B: Wood planks with drilled holes/cutouts for pots
- Option C: Fabric wall pockets
- Potting soil, herb seedlings or seeds
- Drill, screws, wall anchors, level, measuring tape
Step-by-Step Installation
Choose Your Mounting Method
Option A (Rail System): Install a sturdy curtain rod or metal rail on your kitchen wall, ensuring it’s level and securely anchored. Use S-hooks to hang small pots with drainage holes.
Option B (Wood Planter Board): Cut a wooden plank to size. Using a hole saw, cut out circular openings slightly smaller than the rim of your pots, so the pots sit snugly. Sand and finish the wood. Mount the plank securely to the wall, then insert your potted herbs.
Option C (Fabric Pockets): Purchase or sew a fabric wall organizer with multiple pockets. Mount it to the wall using screws or strong adhesive hooks. Place small potted herbs into each pocket.
Prepare Your Herbs
Fill your chosen planters with good quality potting soil. Plant your herb seedlings or sow seeds according to package directions. Water them thoroughly.
Install Your Garden
Once your mounting system is securely in place and your herbs are potted, carefully arrange your herbs onto the wall. Consider their light requirements and position accordingly. This transforms an empty wall into a living piece of DIY kitchen decor.
Tips for Your Herb Garden
- Light Matters: Ensure your chosen spot receives adequate sunlight, or supplement with a grow light if needed.
- Water Wisely: Don’t overwater. Ensure your pots have good drainage to prevent root rot.
- Variety is Best: Choose herbs you use frequently, like basil, mint, parsley, or rosemary.
6. Chalkboard Command Center
A chalkboard command center is a brilliant and interactive DIY kitchen decor idea with wall organization. It serves as a central hub for family notes, grocery lists, meal planning, and reminders, all while adding a stylish, functional element to your kitchen.
Gather Your Materials
- Large sheet of plywood or MDF, or an existing wall section
- Chalkboard paint
- Painter’s tape, paint roller/brush
- Optional: Wood trim for framing, small hooks, containers for chalk/erasers
- Drill, screws, wall anchors (if mounting a board)
Step-by-Step Installation
Prepare Your Surface
Decide whether you’re painting directly onto a wall section or creating a standalone board. If using a board, sand it smooth. If painting a wall, clean it thoroughly and use painter’s tape to create crisp edges for your chalkboard area.
Apply Chalkboard Paint
Follow the manufacturer’s instructions for your chalkboard paint. Typically, you’ll need two or three thin, even coats, allowing sufficient drying time between each. Once the final coat is dry, “season” the chalkboard by rubbing the side of a piece of chalk over the entire surface, then wiping it clean with a dry cloth. This prevents “ghosting” from your first writings.
Frame (Optional) and Accessorize
If you used a board, you can add decorative wood trim around the edges for a polished look. If you painted directly on the wall, you might skip framing. Install small hooks below or beside the chalkboard for hanging keys, bags, or a small bucket to hold chalk and erasers. This creates a complete DIY wall organization hub.
Start Organizing!
Begin using your new command center! Write down meal plans, grocery lists, important appointments, or leave fun messages for family members. This dynamic piece of DIY kitchen decor will quickly become indispensable.
Tips for Your Chalkboard
- Eraser Friendly: Keep a designated chalkboard eraser or a damp cloth nearby.
- Color Your World: Use colored chalk to highlight different tasks or categories.
- Magnetic Twist: If you paint a magnetic primer first, then chalkboard paint, you can also use magnets on your command center!
7. Pot and Pan Railing System
Free up precious cabinet space and make your cookware easily accessible with a pot and pan railing system. This clever DIY kitchen decor idea with wall organization adds a professional, chef-like touch to your kitchen while offering incredible functionality.
Gather Your Materials
- Sturdy metal curtain rod or towel bar
- S-hooks (sized appropriately for your pot handles)
- Drill, screws, wall anchors
- Level, measuring tape, pencil
Step-by-Step Installation
Choose Your Location
Select a wall space near your stove or prep area that can accommodate the length of your rail and the hanging pots. Ensure there’s enough clearance above and below for the pots to hang freely without hitting countertops or other fixtures.
Mount the Rail
Hold the curtain rod or towel bar brackets against the wall, ensuring it’s level. Mark the screw holes. Drill pilot holes and securely fasten the brackets to the wall, ideally into wall studs for maximum weight support. If studs aren’t available, use robust wall anchors suitable for the weight of your pots and pans.
Attach the Rail
Once the brackets are installed, insert the rod into the brackets and secure it according to the manufacturer’s instructions (often with small set screws).
Hang Your Cookware
Slide S-hooks onto the rail. Then, simply hang your pots and pans by their handles onto the S-hooks. You can arrange them by size or frequency of use. This instantly turns clutter into a stylish and accessible display, proving that DIY kitchen decor can be super functional.
Tips for Pot and Pan Rails
- Lid Storage: Consider adding a small wall-mounted lid rack nearby or using a few extra hooks for lids.
- Utensil Haven: Smaller S-hooks can hold spatulas, ladles, and whisks.
- Black or Copper: Choose a rail finish that complements your kitchen’s hardware and existing decor.
8. Open Shelving with Decorative Baskets
Combining the aesthetic appeal of open shelving with the practicality of hidden storage, this is one of the most effective DIY kitchen decor ideas with wall organization. Decorative baskets can hide less attractive items while adding texture and warmth to your kitchen design.
Gather Your Materials
- Wood planks for shelves
- Shelf brackets (decorative or minimalist)
- Decorative baskets (wicker, wire, fabric, etc., sized to fit your shelves)
- Drill, screws, wall anchors
- Level, measuring tape, pencil
- Sandpaper, paint or stain (optional)
Step-by-Step Installation
Prepare and Mount Shelves
Follow the same steps as for “Chic Floating Shelves” (Idea #2) to cut, finish, and securely mount your wooden planks to the wall using brackets. Ensure they are level and capable of holding the weight of your baskets and their contents.
Select and Arrange Baskets
Choose baskets that complement your kitchen’s style. Measure them to ensure they fit well on your shelves, allowing enough space above to easily access contents. Arrange them on the shelves, experimenting with different configurations for a pleasing look.
Organize Your Items
Fill the baskets with items you want to keep handy but out of sight. This could include snacks, plastic containers, linens, small appliances, or even cleaning supplies. Use the remaining open shelf space for displaying pretty dishes, cookbooks, or decorative objects. This blends effective wall organization with charming DIY kitchen decor.
Tips for Open Shelving with Baskets
- Cohesive Look: Choose baskets that are similar in material, color, or style for a harmonious appearance.
- Labeling: Add simple labels to the front of baskets to easily identify contents.
- Mix and Match: Combine baskets with a few exposed decorative items to break up visual monotony.
9. Repurposed Crate Shelves
For a truly unique and eco-friendly approach to DIY kitchen decor with wall organization, consider repurposing old wooden crates into charming wall shelves. This adds a rustic, vintage, or industrial vibe, depending on how you finish them, and offers versatile storage compartments.
Gather Your Materials
- Wooden crates (wine crates, fruit crates, or craft store crates)
- Sandpaper (various grits)
- Wood glue, small nails or screws (optional, for reinforcement)
- Paint, stain, or clear sealant (optional)
- Mounting hardware: D-rings, picture hanging wire, or L-brackets
- Drill, screws, wall anchors, level, measuring tape, pencil
Step-by-Step Installation
Prepare the Crates
Clean your crates thoroughly. Sand down any rough edges or splinters to make them safe to handle. If desired, paint, stain, or apply a clear sealant to protect the wood and match your kitchen’s aesthetic. Let them dry completely.
Plan Your Arrangement
Lay out your crates on the floor in the desired configuration. You can stack them, stagger them, or arrange them in a linear fashion. Consider how you’ll attach them to each other (if stacking) and to the wall.
Assemble and Reinforce (Optional)
If you’re stacking or joining crates to create a larger unit, use wood glue and small nails or screws to securely fasten them together. This provides extra stability before mounting.
Mount to the Wall
For individual crates, attach two D-rings or sturdy picture hangers to the back of the top rail of each crate. Alternatively, use discreet L-brackets attached to the bottom of the crate and screwed into the wall. Mark your wall, drill pilot holes, and use appropriate screws and wall anchors to securely mount each crate. Use a level for each one to ensure straightness.
Decorate and Organize
Fill your new crate shelves with cookbooks, mugs, small plants, decorative dishes, or even fresh produce. The divided sections of crates naturally lend themselves to organized displays, making this a functional and stylish piece of DIY kitchen decor.
Tips for Crate Shelves
- Mix Sizes: Combine different sized crates for more visual interest.
- Add Dividers: For larger crates, consider adding small internal dividers to create more compartments.
- Lighting: Small battery-operated puck lights inside a crate can highlight special items.
10. Wall-Mounted Wine or Mug Rack
Showcase your favorite mugs or store wine bottles beautifully with a custom DIY kitchen decor idea with wall organization. This project adds a personal touch and keeps frequently used items accessible or special items on display.
Gather Your Materials
- Sturdy wooden plank or pallet wood
- Cup hooks (for mugs) OR specific wine glass racks/bottle holders
- Drill, screws, wall anchors
- Measuring tape, pencil, level
- Sandpaper, paint or stain (optional)
Step-by-Step Installation
Prepare Your Wood
Cut your wooden plank to the desired length. Sand it smooth. If you’re using pallet wood, ensure it’s clean and free of splinters. Stain or paint the wood if desired, allowing it to dry completely.
Mark and Install Hooks/Holders
For a Mug Rack: Measure and mark evenly spaced points along the bottom edge of your plank where you want to install your cup hooks. Pre-drill small pilot holes (this prevents wood splitting), then screw in your cup hooks by hand until they are firmly seated.
For a Wine Rack: If using specific wine glass racks, install them according to their instructions. For bottle holders, you might need to drill specific sized holes or attach small wooden supports to cradle the bottles. Plan your layout carefully, ensuring enough space between bottles and glasses.
Mount to the Wall
Hold the assembled wood piece against the wall in your chosen location. Use a level to ensure it’s straight. Mark the screw holes for mounting the plank to the wall. Drill pilot holes and use sturdy screws, ideally into wall studs, or heavy-duty wall anchors, to secure the rack firmly to the wall. It must be able to support the weight of your mugs or wine bottles.
Organize and Display
Hang your favorite mugs or arrange your wine bottles. This project not only provides practical storage but also serves as a charming piece of DIY kitchen decor, adding character and warmth to your space.
Tips for Wine/Mug Racks
- Capacity Check: Always consider the weight capacity of your wall and mounting hardware.
- Complementary Style: Choose wood and hook finishes that match your kitchen’s existing hardware and style.
- Beyond Mugs/Wine: This setup can also hold kitchen towels, small cooking tools, or even light garlands for seasonal decor.
Troubleshooting Common DIY Challenges
Even the simplest DIY kitchen decor ideas with wall organization can sometimes present small hurdles. Here are quick solutions for common issues:
- Finding Studs: If you need to mount heavy items, finding wall studs is crucial for security. Use a stud finder or tap lightly on the wall to listen for solid areas. Once found, confirm with a small pilot hole.
- Unlevel Shelves/Racks: Always use a level! If something looks off after installation, gently loosen screws (if possible), adjust slightly, and re-tighten. Sometimes, removing and remounting is the safest bet for heavily loaded items.
- Drilling Issues: If your drill struggles, you might be hitting metal (pipes, electrical) or a very hard stud. Stop immediately. For masonry walls, you’ll need a hammer drill and masonry bits. For wood, ensure your drill bit is sharp and appropriate for the material.
- Insufficient Weight Capacity: If your shelves sag or feel wobbly, they might be overloaded or not properly anchored. Always use wall anchors appropriate for the weight you plan to put on the shelf, especially if you can’t hit a stud. When in doubt, reinforce or choose a different mounting method.
Conclusion
There you have it – 10 fantastic DIY kitchen decor ideas with wall organization to inspire your next home project! From the adaptable pegboard to charming repurposed crate shelves, these ideas offer practical solutions to common kitchen dilemmas while infusing your personality into your space. By utilizing vertical space, you not only declutter countertops but also create a more efficient, inviting, and uniquely styled kitchen.
Remember, the beauty of DIY is in the journey and the satisfaction of creating something with your own hands. Don’t be afraid to customize these ideas to perfectly fit your kitchen’s style and your family’s needs. Grab your tools, get creative, and enjoy transforming your kitchen into the organized, beautiful heart of your home!