
Transform your space affordably and effortlessly with 5 essential DIY paper decor ideas! These beginner-friendly projects use simple materials to create stunning wall art, adding personality and style to any room without breaking the bank. Get ready for a fun, creative decorating experience!
Feeling like your walls are a little bare, but not sure where to start with decorating? You’re not alone! Many of us want a beautiful home but feel overwhelmed by expensive options or complicated design processes. It’s easy to think stylish decor has to cost a lot of money or require expert skills.
But what if I told you that you can create gorgeous, eye-catching decor using just paper and a few basic supplies? It’s true! Paper is an incredibly versatile and budget-friendly material that can be transformed into amazing pieces of art for your home.
This guide is designed to make decorating simple, fun, and totally achievable, even if you’ve never done a DIY project before. We’ll walk through five fantastic paper decor ideas that are essential for adding charm and personality to your space. Get ready to discover how easy it is to elevate your home’s look!
Why Paper Decor is a Beginner’s Best Friend
Paper is one of the most accessible and forgiving materials for DIY projects. Its low cost means you can experiment without worry, and the variety of colors, textures, and patterns available is practically endless. Whether you’re decorating a dorm room, a first apartment, or just looking to refresh a corner of your house, paper offers limitless creative possibilities.
You don’t need fancy tools or a dedicated craft room. Most of these projects can be done on your kitchen table with common household items. Plus, paper decor is lightweight, making it easy to hang and rearrange, which is perfect for renters or anyone who likes to change their decor often.
Let’s dive into five essential DIY paper decor ideas that are not only beautiful but also incredibly easy to create. These projects are designed to give you maximum impact with minimum fuss, proving that stylish home decor can be both simple and budget-friendly.
1. Elegant 3D Paper Wall Flowers
Imagine your walls blooming with beautiful, dimensional flowers that add a pop of color and texture. These 3D paper wall flowers are surprisingly simple to make and create a huge visual impact. They’re perfect for a bedroom, nursery, or even a living room accent wall.
What You’ll Need:
- Cardstock or heavy-weight paper (various colors)
- Scissors
- Glue stick or hot glue gun
- Pencil
- Template for petals (optional, you can freehand them!)
- Mounting putty or command strips
Step-by-Step Guide:
- Choose Your Colors: Select a few coordinating colors of cardstock. You can use solid colors, patterned paper, or even metallic cardstock for a touch of glam.
- Create Petal Shapes: Draw or print petal shapes onto your paper. You can vary the size and shape for a more organic look. Aim for 5-7 petals per flower. For a simple petal, draw a rounded teardrop shape.
- Cut Out Petals: Carefully cut out all your petal shapes. It’s a good idea to cut a few different sizes for each flower to add depth.
- Shape the Petals: Gently curl the edges of each petal outward using the edge of your scissors or a pencil. This gives them a more realistic, lifelike appearance.
- Assemble the Flower: Start by gluing the largest petals to a central point, overlapping them slightly. Work your way inwards with progressively smaller petals, layering them to create a full, 3D bloom. Use a glue stick for lighter papers or a hot glue gun for a stronger hold.
- Add a Center: For the center of the flower, you can cut out a small circle, roll a thin strip of paper, or even use a decorative bead or button. Glue this to the very center.
- Attach to Wall: Once your flowers are dry, use mounting putty or removable adhesive strips to attach them to your wall. Arrange them in a cluster, a scattered pattern, or a linear design.
Mila’s Tip:
Don’t be afraid to mix and match paper textures! Using a mix of matte, glossy, and textured cardstock can add even more visual interest to your paper flowers. For a cohesive look, try using shades within the same color family.
2. Geometric Paper Wall Art
Geometric patterns are timeless and can bring a modern, sophisticated feel to any room. This DIY project involves cutting and arranging paper shapes to create a striking piece of wall art. It’s a fantastic way to add a personalized touch without needing any artistic drawing skills.
What You’ll Need:
- Cardstock or thick paper in various colors and patterns
- A cutting mat
- Craft knife or a paper trimmer
- Ruler
- Pencil
- Large piece of backing paper or canvas (optional)
- Glue stick or spray adhesive
- Frame (optional)
Step-by-Step Guide:
- Plan Your Design: Decide on a geometric pattern. Think triangles, squares, hexagons, or a combination. You can sketch it out on paper first or just start cutting and arranging.
- Cut Your Shapes: Using your ruler and craft knife (or paper trimmer), cut out numerous geometric shapes from your chosen papers. Consistency in size and shape within each color can create a cleaner look, or mix it up for a more abstract feel.
- Arrange Your Pattern: Lay out your shapes on a flat surface to experiment with different arrangements. Consider color blocking, ombre effects, or random placement. If you’re using a backing paper or canvas, you can arrange them directly on that.
- Adhere the Shapes: Once you’re happy with your arrangement, begin gluing the shapes down. A glue stick works well for smaller pieces, while spray adhesive provides a strong, even bond for larger areas. Ensure the edges are well-glued to prevent peeling.
- Mount Your Art: If you used a backing paper, you can simply hang it as is. If you want a more finished look, consider mounting your geometric art onto a piece of foam board or inside a frame.
Budget-Friendly Variation:
Instead of buying a large canvas or frame, use sturdy cardboard as your backing. You can paint the cardboard a solid color before you start adhering your paper shapes for a polished finish.
3. Rolled Paper Wall Sculpture
This technique creates a beautiful, textured effect that looks incredibly sophisticated. By rolling strips of paper and arranging them, you can build intricate designs that resemble quilling but are much simpler to achieve. It’s a tactile and visually engaging project.
What You’ll Need:
- Paper strips (various colors, widths, and textures). You can buy pre-cut strips or cut your own from cardstock or construction paper.
- Glue stick or liquid craft glue
- Toothpicks or a quilling tool (optional, for rolling)
- A sturdy backing board (cardboard, foam board, or canvas)
- Pencil
- Scissors
Step-by-Step Guide:
- Prepare Your Strips: Cut your paper into strips. The width of the strips will determine the thickness of your rolled elements. You can also vary the lengths for different design elements.
- Roll the Paper: Take a strip of paper and begin rolling it tightly. You can use a toothpick inserted into one end to help get a tight, even roll, or simply use your fingers. Apply a small dab of glue to the end of the strip to secure the roll.
- Create Different Shapes: Once you have a tightly rolled coil, you can leave it as is, or gently pinch it to create different shapes like teardrops, marquises, or squares. You can also loosen the roll slightly before gluing the end to create looser, more open spirals.
- Design Your Sculpture: Sketch a simple design on your backing board with a pencil. This could be an abstract pattern, a floral motif, or even a silhouette.
- Arrange and Glue: Start arranging your rolled paper elements onto the backing board according to your design. Apply a dab of glue to the back of each rolled piece and press it firmly onto the board. Work section by section, filling in your design.
- Fill in Gaps: Use smaller rolls or cut pieces of rolled paper to fill any gaps and create a cohesive sculpture. You can also use the rolled elements to outline shapes or create texture.
External Resource:
For more inspiration on paper rolling and quilling techniques, explore resources from the Quilling Guild. While this project is simpler, understanding basic rolling principles can enhance your results.
4. Layered Paper Cutout Art
This technique creates a beautiful shadow effect, giving your paper art a sense of depth and dimension. It’s like creating a mini-scene or abstract design using multiple layers of cut paper. This method is especially effective for creating landscapes, cityscapes, or intricate floral designs.
What You’ll Need:
- Cardstock in various colors
- Craft knife and cutting mat
- Pencil
- Ruler
- Foam board or thick cardboard for spacers
- Frame with a deep mat (or create your own spacers)
- Glue stick or spray adhesive
Step-by-Step Guide:
- Design Your Layers: Think about a scene or pattern you want to create. Break it down into distinct layers. For example, a landscape might have a background sky layer, a middle ground mountain layer, and a foreground tree layer.
- Cut the Base Layer: Cut your largest, most encompassing shape from one color of cardstock. This will be the background. You can glue this directly to your frame backing or the inside of the frame.
- Prepare Spacers: Cut thin strips of foam board or thick cardboard. These will be used to create the space between your paper layers, allowing for the shadow effect.
- Cut Subsequent Layers: On new pieces of cardstock, draw and cut out the elements for your next layer. For instance, if your base was a sky, this layer might be mountains. You’ll want to cut out the shapes that will be visible.
- Adhere Layers with Spacers: Glue the foam board strips to the back of your second layer of cut paper. Then, carefully adhere this layered piece onto the base layer, creating a gap. Repeat this process for each subsequent layer, building your artwork piece by piece.
- Assemble in Frame: Once all your layers are assembled, place them inside your frame. The deep mat of the frame will help to enclose the layers and enhance the shadow effect.
Considerations for Depth:
The thickness of your spacers is crucial. Thicker spacers create more dramatic shadows and depth. Experiment with different thicknesses to achieve the look you desire.
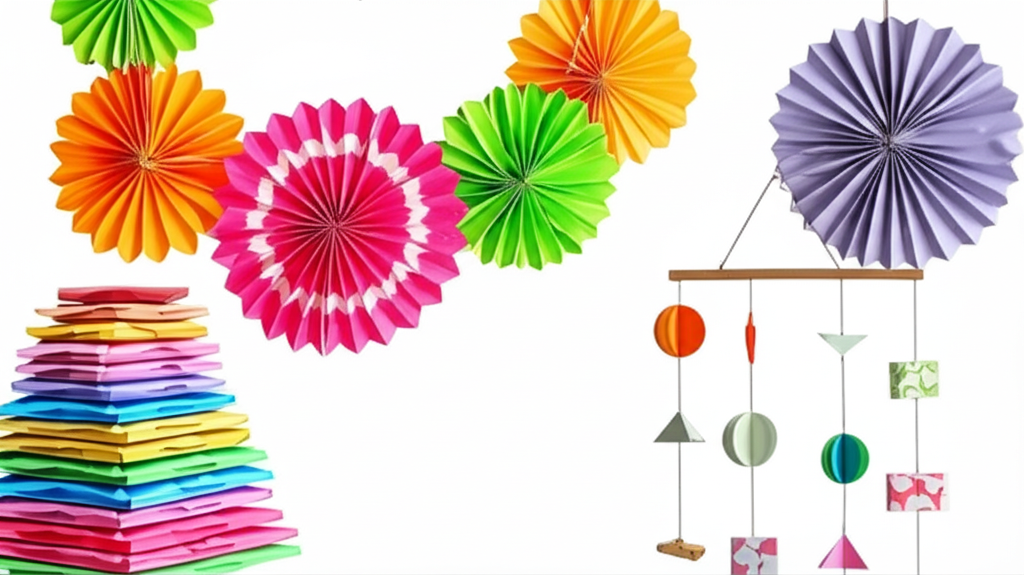
5. Accordion Folded Paper Wall Garland
Garlands are a fantastic way to add instant festivity and color to a space. This easy accordion fold technique can be used to create a variety of shapes, from simple fans to more elaborate floral or geometric designs. It’s a quick and satisfying project.
What You’ll Need:
- Paper (construction paper, cardstock, or even patterned scrapbook paper)
- Scissors
- Glue stick or double-sided tape
- String or twine for hanging
- Hole punch (optional)
Step-by-Step Guide:
- Cut Your Paper: Cut your paper into rectangular strips. The length and width of the strips will determine the size of your folded elements. For a standard garland, strips around 6 inches wide and 12 inches long work well.
- Accordion Fold: Fold the paper strip back and forth like an accordion, making each fold about ½ inch to 1 inch wide. Ensure your folds are crisp and even.
- Form the Shape: Once folded, you’ll have a long, flat strip. You can leave it as is for a simple fan shape, or you can fold it in half and glue the open edges together to create a full circle or fan. For a more intricate shape, you can cut designs into the folded edges before opening.
- Connect the Elements: To create a garland, you have a few options. You can punch a hole at the top of each folded element and thread string through them. Alternatively, you can glue or tape the folded elements directly onto a length of string, spacing them as desired.
- Hang Your Garland: Use the string to hang your beautiful, handmade garland. Drape it across a wall, over a window, or along a shelf.
Creative Variations:
Try using different types of paper for varied textures. Metallic paper adds a festive touch, while patterned paper can introduce a playful element. You can also cut the folded edges into different shapes (like scallops or points) before opening to create unique garland elements.
Essential Tools & Materials Recap
To help you get started with all these wonderful DIY paper decor projects, here’s a quick rundown of the most useful tools and materials. Having these on hand will make your crafting experience smooth and enjoyable.
| Tool/Material | Description | Why It’s Useful |
|---|---|---|
| Cardstock/Heavy Paper | Thicker paper that holds its shape well. | Provides structure and durability for decor pieces. Available in countless colors and textures. |
| Scissors | Sharp cutting tools. | Essential for cutting paper into various shapes. |
| Craft Knife & Cutting Mat | Precise cutting tool and protective surface. | Ideal for intricate cuts and clean lines in geometric or layered art. |
| Glue Stick / Craft Glue | Adhesives for paper. | For securely attaching paper pieces. Craft glue offers a stronger bond for heavier applications. |
| Ruler | Measuring tool. | Ensures straight lines and accurate measurements for patterns and shapes. |
| Pencil | For marking. | To sketch designs and mark cutting lines lightly. |
| Mounting Putty / Command Strips | Removable wall adhesives. | Allows for easy hanging and removal without damaging walls, perfect for renters. |
| Frame / Backing Board | Support for artwork. | Provides a stable surface to build upon and a finished look for your creations. |
Frequently Asked Questions (FAQ)
Here are some common questions beginners might have about creating DIY paper decor.
Q1: Will paper decor last?
A: Yes, paper decor can last a long time, especially when made with cardstock or heavier paper and protected from moisture and direct sunlight. For best longevity, avoid hanging paper crafts in humid areas like bathrooms or steamy kitchens.
Q2: How do I hang paper decor without damaging my walls?
A: Use removable adhesives like Command strips or mounting putty. These are designed to hold decor securely but can be removed cleanly without peeling paint or leaving residue. Always test a small amount of adhesive in an inconspicuous area first.
Q3: Can I use regular printer paper for these projects?
A: While you can use printer paper for some simpler projects or practice, cardstock or heavier craft paper is recommended for most DIY decor. Thicker paper holds its shape better, looks more polished, and is more durable.
Q4: What if I’m not good at drawing or cutting precisely?
A: That’s the beauty of DIY paper decor! Many projects, like the geometric art or rolled paper sculpture, don’t require perfect drawing skills. You can use templates, rulers, and straight-edge cutting tools for clean lines. Embrace imperfection; it adds character!
Q5: How much do these projects typically cost?
A: These DIY projects are incredibly budget-friendly. The main costs are usually for paper and adhesive, which can be very inexpensive, especially if you buy in bulk or use craft store coupons. Many projects can be done for under $10-$20.
Q6: Can I combine different paper decor ideas?
A: Absolutely! Mixing and matching different types of paper decor can create a unique and layered look. For example, you could hang a geometric paper art piece next to a cluster of 3D paper flowers for a dynamic wall display.
Conclusion
Creating beautiful and personalized decor for your home doesn’t need to be complicated or expensive. With just a few sheets of paper and some basic supplies, you can transform your living space into a stylish sanctuary. These five DIY paper decor ideas—elegant 3D flowers, striking geometric art, textured rolled sculptures, layered cutout scenes, and festive accordion garlands—offer simple yet impactful ways to add personality and charm to any room.
Remember, the most important part of DIY is to have fun and let your creativity flow. Don’t be afraid to experiment with different colors, patterns, and arrangements. These projects are perfect for beginners, allowing you to build confidence with each piece you create. Whether you’re decorating a small apartment, a student dorm, or a family home, these essential paper decor ideas provide achievable and affordable solutions to make your space truly your own. So, grab some paper and get crafting – your walls will thank you!
Looking to extend your DIY creativity into the kitchen? Explore our guide on 12 Kitchen Wall Art Ideas: Stunning Makeovers for more inspiration on personalized, handmade decor that fits every room.