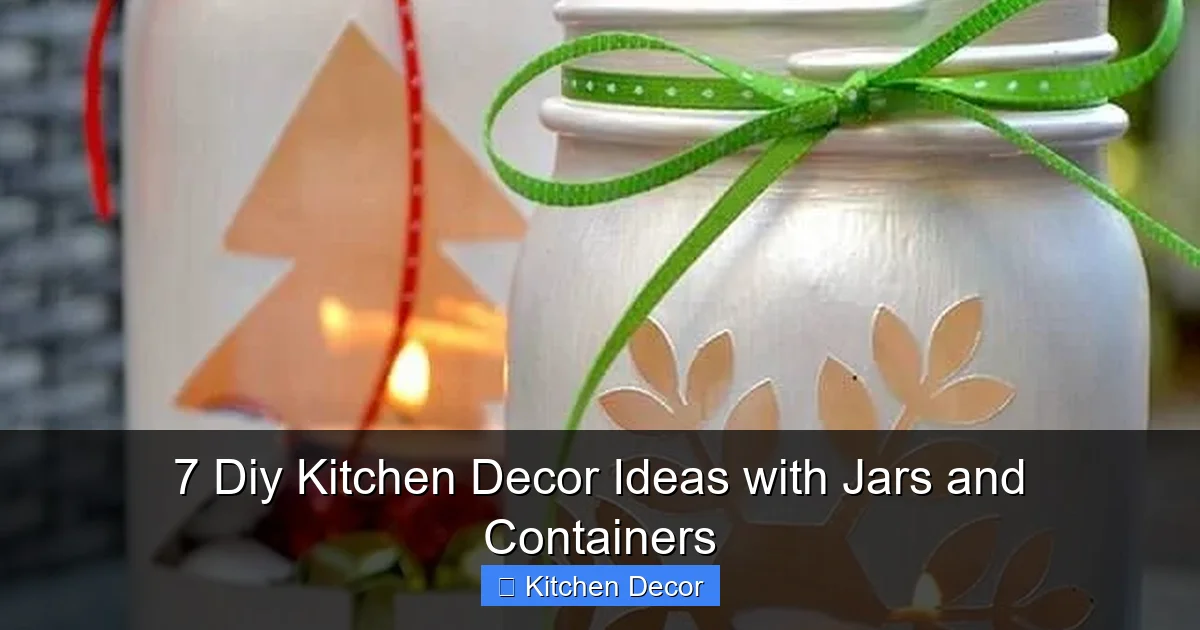
Revitalize your kitchen with these 7 ingenious DIY decor ideas using everyday jars and containers. Discover how to transform simple items into beautiful and functional pieces, from organized pantry storage to charming herb gardens and ambient lighting. This guide offers easy, budget-friendly steps to add personality and order to your culinary space, making it both practical and aesthetically pleasing.
7 Diy Kitchen Decor Ideas with Jars and Containers
Welcome to a world where everyday jars and containers transform into beautiful and functional pieces of kitchen decor! Do you look at your kitchen and wish it had more personality, better organization, or just a touch more charm? You’re in the right place. This guide is packed with simple, fun, and budget-friendly DIY kitchen decor ideas using jars and containers you likely already have or can easily find.
We believe that your kitchen should be a space you love. It should feel organized, inviting, and truly reflect your style. And guess what? You don’t need to spend a fortune to achieve that look. With a little creativity and some humble jars, you can create stunning focal points, streamline your storage, and add unique touches that make your kitchen feel special.
In this comprehensive how-to guide, we will walk you through seven fantastic DIY kitchen decor ideas with jars and containers. Each idea comes with clear, step-by-step instructions, practical tips, and suggestions to help you personalize your creations. Get ready to gather your jars, unleash your inner decorator, and transform your kitchen into a beautifully organized sanctuary!
Key Takeaways
- Embrace Versatility: Jars and containers are incredibly versatile, offering endless possibilities for both functional storage and decorative accents in any kitchen.
- Budget-Friendly Transformation: Repurposing existing jars or finding inexpensive ones is an excellent way to achieve a stylish kitchen refresh without breaking the bank.
- Organization Meets Aesthetics: DIY jar decor seamlessly blends practical organization, like pantry storage and utensil holders, with beautiful design elements, making your kitchen more efficient and appealing.
- Personalize Your Space: Each project provides an opportunity to infuse your personal style, whether through choice of labels, paint colors, or decorative fillers, making your kitchen uniquely yours.
- Start Small, Think Big: Even small changes, like updating your spice rack or adding a jar full of fairy lights, can significantly impact your kitchen’s overall ambiance and functionality.
- Sustainability in Decor: Reusing jars and containers promotes an eco-friendly approach to home decor, giving new life to items that might otherwise be discarded.
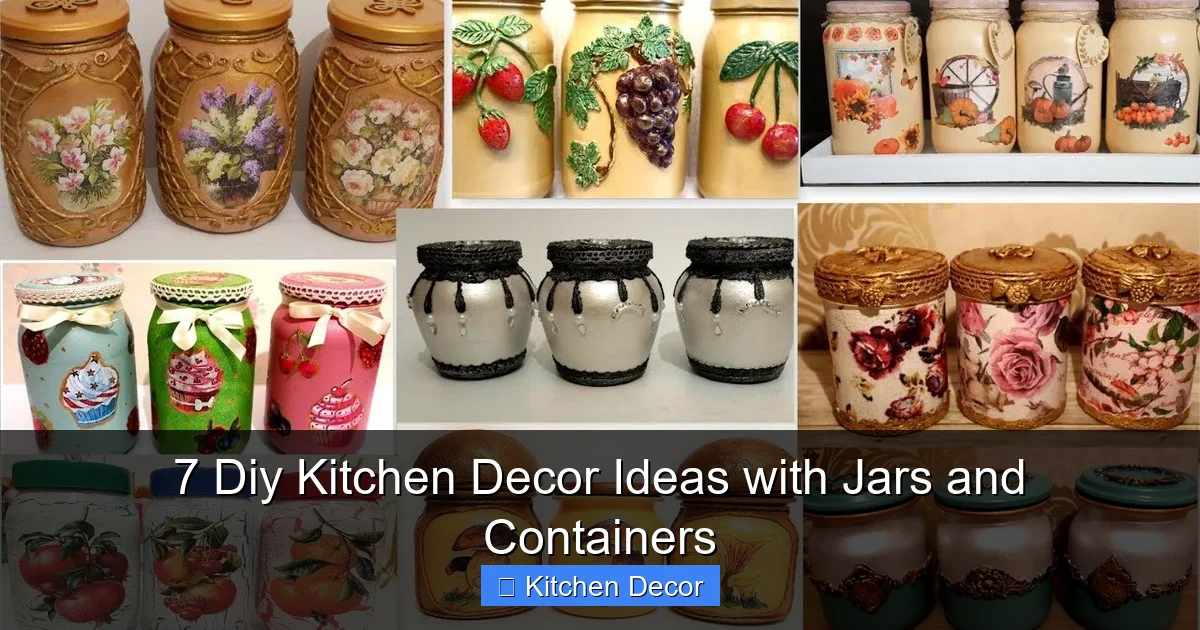
1. Pantry Perfection: Labeled Dry Goods Jars
Transforming your pantry or open shelving with uniformly labeled jars is a classic for a reason. It looks incredibly neat, makes ingredients easy to find, and adds a sophisticated touch to your kitchen decor. This DIY kitchen decor idea with jars and containers is both practical and pleasing to the eye.
Materials You’ll Need:
- Various sizes of clear glass jars with airtight lids (mason jars, old pickle jars, or store-bought containers work great)
- Dry goods like pasta, rice, lentils, flour, sugar, oats, coffee beans, etc.
- Labeling supplies: chalk markers, permanent markers, vinyl labels, sticker labels, or a label maker.
- Optional: paint (chalk paint or spray paint), twine, ribbon, decorative tags.
Step-by-Step Instructions:
- Clean Your Jars Thoroughly: Wash all jars and lids with warm, soapy water. Rinse them well and let them air dry completely. This prevents moisture from affecting your dry goods.
- Prepare Your Dry Goods: Ensure your dry goods are fresh and free from moisture. If transferring from original packaging, do so carefully to avoid spills.
- Fill the Jars: Carefully pour or scoop your dry goods into the clean, dry jars. Fill them to a level that looks aesthetically pleasing, usually leaving a small gap at the top.
- Create Your Labels: This is where you personalize your DIY kitchen decor.
- For Chalk Labels: Paint a small section of the jar or lid with chalk paint. Once dry, write the ingredient name with a chalk marker.
- For Vinyl Labels: Use a cutting machine (like Cricut) to create custom vinyl labels with ingredient names. Apply them smoothly to the jars.
- For Sticker Labels: Write clearly on pre-made sticker labels or use a label maker.
- For Tags: Write on cardstock tags, punch a hole, and tie them around the jar neck with twine or ribbon.
- Apply Lids Securely: Once labeled, screw on the lids tightly to ensure freshness and keep pests out.
- Arrange and Admire: Place your newly organized and labeled jars on pantry shelves, open shelving, or countertops. Group similar items together for a cohesive look.
Tips for Success:
- Consistency is Key: For a cohesive look, try to use jars of similar styles or lids.
- Batch Prep: Make a day of it! Wash all your jars at once and then go through the labeling and filling process efficiently.
- Airtight is Best: Always choose jars with airtight seals to keep food fresh longer.
- Layer for Beauty: If using different colors of pasta or grains, consider layering them for an even more attractive display.
2. Organized Cooking: Chic Utensil Holders
Visual guide about 7 Diy Kitchen Decor Ideas with Jars and Containers
Image source: thespruce.com
Tired of rummaging through drawers for your spatulas and whisks? This DIY kitchen decor idea with jars and containers turns everyday jars into stylish and accessible utensil holders. It’s a simple way to keep your most-used tools within reach and add a touch of rustic or modern charm to your countertop.
Materials You’ll Need:
- Large, sturdy glass jars (e.g., old pickle jars, large mason jars, or even wide-mouthed canisters)
- Optional: paint (spray paint, chalk paint), sandpaper, decorative paper, fabric, glue, ribbon, twine.
- Your kitchen utensils (spatulas, whisks, wooden spoons, tongs, ladles).
Step-by-Step Instructions:
- Select Appropriate Jars: Choose jars that are tall enough to hold your utensils upright without tipping over, and wide enough to accommodate several items.
- Clean and Dry: Wash the jars thoroughly and ensure they are completely dry before decorating or using.
- Decorate Your Jars (Optional):
- Painted Jars: For a sleek look, spray paint the jars a solid color that matches your kitchen (e.g., matte black, white, or a pop of color). For a rustic look, use chalk paint, distress lightly with sandpaper once dry, and seal with wax.
- Wrapped Jars: Wrap jars with decorative paper, fabric, or burlap. Secure with strong craft glue. You can add a ribbon or twine bow for extra flair.
- Simple & Clear: If you love the minimalist look, simply use clean, clear jars as they are.
- Allow to Dry/Cure: If painting or gluing, ensure everything is fully dry and cured according to product instructions before adding utensils.
- Add Utensils: Place your frequently used kitchen utensils into the jars. Arrange them so they are easy to grab.
- Position on Countertop: Place your new utensil holders near your cooking area for easy access.
Tips for Success:
- Weight Matters: If using lighter jars, fill the bottom with a layer of decorative pebbles, sand, or dried beans for added stability, especially if you have heavier utensils.
- Mix and Match: Use jars of slightly different heights or styles for a dynamic display.
- Theme It: Match your jar decor to your kitchen’s existing theme – farmhouse, modern, minimalist, etc.
3. Freshness Indoors: Mini Herb Gardens
Visual guide about 7 Diy Kitchen Decor Ideas with Jars and Containers
Image source: i.ytimg.com
Bring the outdoors in with a charming mini herb garden nestled in jars. Not only does this DIY kitchen decor idea with jars and containers add a touch of greenery and life to your kitchen, but it also provides fresh herbs for your cooking. Imagine snipping fresh basil or mint right from your countertop!
Materials You’ll Need:
- Medium to large glass jars (e.g., wide-mouthed mason jars, old pasta sauce jars).
- Small herb plants or herb seeds (basil, mint, chives, rosemary, thyme are good choices).
- Potting soil suitable for herbs.
- Small pebbles or gravel for drainage.
- Optional: labels for herb names, twine, small decorative rocks.
Step-by-Step Instructions:
- Choose Your Jars: Select jars with relatively wide openings to give your herbs room to grow. You can paint the jars or leave them clear.
- Ensure Drainage: Glass jars don’t have drainage holes, so it’s crucial to create a false bottom. Add a 1-2 inch layer of small pebbles or gravel to the bottom of each jar. This prevents root rot.
- Add Potting Soil: Fill the jars with good quality potting soil, leaving about an inch or two from the rim.
- Plant Your Herbs:
- For Small Plants: Gently remove the herb plant from its nursery pot. Loosen the roots slightly and place it in the jar, pressing soil around the base.
- For Seeds: Follow the seed packet instructions for depth and spacing. Typically, you’ll sow a few seeds and lightly cover them with soil.
- Water Gently: Water your newly planted herbs carefully, ensuring the soil is moist but not waterlogged.
- Label Your Herbs: Create small labels for each jar so you know which herb is which. You can use mini chalkboard stakes, craft sticks, or custom jar labels.
- Find a Sunny Spot: Place your jar herb garden on a windowsill or counter where it will receive plenty of sunlight.
Tips for Success:
- Don’t Overwater: Since there are no drainage holes, be extra careful not to overwater. Check the soil moisture before watering again.
- Rotate Jars: Rotate your jars every few days so all sides of the plants get adequate sunlight.
- Harvest Regularly: Pinch off leaves from the top to encourage bushier growth.
- Consider a Tray: Place your jars on a decorative tray to catch any drips and make them easy to move.
4. Spice It Up: Decorative Spice Jars
Visual guide about 7 Diy Kitchen Decor Ideas with Jars and Containers
Image source: i.pinimg.com
Give your spice rack a makeover with a uniform collection of decorative spice jars. This DIY kitchen decor idea with jars and containers not only keeps your spices organized and fresh but also elevates the look of your pantry or kitchen counter. Say goodbye to mismatched spice containers!
Materials You’ll Need:
- Small, uniform glass jars with airtight lids (mini mason jars, baby food jars, or dedicated spice jars).
- Your favorite spices.
- Labeling supplies: waterproof labels, chalk labels, a label maker, or spice rack stickers.
- Optional: jar rack, magnetic strips, paint (for lids).
Step-by-Step Instructions:
- Gather Your Jars: Collect enough small jars to hold all your frequently used spices. Ensure they are clean and dry.
- Transfer Spices: Carefully pour or scoop your spices into the clean jars. Funnels can be very helpful here to avoid spills.
- Secure Lids: Place the lids on tightly to preserve the freshness and aroma of your spices.
- Create and Apply Labels:
- Top or Side Labels: Decide if you want labels on the top of the lid (great for drawer storage) or on the side of the jar (ideal for shelves or racks).
- Waterproof Labels: These are excellent for kitchen use where spills might occur. Write neatly with a permanent marker or print custom labels.
- Chalkboard Labels: Paint the lids with chalkboard paint and write spice names with a chalk marker.
- Pre-made Spice Stickers: Many beautiful sets are available online.
- Organize Your Spice Display:
- On a Rack: Arrange your jars alphabetically or by frequency of use on a tiered spice rack.
- In a Drawer: Lay them flat in a drawer with top labels facing up.
- Magnetic Wall: Attach magnets to the back of the jars (or use magnetic lids) and display them on a magnetic strip or board.
Tips for Success:
- Use a Funnel: A small funnel makes transferring spices much easier and less messy.
- Date Your Spices: Consider adding a small date on the bottom or back of the jar to keep track of freshness. Spices do lose potency over time.
- Consider Lid Decor: Paint the lids a uniform color (e.g., metallic, white, or a vibrant accent) for an extra touch of polish.
- Alphabetize: Organizing spices alphabetically makes finding them quick and easy, especially when cooking.
5. Warm Glow: Jar Lanterns & Fairy Lights
Add a magical and cozy ambiance to your kitchen with enchanting jar lanterns filled with fairy lights or LED candles. This purely decorative DIY kitchen decor idea with jars and containers creates a warm glow that transforms the mood of any space, perfect for evening meals or relaxing.
Materials You’ll Need:
- Clear glass jars of various sizes (mason jars, old jam jars, decorative glass containers).
- Battery-operated LED fairy lights (string lights).
- OR battery-operated LED pillar candles or tea lights.
- Optional: decorative sand, small pebbles, moss, faux flowers, glitter.
Step-by-Step Instructions:
- Clean and Dry Jars: Ensure all jars are sparkling clean and completely dry.
- Choose Your Lighting: Decide if you want to use fairy lights or LED candles. Both create a lovely effect.
- Insert Fairy Lights:
- Gently coil the string of LED fairy lights into the jar. Leave the battery pack outside or hide it within the jar if it’s small enough.
- For a diffused glow, you can add a layer of decorative sand or small pebbles at the bottom before adding the lights.
- Insert LED Candles:
- Place the LED pillar candle or tea light at the bottom of the jar.
- You can surround the candle with decorative elements like small stones, coffee beans (for aroma too!), or faux moss.
- Optional Decorations:
- Glitter: Lightly spray the inside of the jar with spray adhesive and sprinkle glitter for a shimmering effect.
- Frosted Look: Use frosted glass spray paint for a softer, diffused glow.
- Twine/Ribbon: Tie decorative twine or ribbon around the neck of the jar.
- Place and Enjoy: Arrange your glowing jar lanterns on shelves, windowsills, a kitchen island, or dining table. Turn them on to create a beautiful atmosphere.
Tips for Success:
- Battery Life: Choose fairy lights with good battery life, or consider rechargeable options if you plan to use them frequently.
- Mix Sizes: Group jars of different sizes together for a more dynamic and interesting display.
- Safety First: Always use battery-operated LED lights or candles in glass jars. Never use real flames due to fire risk and heat.
- Thematic Fillers: Consider seasonal fillers. For example, mini pinecones in winter, small seashells in summer.
6. Sweet & Savory Displays: Treat & Produce Jars
Elevate your kitchen’s aesthetic by beautifully displaying fresh produce or tempting treats in clear glass jars. This DIY kitchen decor idea with jars and containers is a feast for the eyes and a functional way to store items that look good on display, like vibrant lemons, limes, garlic, or delicious cookies.
Materials You’ll Need:
- Large, clear glass jars (apothecary jars, cookie jars, or large wide-mouthed canisters).
- Fresh produce (lemons, limes, oranges, apples, garlic bulbs) or baked goods (cookies, biscotti, candy).
- Optional: decorative tags, ribbon.
Step-by-Step Instructions:
- Select Your Jars: Choose clear jars that are appealing to the eye and large enough to hold a decent quantity of your chosen items. Jars with interesting shapes or elegant lids work especially well.
- Clean and Dry: Wash the jars thoroughly and ensure they are completely dry before filling.
- Prepare Your Contents:
- For Produce: Ensure fruits like lemons or limes are clean and dry. Arrange them carefully to prevent bruising.
- For Baked Goods: Make sure cookies or treats are completely cooled before placing them in airtight jars to prevent condensation and sogginess.
- Fill and Arrange:
- For Fruits/Veggies: Gently place the produce into the jar. You can stack them neatly or allow them to tumble naturally for a more rustic look.
- For Treats: Carefully stack cookies or arrange candies. A mix of colors or textures can be very appealing.
- Seal if Needed: If storing baked goods, seal the jar tightly to keep them fresh. For fruits, an airtight seal isn’t strictly necessary if you plan to use them quickly, but it helps prevent dust.
- Display Prominently: Place your beautiful display jars on your kitchen island, countertop, open shelves, or a dining room buffet.
Tips for Success:
- Rotate Produce: If using fresh fruits, remember to rotate them and use the older ones first to prevent spoilage.
- Color Pop: Use brightly colored fruits like lemons or limes for a cheerful pop of color in your kitchen.
- Apothecary Jars: These types of jars, with their pedestals and ornate lids, are perfect for creating an upscale display.
- Beyond Food: This idea isn’t just for food! You could also display decorative pebbles, corks, or even colorful dish sponges in an attractive way.
7. Brewing Bliss: Coffee & Tea Station Jars
Create an inviting and organized coffee and tea station using jars and containers. This DIY kitchen decor idea not only keeps your brewing essentials neat but also adds a dedicated, stylish nook to your kitchen, making your morning routine a little more special.
Materials You’ll Need:
- Assorted jars for coffee beans/grounds, tea bags, sugar, stirrers, creamer packets, etc. (airtight for coffee/tea/sugar).
- Labels (chalk markers, vinyl labels, sticker labels).
- Optional: small tray, scoop, decorative spoon, small mug rack.
Step-by-Step Instructions:
- Select Appropriate Jars: Choose jars suitable for each item. Larger, airtight jars for coffee beans/grounds and sugar. Smaller jars for tea bags (or a canister), stirrers, or sugar cubes.
- Clean and Dry: Wash all jars and lids thoroughly and ensure they are completely dry.
- Fill Your Jars:
- Coffee Beans/Grounds: Fill an airtight jar with your favorite coffee.
- Tea Bags: Stack individually wrapped tea bags neatly in a jar, or store loose leaf tea in a smaller airtight jar.
- Sugar: Pour granulated sugar or sugar cubes into an appropriate jar.
- Stirrers/Spoons: Place stirrers, small spoons, or creamer packets into a taller, open jar.
- Label Everything: Clearly label each jar so everyone knows what’s inside. Use consistent labels for a unified look.
- Arrange Your Station:
- On a Tray: Place all your labeled jars on a decorative tray to define the coffee/tea station area and make it easy to move for cleaning.
- With Accessories: Add a small scoop for coffee, a sugar spoon, and perhaps a favorite mug or two.
- Find the Perfect Spot: Position your coffee and tea station on a clear section of your countertop, near the kettle or coffee maker.
Tips for Success:
- Airtight for Freshness: For coffee and tea, airtight jars are crucial to maintain flavor and freshness.
- Scoop Inclusion: Consider keeping a small scoop right in the coffee jar for convenience.
- Vertical Storage: If space is limited, use taller, slimmer jars or stackable containers.
- Personalize with Mugs: Displaying a few of your favorite mugs near the station adds to the personal touch.
- Seasonal Touches: Add a small seasonal decoration, like a tiny faux pumpkin for fall or a sprig of holly for winter, to your station.
Troubleshooting & General Tips for Jar Decor
While DIY kitchen decor with jars and containers is generally straightforward, here are a few common issues and overall tips to keep in mind:
Troubleshooting:
- Lids Not Sealing: If your lids aren’t sealing well, especially on old jars, check for rust or bends. Sometimes replacing the rubber seal or using a fresh lid is necessary.
- Labels Peeling: Ensure the jar surface is clean and dry before applying labels. For waterproof labels, press firmly to remove air bubbles. For painted surfaces, ensure the paint is fully cured.
- Jars Tipping Over: For tall, narrow jars, add weight to the bottom (e.g., pebbles, sand, or marbles) before adding contents like utensils or tall flowers.
- Moisture in Pantry Jars: Always make sure both the jar and the dry goods are completely dry before filling. Store away from direct sunlight or excessive humidity.
General Tips for All Jar Projects:
- Thorough Cleaning: Always start with impeccably clean and dry jars. Residue can affect seals, decor, or food quality.
- Test First: If painting or using adhesives, do a small test on an inconspicuous part of the jar or on a spare jar first.
- Safety First: Handle glass jars with care to avoid breakage. If a jar breaks, dispose of it safely.
- Mix Textures & Heights: For an interesting display, group jars of different heights, shapes, and textures (e.g., clear glass with frosted, or smooth with ribbed).
- Repurpose & Recycle: Don’t buy new if you don’t have to! Old jam jars, pickle jars, and sauce containers are perfect candidates for upcycling.
- Consider Your Kitchen Style: Choose decor ideas and finishes that complement your kitchen’s existing aesthetic. A rustic kitchen might love burlap and twine, while a modern kitchen might prefer sleek paint and minimalist labels.
- Less is More: Don’t overcrowd your countertops. A few well-placed and thoughtfully decorated jars can have a bigger impact than many cluttered ones.
Conclusion
You’ve now got seven fantastic DIY kitchen decor ideas with jars and containers under your belt! From creating an impeccably organized pantry to crafting a charming herb garden or setting a cozy mood with fairy light lanterns, these projects offer endless opportunities to personalize your kitchen. Using jars and containers is not just about saving money; it’s about infusing your home with creativity, functionality, and a touch of your unique style.
So, go ahead! Gather those forgotten jars, unleash your inner decorator, and start transforming your kitchen today. You’ll be amazed at how simple, everyday items can bring so much charm and order to the heart of your home. Enjoy the process, and happy decorating!