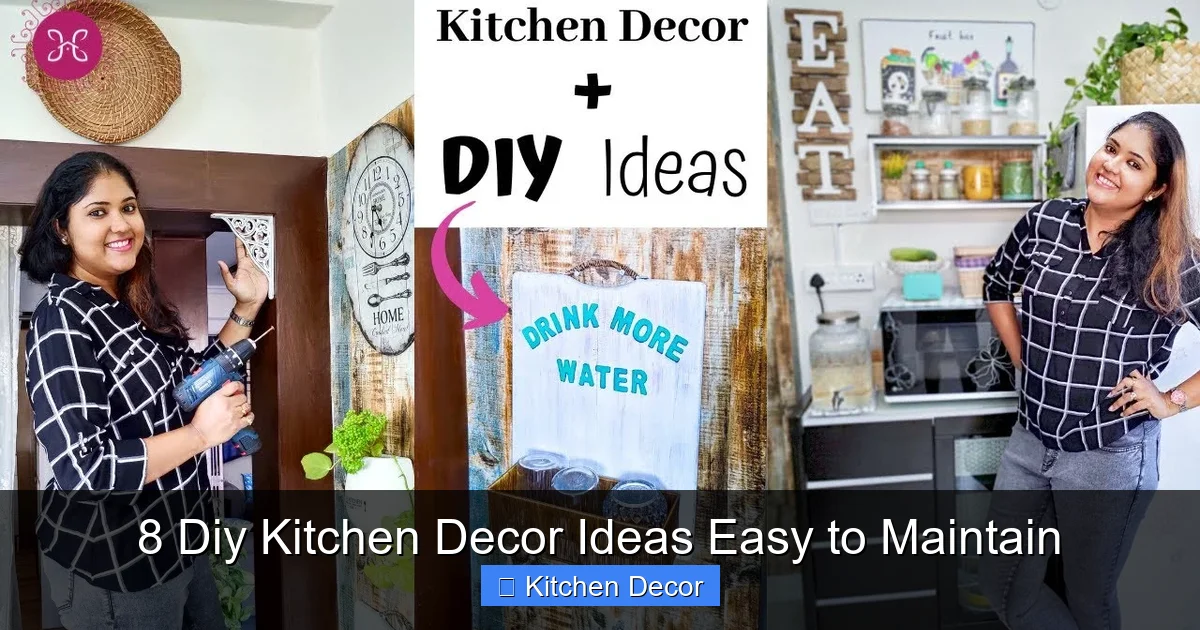
Give your kitchen a fresh, personal touch with these 8 DIY decor ideas designed for easy maintenance. From charming herb gardens to clever storage solutions, each project helps you create a stylish and functional space without the hassle of constant cleaning. Discover how to personalize your kitchen effortlessly and keep it looking great with minimal effort, ensuring your space always feels welcoming and neat.
8 Diy Kitchen Decor Ideas Easy to Maintain
Your kitchen is often the heart of your home, a place where memories are made, meals are shared, and creativity often blossoms. But let’s be honest, keeping it looking its best can sometimes feel like a never-ending battle, especially with spills, splatters, and daily wear and tear. What if you could infuse personality and style into your kitchen without adding to your cleaning chore list?
You’re in luck! This guide is packed with 8 DIY kitchen decor ideas that are not only fun to create but also incredibly easy to maintain. We understand that life is busy, and your decor shouldn’t demand constant attention. So, get ready to discover simple, budget-friendly projects that will elevate your kitchen’s aesthetic, enhance its functionality, and most importantly, keep your cleaning routine breezy. Let’s make your kitchen a beautifully decorated space you love, without the maintenance headache!
Key Takeaways
- Embrace Functional Decor: Choose DIY kitchen decor ideas that not only look good but also serve a purpose, making maintenance naturally simpler.
- Prioritize Easy-to-Clean Materials: Opt for surfaces and items that can be quickly wiped down or thrown into the wash, saving you time and effort.
- Leverage Smart Storage Solutions: Transform everyday items into decorative elements that also help keep your kitchen organized and clutter-free.
- Personalize with Simple Touches: Add character through art, textiles, or plants that are easy to update or replace, keeping your decor fresh.
- Focus on Low-Commitment Projects: Many of these DIY ideas are renter-friendly or easily reversible, allowing for change without major overhaul.
- Regular, Gentle Upkeep is Key: A few minutes of consistent cleaning will keep your low-maintenance decor looking its best for longer.
1. Create a DIY Herb Garden (Vertical or Countertop)
Adding fresh herbs to your kitchen brings life, color, and incredible aroma. A DIY herb garden is one of the best DIY kitchen decor ideas easy to maintain because it serves a practical purpose while looking absolutely charming. Imagine snipping fresh basil for your pasta or mint for your tea, right from your kitchen!
What You’ll Need:
- Small pots or a vertical planter kit
- Potting soil
- Herb seeds or small herb plants (e.g., basil, mint, chives, rosemary)
- A sunny spot near a window or under grow lights
- A small watering can
Step-by-Step Instructions:
For a Countertop Garden:
- Choose Your Herbs: Select herbs that thrive indoors and that you’ll use often. Basil, mint, chives, and parsley are great starters.
- Select Pots: Look for attractive small pots with drainage holes. Terra cotta pots are classic and allow roots to breathe, but ceramic or metal pots also work well. Consider placing a small saucer beneath each pot to catch excess water.
- Planting: Fill pots with good quality potting soil. Plant your seeds or transfer small herb plants, ensuring their roots are well covered.
- Placement: Find the sunniest spot in your kitchen. Most herbs need at least 4-6 hours of direct sunlight daily. A south-facing window is ideal.
For a Vertical Garden:
- Select Your System: You can buy ready-made vertical garden kits that hang on a wall, or you can DIY one using pallet wood or even a hanging shoe organizer with fabric pockets.
- Prepare Pockets/Containers: If using a kit, follow its instructions. For DIY pockets, ensure they are lined to prevent water leakage onto your walls.
- Planting: Place a small amount of soil in each pocket or container, then plant your herb seedlings.
- Installation: Securely hang your vertical garden on an empty wall space that receives ample light.
Maintenance Tips for Your Herb Garden:
- Watering: Check soil moisture daily. Water when the top inch of soil feels dry to the touch. Don’t overwater; soggy roots are a common plant killer.
- Sunlight: Rotate pots regularly to ensure even growth. If natural light is insufficient, consider a small LED grow light.
- Pruning: Harvest herbs regularly by snipping off the top leaves. This encourages bushier growth and prevents them from flowering too soon.
- Cleaning: Wipe down the outsides of pots or the vertical planter structure with a damp cloth as needed. Trim any yellowing leaves immediately.
A DIY herb garden adds a touch of nature and a burst of freshness, proving that some of the best DIY kitchen decor ideas easy to maintain are also the most practical.
2. Design a Chalkboard Wall or Message Board
A chalkboard surface in your kitchen is not just functional; it’s a dynamic piece of decor that you can change as often as you like. From grocery lists to sweet messages or even artistic doodles, it’s a truly low-maintenance way to personalize your space. This project is a fantastic example of DIY kitchen decor ideas easy to maintain because it literally wipes clean!
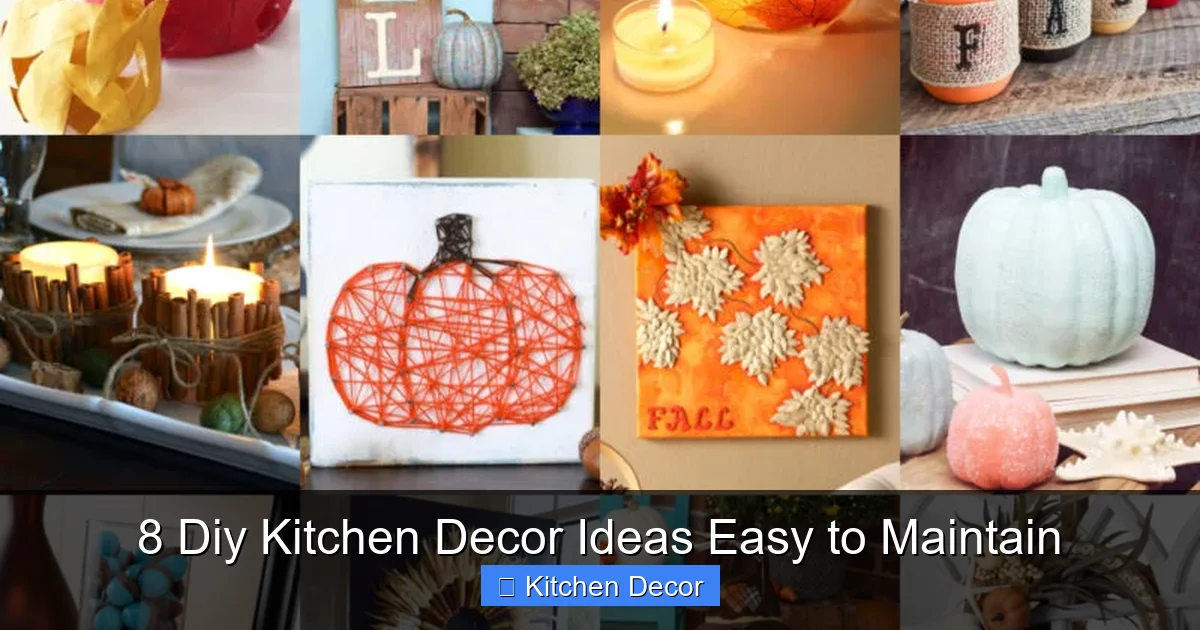
Visual guide about 8 Diy Kitchen Decor Ideas Easy to Maintain
Image source: modpodgerocksblog.com
What You’ll Need:
- Chalkboard paint (available in various colors, not just black!)
- Paint roller and tray, or a paintbrush
- Painter’s tape
- Drop cloth or old newspapers
- Chalk (regular and liquid chalk markers)
- Eraser or damp cloth
Step-by-Step Instructions:
- Choose Your Spot: Decide where you want your chalkboard. A small section of a wall, the inside of a pantry door, or the side of a cabinet are all great options. Ensure the surface is smooth and clean.
- Prepare the Area: Lay down drop cloths to protect your floor and surrounding surfaces. Use painter’s tape to create clean edges around the area you’ll be painting.
- Clean the Surface: Wipe down the wall or door with a damp cloth to remove any dust or grease. Let it dry completely.
- Apply Chalkboard Paint: Stir the chalkboard paint thoroughly. Apply an even coat using your roller or brush. Allow it to dry completely according to the manufacturer’s instructions (usually 2-4 hours).
- Add More Coats: Apply a second and, if needed, a third coat for complete coverage and durability. Make sure each coat dries thoroughly between applications.
- Cure and Season: Once the final coat is dry (allow at least 3 days for full curing), “season” your chalkboard. Rub the side of a piece of chalk over the entire surface, then erase it with a dry cloth. This prevents “ghosting” from your first drawings.
Maintenance Tips for Your Chalkboard:
- Daily Cleaning: Simply wipe away chalk drawings with a dry eraser or a clean, dry cloth.
- Deeper Clean: For a thorough cleaning or to remove stubborn marks, wipe the surface with a damp cloth. Make sure it dries completely before writing on it again to avoid streaking.
- Avoid Harsh Cleaners: Stick to water or a very mild soap solution if necessary. Abrasive cleaners can damage the chalkboard finish.
With a chalkboard, your kitchen gets a fresh look whenever you feel like it, making it one of the most versatile DIY kitchen decor ideas easy to maintain.
3. Upcycle Glass Jars for Stylish Storage
Clutter can make any kitchen feel messy, but visible, organized storage can be a beautiful thing. Upcycling glass jars into attractive storage containers is an eco-friendly and stylish way to tackle organization. This is a classic among DIY kitchen decor ideas easy to maintain because glass is incredibly durable and simple to clean.
What You’ll Need:
- Various sizes of clean glass jars with lids (from pasta sauce, pickles, jam, etc.)
- Dish soap and hot water
- Optional: Spray paint (food-safe for lids), labels (DIY or purchased), stencils, twine, fabric scraps
Step-by-Step Instructions:
- Collect and Clean Jars: Gather an assortment of glass jars. Remove any old labels by soaking them in hot soapy water, then scrubbing. For stubborn glue, use rubbing alcohol or a commercial adhesive remover.
- Sterilize (Optional but Recommended): For food storage, it’s best to sterilize your jars. Wash them thoroughly with hot soapy water, rinse, and then either boil them for 10 minutes or run them through a hot dishwasher cycle. Let them air dry completely.
- Decorate Lids (Optional): If you want a cohesive look, spray paint the metal lids a uniform color (e.g., matte black, white, or a metallic). Ensure the paint is suitable for the material and allow it to dry completely. You can also cover lids with fabric scraps, tie twine around the necks, or add decorative elements.
- Create Labels: This is key for organization. You can use a label maker, hand-write on sticky labels, use chalkboard labels, or even stencil directly onto the glass. Clear labels are great for seeing contents quickly.
- Fill and Display: Fill your jars with dry goods like pasta, rice, beans, flour, sugar, spices, or even snacks. Arrange them on open shelves, inside cabinets, or on your countertop for easy access and a decorative touch.
Maintenance Tips for Your Upcycled Jars:
- Cleaning: Most glass jars are dishwasher safe. If you’ve decorated the lids, hand wash them to protect the paint or fabric.
- Refilling: Before refilling, empty the jar completely and give it a quick wash to prevent old residue from mixing with new contents.
- Wipe Downs: Regularly wipe down the outsides of the jars to remove dust or fingerprints.
These organized and attractive jars prove that functional storage can be a beautiful addition to your home, making them ideal DIY kitchen decor ideas easy to maintain.
4. Curate a Printable Art Gallery Wall
An art gallery wall is a fantastic way to inject personality and color into your kitchen. By using printable art, you keep costs low and flexibility high. This makes it one of the most adaptable DIY kitchen decor ideas easy to maintain because you can refresh the look simply by printing new art!
What You’ll Need:
- Picture frames in various sizes and styles (new or thrifted)
- Free or inexpensive printable art (kitchen-themed, abstract, quotes)
- Printer and good quality paper (cardstock for better durability)
- Tape measure, level, hammer, and picture hanging hooks or strips
Step-by-Step Instructions:
- Choose Your Theme and Color Palette: Decide on a theme (e.g., coffee, botanical, abstract) and a color scheme that complements your kitchen. Look for inspiration online (Pinterest is great!).
- Find Printable Art: Many websites offer free printables (Etsy, Unsplash, Public Domain archives). You can also purchase affordable digital prints. Look for high-resolution files to ensure good print quality.
- Select Frames: Collect frames that fit your chosen aesthetic. Mixing frame styles (e.g., rustic wood, sleek metal, ornate vintage) can create an eclectic and interesting look. Ensure they have glass or acrylic covers to protect the art from kitchen splatters.
- Print Your Art: Print your chosen designs at home using a good quality printer and sturdy paper (like cardstock). Alternatively, use a local print shop for professional results.
- Arrange and Hang: Before hanging, lay your frames out on the floor to experiment with different arrangements. Once you have a layout you like, use a tape measure and level to hang them on your chosen wall. Command strips are excellent for renters or if you prefer not to make holes.
Maintenance Tips for Your Art Wall:
- Dusting: Regularly dust the frames and glass with a microfiber cloth to prevent buildup.
- Wiping: If any cooking splatters reach your art, immediately wipe the glass clean with a damp cloth and then dry it. The frame protects the print from damage.
- Updating: If you get tired of a print, simply print a new one and swap it out! No need to re-frame or re-hang.
A printable art gallery wall is a simple, budget-friendly, and very flexible way to add a personal touch, making it one of the best DIY kitchen decor ideas easy to maintain.
5. Master Smart Open Shelving Styling
Open shelves can be a beautiful feature in a kitchen, but they often get a bad rap for being dust magnets. The secret to making them easy to maintain is smart, minimalist styling. Focus on functionality and beauty, not clutter. This approach makes open shelving one of the more elegant DIY kitchen decor ideas easy to maintain.
What You’ll Need:
- Existing open shelves or new shelves to install
- Items to display: aesthetically pleasing dishes, glasses, cookbooks, small plants, decorative bowls, unique pantry items in clear jars.
- A clean microfiber cloth
Step-by-Step Instructions:
- Curate Your Items: The key to low-maintenance open shelving is to display only items that are frequently used, visually appealing, or both. Think about what you reach for often (e.g., everyday plates, coffee mugs, favorite spices).
- Group Similar Items: Arrange items in logical groups. Stack plates neatly, line up glasses, or group cookbooks by color. This creates visual order.
- Incorporate Varied Heights and Textures: To add interest, mix items of different heights and textures. Place a small plant next to a stack of bowls, or a wooden cutting board behind a set of ceramic mugs.
- Utilize Negative Space: Do not overcrowd your shelves! Leave plenty of empty space around your displayed items. This makes the shelves look clean, prevents dust from accumulating as easily, and simplifies dusting.
- Add a Touch of Greenery: A small potted herb or a trailing plant can add a fresh, organic element.
- Maintain a Color Palette: Sticking to a consistent color palette (neutrals, a few accent colors) helps create a cohesive and serene look that feels less cluttered.
Maintenance Tips for Open Shelving:
- Regular Dusting: Make it a habit to dust your open shelves and the items on them at least once a week. A quick wipe with a dry microfiber cloth is usually sufficient.
- Rotate Items: If you have items that rarely get used, consider rotating them or storing them in closed cabinets. The less stuff you have, the easier it is to clean.
- Wipe Spills Immediately: In a kitchen, spills are inevitable. Wipe them down instantly to prevent stains or sticky residue.
- Keep it Minimal: Resist the urge to add more and more items. The less you have on display, the quicker and easier your cleaning routine will be.
By being intentional with what you display, open shelves can be a stunning and surprisingly easy-to-maintain feature, fitting perfectly into the category of DIY kitchen decor ideas easy to maintain.
6. Introduce Decorative & Washable Textiles
Textiles are one of the simplest and most effective ways to add color, texture, and pattern to your kitchen. The best part? Most are machine washable, making them incredibly easy to maintain. Think beyond just dish towels; consider placemats, napkins, or even small accent rugs. This is truly one of the most effortless DIY kitchen decor ideas easy to maintain.
What You’ll Need:
- Decorative dish towels (cotton or linen are best)
- Fabric placemats or cloth napkins
- A small, washable kitchen rug (optional)
- Your washing machine!
Step-by-Step Instructions:
- Choose Your Textiles: Look for dish towels and placemats that complement your kitchen’s color scheme and style. Consider patterns that add visual interest or solid colors for a sleek look. Cotton and linen are excellent choices for their absorbency and durability.
- Display Dish Towels: Hang your decorative dish towels over oven handles, on hooks, or draped neatly over a countertop for easy access and a pop of color.
- Use Placemats/Napkins: Even when not dining, placemats can protect surfaces and add a decorative layer to your counter or table. Keep a stack of cloth napkins ready for use.
- Consider a Washable Rug: If you have a sink area or a high-traffic spot, a small washable rug can add comfort and style. Look for ones specifically designed for kitchens that are durable and non-slip.
- DIY Fabric Accents (Optional): If you’re feeling crafty, you can sew your own dish towels from attractive fabric or add embroidery to plain ones. This personalizes your items even further.
Maintenance Tips for Your Textiles:
- Regular Washing: The beauty of textiles is that they can be thrown into the washing machine! Wash dish towels, placemats, and napkins regularly (daily for dish towels, weekly for placemats/napkins) with your usual laundry detergent.
- Stain Treatment: Treat stains promptly before washing for the best results.
- Drying: Tumble dry on a low setting or hang to air dry to prevent shrinking and prolong their life.
- Rotating: Have a few sets of towels and placemats so you can rotate them, always having fresh ones on hand.
Washable textiles are the ultimate low-commitment decor, allowing you to change your kitchen’s look with minimal effort and maximal cleanliness. They are truly one of the simplest DIY kitchen decor ideas easy to maintain.
7. Apply Removable Wallpaper for an Accent Wall
Want to make a big impact without the long-term commitment or messy paint job? Removable wallpaper is your answer! It’s a fantastic way to add pattern, texture, or a bold color to a kitchen accent wall, and it’s surprisingly easy to install and maintain. This DIY project is perfect for renters or anyone who loves to change their decor frequently, making it a stellar choice among DIY kitchen decor ideas easy to maintain.
What You’ll Need:
- Rolls of removable peel-and-stick wallpaper (measure your wall carefully!)
- Tape measure
- Pencil
- Utility knife or sharp blade
- Smoothing tool or squeegee
- Step stool or ladder
- Clean cloth
Step-by-Step Instructions:
- Choose Your Wall: Select an accent wall that doesn’t have too many windows or doors, as this will simplify the installation. A small wall section, a backsplash area, or the space above cabinets can work wonderfully.
- Prepare the Surface: Ensure your wall is clean, dry, and smooth. Wipe down with a damp cloth and allow to dry completely. Patch any holes or imperfections, as they might show through the wallpaper.
- Measure and Cut: Measure the height of your wall, adding an extra few inches to the top and bottom for trimming. Cut your first strip of wallpaper. If your paper has a pattern, plan how you’ll match it with subsequent strips.
- Apply the First Strip: Starting from the top of your wall, peel back a few inches of the backing paper. Align the wallpaper carefully along a plumb line (use a level to draw one first). Slowly peel more of the backing away as you press the wallpaper onto the wall, using your smoothing tool to push out air bubbles and ensure it adheres evenly.
- Continue Applying Strips: For subsequent strips, align them carefully with the first, matching the pattern if necessary. Overlap slightly if recommended by the manufacturer. Continue smoothing as you go.
- Trim Excess: Once all strips are applied, use your utility knife and a straight edge (like a ruler) to carefully trim any excess wallpaper at the top, bottom, and around outlets or edges.
Maintenance Tips for Removable Wallpaper:
- Wipe Clean: Most removable wallpapers are made of vinyl or similar durable materials that can be easily wiped clean with a damp cloth. This makes them perfect for kitchen environments where splashes can occur.
- Avoid Harsh Cleaners: Stick to water or a very mild, non-abrasive soap solution.
- Peel and Replace: If a section gets damaged or you simply want a new look, you can peel it off without damaging the paint underneath and apply a new design.
An accent wall with removable wallpaper offers a dramatic transformation that’s surprisingly easy to manage, solidifying its place among top DIY kitchen decor ideas easy to maintain.
8. Revamp Your Pantry or Cabinet Doors
Don’t overlook the potential of your kitchen doors! A fresh coat of paint, a new color, or a simple stencil design can completely transform the look and feel of your kitchen without replacing expensive cabinetry. This DIY project is a brilliant way to achieve a custom look while ensuring easy cleaning, making it one of the most impactful DIY kitchen decor ideas easy to maintain.
What You’ll Need:
- Painter’s tape
- Drop cloths
- Screwdriver (to remove hardware)
- Degreaser cleaner
- Fine-grit sandpaper (120-220 grit)
- Primer (optional, but recommended for durability)
- High-quality kitchen cabinet paint (semi-gloss or satin finish for easy cleaning)
- Paintbrushes and small foam rollers
- Optional: Stencils, stencil brush, contrasting paint color
Step-by-Step Instructions:
- Prepare the Area: Lay down drop cloths to protect your floors. Remove cabinet or pantry doors, and carefully label them (e.g., “upper left”) if you have many. Remove all hardware (hinges, knobs, pulls).
- Clean Thoroughly: Kitchen doors accumulate grease and grime. Use a good degreaser cleaner to meticulously clean all surfaces you plan to paint. Rinse well with clean water and let dry completely.
- Lightly Sand: Lightly scuff all surfaces with fine-grit sandpaper. This creates a “tooth” for the paint to adhere to. Wipe away all sanding dust with a tack cloth or damp cloth, then let dry.
- Prime (Recommended): Apply a thin, even coat of high-quality primer. This improves paint adhesion and coverage, especially if you’re changing color dramatically. Let it dry according to manufacturer instructions.
- Paint Your Doors: Apply a thin, even coat of your chosen kitchen cabinet paint. Use a paintbrush for any detailed areas and a foam roller for smooth, even coverage on flat surfaces.
- Apply Second Coat (and Third if Needed): Let the first coat dry completely before applying a second. Many cabinet paints require two or three thin coats for the best finish and durability.
- Add Stenciling (Optional): Once the final paint coat is completely dry, position your stencil. Use painter’s tape to secure it. Dip your stencil brush into a small amount of contrasting paint, blot off excess, and dab lightly over the stencil. Remove stencil carefully.
- Reinstall Hardware and Doors: Allow the paint to cure fully (check manufacturer’s recommendation, often 24-72 hours or more) before reinstalling hardware and rehanging the doors.
Maintenance Tips for Painted Doors:
- Gentle Cleaning: Wipe down painted doors regularly with a soft, damp cloth and a mild soap solution.
- Avoid Abrasives: Do not use abrasive cleaners, scourers, or harsh chemicals, as these can scratch or dull the paint finish.
- Immediate Spill Cleanup: Wipe off any food splatters or drips immediately to prevent them from drying and staining.
Revamping your doors gives your kitchen a custom, refreshed look that’s easy to keep clean, making it a truly rewarding one among DIY kitchen decor ideas easy to maintain.
Maintenance & Troubleshooting for Your DIY Kitchen Decor
Even with “easy to maintain” decor, a little proactive care goes a long way. Here are some general tips to keep all your DIY projects looking fresh and fantastic:
- Dust Regularly: Make a habit of doing a quick dust of all surfaces weekly. A microfiber cloth is your best friend.
- Wipe Spills Immediately: The quicker you clean a spill, the less likely it is to stain or become sticky.
- Use Mild Cleaners: For most surfaces (paint, glass, wallpaper), a damp cloth with plain water or a very mild dish soap solution is all you need. Harsh chemicals can damage finishes.
- Protect Surfaces: For countertop decor, consider felt pads underneath to prevent scratches, especially if moving items frequently.
- Rotate & Refresh: For items like printable art or textiles, don’t be afraid to swap them out seasonally or when you need a change. This keeps your kitchen feeling fresh and prevents decor fatigue.
- Address Wear and Tear: If you notice a small chip in paint or a loose hook, fix it promptly before it becomes a bigger issue.
These simple habits ensure your beautifully updated kitchen decor remains easy to maintain, just as promised!
Conclusion
Giving your kitchen a fresh, personalized look doesn’t have to be an arduous task that adds to your already busy schedule. As we’ve explored, there are numerous DIY kitchen decor ideas easy to maintain that can bring charm, functionality, and style to your space without demanding constant upkeep.
From the living freshness of an herb garden to the dynamic utility of a chalkboard wall, the smart storage of upcycled jars, or the artistic flair of a gallery wall, each project empowers you to create a kitchen that truly reflects your personality. By choosing easy-to-clean materials, embracing smart organization, and committing to simple, regular maintenance, you can enjoy a beautifully decorated kitchen that stays neat and inviting with minimal fuss.
So, roll up your sleeves, pick a project that inspires you, and start transforming your kitchen into a place you love even more – a stylish sanctuary that truly works for you. Happy decorating!