
Transform your space with 30 simple DIY room decor ideas that offer effortless makeovers. This guide provides budget-friendly, beginner-friendly projects to refresh any room, proving style doesn’t need to be complicated or expensive. Get ready to create a home you love!
Feeling like your room needs a refresh but don’t know where to start? You’re not alone! Many of us look at magazines or Pinterest and feel a little intimidated by all the design possibilities. It’s easy to think that a beautiful, stylish home requires a big budget and a professional touch.
But what if I told you that you can create stunning room transformations with simple, hands-on projects? It’s totally possible to inject personality and style into your space without breaking the bank or feeling overwhelmed. This guide is here to show you how!
We’re diving into 30 easy DIY room decor ideas that are perfect for beginners. From quick updates to slightly more involved projects, you’ll find inspiration to tackle any room. Get ready to discover how simple it can be to make your home feel brand new!
30 Simple DIY Room Decor Ideas: Effortless Makeovers
Ready to get your hands a little creative? These 30 DIY room decor ideas are designed to be straightforward, affordable, and incredibly rewarding. Whether you’re a student in a dorm, a renter looking to personalize your space, or a homeowner wanting a change, there’s something here for everyone.
1. Gallery Wall Magic
A gallery wall is a fantastic way to add personality and visual interest to any blank wall. Mix and match frames of different sizes and styles, and fill them with your favorite photos, prints, or even meaningful quotes.
How to Create a Stunning Gallery Wall:
- Choose a Theme: Decide if you want a cohesive look (all black and white photos) or a mix of styles.
- Gather Your Art: Collect prints, photos, postcards, and even small trinkets.
- Plan Your Layout: Lay everything out on the floor first to get a feel for the arrangement. Use craft paper cutouts to test on the wall.
- Hang with Care: Use a level to ensure your pieces are straight.
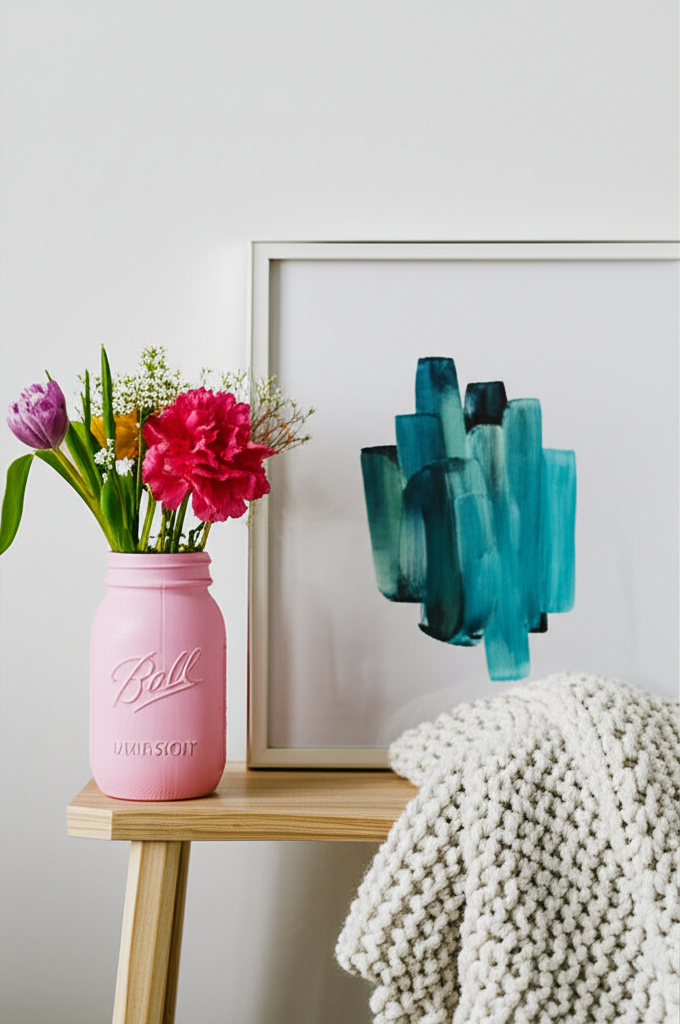
2. Upcycled Jar Vases
Don’t toss those old jam jars or pickle jars! They can be transformed into charming vases for your favorite blooms. A quick coat of paint or some twine can give them a whole new look.
Quick Upcycled Jar Ideas:
- Paint them with chalk paint for a matte finish.
- Wrap them with jute twine for a rustic feel.
- Use glass paint to create colorful patterns.
3. DIY Coasters from Tiles
Protect your furniture and add a decorative touch with homemade coasters. Simple ceramic tiles are a great base, and you can decorate them in countless ways.
Easy Tile Coaster Steps:
- Purchase plain ceramic tiles (available at most hardware stores).
- Decorate the tiles using permanent markers, decoupage with pretty paper, or paint designs.
- Seal your creations with a clear sealant spray to protect the design.
- Consider adding felt pads to the bottom to prevent scratching surfaces.
4. No-Sew Pillow Covers
Give your old throw pillows a facelift without any sewing! You can create new covers using fabric glue or even by tying fabric around existing pillows.
No-Sew Pillow Cover Method:
- Measure your existing pillow.
- Cut two pieces of fabric slightly larger than your pillow.
- Place the fabric right sides together, and use fabric glue to seal three sides.
- Insert the pillow, then fold the remaining open edges inward and glue them shut.
5. Painted Furniture Facelift
An old dresser, side table, or chair can be completely transformed with a fresh coat of paint. Chalk paint is particularly forgiving and creates a lovely matte finish that requires minimal prep.
Painting Tips for Beginners:
- Clean the furniture thoroughly.
- Lightly sand the surface if needed (chalk paint often requires less sanding).
- Apply thin, even coats of paint.
- Finish with a clear wax or sealant for durability.
6. Mason Jar Herb Garden
Bring a touch of green indoors with a DIY herb garden. Mason jars are perfect for this, providing a cute and functional display for your kitchen.
Setting Up Your Herb Garden:
- Fill mason jars with potting soil.
- Plant your favorite herb seeds or small starter plants (basil, mint, parsley are great choices).
- Ensure good drainage by adding a layer of gravel at the bottom, or use jars with drainage holes.
- Place in a sunny spot and water regularly.
7. Washi Tape Wall Art
Washi tape is a crafter’s dream! This decorative tape comes in endless patterns and colors, making it perfect for creating temporary or semi-permanent wall art. Think geometric shapes, stripes, or even outlining your furniture.
Washi Tape Decor Ideas:
- Create a geometric accent wall.
- Outline a mirror or a headboard.
- Make decorative stripes on a plain wall.
- Add patterns to plain furniture.
8. DIY String Art
String art is a fun and surprisingly easy craft that can create stunning visual pieces. You’ll need a piece of wood, some nails, and colorful string or yarn.
Basic String Art Process:
- Sketch your design onto a piece of paper.
- Hammer nails into your wood base along the outline of your design.
- Wrap the string around the nails, crisscrossing to create your pattern.
- Continue until the design is filled in.
9. Repurposed Book Page Art
Old books can be more than just reading material; they can be art supplies! Use pages from old, damaged books to create unique wall art, decorative flowers, or even to cover a lampshade.
Book Page Art Inspiration:
- Cut pages into shapes to create a “paper quilt” effect.
- Roll pages into tubes to form 3D wall art.
- Decoupage book pages onto a canvas or wooden board.
10. Rope-Wrapped Decor
Jute rope or sisal rope can add a touch of natural texture to various decor items. Think about wrapping around plain vases, candle holders, or even furniture legs.
Rope Wrapping Technique:
- Start by securing the end of the rope with hot glue.
- Apply hot glue in sections as you go.
- Wrap the rope tightly and evenly around the object.
- Secure the final end with glue.
11. DIY Floating Shelves
Floating shelves offer a clean, modern look and are surprisingly simple to install. They’re perfect for displaying decor, books, or plants without bulky brackets.
Getting Started with Floating Shelves:
- Purchase a floating shelf kit or build your own using wood and hidden brackets.
- Locate wall studs for secure mounting – using a stud finder is key.
- Follow the kit’s instructions or your custom plan for installation.
- Ensure they are level before placing items on them. For more on wall anchoring, consult resources from the Consumer Product Safety Commission.
12. Fabric-Covered Bulletin Board
Create a stylish and functional bulletin board for notes, photos, or inspiration. Simply cover a plain corkboard or foam board with your favorite fabric.
Fabric Bulletin Board Steps:
- Cut fabric about 2 inches larger than your board on all sides.
- Stretch the fabric taut over the front of the board.
- Wrap the excess fabric around to the back and secure with staples or strong glue.
- Attach a hanging mechanism to the back.
13. DIY Macrame Plant Hanger
Bring a bohemian vibe to your space with a handmade macrame plant hanger. Even beginners can master basic macrame knots to create beautiful hangers.
Macrame Basics:
- You’ll need macrame cord, scissors, and a ring.
- Learn a few simple knots like the square knot and half hitch.
- There are many beginner-friendly tutorials available online to guide you through the process.
14. Painted Terra Cotta Pots
Give plain terra cotta pots a vibrant makeover with acrylic paints. You can create simple patterns, ombre effects, or even paint faces for a whimsical touch.
Terra Cotta Pot Painting Ideas:
- Geometric designs
- Polka dots
- Solid bright colors
- Faux marble effect
15. DIY Room Divider Screen
Need to separate a space or add a decorative element? A DIY room divider can be as simple as repurposing old doors, hanging fabric panels, or creating a framed screen.
Simple Screen Ideas:
- Hinge together several lightweight wooden panels.
- Hang a beautiful tapestry or large piece of fabric from the ceiling.
- Repurpose an old folding screen with a fresh coat of paint or new fabric.
16. Upcycled Ladder Shelf
An old wooden ladder can be transformed into a unique and rustic shelving unit. Lean it against a wall and use the rungs to display books, plants, or decor items.
Ladder Shelf Tips:
- Ensure the ladder is stable and secure.
- Clean it thoroughly and consider a light sanding or refinishing.
- For added stability, you can secure it to the wall with brackets.
17. DIY Wall Organizer with Pegboard
Pegboards are incredibly versatile for organization and decor. Paint a pegboard a fun color and use hooks and baskets to create a custom wall organizer for anything from craft supplies to kitchen utensils.
Pegboard Organization:
- Choose a pegboard and paint it your desired color.
- Mount it securely to the wall.
- Add hooks, shelves, and containers to organize your items.
- This is a great way to keep small spaces tidy and stylish.
18. Faux Fireplace Accent
Even if you don’t have a real fireplace, you can create a charming faux one. Use stacked crates, a salvaged mantelpiece, or even a creatively painted wall to mimic the look and add a cozy focal point.
Creating a Faux Fireplace:
- Find a salvaged mantelpiece or build a simple frame.
- Arrange decorative elements inside the “hearth” like candles, logs, or fairy lights.
- Paint a faux brick or stone pattern on the wall behind it.
19. DIY Dreamcatcher
Add a touch of bohemian charm and personal meaning to your room with a DIY dreamcatcher. These are relatively simple to make and can be customized with feathers, beads, and ribbons.
Dreamcatcher Components:
- Embroidery hoop (for the frame)
- String or yarn (for weaving the web)
- Feathers, beads, ribbons (for decoration)
- Glue gun
20. Painted Geometric Wall Design
Want a bold statement without wallpaper? Use painter’s tape and a few cans of contrasting paint to create a stunning geometric mural on your wall. This is a renter-friendly option if done on a removable surface or if you’re allowed to paint.
Geometric Wall Painting Guide:
- Clean your wall and apply painter’s tape to create your desired geometric pattern.
- Ensure the tape is pressed down firmly to prevent paint bleed.
- Paint within the taped sections.
- Allow the paint to dry slightly before carefully removing the tape for crisp lines.
21. DIY Upholstered Headboard
A custom upholstered headboard can elevate your bed and add a luxurious feel to your bedroom. You can create one by attaching fabric to a plywood base and adding batting for softness.
Headboard Materials:
- Plywood sheet
- Foam batting
- Upholstery fabric
- Staple gun
- Screws for attaching to the bed frame or wall
22. Cork Board Backsplash
For a kitchen or home office, a corkboard backsplash offers a unique and functional surface. It’s perfect for pinning notes, recipes, or photos.
Corkboard Backsplash Installation:
- Cut cork tiles to fit the desired area.
- Adhere them to the wall using a strong adhesive spray or mounting tape.
- Ensure all edges are neatly aligned.
23. DIY Terrarium
Bring a mini-ecosystem into your home with a DIY terrarium. All you need is a glass container, soil, small plants, and decorative elements like pebbles or moss.
Terrarium Essentials:
- Glass container (jar, bowl, or specialized terrarium vessel)
- Drainage layer (gravel or small stones)
- Activated charcoal (helps keep it fresh)
- Potting mix
- Small, slow-growing plants
- Decorative elements (moss, small figurines)
24. Painted Chair Makeover
Give an old wooden chair a new lease on life with a creative paint job. You can go for a solid color, a distressed look, or even a two-tone design.
Chair Painting Steps:
- Clean and lightly sand the chair.
- Apply your chosen paint in thin coats.
- For a distressed look, lightly sand edges after painting.
- Seal with a clear coat for durability, especially if it will be used often.
25. DIY Welcome Mat
Create a personalized welcome mat that greets guests with style. You can use stencils and outdoor paint on a plain mat, or even weave your own if you’re feeling ambitious!
Stenciled Welcome Mat:
- Purchase a plain coir doormat.
- Find or create a stencil with your desired design or phrase.
- Secure the stencil to the mat with temporary adhesive spray.
- Use outdoor-grade stencil paint and a brush or roller to apply the design.
- Let it dry completely before use.
26. DIY Jar Lanterns
Transform mason jars into beautiful lanterns for ambient lighting. You can paint them, wrap them in twine, or add fairy lights inside.
Jar Lantern Ideas:
- Fill with battery-operated fairy lights.
- Paint with translucent glass paint.
- Wrap with burlap or lace for texture.
- Hang them with wire or place them on surfaces.
27. Painted Rug Design
Give a plain, inexpensive rug a custom look by painting a design onto it. This is a budget-friendly way to achieve a high-end look.
Painting a Rug:
- Choose a flat-weave rug made of natural fibers like cotton or jute.
- Use chalk paint or fabric paint for best results.
- Plan your design and use painter’s tape to create stencils or straight lines.
- Apply paint and let it dry thoroughly.
- You may need to seal it with a fabric sealant.
28. DIY Photo Display Board
Instead of a traditional frame, create a rustic or modern photo display board. Use a piece of driftwood, a vintage window pane, or a simple board with clips to hang your favorite memories.
Photo Display Board Concepts:
- A piece of reclaimed wood with small clips attached.
- A vintage window frame with photos placed behind the glass panes.
- A wire grid panel with clothespins holding photos.
29. DIY Yarn-Wrapped Letters/Monograms
Add a cozy and personalized touch to a shelf or wall with yarn-wrapped letters or monograms. This is a simple project that can be done in any color to match your decor.
Yarn Wrapping Method:
- Get cardboard or wooden letters from a craft store.
- Secure the end of your yarn with glue.
- Wrap the yarn tightly around the letter, covering it completely.
- Glue the end of the yarn when finished.
30. Upcycled Crate Storage
Wooden crates are incredibly versatile for storage and decor. They can be stacked to create shelves, mounted on the wall as cubbies, or used as standalone storage bins.
Crate Decor Ideas:
- Clean and sand the crates.
- Paint or stain them to match your room’s color scheme.
- Stack them for a modular shelving unit.
- Add caster wheels to create mobile storage.
Choosing the Right DIY Project for You
With so many ideas, how do you pick the perfect project? Consider these factors:
Project Considerations:
- Your Skill Level: Start with simpler projects if you’re new to DIY.
- Your Budget: Many of these ideas use materials you might already have or can find affordably.
- Your Time Commitment: Some projects take an hour, while others might take an afternoon.
- Your Room’s Style: Think about what will best complement your existing decor.
Tools and Materials You Might Need
While each project is different, here’s a list of common tools and materials that are helpful for many DIY decor projects. Having these on hand can make your crafting sessions smoother.
Essential DIY Toolkit:
- Measuring Tape: For accurate measurements.
- Craft Knife/Box Cutter: For precise cutting.
- Scissors: For fabric, paper, and yarn.
- Hot Glue Gun & Glue Sticks: A crafter’s best friend for quick adhesion.
- Paint Brushes & Rollers: For painting projects.
- Painter’s Tape: For clean lines in painting and stenciling.
- Screwdriver Set: For assembling or mounting items.
- Level: To ensure shelves and art are straight.
- Sandpaper: For preparing surfaces for paint or a smoother finish.
- Drill (optional but helpful): For more involved mounting or assembly.
- Fabric Glue: For no-sew projects.
- Clear Sealant/Mod Podge: To protect painted surfaces or decoupage.
Many of these supplies can be found at your local craft store or hardware store. For more information on basic tool usage and safety, websites like This Old House offer excellent beginner guides.
Budget-Friendly Decorating Strategies
DIY is inherently budget-friendly, but here are some extra tips to keep costs down:
Smart Shopping and Sourcing:
- Thrift Stores & Flea Markets: Excellent places to find furniture, frames, jars, and other items to upcycle.
- Sales & Clearance Sections: Keep an eye out for discounted craft supplies, fabric, and paint.
- Repurpose Household Items: Before buying new, see what you already own that can be given a new purpose.
- Ask Friends & Family: They might have items they’re looking to get rid of that you can use.
Material Cost Comparison:
Here’s a quick look at how some DIY projects compare in terms of material costs, assuming you might have some basic tools already.
| DIY Project Idea | Estimated Material Cost (Low to Medium) | Potential for Upcycling Savings |
|---|---|---|
| Upcycled Jar Vases | $5 – $15 (paint, twine) | High (uses free jars) |
| Painted Furniture Facelift | $20 – $50 (paint, primer, sandpaper, wax) | Medium (cost of paint, but furniture can be free/cheap) |
| Washi Tape Wall Art | $10 – $30 (washi tape rolls) | High (applied to existing walls/furniture) |
| DIY Floating Shelves | $30 – $70 (wood, brackets, screws) | Medium (depends on wood source) |
| DIY Macrame Plant Hanger | $15 – $35 (macrame cord, ring) | High (can use found objects for hanging) |
As you can see, leveraging items you already have significantly reduces the cost. The “upcycling” column highlights how much you can save by giving new life to old items.
Frequently Asked Questions (FAQ)
Q1: Are these DIY ideas suitable for renters?
Many of these ideas are perfect for renters! Projects like gallery walls using command strips, washi tape art, upcycled jar vases, and no-sew pillow covers can be done without damaging walls or furniture. Always check your lease agreement regarding any painting or permanent alterations.
Q2: What if I don’t have any crafting experience?
Don’t worry! This list is specifically curated for beginners. Projects like painting jars, creating gallery walls, and using washi tape are very straightforward. Start with the simplest ideas and build your confidence. Online tutorials are also a great resource for visual guidance.
Q3: How can I make my DIY decor look professional?
Key to a professional look is attention to detail. Measure carefully, use a level, ensure clean lines with painter’s tape, and always tidy up your workspace. For painted items, thin, even coats are better than one thick, messy one. Sealing your projects can also add a polished finish.
Q4: Where can I find inspiration for my DIY projects?
Pinterest and Instagram are fantastic visual platforms for DIY inspiration. Websites like Apartment Therapy, HGTV, and even YouTube channels dedicated to crafting and home decor offer endless ideas and tutorials. Don’t be afraid to adapt ideas to your own style!
Q5: How do I choose the right colors for my DIY projects?
Consider the existing color palette of your room. You can pick accent colors from existing decor, or choose neutral tones for a calming effect. Websites like Sherwin-Williams offer color trend inspiration that can help guide your choices.
Q6: What’s the best way to remove paint or tape from walls when I move out?
For paint, if you’ve painted yourself, you can often touch up with the original wall color. For tape residue, try using a hairdryer on a low setting to gently warm the adhesive, then peel slowly. Isopropyl alcohol or Goo Gone can also be effective for stubborn residue, but test in an inconspicuous spot first.
Conclusion
There you have it – 30 simple DIY room decor ideas to help you effortlessly transform your space! You’ve seen how easy it can be to breathe new life into old items, add personal touches with creative crafts, and make your home uniquely yours without a hefty price tag.
Remember, decorating your home should be a joyful and creative process. Don’t be afraid to experiment, mix and match ideas, and let your personality shine through. Whether you decide to paint a chair, create a gallery wall, or whip up some upcycled vases, each small project adds up to a big impact.
So gather your supplies, put on some music, and get ready to enjoy the rewarding feeling of creating a space you truly love. Happy decorating!
Looking to extend your DIY creativity into the kitchen? Explore our guide on 10 Best Kitchen Decor Themes for stylish ideas that blend function and flair.
For those who love minimalist design, check out 10 Minimal Decor Ideas For Kitchens