Transforming a studio apartment can be a rewarding challenge. This guide breaks down how to decor studio room by focusing on maximizing space, creating distinct zones, and personalizing your aesthetic. Learn practical tips to make your studio feel larger, more organized, and uniquely yours, proving that a small space can be a stylish sanctuary.
Welcome to your ultimate guide on how to decor studio room! Studio apartments, by nature, are compact spaces where living, sleeping, and often dining and working all happen within a single room. This can feel daunting, but with the right strategies, you can transform your studio into a stylish, functional, and comfortable haven. This guide will walk you through every step, from initial planning to the final decorative touches, ensuring you make the most of every square inch. We’ll cover how to maximize space, create distinct zones, choose the right furniture, and infuse your personal style. Get ready to make your studio apartment a place you truly love to live in!
Key Takeaways
- Embrace Multifunctional Furniture: Opt for pieces that serve multiple purposes to save precious floor space and increase utility.
- Define Zones Visually: Use rugs, furniture placement, and lighting to create distinct living, sleeping, and working areas within the single room.
- Utilize Vertical Space: Tall bookshelves, wall-mounted shelves, and hanging storage are essential for keeping clutter at bay and maximizing your studio’s potential.
- Choose a Cohesive Color Palette: A well-thought-out color scheme can make your studio feel larger and more unified.
- Smart Lighting is Key: Layer different light sources to create ambiance, define areas, and make the space feel more open and inviting.
- Declutter Ruthlessly: Regular decluttering is non-negotiable in a studio; keep only what you need and love.
- Personalize with Art & Decor: Infuse your personality through carefully selected artwork, plants, and decorative items to make your studio feel like home.
Step 1: Plan Your Studio Layout and Flow
Before you buy a single piece of furniture or paint a wall, take time to plan. Understanding how you use your space is crucial for making it work for you.
Assess Your Needs
Think about your daily routine. Do you work from home? Do you entertain often? Do you need a dedicated dining area? List out all the activities you perform in your studio and how much space each typically requires.
Measure Everything
Accurately measure your studio space, including wall lengths, window placements, and door swings. Also, measure any existing furniture you plan to keep. This will prevent costly mistakes and ensure everything fits.
Sketch it Out
Draw a floor plan of your studio. You can do this on paper or use free online tools. Experiment with different furniture arrangements. Consider traffic flow – how will you move from your bed to the kitchen, or from your desk to the sofa?
Consider Vertical Space
Don’t just think about the floor! Look up. Your walls offer valuable real estate for storage and decoration. Think about how high you can go with bookshelves, wall-mounted shelves, and even hanging plants.
Step 2: Define Your Studio Zones
The biggest challenge in a studio is separating different functional areas without physical walls. The solution lies in clever visual cues.
Create a Living Area
This is often the “centerpiece” of your studio. Arrange a comfortable sofa, a coffee table, and perhaps an armchair. Use a rug to anchor this space and visually distinguish it from other areas. Position the sofa facing a focal point, like a TV or a window.
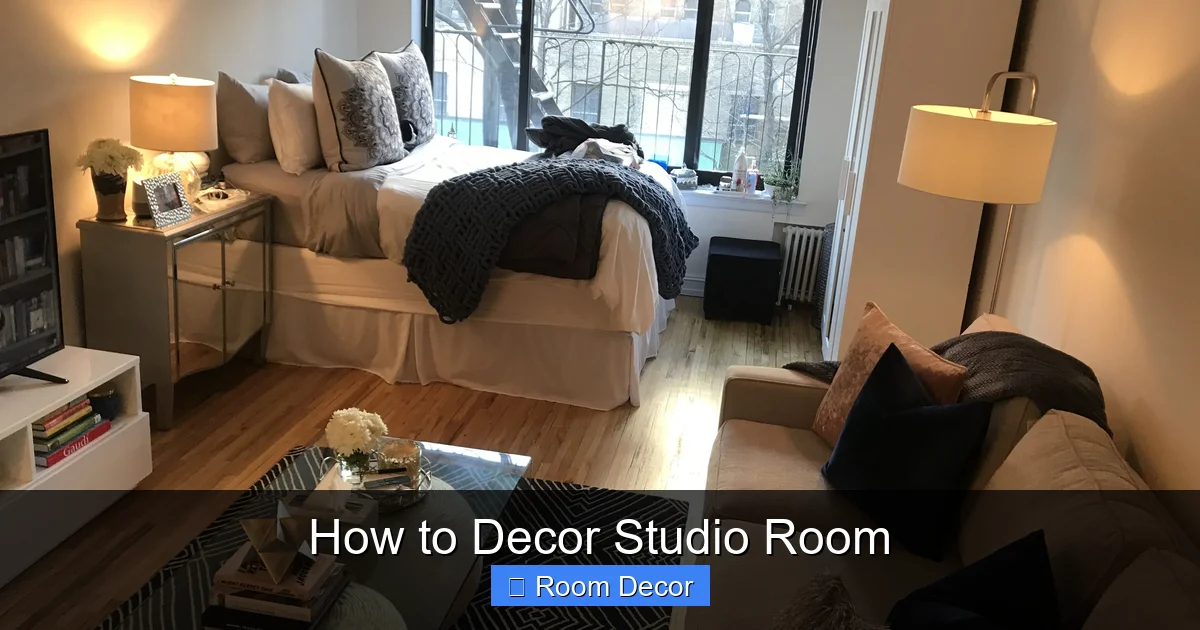
Visual guide about How to Decor Studio Room
Image source: thespruce.com
Establish a Sleeping Zone
Your bed can easily make the whole studio feel like a bedroom. Consider these strategies:
- Bed Placement: If possible, place your bed in a corner or against a wall that feels less central.
- Room Dividers: A stylish bookshelf, a folding screen, or even a tall plant can act as a soft divider. Avoid anything too solid that can make the space feel smaller.
- Daybed or Sofa Bed: If you need your sleeping area to also function as seating during the day, a daybed or a high-quality sofa bed is an excellent choice.
Designate a Workspace (If Needed)
If you work from home, a dedicated workspace is essential for productivity and mental separation. Even a small desk tucked into a corner can make a difference.
- Wall-Mounted Desk: These fold up when not in use, saving precious floor space.
- Console Table: A narrow console table can double as a desk.
- Creative Nooks: Utilize alcoves or the space under a window for a desk.
Set Up a Dining Area
This doesn’t need to be elaborate. A small bistro table and two chairs can work, or you can opt for a breakfast bar that doubles as a kitchen counter extension.
- Bar Stools: If you have a kitchen counter, bar stools can be easily tucked away.
- Foldable Table: A small table that folds down from the wall is perfect for occasional use.
Step 3: Choose the Right Furniture
Furniture in a studio apartment needs to be smart, efficient, and proportionate.
Embrace Multifunctional Furniture
This is where studio living truly shines! Look for pieces that do double duty:
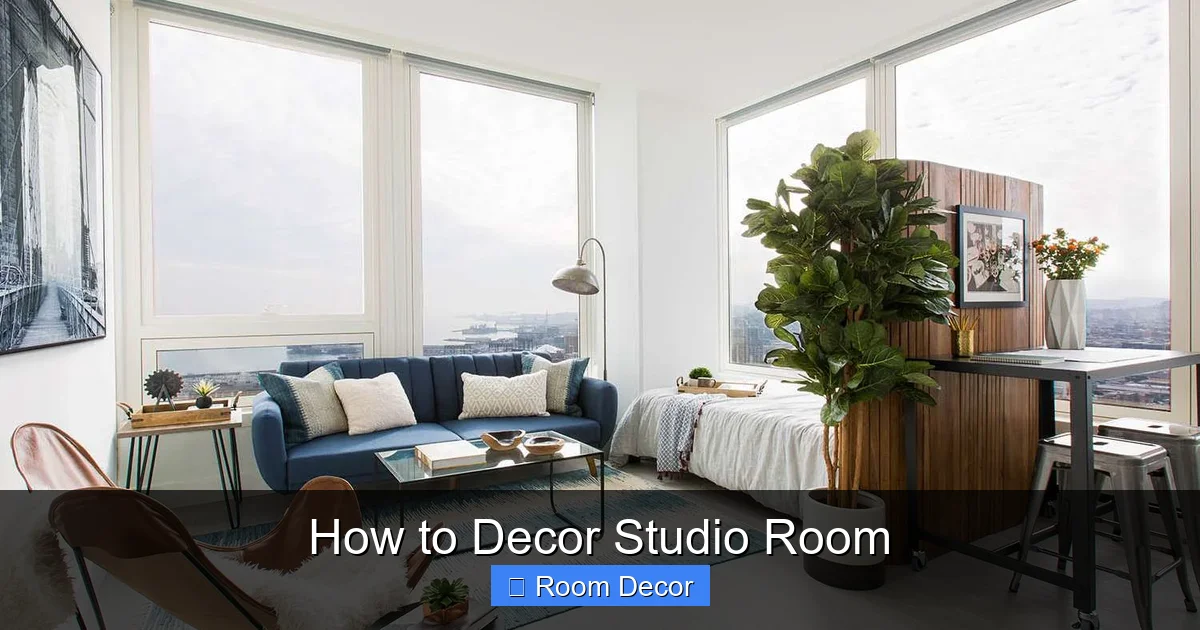
Visual guide about How to Decor Studio Room
Image source: cocolapinedesign.com
- Ottomans with Storage: These can be footrests, extra seating, and hidden storage all in one.
- Nesting Tables: Use them as a coffee table, side tables, or pull them out when you need extra surface area.
- Sofa Beds/Daybeds: As mentioned, these are vital if you want your living area to double as your sleeping area.
- Storage Beds: Beds with built-in drawers or lift-up mechanisms are fantastic for storing linens, seasonal clothing, or extra blankets.
Select Proportionate Pieces
Avoid bulky, oversized furniture. Choose pieces that are scaled to your space. A massive sectional might look great in a large home, but it will overwhelm a studio. Opt for streamlined designs and pieces with visible legs, which create a sense of airiness.
Think About Mobility
Consider furniture on wheels. A small rolling cart can be a mobile kitchen island, a side table, or even a bar cart. This flexibility is a studio dweller’s best friend.
Step 4: Master Storage Solutions
Clutter is the enemy of a small space. Smart storage is non-negotiable.
Go Vertical
This cannot be stressed enough. Tall, slim bookshelves are your best friend. Wall-mounted shelves are excellent for displaying decor while keeping essentials accessible. Use the space above doors or windows for shelving too.
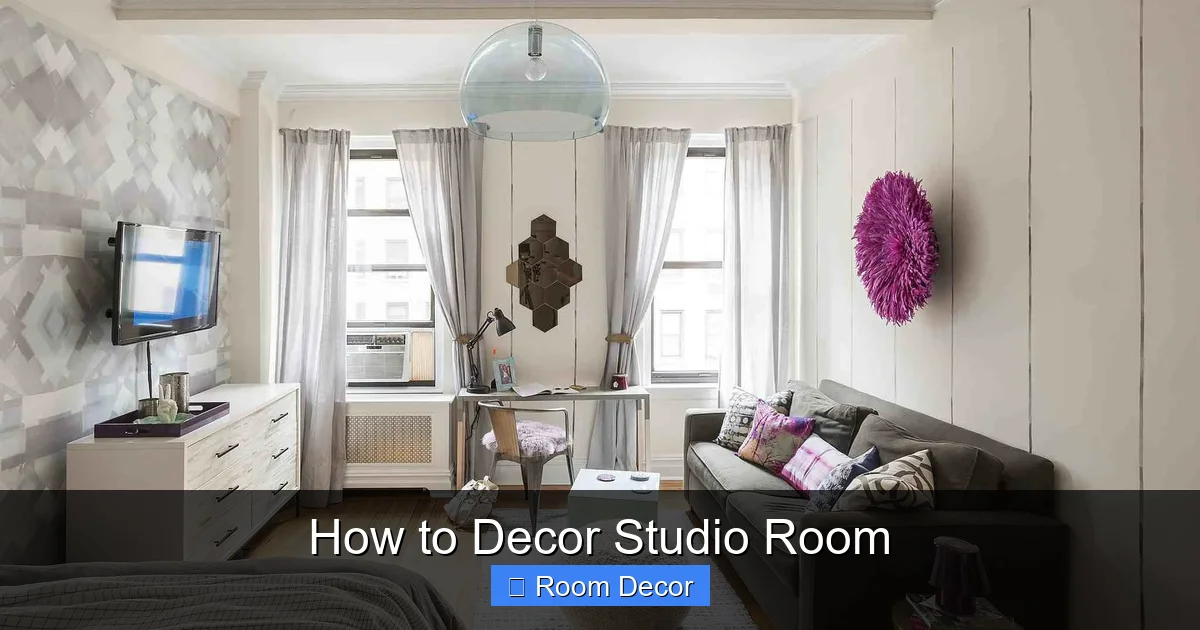
Visual guide about How to Decor Studio Room
Image source: thespruce.com
Utilize Hidden Storage
Look for furniture with built-in storage. Baskets and decorative boxes are perfect for corralling items on shelves and in cabinets. Under-bed storage bins are a lifesaver for things you don’t use daily.
Think Inside Cabinets and Drawers
Use drawer dividers, shelf organizers, and cabinet racks to maximize the space you have. You’d be surprised how much more you can fit with a little organization.
Wall-Mounted Everything
Consider wall-mounting your TV, shelving, and even bedside tables. This frees up floor space and creates a cleaner, more expansive look.
Step 5: Select a Cohesive Color Palette
Color has a huge impact on how a space feels. For studios, lighter colors are generally your friend.
Light and Bright
White, off-white, light grays, and pastel shades reflect light and make walls appear to recede, creating an illusion of more space. Use these on your walls and for larger furniture pieces.
Add Depth with Accent Colors
While keeping the base light, introduce pops of color through accessories, throw pillows, artwork, or a statement rug. This adds personality without overwhelming the space.
Consider a Monochromatic Scheme
Using varying shades and textures of a single color can create a sophisticated and cohesive look that makes the room feel larger and more unified.
Don’t Forget Wood Tones
Natural wood tones can add warmth and texture. Lighter woods like birch or maple are excellent choices for studios.
Step 6: Implement Smart Lighting
Good lighting can transform a small, potentially dark studio into a bright, inviting space. Layering your lights is key.
Ambient Lighting
This is the general illumination of the room. Think ceiling fixtures or floor lamps that cast a soft glow. Dimmers are a great addition to control the mood.
Task Lighting
These lights are for specific activities. A desk lamp for your workspace, a reading lamp by your bed or sofa, and under-cabinet lighting in your kitchen.
Accent Lighting
Use accent lights to highlight artwork, plants, or architectural features. Picture lights or small spotlights can add a touch of sophistication.
Natural Light Maximization
Keep windows as unobstructed as possible. Use sheer curtains or blinds that allow light to filter in. Avoid heavy drapes that can make the space feel closed off.
Step 7: Decorate and Personalize
This is where you inject your personality and make your studio feel like home.
Choose Art Wisely
Large-scale artwork can surprisingly make a small room feel bigger by creating a focal point. Alternatively, a gallery wall of smaller pieces can add interest, but be mindful not to make it too cluttered.
Incorporate Plants
Plants add life, color, and improve air quality. Hanging plants or those on tall stands are great for utilizing vertical space and adding a touch of nature.
Use Mirrors Strategically
Mirrors are magic in small spaces. They reflect light and create the illusion of depth. Place a large mirror opposite a window to bounce natural light around the room.
Add Texture
Layering textures through rugs, throw pillows, blankets, and even wall hangings adds depth and comfort. Think chunky knits, soft velvets, and natural fibers.
Personal Touches
Display cherished photos, souvenirs, or collections. These are what make a space uniquely yours.
Troubleshooting Common Studio Decor Challenges
* Problem: The studio feels cramped and dark.
* Solution: Maximize natural light by using sheer curtains. Incorporate more mirrors. Choose lighter paint colors. Add more light sources, especially layered task and ambient lighting. Declutter to create visual breathing room.
* Problem: Difficulty separating the sleeping area.
* Solution: Use a visually light room divider like a tall bookshelf or a decorative screen. Consider a headboard that acts as a visual barrier. Ensure bedding and the surrounding area are always tidy to make the zone feel intentional.
* Problem: Not enough storage.
* Solution: Ruthlessly declutter first. Invest in furniture with hidden storage (ottomans, beds). Utilize vertical space with tall shelves and wall mounts. Use the inside of cabinet doors for small organizers.
* Problem: Everything looks generic.
* Solution: This is where personalization comes in! Add artwork that speaks to you, introduce bold accent colors through pillows or throws, and display items that have meaning. Mix textures for visual interest.
Conclusion
Decorating a studio room is an exercise in smart design and thoughtful curation. By planning your layout, defining zones, choosing multifunctional furniture, mastering storage, and using color and light to your advantage, you can create a space that is both beautiful and highly functional. Remember that your studio is your sanctuary, so don’t forget to inject your personality and make it a reflection of you. With these tips on how to decor studio room, you’re well on your way to transforming your compact living space into a stylish and comfortable home. Happy decorating!