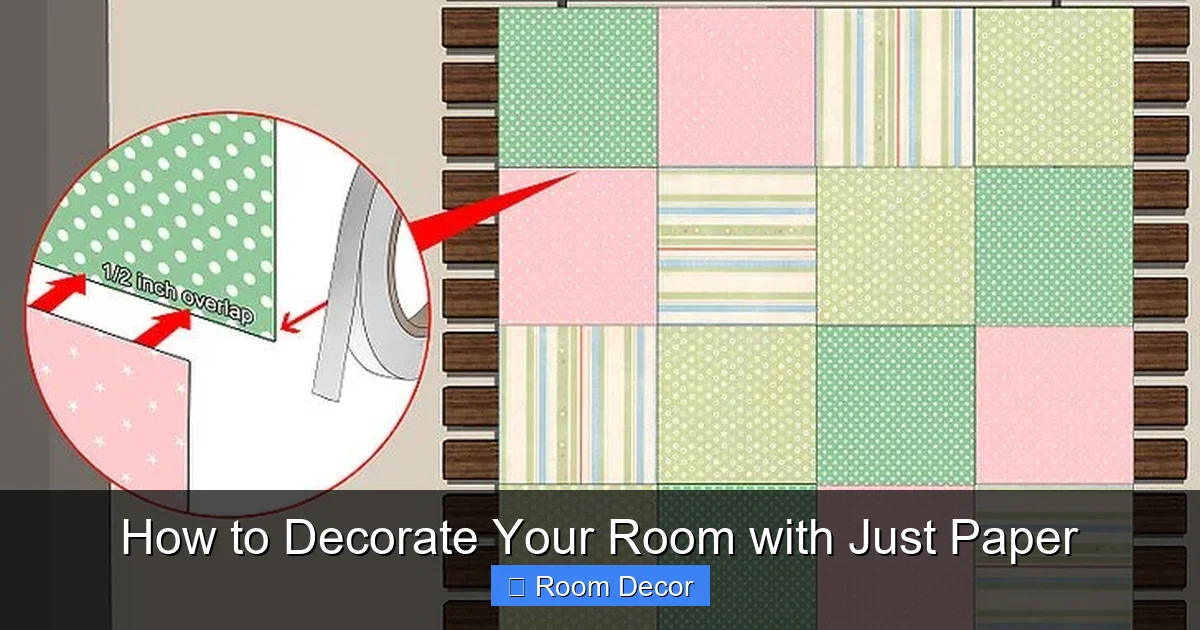
Ready to give your room a stunning makeover without breaking the bank? This comprehensive guide reveals how to decorate your room with just paper, proving that creativity and affordability go hand-in-hand. Learn to craft beautiful wall art, unique furniture accents, and even functional decor pieces using this versatile and accessible material. Get ready to unleash your inner artist and transform your space with paper magic!
Are you dreaming of a room refresh but working with a tight budget? Do you love the idea of a personalized space that reflects your unique style? What if we told you that you could achieve both with one of the most common and affordable materials available: paper? That’s right! In this comprehensive guide, we’ll dive deep into the wonderful world of paper decorating. You’ll learn how to transform ordinary sheets of paper into extraordinary decorative elements that will make your room truly shine. From stunning wall art and unique accents to functional pieces, we’ll show you that with a little creativity and some basic techniques, you can decorate your room with just paper and create a space you’ll absolutely love.
This guide is designed for everyone, whether you’re a seasoned crafter or a complete beginner. We’ll break down each idea into simple, easy-to-follow steps, making the process enjoyable and rewarding. So, gather your paper, scissors, and adhesive, and let’s get started on your paper decorating adventure!
Key Takeaways
- Unleash Budget-Friendly Creativity: Discover how to achieve a stylish and personalized room transformation using only paper, making decor accessible to everyone.
- Master Various Paper Techniques: Learn a range of paper crafting methods, from simple folding and cutting to more intricate quilling and weaving, to create diverse decorative elements.
- Create Stunning Wall Art: Explore DIY projects for eye-catching paper wall hangings, geometric designs, and even large-scale murals to elevate your room’s aesthetic.
- Enhance Furniture and Lighting: Find out how to add personality and flair to existing furniture with paper accents and create unique paper lampshades or light covers.
- Design Functional Paper Decor: Learn to craft practical items like paper storage solutions, organizers, and even decorative borders to maximize both beauty and utility.
- Personalize Your Space: Understand how to select paper types, colors, and patterns to perfectly match your personal style and create a truly unique room ambiance.
Getting Started: Your Paper Decor Toolkit
Before we dive into the creative projects, let’s talk about what you’ll need. The beauty of decorating with paper is its simplicity and accessibility.
Essential Materials:
- Paper: This is your primary medium! You can use almost any kind of paper. Think printer paper, construction paper, cardstock, scrapbook paper, old magazines, newspapers, wrapping paper, or even kraft paper. Consider the weight, texture, and color of your paper based on the project and the look you want to achieve.
- Scissors: Sharp scissors are crucial for clean cuts. You might also want a craft knife for more intricate designs.
- Adhesive: White glue, craft glue, glue sticks, or double-sided tape will be your best friends for assembling your paper creations.
- Ruler and Pencil: For measuring and marking your paper accurately.
- Cutting Mat (Optional but Recommended): Protects your surfaces if you’re using a craft knife.
- Bone Folder (Optional): Helps create crisp folds, especially for origami or complex folding techniques.
- Hole Punch: Useful for creating decorative elements or hanging pieces.
Choosing Your Paper Palette:
The type of paper you choose will significantly impact the final look.
- Cardstock: Thicker and sturdier, perfect for projects that need to hold their shape, like 3D flowers or geometric sculptures.
- Scrapbook Paper: Comes in an endless variety of colors, patterns, and textures, offering a rich palette for any theme.
- Magazines and Newspapers: Great for a more rustic, recycled, or avant-garde look. The text and images can add an interesting dimension.
- Kraft Paper: Offers a natural, earthy feel, ideal for minimalist or bohemian decor.
- Colored Printer Paper: A versatile and affordable option for a wide range of projects.
Don’t be afraid to mix and match different types and textures for added visual interest.
DIY Paper Wall Art: Making a Statement

Visual guide about How to Decorate Your Room with Just Paper
Image source: i.ytimg.com
Your walls are a blank canvas, and paper is the perfect medium to bring them to life. Here are some popular and impactful paper wall art ideas.
1. Geometric Paper Wall Art
This is a modern and stylish way to add color and texture to your walls. It’s surprisingly easy to create and highly customizable.
How to Make Geometric Paper Art:
- Design Your Pattern: Decide on a geometric pattern. This could be a series of overlapping triangles, hexagons, squares, or a more abstract arrangement. You can sketch this out on paper or find inspiration online.
- Cut Your Shapes: Cut out numerous geometric shapes from your chosen paper. Use a ruler and pencil to ensure consistent sizes or embrace a more eclectic mix. For a layered effect, cut shapes from different colors and slightly varying sizes.
- Arrange and Adhere: Lay out your shapes on the floor or a large table in your desired pattern. Once you’re happy with the arrangement, begin adhering them to your wall. You can use double-sided tape or small dots of glue. For a cleaner look, consider mounting the paper shapes onto a backing board (also made of paper or cardstock) and then hanging the entire piece.
- Add Dimension (Optional): For a more dynamic look, you can slightly fold some of the shapes before adhering them, creating a subtle 3D effect.
Tip: Use a level to ensure your main lines or focal points are straight. For a monochromatic look, use different shades of the same color.
2. Paper Flower Garlands and Wall Hangings
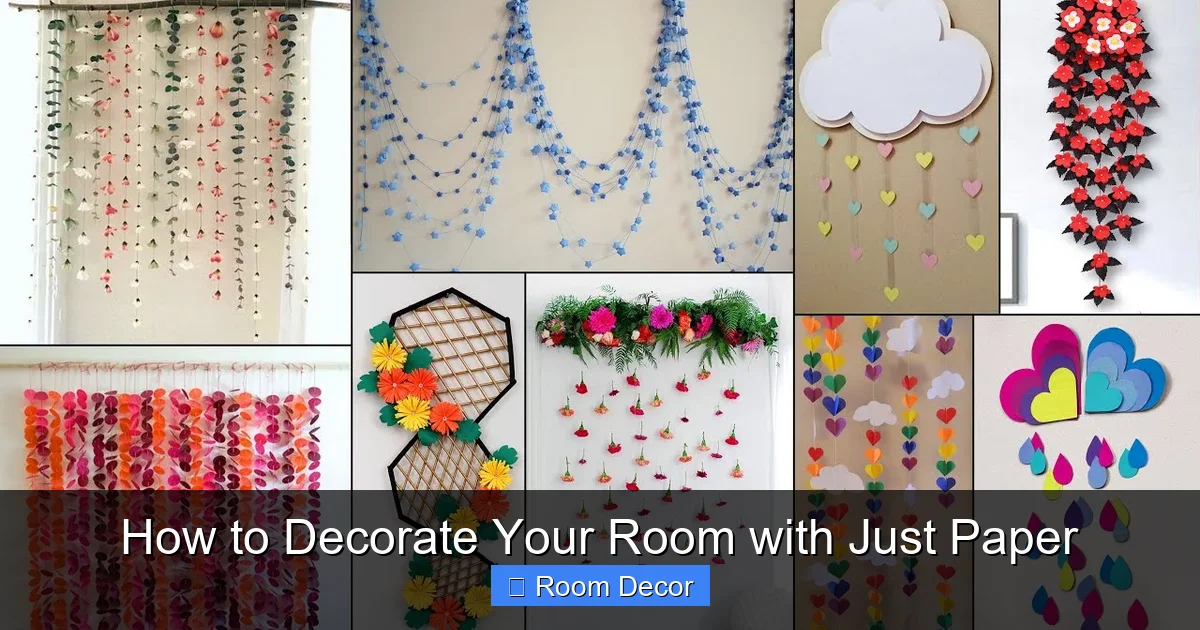
Paper flowers are timeless and can add a touch of whimsy and romance to any room.
How to Make Paper Flowers:
- Simple Petals: Cut out multiple petal shapes from colored paper. Curl the edges slightly with a pencil or a bone folder. Layer and glue the petals together, starting from the outside and working your way in, to form a flower.
- Rolled Roses: Cut out a spiral from a piece of paper. Starting from the outer edge of the spiral, tightly roll the paper inwards. Once rolled, gently release the tension and let the spiral unfurl slightly to form a rose shape. Secure the base with a dab of glue.
- 3D Bloom: Cut out several circles from paper. Fold each circle in half, then in half again to create a quarter-circle. Cut small slits along the curved edge to create fringe. Unfold the circles and glue them together in layers, starting with the largest at the bottom.
Once you have a collection of flowers, you can:
- String them into a Garland: Punch a small hole at the base of each flower and thread them onto a string or twine.
- Create a Wall Cluster: Arrange and glue them directly onto the wall in a pleasing pattern.
- Mount on Cardstock: Glue them onto a piece of cardstock to create a framed artwork.
3. Origami Wall Art
The art of paper folding, or origami, can create incredibly intricate and beautiful designs.
How to Create Origami Wall Art:
- Choose Your Model: Select simple origami models that can be scaled up or down, such as cranes, stars, or geometric shapes.
- Fold with Precision: Follow origami instructions carefully. Using patterned paper can add an extra layer of visual interest.
- Arrange and Display: You can create a repeating pattern of a single origami model or a varied collection. Arrange them in a grid or a more organic cluster on your wall. Use a small piece of double-sided tape or a tiny dot of glue to attach them.
Tip: For a cohesive look, use paper in similar color families or stick to a minimalist black and white palette.
Paper Accents for Furniture and Decor
Visual guide about How to Decorate Your Room with Just Paper
Image source: i.ytimg.com
Don’t stop at the walls! Paper can also be used to add character and style to your existing furniture and other decorative items.
1. Decoupage Furniture Accents
Decoupage is a technique of gluing paper cutouts onto a surface and then sealing them with a protective finish.
How to Decoupage:
- Prepare Your Surface: Ensure the furniture piece or item you want to decorate is clean and dry. Small items like picture frames, vases, or drawer fronts work well.
- Cut Your Paper: Tear or cut out pieces of paper – magazine clippings, patterned paper, or even maps are great for this.
- Apply Adhesive: Using a brush, apply a thin layer of decoupage glue (or watered-down white glue) to a small section of the surface.
- Place Paper: Carefully place your paper cutouts onto the glued area, smoothing out any wrinkles or bubbles with your fingers or a soft cloth. Overlap pieces for a mosaic effect.
- Seal the Deal: Once your design is complete and dry, apply a few more layers of decoupage glue over the entire surface. This seals the paper and gives it a finished look. Allow each layer to dry completely before applying the next.
Tip: For added durability, especially on items that get a lot of handling, you can seal the decoupage with a clear varnish or sealant once it’s fully dry.
2. Paper Lampshades and Light Covers
Transform a plain lampshade into a statement piece or create a soft, diffused light effect with paper.
How to Create a Paper Lampshade:
- Option 1: Paper Cutouts: Cut out decorative shapes (stars, hearts, geometric patterns) from thin cardstock or thick paper. Carefully glue these onto the outside of a plain lampshade. Ensure the paper doesn’t touch the light bulb directly and that there’s enough airflow.
- Option 2: Paper Strips: Cut paper into thin strips. You can weave these strips together to create a textured lampshade cover, or glue them vertically or horizontally onto an existing plain shade for a layered effect.
- Option 3: Paper Lantern Style: If you have a plain globe or cylindrical lampshade, you can cut intricate patterns into paper that wraps around it. The light shining through will create beautiful shadow effects.
Safety Note: Always use LED bulbs in paper lampshades, as they generate less heat and are safer. Ensure there is ample space between the paper and the bulb.
3. Woven Paper Baskets and Bowls
Add a touch of artisanal charm with woven paper baskets or decorative bowls.
How to Make Woven Paper Baskets:
- Prepare Strips: Cut uniform strips of paper (e.g., 1-2 inches wide) from sturdy paper like cardstock or multiple layers of regular paper glued together.
- Create the Base: Lay several strips parallel to each other. Weave other strips perpendicularly through them to create a woven base. Secure the ends with glue.
- Weave the Sides: Fold up the ends of the base strips to form the “warps.” Begin weaving the “weft” strips around and over the warp strips, gradually building up the sides of your basket.
- Shape and Secure: Continue weaving, shaping the basket as you go. Once the desired height is reached, fold the ends of the weft strips over the top edge of the warps and glue them down securely. You can also create handles by folding and weaving thicker paper strips.
These can be used for storing small items like remote controls, keys, or craft supplies.
Functional Paper Decor: Beauty Meets Utility

Visual guide about How to Decorate Your Room with Just Paper
Image source: i.pinimg.com
Paper isn’t just for decoration; it can also be incredibly functional.
1. Paper Shelving and Organizers
With the right techniques, you can create surprisingly sturdy paper shelves and storage solutions.
How to Create Paper Shelving:
- Honeycomb Structures: Cut paper into equal strips. Fold each strip accordion-style. Glue these folded strips together side-by-side to create a hexagonal honeycomb structure. These structures are incredibly strong and can be arranged to form shelves or decorative wall units. You can glue multiple honeycomb units together to create larger surfaces.
- Rolled Paper Tubes: Roll sheets of paper tightly around a dowel or pencil and secure with glue. Create many of these tubes. You can then arrange and glue these tubes together to form a grid or a more complex shelving unit. The density of the rolls provides strength.
Tip: For added strength, use multiple layers of paper for your rolls or honeycomb segments. You can also coat the finished structure with a sealant for extra durability.
2. Decorative Paper Borders and Wall Accents
Add personality to your room with custom paper borders or wall cutouts.
DIY Paper Borders:
- Cut-Out Designs: Use a craft knife to cut intricate patterns into long strips of paper. These can be applied along the top of your walls, around windows, or as chair rails.
- Layered Shapes: Cut out multiple identical shapes (leaves, stars, hearts) from different colored papers. Layer and glue them together to create a decorative border.
- Stenciled Look: Create a stencil by cutting a design into a piece of cardstock. Use this stencil to trace repeating patterns onto your wall with a pencil, then fill in the traced shapes with paper cutouts.
Troubleshooting Common Paper Decor Challenges
Even with simple materials, you might encounter a few bumps along the way.
My paper is curling or warping.
This can happen due to humidity or if the glue is too wet.
- Solution: Ensure you are using the right type of paper for the project. If using wet glue, apply it thinly and allow pieces to dry flat. For delicate pieces, consider using a spray adhesive or double-sided tape. If warping occurs, you can try gently pressing the piece under a heavy book once dry.
My glued pieces are not holding.
The adhesive might not be strong enough or wasn’t applied properly.
- Solution: Make sure you are using an appropriate adhesive for the paper type and the weight of the project. For cardstock, a stronger craft glue or a glue stick might be better than a thin liquid glue. Apply adhesive evenly to both surfaces where possible.
My cuts are not clean.
Dull scissors or a poor-quality craft knife can lead to jagged edges.
- Solution: Invest in sharp scissors or a good craft knife. For intricate cuts, use a cutting mat and a craft knife for precision. Take your time and make slow, deliberate cuts.
Conclusion: Your Paper Decor Dream Space Awaits
As you can see, the possibilities for decorating your room with just paper are virtually endless. From simple yet impactful wall art to functional and charming accents, paper offers a fantastic and affordable way to express your creativity and personalize your living space. You’ve learned about the essential tools, explored various techniques for wall decor, furniture accents, and functional items, and even touched upon how to overcome common challenges.
The most important ingredient, however, is your imagination. Don’t be afraid to experiment, combine techniques, and create something entirely your own. Whether you’re aiming for a bold statement piece or subtle, charming details, decorating with paper is a rewarding journey. So, go forth, gather your paper supplies, and transform your room into a unique sanctuary that perfectly reflects your style and personality. Happy paper crafting!