Tired of cluttered small kitchen cabinets? This guide provides a comprehensive small kitchen cabinet organization checklist to help you reclaim your space. Learn how to declutter, categorize, and utilize smart storage solutions to transform your tiny kitchen into a functional, stress-free hub, making cooking and daily tasks a breeze.
Small Kitchen Cabinet Organization Checklist
Do you ever open your kitchen cabinets only to be met with an avalanche of mismatched containers, forgotten spices, and rarely used gadgets? For those of us with a small kitchen, this feeling of chaos can be even more overwhelming. A cramped kitchen can feel like a constant battle against clutter, making cooking a chore rather than a joy.
But here’s the good news: a small kitchen doesn’t have to mean a dysfunctional kitchen. With the right strategy, even the tiniest of spaces can become highly organized, efficient, and surprisingly spacious. This comprehensive small kitchen cabinet organization checklist is designed to guide you, step-by-step, through transforming your cluttered cabinets into a system that works for you. We’ll cover everything from decluttering to smart storage solutions, all tailored specifically for the unique challenges of small kitchen cabinets.
By the end of this guide, you’ll have a clear plan to maximize every inch of your kitchen, create a stress-free environment, and truly enjoy your cooking space. Let’s get started on your journey to beautifully organized small kitchen cabinets!
Key Takeaways
- Embrace a Ruthless Decluttering Mindset: For small kitchen cabinets, less is truly more. Be honest about what you use and need to free up valuable space.
- Categorize Logically Before Organizing: Group similar items together (e.g., baking supplies, spices, dinnerware) to make finding and storing things intuitive and efficient.
- Measure Your Space Accurately: Before buying any organizers, carefully measure the height, width, and depth of your small kitchen cabinets to ensure a perfect fit and maximize utility.
- Utilize Vertical and Door Space: Small kitchens benefit immensely from shelf risers, stackable bins, and door-mounted organizers to extend storage capacity upwards and outwards.
- Invest in Smart, Versatile Organizers: Clear bins, pull-out shelves, lazy Susans, and drawer dividers are invaluable tools for making every inch of your small kitchen cabinets functional and accessible.
- Implement Zone Planning: Store items where they are most frequently used (e.g., coffee mugs near the coffee maker, pots near the stove) to streamline your workflow.
- Maintain Regularly to Prevent Re-clutter: Organization is an ongoing process. Schedule quick tidy-ups and periodic reviews to keep your small kitchen cabinets functioning beautifully.
Step 1: The Mindset Shift – Embrace Your Small Space
Before you even open a cabinet door, it’s important to adjust your perspective. Small kitchens often get a bad rap, but they can be incredibly efficient and cozy. Instead of seeing your small kitchen as a limitation, view it as an opportunity to be strategic and creative with your storage. This small kitchen cabinet organization checklist begins with embracing your space.
Think Strategically About Your Needs
A small kitchen forces you to be intentional about what you keep. This isn’t about deprivation; it’s about optimizing. Consider your cooking habits, the size of your household, and what you truly use regularly. This mental preparation is key to making tough decluttering decisions later.
Visualize the Organized Outcome
Imagine opening your small kitchen cabinets to find everything neatly in its place, easy to access, and no longer overflowing. This positive visualization can be a great motivator as you work through the organization process.
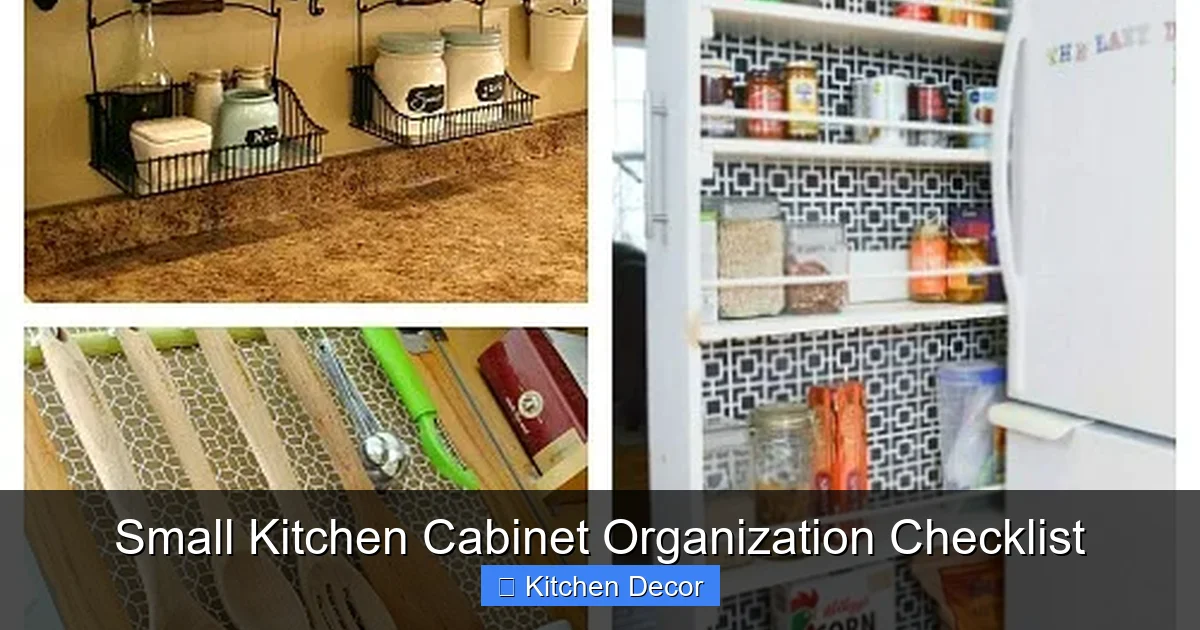
Step 2: Empty Everything Out (The Grand Unveiling)
This is arguably the most crucial step in any organization project, especially for small kitchen cabinets. You can’t truly organize what you can’t see. Take a deep breath, put on some music, and prepare to empty every single item from your small kitchen cabinets and drawers.
Visual guide about Small Kitchen Cabinet Organization Checklist
Image source: mydomaine.com
H3.1 Clear One Cabinet at a Time
If emptying everything feels too overwhelming, tackle one cabinet or even one shelf at a time. This makes the task more manageable and prevents your entire kitchen from becoming a chaotic mess.
H3.2 Create Sorting Zones
As you pull items out, immediately start sorting them into three distinct piles (or bins):
- Keep: Items you use regularly, are in good condition, and definitely belong in your kitchen.
- Donate/Sell: Items that are still functional and in good condition but you no longer need or use (e.g., duplicate gadgets, rarely used small appliances, extra serving dishes).
- Toss: Broken items, expired food, anything irreparable, or pieces that are missing their counterparts (like a single plastic container lid without a base).
Be honest and ruthless, especially when organizing small kitchen cabinets. Every item you keep takes up valuable real estate.
H3.3 Clean the Empty Cabinets
While your small kitchen cabinets are empty, take the opportunity to give them a thorough cleaning. Wipe down shelves, vacuum out crumbs, and address any sticky spots. This fresh start will make putting things back feel even more rewarding.
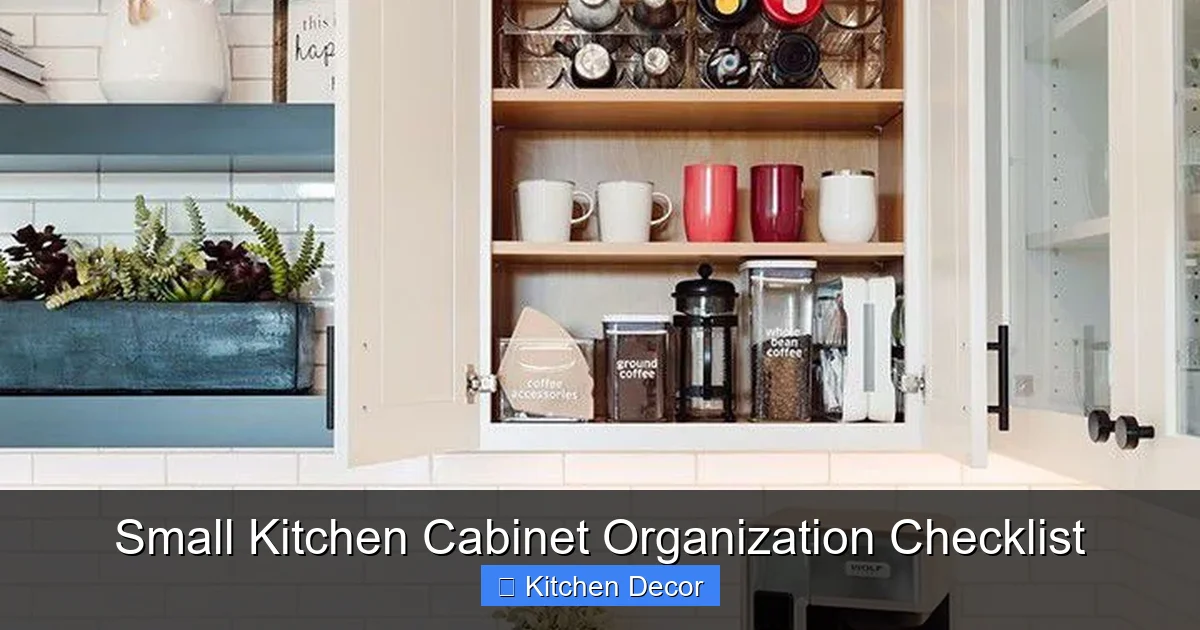
Step 3: Declutter Ruthlessly (The Edit)
Now that everything is out, it’s time for the true editing process. This is where you make critical decisions about what gets to return to your small kitchen cabinets. Remember, for small spaces, less is always more.
Visual guide about Small Kitchen Cabinet Organization Checklist
Image source: ablissfulnest.com
H3.1 Check Expiration Dates
Go through all your spices, pantry items, and condiments. Toss anything past its prime. Spices, in particular, lose their potency over time, so if you can’t remember when you bought it, it’s probably time to replace it.
H3.2 Eliminate Duplicates
Do you really need three can openers or four spatulas? Keep only the best one or two of each essential item. Duplicates are a major space hog in small kitchen cabinets.
H3.3 Re-evaluate Infrequently Used Items
Be honest: when was the last time you used that specialty melon baller or the bread maker? If an item hasn’t been used in over a year, consider if it truly earns a spot in your limited kitchen space. Could it be stored elsewhere (like a basement or garage), or is it time to let it go?
H3.4 Discard Broken or Damaged Items
It’s easy to hold onto chipped mugs or containers with missing lids “just in case.” These items only add to clutter and serve no functional purpose. Toss them!
H3.5 Consider the “One In, One Out” Rule
Moving forward, adopt the “one in, one out” rule for certain categories, especially if you have a tendency to accumulate. If you buy a new mug, an old one must go. This helps maintain your organized small kitchen cabinets over time.
Step 4: Categorize and Group (Logical Grouping)
With only the “keep” pile remaining, it’s time to group similar items. This step is essential for creating a logical and intuitive system for your small kitchen cabinets. When everything has a “home,” it’s easier to put away and find.
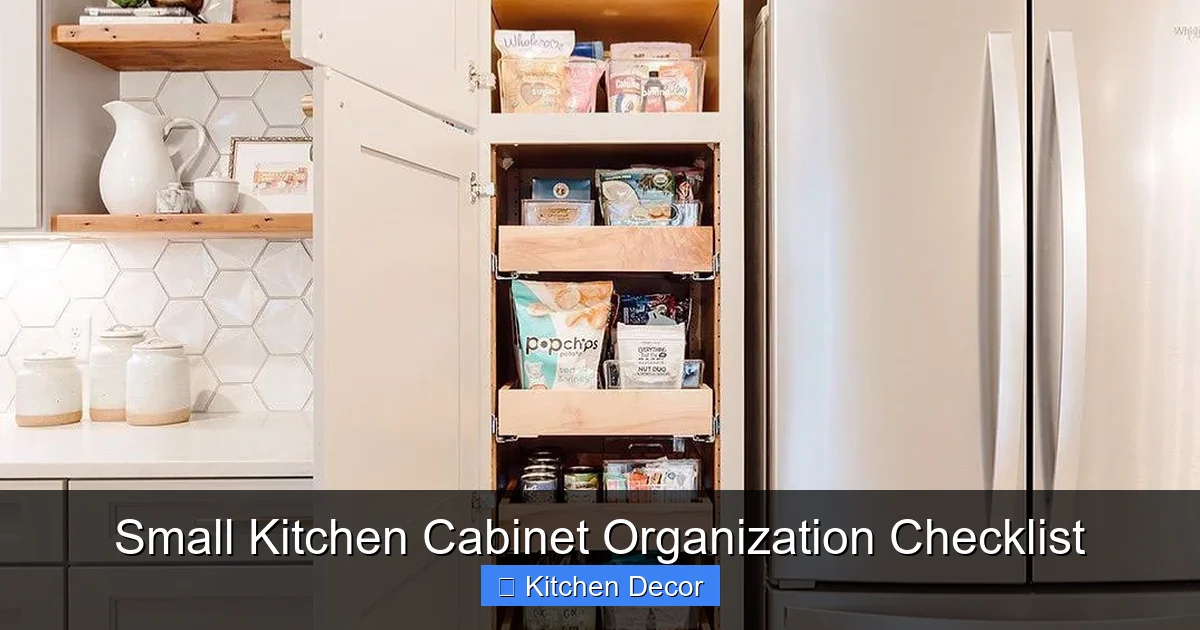
Visual guide about Small Kitchen Cabinet Organization Checklist
Image source: mydomaine.com
H3.1 Common Categories to Consider:
- Pots & Pans: Group by size or type.
- Baking Supplies: Flour, sugar, baking powder, measuring cups, mixing bowls.
- Food Storage Containers: Lids and bases together!
- Plates & Bowls: Everyday vs. special occasion.
- Spices: Alphabetical, by usage, or by cuisine.
- Everyday Dishware: Mugs, glasses, plates, bowls.
- Cooking Utensils: Spatulas, ladles, whisks.
- Cleaning Supplies: Under the sink, away from food.
- Small Appliances: Toasters, blenders, coffee makers.
- Pantry Items: Cans, dry goods, snacks.
H3.2 Think About Workflow
As you group, start thinking about where these categories might live. Items used together should be stored together. For example, coffee mugs and coffee filters should be near the coffee maker. This creates “zones” in your small kitchen, which we’ll delve into more later.
Step 5: Measure Your Space (Knowledge is Power)
Before you rush out and buy a bunch of trendy organizers, you must measure your specific small kitchen cabinets. This step is often overlooked but is absolutely critical for successful small kitchen organization. Ill-fitting organizers can create more clutter and frustration than they solve.
H3.1 Measure Height, Width, and Depth
Use a tape measure to get precise dimensions for:
- Inside Height: From the bottom of the shelf to the top of the cabinet or the next shelf. This is crucial for vertical organizers.
- Inside Width: From side to side.
- Inside Depth: From the front to the back of the cabinet.
Don’t forget to measure the cabinet doors themselves if you plan to use door-mounted organizers. Account for any hinges or pipes that might impede a perfect fit.
H3.2 Consider Door Clearance
If you’re using pull-out shelves or bins, ensure there’s enough room for them to slide out without hitting the cabinet door or adjacent items. This detail is especially important for small kitchen cabinets where every millimeter counts.
H3.3 Sketch a Simple Layout
A rough sketch of your cabinet interiors, including dimensions, can be incredibly helpful when shopping for storage solutions. This allows you to visualize where items and organizers will fit.
Step 6: Choose Smart Storage Solutions (The Organizer’s Arsenal)
Now for the fun part! With your measurements and categories in hand, you can select organizers that truly maximize your small kitchen cabinets. The key is to think vertically, pull-out, and clearly visible.
H3.1 Vertical Space Maximizers
These are your best friends in a small kitchen:
- Shelf Risers/Expandable Shelves: Instantly double your shelf space for plates, mugs, or pantry items.
- Stackable Bins/Containers: Use for dry goods, snacks, or cleaning supplies. Look for ones designed to stack securely.
- Pot & Pan Organizers: Vertical racks allow you to store pots and pans on their sides, making them easier to grab without unstacking.
H3.2 Pull-Out Organizers
These prevent items from getting lost in the back of deep small kitchen cabinets:
- Sliding Shelves: Can be installed into existing cabinets to create custom pull-out drawers.
- Pull-Out Bins/Baskets: Perfect for cleaning supplies under the sink or larger pantry items.
- Drawer Organizers/Dividers: Keep utensils, gadgets, and small items from shifting around.
H3.3 Door Organizers
Don’t let the inside of your cabinet doors go to waste:
- Door-Mounted Spice Racks: Frees up shelf space.
- Hooks: For measuring cups, oven mitts, or dish towels.
- Small Bins/Baskets: For foil, plastic wrap, or plastic bags.
H3.4 Clear Bins & Containers
Visibility is key! Clear containers allow you to see what you have at a glance, preventing you from buying duplicates and making it easier to find items. They also keep things tidy and prevent spills.
H3.5 Turntables (Lazy Susans)
Incredibly useful for corner small kitchen cabinets, pantries, and under-sink areas. They make items easily accessible with a simple spin. Use them for oils, condiments, spices, or cleaning products.
H3.6 Drawer Dividers
For your utensil drawers and junk drawers (yes, even small kitchens have them!). Dividers keep items separated and orderly. Look for adjustable or customizable options.
H3.7 Magnetic Strips
Install these on the inside of cabinet doors or on a backsplash for knives, metal spice tins, or even small metal cooking utensils. This frees up drawer and counter space.
Step 7: Implement Your Organization Strategy (The Setup)
Now it’s time to put your plan into action and fill your small kitchen cabinets with purpose and precision. This is where your careful planning comes to life!
H3.1 Zone Planning (Logical Placement)
This is crucial for an efficient small kitchen. Store items in the cabinets closest to where you’ll use them:
- Cooking Zone: Pots, pans, cooking utensils, oils, spices near the stove.
- Prep Zone: Cutting boards, knives, mixing bowls, measuring cups near your primary counter space.
- Dishware Zone: Plates, bowls, glasses, cutlery near the dishwasher or drying rack.
- Pantry Zone: Dry goods, canned items, snacks in a dedicated pantry cabinet.
- Baking Zone: Flours, sugars, baking sheets, cookie cutters together.
- Cleaning Zone: Under the sink for sponges, detergents, and dish soap (keep separate from food!).
H3.2 Heavy Items Below, Lighter Above
Always place heavier items (like cast iron pans or large bags of flour) on lower shelves for safety and stability. Lighter items (plastic containers, glassware) can go on upper shelves.
H3.3 Prioritize Accessibility
Place frequently used items at the front and at eye level. Rarely used items can go on higher shelves or deeper into cabinets (with pull-out solutions, of course!). This ensures that your small kitchen cabinet organization is functional for daily life.
H3.4 Maximize Vertical Space Creatively
Don’t just stack items directly on top of each other. Use your shelf risers, pot lid organizers, and vertical dividers to make every layer accessible. For example, use a magazine file holder on its side to store cutting boards or baking sheets vertically.
H3.5 Master Food Storage Containers
This is often a pain point. Store container bases nested together and all lids vertically in a separate bin or lid organizer. This prevents the “lid avalanche” and makes finding the right match a breeze.
H3.6 Label Everything (Especially Opaque Containers)
If you’re using opaque bins or decanting dry goods into airtight containers, labels are non-negotiable. Clearly label contents and expiration dates. This saves time and prevents food waste, a smart move for any organized kitchen, big or small.
Step 8: Maintain Your System (The Ongoing Journey)
Organizing your small kitchen cabinets is not a one-time event; it’s an ongoing process. To keep your kitchen looking tidy and functioning efficiently, establish some simple maintenance habits.
H3.1 The “Put It Away Now” Rule
The simplest rule: when you’re done with an item, put it back in its designated spot immediately. This prevents clutter from accumulating on counters and in open cabinets.
H3.2 Weekly Tidy-Ups
Dedicate 5-10 minutes each week to a quick cabinet check. Straighten items, wipe down any spills, and put stray items back in their homes. This prevents small messes from turning into big re-organization projects.
H3.3 Quarterly Reviews
Every three months or so, do a mini declutter. Check expiration dates, re-evaluate items you haven’t used, and adjust your system if your needs have changed. This keeps your small kitchen cabinet organization checklist active and effective.
H3.4 One In, One Out Reinforcement
Continue to practice the “one in, one out” rule, especially for items prone to accumulation like mugs, plastic containers, or specialty gadgets. This prevents new clutter from sabotaging your hard work.
Troubleshooting Common Small Kitchen Cabinet Challenges
Even with the best plan, small kitchens present unique quirks. Here are some solutions to common frustrations you might encounter with your small kitchen cabinet organization checklist.
Challenge 1: Limited Counter Space
Solution: Focus on vertical storage inside cabinets to free up counters. Use a dish drying rack that rolls over the sink, an over-the-sink cutting board, or even a small mobile island with built-in storage if space allows. Wall-mounted shelves and magnetic knife strips are also excellent ways to get things off the counter.
Challenge 2: Awkward Corner Cabinets
Solution: Lazy Susans (turntables) are your best friend here. They allow you to easily spin and access items in deep corners. For blind corner cabinets, consider pull-out kidney-shaped shelves or a magic corner unit if you’re undertaking a renovation. Otherwise, use large, clear bins that you can pull out entirely to access items in the back.
Challenge 3: Deep, Narrow Cabinets
Solution: These can be tricky. Use deep, narrow bins that you can pull out like drawers. Store items vertically, like cutting boards or baking sheets, using tension rods or vertical dividers. Stackable containers are also useful, but ensure they are easy to unstack to access items at the bottom.
Challenge 4: Too Many Mugs/Plates for the Space
Solution: Re-evaluate your quantity. How many people are in your household? Do you really need a mug for every guest you *might* have? Keep only what you use regularly. For plates, use plate organizers or shelf risers to stack them vertically rather than horizontally, maximizing the height of your small kitchen cabinets.
Challenge 5: Small Appliances Taking Up Too Much Room
Solution: If you use an appliance daily (like a coffee maker), it might earn counter space. For less frequent use, assign a dedicated spot in a cabinet or pantry. Use vertical stacking where possible (e.g., a toaster oven on a pull-out shelf). Consider multi-functional appliances to reduce the total number you own.
Conclusion
Congratulations! You’ve navigated the comprehensive small kitchen cabinet organization checklist. Transforming your small kitchen cabinets from cluttered chaos to functional bliss is an incredibly rewarding project. It not only makes cooking and daily tasks more enjoyable but also brings a sense of calm and efficiency to the heart of your home.
Remember, the goal isn’t perfection, but progress. Start small, be patient with yourself, and celebrate each step along the way. With these strategies, you’re now equipped to maintain an organized, stress-free small kitchen that you’ll love spending time in. Enjoy your beautifully organized space!